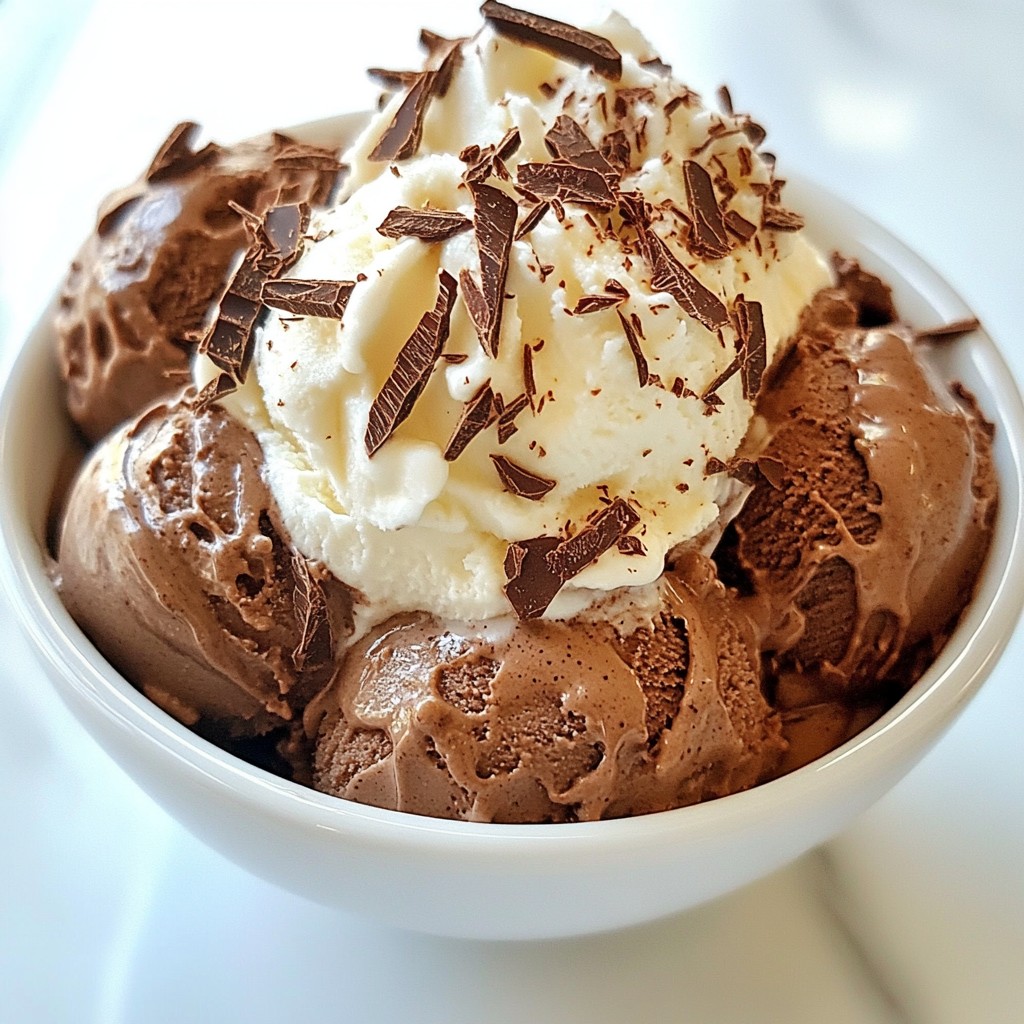
Ready to indulge in rich, creamy bliss? My Ultra Creamy Homemade Chocolate Ice Cream Delight will transform your kitchen into a dessert paradise. With easy steps and simple ingredients, you’ll make ice cream that rivals your favorite shop. Picture this: velvety smooth chocolate, topped with your favorite treats. Let’s dive into this delectable recipe and create a sweet masterpiece together! Your taste buds will thank you.
Why I Love This Recipe
- Rich and Decadent Flavor: This chocolate ice cream is incredibly rich, offering a deep chocolate flavor that chocolate lovers will adore.
- Ultra Creamy Texture: The combination of heavy cream and egg yolks creates a luxuriously creamy texture that melts in your mouth.
- Customizable Add-Ins: You can easily personalize the recipe by adding your favorite mix-ins, like chocolate chips or nuts, for an extra crunch.
- Perfect for Any Occasion: This homemade ice cream is perfect for summer gatherings, birthday parties, or simply enjoying as a delightful treat any day!
Ingredients
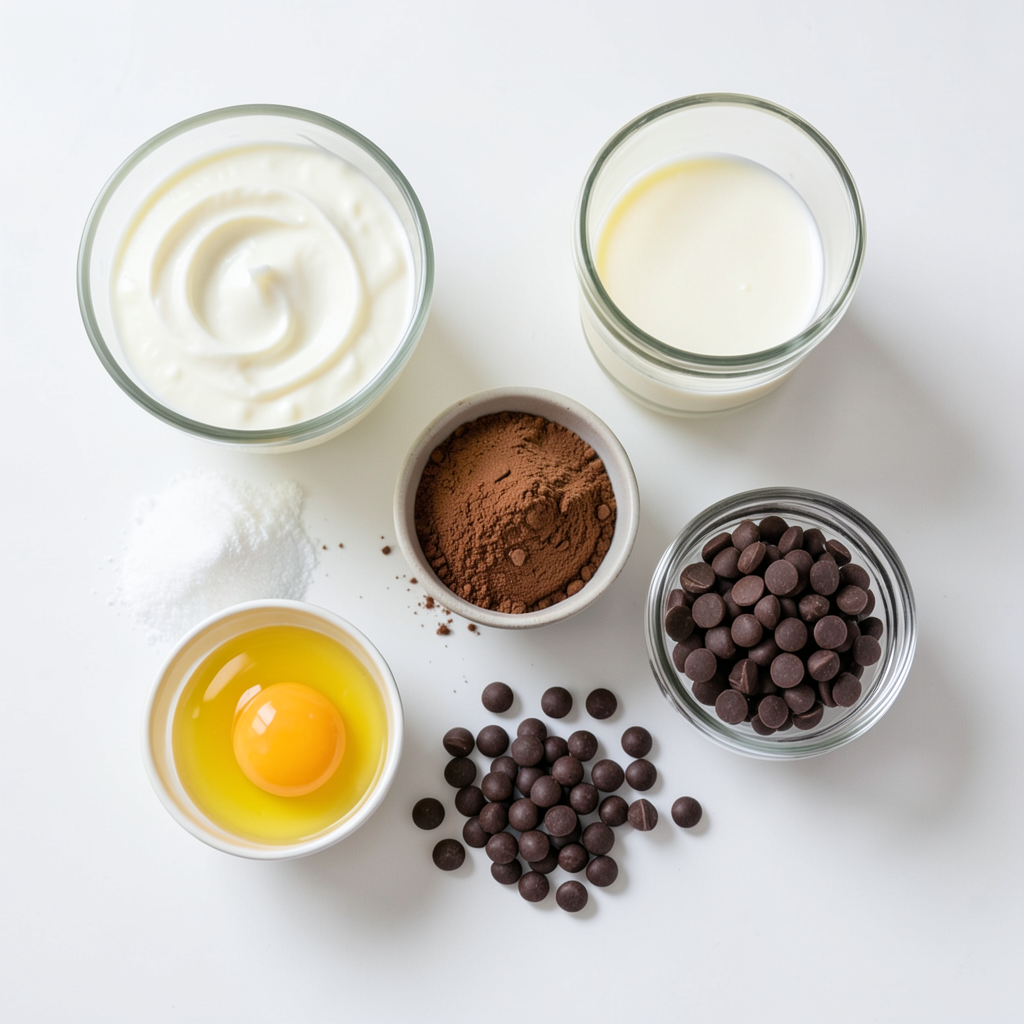
To make ultra creamy homemade chocolate ice cream, gather these fresh ingredients:
- 2 cups heavy cream
- 1 cup whole milk
- 3/4 cup granulated sugar
- 1 cup unsweetened cocoa powder
- 1 teaspoon pure vanilla extract
- 1/2 teaspoon fine sea salt
- 4 large egg yolks
- 1/2 cup semi-sweet chocolate chips (optional, for added texture)
Each ingredient plays a key role in creating a rich and smooth ice cream. The heavy cream and whole milk provide the creamy base. The granulated sugar sweetens the mix, while the cocoa powder gives it that deep chocolate flavor.
Adding vanilla extract enhances the overall taste, and the fine sea salt balances the sweetness. The egg yolks add richness and help create a velvety texture. If you want more chocolate, the semi-sweet chocolate chips are a delightful addition.
Make sure to use fresh ingredients for the best flavor. Now, let’s dive into how to use these ingredients to create your creamy treat!
Step-by-Step Instructions
Preparing the Chocolate Base
First, take a medium saucepan. Pour in 2 cups of heavy cream, 1 cup of whole milk, and 3/4 cup of granulated sugar. Place the saucepan over low heat. Whisk gently until the sugar dissolves and the mix warms.
Next, sift in 1 cup of unsweetened cocoa powder. Keep whisking to avoid lumps. You want a smooth chocolate base.
Tempering the Egg Yolks
In a separate bowl, whisk 4 large egg yolks until they blend well. Now, carefully add about one cup of the warm chocolate mix to the yolks. Do this slowly while whisking fast. This step is called tempering. It helps keep the eggs from curdling.
Once combined, pour the egg yolk mix back into the saucepan.
Cooking the Chocolate Mixture
Now, stir the mix over medium heat. Cook until it thickens enough to coat the back of a spoon. This should take about 8 to 10 minutes. Make sure it does not boil.
After thickening, remove the pan from heat. Stir in 1 teaspoon of pure vanilla extract and 1/2 teaspoon of fine sea salt. If you want, fold in 1/2 cup of semi-sweet chocolate chips for extra texture.
Cooling and Churning
Let the mix cool to room temperature. Once cool, cover it with plastic wrap or a lid. Refrigerate for at least 4 hours, or overnight for the best flavor.
After chilling, pour the mix into your ice cream maker. Churn it according to the machine's instructions until it reaches a soft-serve texture. This usually takes about 20 to 25 minutes.
Finally, transfer the churned ice cream to an airtight container. Smooth the top and freeze for at least 2 hours to firm it up. Now, you are ready to enjoy your ultra creamy chocolate ice cream!
Tips & Tricks
Achieving Ultra Creaminess
To make your ice cream super creamy, use high-fat dairy. This adds richness and smoothness. Heavy cream and whole milk are your best friends here. They give a lush texture that makes each scoop a delight.
Tempering eggs is key to a rich base. Start by whisking the egg yolks in a bowl. Slowly add warm chocolate mix while whisking fast. This keeps the eggs from cooking too quickly. Once mixed, pour it back into the pan with the chocolate.
Enhancing Flavor and Texture
Want more chocolate goodness? Add chocolate chips to the base. They create little bursts of flavor in each bite. Make sure to use semi-sweet ones for a balanced taste.
Quality vanilla extract elevates the flavor. Choose pure vanilla for the best results. A little goes a long way in making your ice cream taste amazing.
Serving Suggestions
Present your ice cream in chilled bowls or waffle cones. This keeps it cold longer and adds style. For toppings, think chocolate shavings, whipped cream, or a drizzle of chocolate sauce. These extras make your treat look and taste even better. Enjoy every scoop!
Pro Tips
- Chill Your Equipment: For an ultra-creamy texture, chill your ice cream maker's bowl and paddle in the freezer for at least 24 hours before churning.
- Use Quality Cocoa Powder: A high-quality unsweetened cocoa powder will significantly enhance the chocolate flavor, making your ice cream more indulgent.
- Don’t Skip the Tempering: Properly tempering the egg yolks is crucial to avoid curdling and achieving a smooth, creamy base.
- Experiment with Mix-Ins: Feel free to get creative! Add nuts, dried fruits, or other chocolate varieties to customize your ice cream.
Variations
Adding Flavors
You can easily change up your chocolate ice cream. Here are two great ideas:
- Mint chocolate chip: Add a few drops of mint extract to the base. This makes a fresh and cool treat. You can also mix in mint chocolate chips for extra flavor.
- Sea salt caramel swirl: Drizzle some caramel sauce into the churned ice cream. Sprinkle a pinch of sea salt on top. This gives you a sweet and salty treat that is hard to resist.
Alternative Ingredients
Want to make your ice cream different? Here are some options to try:
- Dairy-free options: Use coconut cream or almond milk instead of heavy cream and whole milk. This keeps it creamy and delicious without dairy.
- Sugar substitutes: If you want to cut sugar, try using honey or agave syrup. You can also use stevia or monk fruit sweetener for a low-calorie choice. Just adjust the amount based on how sweet you want it.
These variations and alternatives let you make this ice cream your own. Enjoy experimenting!
Storage Info
How to Store Ice Cream
To keep your ice cream fresh, use an airtight container. This helps to prevent air from getting in and making your ice cream icy. Make sure to press a piece of plastic wrap directly onto the surface of the ice cream before sealing it. This extra layer keeps moisture out and protects your creamy treat.
For the best storage, avoid frequent opening of the container. Each time you open it, warm air enters, which can change the texture. Try to scoop out what you need quickly. If you have leftovers, seal it up tight right after.
Shelf Life
Homemade chocolate ice cream can last about two weeks in the freezer. After that, the quality may decline. It might still taste good, but the texture may become icy or grainy. To ensure the best flavor and texture, aim to enjoy your ice cream within this time frame. If you notice ice crystals forming or off flavors, it’s best to toss it out.
FAQs
Can I make this ice cream without an ice cream maker?
Yes, you can make ice cream without a machine. After chilling the mixture, pour it into a shallow dish. Place it in the freezer. Every 30 minutes, stir it with a fork. This breaks up ice crystals. Do this for about 3 hours, or until it is firm.
How do I fix icy ice cream?
If your ice cream turns out icy, it usually means it froze too fast. To fix this, you can add more fat. Mixing in extra cream can help. Also, ensure to churn well and chill the base before freezing. This makes for a smoother texture.
What is the best way to serve homemade ice cream?
Serve your ice cream in chilled bowls or waffle cones. For extra flair, top with chocolate shavings or whipped cream. Adding a drizzle of chocolate sauce makes it even better. These simple touches wow your guests and enhance the flavor.
Can I use dairy alternatives in this recipe?
Yes, you can use dairy alternatives! Try coconut milk or almond milk for a dairy-free option. Use coconut cream for added richness. You may need to adjust the sweetness, as some alternatives are less sweet than regular milk.
You now have a guide to make rich, homemade ice cream. We covered the key ingredients like heavy cream and cocoa powder, along with easy step-by-step instructions. Remember to use high-fat dairy for creaminess and add your favorite mix-ins for extra flavor.
Storing your ice cream correctly keeps it fresh for longer. Try out variations like mint chocolate chip or caramel swirl. Homemade ice cream is fun to make and share. Enjoy your delicious treat today!