Whole30 Slow Cooker Chicken Chili Flavorful Delight

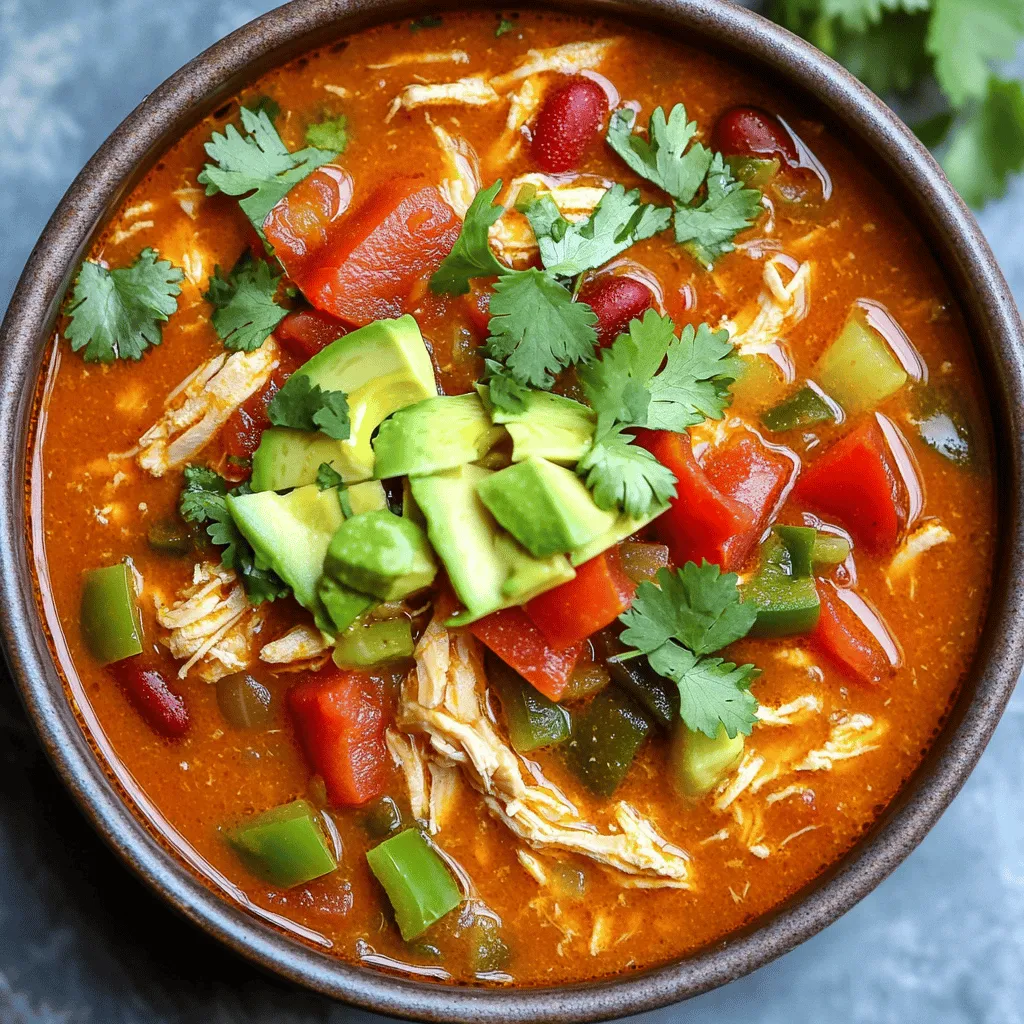
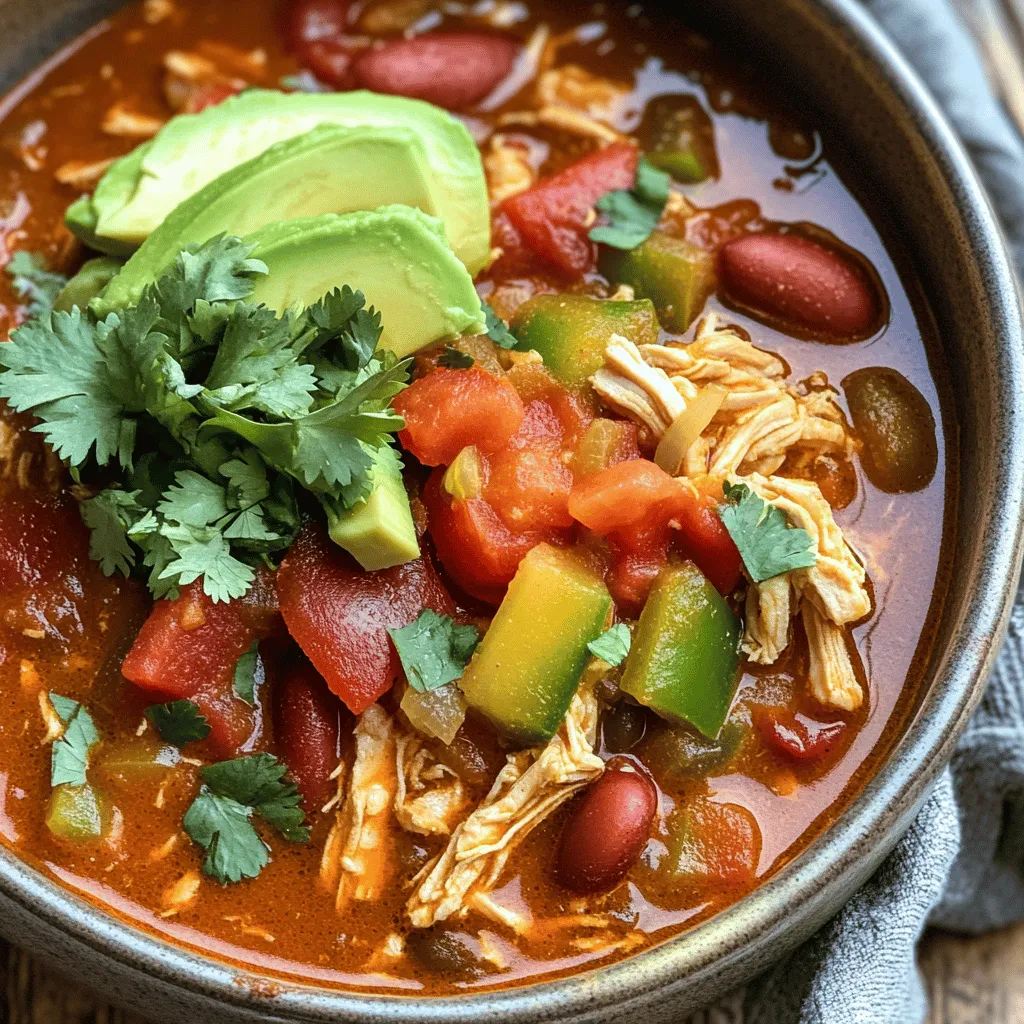
Are you ready to savor a warm, delicious meal that fits your Whole30 journey? This Whole30 Slow Cooker Chicken Chili offers a perfect blend of tender chicken, earthy spices, and vibrant veggies. With just a few simple steps, you can create a flavorful dish that warms your soul. Plus, I’ll share tips to enhance its taste and storage secrets for leftovers. Let’s dive into this mouthwatering recipe that will impress your family!
Ingredients
Main Ingredients
– 2 pounds boneless, skinless chicken thighs
– 2 cans (14 oz each) of diced tomatoes
– 1 can (15 oz) of coconut milk
The base of this chili is the chicken thighs. They add rich flavor and tenderness. I use diced tomatoes that have no sugar added. This keeps the dish healthy and tasty. Coconut milk adds creaminess and depth. It balances the spices and makes the chili comforting.
Vegetables
– 1 medium onion, finely diced
– 3 cloves of garlic, minced
– 1 red bell pepper, diced
– 1 green bell pepper, diced
The veggies bring color and nutrition. Onion gives a sweet base flavor. Garlic adds a punch of taste. I choose both red and green bell peppers for sweetness and crunch. Together, they create a hearty mix that complements the chicken.
Spices and Seasonings
– 1 tablespoon chili powder
– 1 tablespoon ground cumin
– 1 teaspoon smoked paprika
Spices are key to this chili. Chili powder adds heat and warmth. Ground cumin gives an earthy note. I love smoked paprika for its unique flavor. It adds a hint of smokiness that makes every bite special. These spices work together to create a balanced and bold dish.
Step-by-Step Instructions
Preparation Steps
1. Start by preparing your vegetables. Dice one medium onion and chop both red and green bell peppers into small pieces. Mince three cloves of garlic until fine.
2. In your slow cooker, layer the diced onion first. Then add the minced garlic and both bell peppers evenly on top.
Cooking Process
1. Place two pounds of boneless, skinless chicken thighs on top of your layered veggies. Make sure they spread out well.
2. Open two cans of diced tomatoes (14 oz each) and pour them over the chicken and veggies. Follow with one can of coconut milk (15 oz). This will create a creamy base.
3. Sprinkle in one tablespoon of chili powder, one tablespoon of ground cumin, one teaspoon of smoked paprika, one teaspoon of onion powder, and one teaspoon of garlic powder. Add salt and pepper to taste.
4. Gently stir the mixture with a large spoon. Be careful not to disturb the chicken thighs too much.
5. Secure the lid on your slow cooker. Set it to cook on low for 6-8 hours or on high for 3-4 hours. This allows the flavors to meld well together.
6. About 30 minutes before serving, shred the chicken in the slow cooker using two forks. This helps the chicken soak up all those tasty flavors. Stir the shredded chicken back into the mixture.
Final Adjustments
1. Before serving, taste your chili. Adjust the seasoning by adding more salt, pepper, or spices if needed. This ensures the chili suits your taste.
2. Serve the chili hot in rustic bowls. Garnish with fresh cilantro leaves and top with avocado slices if you like. For an extra zing, drizzle some lime juice over each bowl.
Tips & Tricks
How to Enhance Flavor
To make your chili even better, add more spices. Consider using cayenne pepper for heat or oregano for depth. You can also try a pinch of cinnamon for a warm flavor twist.
Flavor boosters can transform your dish. A splash of lime juice adds brightness. Try adding a tablespoon of apple cider vinegar for tang. These small changes can elevate your chili to new heights.
Slow Cooker Best Practices
For even cooking, layer your ingredients well. Place dense items like onions at the bottom. Add chicken on top to keep it moist. This method helps every layer cook evenly.
Avoid overcooking by keeping an eye on the time. Cooking on low for 6-8 hours is ideal. If you are short on time, the high setting works, too. Just remember to check the chicken for doneness.
Serving Suggestions
Toppings can enhance your chili experience. Fresh cilantro adds a bright note. Creamy avocado slices bring richness. Consider adding some fresh lime wedges for a zesty kick.
Chili pairs well with various sides. Serve it with a green salad for crunch. Rice or cauliflower rice can also make a hearty base. Enjoy the mix of flavors and textures!

Variations
Whole30 Compliant Modifications
You can easily swap veggies to fit your taste. Try using zucchini, carrots, or sweet potatoes. These options add color and nutrients. You can also leave out black beans for a strict Whole30 dish. If you want to change the meat, use pork or turkey instead of chicken. Just remember to adjust cooking times based on the meat you choose.
Family-Friendly Variations
Make this chili kid-friendly by reducing the spice. Use less chili powder and smoked paprika. You can add a bit of honey if your kids enjoy sweetness. Let them top their bowls with cheese or sour cream if they are not on Whole30. This dish is easy to customize, so each person can make it their own.
Alternative Cooking Methods
If you want a quicker method, try the Instant Pot. Cook the chili on high for about 20 minutes, then let it naturally release. For stovetop cooking, cook on medium heat for 30 to 40 minutes. Stir often to keep it from sticking. Regardless of the method, this chili will be a hit!
Storage Info
Refrigerator Storage
To store leftovers, let the chili cool first. Then, put it in an airtight container. It will stay fresh in the fridge for up to five days. When you’re ready to eat, heat it in a pot on the stove or in the microwave. Stir it well to ensure even heating.
Freezing Tips
You can freeze this chili for longer storage. Use freezer-safe bags or containers. Make sure to leave some space for expansion. It will last for about three months in the freezer. When you want to eat it, thaw it overnight in the fridge. Reheat it on the stove or in the microwave until hot.
Shelf Life
For the best taste, eat the chili within five days if stored in the fridge. If you freeze it, enjoy it within three months. Signs of spoilage include a sour smell or mold on the surface. If you see these signs, throw it away. Always prioritize safety in your food choices.
FAQs
Common Questions About Whole30 Chicken Chili
Can I use chicken breast instead of thighs?
Yes, you can use chicken breast. It will cook faster and may be less juicy. Chicken thighs add more flavor and moisture.
What can I substitute for coconut milk?
You can use almond milk or cashew cream for a different flavor. Keep in mind that this changes the taste a bit. Make sure to check for Whole30 compliance.
Nutritional Information Queries
Is this recipe healthy?
Yes, this recipe is healthy. It uses lean protein, fresh veggies, and healthy fats. It is also free from grains, dairy, and added sugars, which makes it great for Whole30.
What is the calorie count per serving?
Each serving is about 300 calories. This can vary based on the exact amounts and any toppings you add, like avocado.
Slow Cooker Specific Questions
Can I cook on high for a shorter time?
Yes, you can cook on high for 3-4 hours. This is great for busy days when you need a quick meal.
What if I don’t have a slow cooker?
You can make this chili on the stovetop. Just simmer it in a pot for about 30-40 minutes. Stir often to prevent sticking.
This article covered a tasty Whole30 chicken chili recipe. You learned about key ingredients, step-by-step instructions, and useful tips. We explored variations and how to store leftovers safely. Remember, you can adjust spices and ingredients to fit your taste. Enjoy this dish with your favorite toppings for a satisfying meal. Cooking can be fun and simple. I hope you feel more confident in making this hearty chili.


![To make these tasty blueberry cheesecake cookies, gather the following main ingredients: - 1 cup unsalted butter, softened to room temperature - 1 cup cream cheese, also softened - 1 cup granulated sugar - 1/2 cup brown sugar, packed tightly - 1 large egg - 1 teaspoon pure vanilla extract - 3 cups all-purpose flour - 1 teaspoon baking powder - 1/2 teaspoon baking soda - 1/4 teaspoon fine salt - 1 cup fresh blueberries (or frozen, thawed and drained) - 1/2 cup white chocolate chips These ingredients create a rich, creamy base for your cookies. The combination of butter and cream cheese gives them a soft texture, while the sugars provide sweetness. The blueberries add a burst of flavor and color. You can enhance these cookies with a few optional ingredients: - 1/4 teaspoon lemon zest (for a fresh, citrus taste) Adding lemon zest brightens the flavor and pairs well with the blueberries. Before you start baking, gather this equipment: - Two baking sheets - Parchment paper - Large mixing bowl - Electric mixer - Measuring cups and spoons - Cookie scoop or tablespoon - Wire rack Having the right tools makes the process smoother. The parchment paper prevents sticking and helps with easy cleanup. Start by preheating your oven to 350°F (175°C). This ensures the cookies bake evenly. Next, line two baking sheets with parchment paper. This helps the cookies not stick. In a large bowl, mix the softened butter and cream cheese. Add both the granulated and brown sugars. Use an electric mixer on medium speed until the mixture is smooth. This should take about 3-4 minutes. Now, add one large egg and a teaspoon of pure vanilla extract to the bowl. Beat it well until everything is mixed. In another bowl, whisk together the flour, baking powder, baking soda, and salt. Gradually add this dry mix to the wet ingredients. Mix on low speed until just combined, so you don't overmix. Carefully fold in one cup of fresh blueberries and half a cup of white chocolate chips. If you like, add a little lemon zest for extra flavor. Gently folding keeps the blueberries whole. Use a tablespoon or cookie scoop to drop dough onto the prepared baking sheets. Space them about 2 inches apart. This gives them room to spread while baking. Put the trays in the oven and bake for 12-14 minutes. The edges should be lightly golden, and the centers should feel set when touched. Once baked, take them out and let them cool on the sheets for 5 minutes. Then, transfer the cookies to a wire rack to cool completely. For a fun touch, drizzle icing made from powdered sugar and lemon juice over the cooled cookies. Arrange them on a colorful platter to show off their beauty. Enjoy your delicious blueberry cheesecake cookies! When picking blueberries, look for firm, plump ones. They should be deep blue and shiny. Avoid any that are soft or have green spots. Fresh blueberries work best, but frozen can be used too. Just make sure to thaw and drain them well. This keeps your cookies from getting too soggy. To store your cookies, keep them in an airtight container. This keeps them soft and fresh. You can store them at room temperature for up to a week. For longer storage, place them in the fridge for up to two weeks. If you want to freeze them, wrap each cookie in plastic wrap. Place them in a freezer bag for up to three months. To reheat, pop them in the oven at 350°F for a few minutes. This will bring back the warm, soft texture. One common mistake is overmixing the dough. This can make your cookies tough. Mix just until combined. Another mistake is not spacing the cookies out on the baking sheet. If they are too close, they will stick together. Lastly, don’t skip cooling the cookies on a wire rack. This helps them keep their shape and texture. For more detailed instructions, check the Full Recipe. {{image_4}} You can make these cookies even better by adding nuts or different fruits. Walnuts and pecans add a nice crunch. Try mixing in a half-cup of chopped nuts to the dough. If you want to try other fruits, diced strawberries or raspberries work great too. Just make sure to keep the total fruit amount around one cup to maintain the cookie's texture. If you need a gluten-free option, swap regular flour for gluten-free flour. A blend that includes almond flour or coconut flour can make your cookies soft and tasty. Just keep in mind that gluten-free flours may require extra moisture. You might want to add a tablespoon of milk to the dough. This will help keep your cookies moist and chewy. For chocolate lovers, you can add cocoa powder to the mix. Use a quarter cup of cocoa powder and reduce the flour by the same amount. You can also swap white chocolate chips for dark chocolate chips. This change will give your cookies a rich flavor that pairs well with blueberries. If you want to get fancy, drizzle melted chocolate on top before serving. Try these variations to make your blueberry cheesecake cookies unique and delicious. For the full recipe, check out the [Full Recipe]. You can find delicious blueberry cheesecake cookies at local bakeries. Many bakeries make fresh cookies daily. Look for shops that focus on quality ingredients. Ask if they use real blueberries. This makes a big difference in taste. Try visiting farmers' markets, too. Some local vendors sell homemade cookies. If you prefer to shop online, many websites offer blueberry cheesecake cookies. Websites like Etsy have bakers who sell unique treats. You can also check bigger stores like Amazon. They often carry cookies from well-known brands. Read reviews to ensure you are getting a tasty product. You can find store-bought blueberry cheesecake cookies at your local grocery store. Brands like Nabisco or Entenmann's may have options. Look in the cookie aisle for pre-packaged treats. If you want to try something new, check the freezer section for gourmet brands. These cookies often taste great and save you time. If you want to make your own, check out the Full Recipe for a great way to enjoy these cookies at home. To make these cookies vegan, you can swap out a few key ingredients. Replace the butter with vegan butter or coconut oil. Use a dairy-free cream cheese to mimic the rich texture. For the egg, opt for a flax egg. Mix one tablespoon of ground flaxseed with three tablespoons of water. Let it sit for five minutes until it thickens. This will help bind your cookies without any animal products. You can also ensure that your sugar is vegan, as some brands use bone char in their processing. To keep your cookies from spreading too much, chill your dough before baking. After mixing, cover the bowl and place it in the fridge for at least 30 minutes. This firms up the butter and helps the cookies hold their shape. Also, avoid overmixing your dough. Overmixing can create more gluten, which leads to spreading. Make sure your baking sheets are not too warm when you place the dough on them. Room temperature sheets help cookies maintain their shape better. Yes! Freezing Blueberry Cheesecake Cookies is a great way to enjoy them later. To freeze, let the cookies cool completely. Place them in an airtight container, separating layers with parchment paper. You can also freeze the dough. Scoop the dough onto a baking sheet and freeze until solid. Then, transfer the dough balls to a freezer bag. When you’re ready to bake, just bake from frozen. Add a couple of extra minutes to the baking time. Enjoy fresh cookies anytime with this simple method! For the full recipe, check back to the main sections. In this post, we covered how to make blueberry cheesecake cookies. You learned about the key and optional ingredients, essential equipment, and simple steps for success. We shared tips for perfect cookies and explored fun variations. You also discovered where to buy them and answered common questions. With the right tools and knowledge, you can create delicious cookies. Enjoy baking and experimenting with flavors for your own unique treats!](https://fastmealmate.com/wp-content/uploads/2025/07/bf5d8b6e-2600-4966-8b4a-5dec4dcc22b6-768x768.webp)


