Ultimate Pumpkin Cold Foam Simple and Delicious Recipe

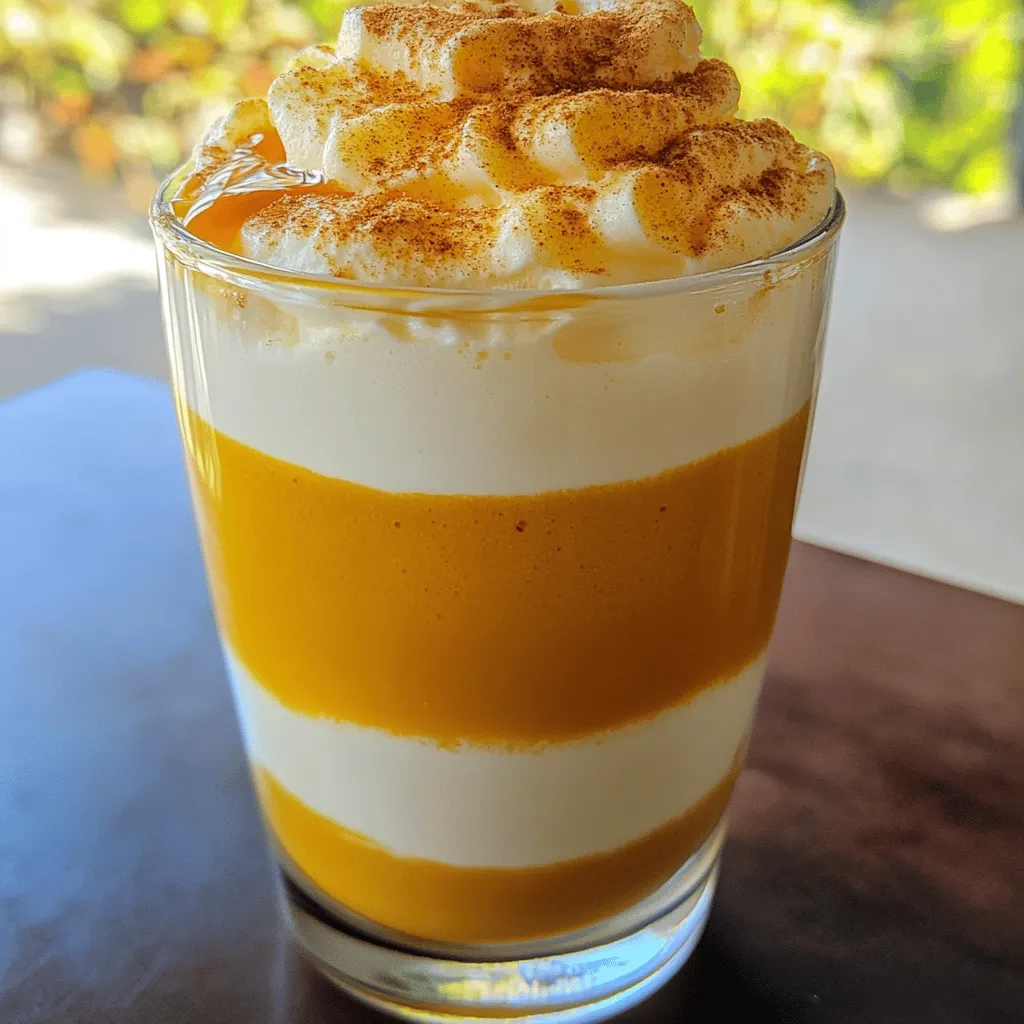
Fall is here, and it’s time to treat yourself with the Ultimate Pumpkin Cold Foam! This simple recipe is perfect for cozy mornings or festive gatherings. I’ll guide you through easy steps, using common ingredients you already have. Plus, discover tips to make it even better! Get ready to impress your friends and family with this sweet and creamy fall favorite that’s simple to whip up. Let’s dive in!
Ingredients
Essential Ingredients for Ultimate Pumpkin Cold Foam
To make the ultimate pumpkin cold foam, you need a few key ingredients. Here’s what you’ll need:
– 1 cup heavy cream
– 1/2 cup pumpkin puree
– 1/4 cup powdered sugar
– 1 teaspoon vanilla extract
– 1 teaspoon pumpkin pie spice
– Pinch of salt
– 1/2 cup milk (dairy or non-dairy)
These ingredients work together to create a rich and tasty foam that brings fall to your cup.
Optional Add-Ins for Flavor Enhancement
While the basic recipe is great, you might want to spice things up. Here are some fun add-ins:
– A splash of maple syrup for sweetness
– A dash of cinnamon for extra warmth
– A hint of nutmeg for a cozy flavor
Feel free to mix and match these to find your perfect taste!
Ingredient Substitutions
Sometimes, you might not have all the ingredients on hand. Here’s what you can use instead:
– Instead of heavy cream, you can use coconut cream for a dairy-free option.
– If you don’t have pumpkin pie spice, blend cinnamon, nutmeg, and ginger.
– For a lower sugar option, use a sugar substitute like stevia.
These swaps can keep your foam delicious while fitting your needs.
Step-by-Step Instructions
Preparation of Pumpkin Cold Foam Base
To start, gather your ingredients. You need heavy cream and pumpkin puree. In a big bowl, mix the heavy cream and pumpkin puree well. Use a whisk or an electric mixer. Keep mixing until it looks smooth and creamy. This step creates the base for your foam. It should feel thick but light.
Whipping the Cream to the Right Consistency
Now it’s time to whip the mixture. Add powdered sugar, vanilla extract, pumpkin pie spice, and a pinch of salt to the bowl. Stir everything together until it blends well. Start whipping on medium speed. You want soft peaks to form. This takes about 4-5 minutes. Don’t overwhip; you want it airy, not stiff.
How to Froth Milk for the Perfect Texture
While the pumpkin mix is resting, froth your milk. You can use a milk frother, a French press, or just a whisk. Whisk vigorously until the milk gets frothy and doubles in size. This gives your drink a nice texture. Pour the frothed milk into a glass, leaving room for the foam.
Now you have the base and froth ready.Enjoy making this fun treat!
Tips & Tricks
Mistakes to Avoid When Making Cold Foam
One common mistake is overwhipping the cream. This makes the foam too stiff. Aim for soft peaks, which give a light and airy texture. Another mistake is not using enough pumpkin puree. Too little will make the flavor weak. Always measure carefully to get that perfect pumpkin taste. Lastly, avoid skipping the pinch of salt. It balances sweetness and enhances the flavor.
Best Tools for Whipping and Frothing
To whip the cream, a hand mixer or electric mixer works best. If you want a workout, use a whisk. For frothing milk, a milk frother is ideal. A French press can also froth well. If you don’t have either, whisking by hand will do. Just be sure to whisk vigorously to get that nice foam.
Flavor Pairing Suggestions
Pumpkin cold foam pairs well with many drinks. Try it on top of a spiced latte for a warm treat. It also tastes great with coffee or chai. For a fun twist, add a splash of vanilla or caramel syrup. Nutmeg and cinnamon can boost the fall flavors too. Don’t be afraid to experiment and find your perfect match!

Variations
Alternate Flavors for the Foam
You can switch up your pumpkin foam with different flavors. Try adding chocolate or caramel for a sweet twist. A dash of maple syrup brings a cozy vibe. You can also add a touch of espresso for a coffee kick. Each option gives a unique taste that can surprise your guests.
Dairy-Free and Vegan Options
If you want to make this foam dairy-free, use coconut cream instead of heavy cream. Almond milk or oat milk works well for the frothed milk. Substitute powdered sugar with a vegan sweetener, like agave nectar. This way, everyone can enjoy the creamy goodness of pumpkin foam.
Sweet vs. Spicy Pumpkin Foam
You can balance the sweetness of the pumpkin foam with spice. Add extra pumpkin pie spice for a warm flavor. For a bolder taste, try cayenne pepper or ginger. This contrast makes your foam exciting and layered. Sweet and spicy together create a rich experience that makes each sip special.
Storage Info
How to Store Leftover Foam
To store leftover foam, place it in an airtight container. This keeps it fresh and safe. Make sure to cool the foam first. It is best to use it within three days for the best flavor and texture.
When to Use Stored Foam
You can use stored foam in many ways. It works great on coffee, hot chocolate, or even pancakes. Just remember, the flavor is best within the first day or two. If it sits longer, it may lose some of its yummy taste.
Best Practices for Reheating and Reviving Foam
If your foam needs a little love, gently rewhip it to bring back its fluff. Use a hand mixer or whisk for this task. Avoid overheating it, as foam can lose its airy texture when too warm. Just a light whip will help revive it nicely. Enjoy your Ultimate Pumpkin Cold Foam as a treat!
FAQs
What is Ultimate Pumpkin Cold Foam?
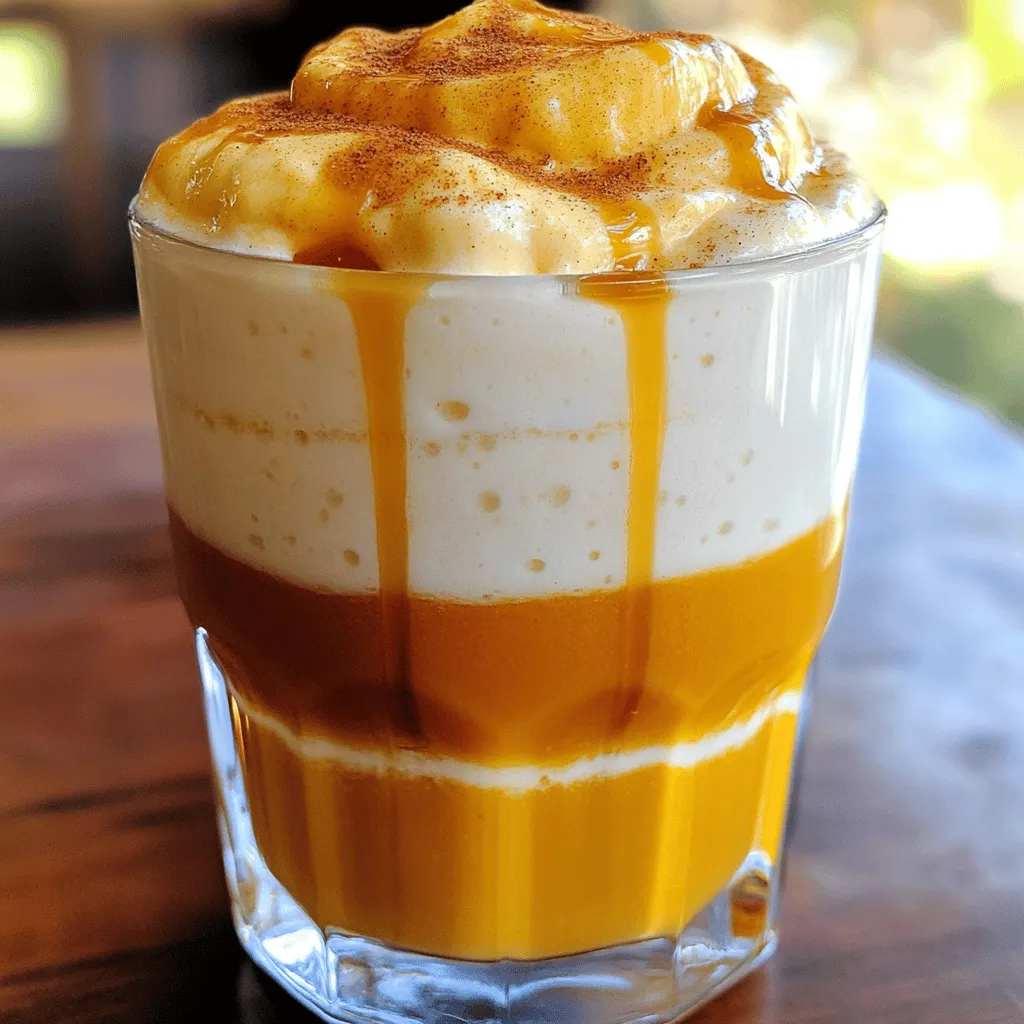
Ultimate Pumpkin Cold Foam is a light and creamy topping for drinks. It combines pumpkin puree, cream, and spices. This foam adds a delicious fall flavor to your beverages. It is perfect for coffee, tea, or even a dessert drink. The blend of flavors makes it a seasonal favorite.
How can I make my cold foam thicker?
To make your cold foam thicker, whip the cream longer. Aim for medium to stiff peaks. This means it should hold its shape well when you scoop it. Avoid overwhipping, as that can turn it into butter. You can also use less milk when frothing. This helps keep it thick and rich.
Can I use store-bought pumpkin puree?
Yes, you can use store-bought pumpkin puree. It saves time and effort. Just make sure to choose a brand with no added sugar or spices. This way, you control the sweetness and flavor of your cold foam better. It works great for this recipe and tastes just as good.
What drinks can I top with pumpkin cold foam?
You can top many drinks with pumpkin cold foam. It pairs well with lattes, iced coffee, or chai tea. It also tastes great on hot chocolate or even smoothies. Get creative and try it on your favorite drink. It adds a delightful fall twist to any beverage!
In this article, we explored how to make the ultimate pumpkin cold foam. We covered essential ingredients, optional add-ins, and substitutions. You learned step-by-step instructions for preparation and tips to avoid common mistakes. We also discussed exciting variations and safe storage practices to keep your foam fresh.
Now, you can enjoy a rich and creamy drink topped with pumpkin cold foam. With these methods, your drinks can be both fun and delicious. I hope you try this at home!


![- 2 large cucumbers, peeled and thinly sliced - 1 medium red onion, thinly sliced - 1/4 cup apple cider vinegar - 2 tablespoons honey - 1 tablespoon olive oil - 1 teaspoon salt - 1/2 teaspoon freshly ground black pepper - 1/4 teaspoon red pepper flakes (optional, for a hint of heat) - Fresh dill or chopped parsley for garnish Cucumbers are refreshing and hydrating. They contain vitamins A and K. Red onions add a sweet and mild flavor. They also have antioxidants that may help reduce inflammation. Apple cider vinegar provides a tangy taste. It may help with digestion. Honey adds sweetness and balances flavors. Olive oil not only adds richness but is also heart-healthy. Salt enhances all the flavors, while black pepper adds a slight kick. Fresh herbs like dill or parsley brighten up the dish. If you can’t find red onions, try using white or yellow onions. Both will work well. You can swap apple cider vinegar with white wine vinegar for a different taste. If you prefer, maple syrup can replace honey for a vegan option. For a lighter touch, use lemon juice instead of vinegar. If you want a different herb, mint or basil can add a unique flavor twist. For those who dislike spice, leave out the red pepper flakes altogether. You can find the full recipe above for a detailed guide on making this crisp salad! To make a fresh cucumber and onion salad, start with two large cucumbers. Peel them and slice them thinly. Use a sharp knife or a mandolin slicer for even slices. Next, take one medium red onion and slice it thinly as well. Add both slices to a large mixing bowl. In a small bowl, whisk together 1/4 cup of apple cider vinegar and 2 tablespoons of honey. Add 1 tablespoon of olive oil, 1 teaspoon of salt, 1/2 teaspoon of freshly ground black pepper, and 1/4 teaspoon of red pepper flakes if you like some heat. Mix until the honey is dissolved. Drizzle this dressing over the cucumbers and onions. Toss everything gently with two big spoons or salad tongs. Cover the bowl and place it in the fridge for at least 30 minutes. This helps the flavors meld together. When you are ready to serve, toss the salad again. Taste it, and adjust the seasoning if needed. Finally, add fresh dill or chopped parsley on top for garnish. To slice cucumbers and onions well, aim for thin and even pieces. This helps them blend in the salad. Use a mandolin slicer if you have one; it gives uniform slices. If you use a knife, keep your fingers tucked in. This helps prevent cuts. Chill your knife in the fridge before slicing. This can keep your vegetables crisper. Mixing the salad well is key to great flavor. Use two large spoons or salad tongs to toss the ingredients. Be gentle to avoid crushing the vegetables. Make sure every slice gets coated in dressing. Let the salad sit in the fridge for at least 30 minutes. This allows the flavors to soak in. Before serving, always taste and adjust the seasoning. This ensures the salad is just right for you. For a fun twist, consider adding other fresh herbs like basil or cilantro! To boost the taste of your Cucumber and Onion Salad, think about adding fresh herbs. Chopped dill or parsley brings a bright flavor. You can also add a squeeze of lemon juice for zest. If you like heat, try adding a pinch of cayenne pepper. This will give your salad a nice kick. Always taste as you go. Adjust the flavors to fit your own liking. For the best dressing, whisk the ingredients well. Mix the vinegar, honey, and olive oil until smooth. The honey needs to dissolve fully. If the dressing is too thick, add a little water or more vinegar. This will help it coat the veggies better. You want a nice balance between tangy and sweet. One common mistake is not letting the salad chill. Allowing it to sit in the fridge helps the flavors blend. Another mistake is cutting the cucumbers too thick. Thin slices absorb the dressing well. Lastly, don’t forget to taste your salad before serving. Adjust the salt and pepper to make it just right. Remember, the key is to keep it fresh and crisp. For a full recipe, check out the Crisp Cucumber & Sweet Onion Delight. {{image_4}} You can make this salad even better by adding other veggies. Try bell peppers for crunch. You can also add tomatoes for a sweet touch. Radishes bring a nice bite and color. Grated carrots can add a fun twist. Mix and match to find your favorite blend! While I love the apple cider vinegar dressing, you can switch it up. Try a creamy dressing like ranch or yogurt. Lemon juice can add a fresh zing. You can also use balsamic vinegar for a sweeter flavor. Experiment with herbs like basil or cilantro to change the taste. Seasonal ingredients can make your salad shine. In summer, add fresh herbs like mint or basil. In fall, sliced apples can give a sweet crunch. Winter might call for roasted veggies like squash. Use what’s fresh at the market to keep it exciting! For the complete recipe, check out the [Full Recipe]. To keep your cucumber and onion salad fresh, store it in an airtight container. This helps keep the crispness intact. Make sure to place the salad in the fridge. The cold temperature slows down spoilage. If you have a lot of salad left, divide it into smaller containers. When stored properly, this salad lasts about 3 to 5 days in the fridge. To maintain freshness, avoid adding dressing until you are ready to eat. The vinegar can cause the cucumbers to become soggy over time. If you notice any signs of wilting or change in color, it’s best to discard the salad. I do not recommend freezing cucumber and onion salad. The freezing process makes cucumbers watery and soft, ruining their crunch. If you want to use cucumbers later, consider pickling them instead. Pickled cucumbers can last for months and taste great in many dishes. For fresh enjoyment, stick to the fridge for this salad. You can find the Full Recipe to enjoy this dish fresh. For this salad, I recommend using English cucumbers. They are long, thin, and have fewer seeds. Their skin is also tender, which means no peeling is needed. If English cucumbers are not available, you can use Persian cucumbers. They are small and sweet, making them a great choice too. Yes, you can make this salad ahead of time. In fact, chilling it for a few hours helps the flavors blend. I suggest preparing it up to a day in advance. Just remember to toss it again before serving to mix the dressing well. To add some heat, you can increase the red pepper flakes in the dressing. You can also add sliced jalapeños or a dash of hot sauce for an extra kick. Start with a small amount and taste as you go to find the right spice level for you. This salad pairs well with grilled meats like chicken or fish. It also makes a great side for sandwiches and wraps. For a light meal, serve it alongside quinoa or rice. The fresh flavors complement many dishes beautifully. If you want to explore more, check out the Full Recipe for ideas on how to enhance your meal. Cucumber and Onion Salad is fresh and easy to make. You learned the best ingredients, helpful tips for slicing and mixing, and ways to enhance flavor. I shared options for variations, storage, and common mistakes to avoid. In the end, this salad is great any time of year. Enjoying it can brighten any meal. Keep experimenting and find what flavors you love best!](https://fastmealmate.com/wp-content/uploads/2025/06/e5e61b33-6e6d-48c4-8abd-5090a0f7425b-768x768.webp)


![Here is everything you need for this tasty dish: - 8 oz spaghetti or fettuccine pasta - 1 lb fresh scallops, cleaned and patted dry - 1 lb shrimp, peeled and deveined - 6 tablespoons unsalted butter - 4 cloves garlic, finely minced - 1 teaspoon red pepper flakes (optional for heat) - 1 cup cherry tomatoes, halved - 1 medium lemon, zested and juiced - 1/4 cup fresh parsley, chopped - Salt and freshly ground black pepper to taste - Grated Parmesan cheese, for serving Fresh, quality ingredients make a big difference. The pasta forms the base and gives the dish its heart. Scallops and shrimp add a rich flavor that makes each bite special. Garlic brings out the best in seafood, while the lemon brightens everything. Don't forget the fresh parsley for a pop of color and taste. For those who like a little kick, red pepper flakes can be a nice touch. Using these ingredients, you can create a beautiful meal that impresses friends and family. Check the [Full Recipe] for detailed steps to follow. Enjoy cooking! To make perfect pasta, start with a big pot of salted water. Bring it to a rolling boil. Add 8 oz of spaghetti or fettuccine and cook it until al dente. This usually means cooking it for about 1-2 minutes less than the package says. Before you drain the pasta, save 1 cup of the starchy pasta water. This water helps the sauce stick later. After reserving the water, drain the pasta and set it aside. For great seared scallops, use a hot skillet. Melt 3 tablespoons of unsalted butter over medium-high heat. Season 1 lb of cleaned scallops with salt and pepper. When the butter is sizzling, gently add the scallops. Sear them for 2-3 minutes on each side. They should be golden brown and opaque. Once done, take them out and place them on a plate. In the same skillet, lower the heat to medium and add the rest of the butter. Wait until it melts, then add 4 cloves of finely minced garlic and 1 teaspoon of red pepper flakes if you like heat. Sauté for about 30 seconds until the garlic smells great. Now, toss in 1 lb of peeled and deveined shrimp. Cook for 2-3 minutes, stirring often, until the shrimp turn pink. Next, add 1 cup of halved cherry tomatoes to the skillet. Cook for another minute until the tomatoes soften. Return the seared scallops to the pan. Squeeze the juice from 1 medium lemon over everything, and add the lemon zest. Stir gently to mix the flavors well. Now for the fun part! Add the cooked pasta to the skillet. Toss everything together so the pasta gets coated in the garlic butter sauce. If the sauce feels too thick, add some of the reserved pasta water slowly until you like the consistency. Make sure the pasta is evenly coated. Fold in 1/4 cup of chopped fresh parsley. Taste your dish and adjust the salt and pepper if needed. Serve the pasta hot. For an elegant touch, sprinkle grated Parmesan cheese on top. You can also add a sprig of parsley and a lemon wedge for a nice look. Enjoy this meal that combines so many amazing flavors! Check out the Full Recipe for detailed steps. - Recommended cooking times: For scallops, cook 2-3 minutes per side. Shrimp need about 2-3 minutes until pink. Pasta should be al dente, usually around 8-10 minutes. - Adjusting spice levels: If you like heat, add more red pepper flakes. For milder flavor, leave them out or reduce the amount. - Best pans for searing: Use a large skillet with a heavy bottom or cast iron. These help get a good sear on scallops and shrimp. - Essential tools for pasta preparation: A large pot for boiling pasta and a colander for draining are key. Tongs work great for tossing pasta with sauce. - Suggested wines to pair: A crisp white wine, like Sauvignon Blanc, complements the seafood well. You can also try a light Pinot Grigio. - Additional herbs and spices to try: Fresh basil or thyme can add a nice twist. A touch of smoked paprika gives a unique flavor boost. For the full recipe, check out the details above. {{image_4}} You can easily swap the seafood in this dish. Try using fish like cod or halibut. These options give a nice, flaky texture. You can also use lobster or crab for a more luxurious feel. If you prefer a lighter dish, switch to shrimp and scallops only. For a vegan or vegetarian twist, use mushrooms instead of seafood. Portobello or oyster mushrooms can add a meaty texture. You can also use firm tofu. This change keeps the dish flavorful while being plant-based. Cheese can change the flavor of this pasta. Adding feta cheese gives a tangy taste. Creamy goat cheese adds richness, while a sharp blue cheese brings boldness. Each cheese will create a unique twist. Incorporating seasonal vegetables can also enhance the dish. Fresh asparagus or zucchini adds crunch and color. You can toss in spinach or arugula for a touch of green. These veggies make the pasta healthier and more vibrant. If gluten is a concern, try gluten-free pasta. Options like brown rice or quinoa pasta work well. They will absorb the garlic butter sauce nicely without losing flavor. You can also switch up the noodles. Instead of spaghetti or fettuccine, use penne or linguine. Each type of noodle will give a different eating experience. Just make sure to adjust cooking times as needed. For the full recipe, check the section above! To keep your garlic butter scallop and shrimp pasta fresh, follow these steps: - Refrigeration: Place leftovers in an airtight container. Store them in the fridge for up to 3 days. This keeps the flavors intact and prevents spoilage. - Freezing: If you want to freeze, use a freezer-safe container. This dish can stay frozen for up to 2 months. However, scallops and shrimp may lose some texture when thawed. To enjoy your pasta again, use these reheating methods: - Best Method: Heat the pasta in a skillet over low heat. Add a splash of water or broth to prevent sticking. Stir gently until warmed through. - Refreshing Flavors: To boost the taste, add a little fresh garlic or a squeeze of lemon juice while reheating. This brings back the vibrant flavors of the dish. For the full recipe and more cooking tips, refer to the Full Recipe provided above. Garlic butter scallop and shrimp pasta can last up to three days in the fridge. Store it in an airtight container to keep it fresh. Always check for any off smells or changes in texture before eating. Yes, you can make garlic butter scallop and shrimp pasta ahead of time. Cook the pasta and seafood, then store them separately. Mix them together right before serving for the best taste and texture. You can serve garlic butter scallop and shrimp pasta with: - A simple green salad - Garlic bread - Roasted vegetables - A light white wine, like Sauvignon Blanc These sides balance the rich flavors of the pasta. To reheat the pasta, use a skillet over low heat. Add a splash of water or broth to keep it moist. Stir gently until heated through. This method helps maintain the dish's creamy texture. You can enhance garlic butter scallop and shrimp pasta with these spices: - Fresh basil for a sweet touch - Thyme for earthiness - Oregano for a hint of warmth - Black pepper for a little kick - A pinch of paprika for color and depth These spices can boost flavor and create a unique twist. For the full recipe, check the section above. This dish of garlic butter scallop and shrimp pasta combines fresh seafood with rich flavors. We covered the key ingredients, tips for cooking pasta, and how to perfect your dish. Remember to adjust spice levels to suit your taste. You can try different seafood or pasta types for fun twists. This recipe is easy to follow and great for impressing guests. Enjoy every bite and share it with family and friends for a delightful meal experience. Happy cooking!](https://fastmealmate.com/wp-content/uploads/2025/06/494cb207-4638-4860-b24c-000c711884e6-768x768.webp)
