Ultimate Grilled Chicken Marinade Simple Flavor Boost

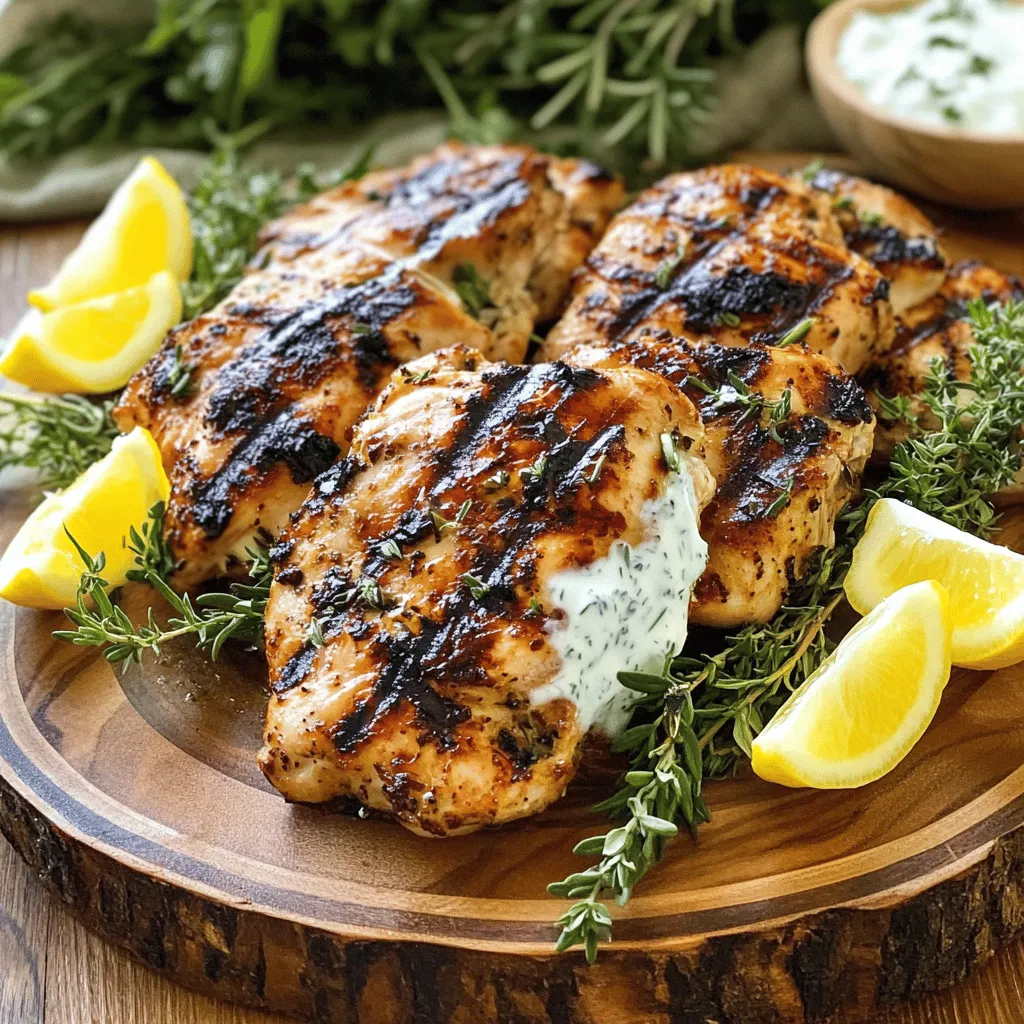
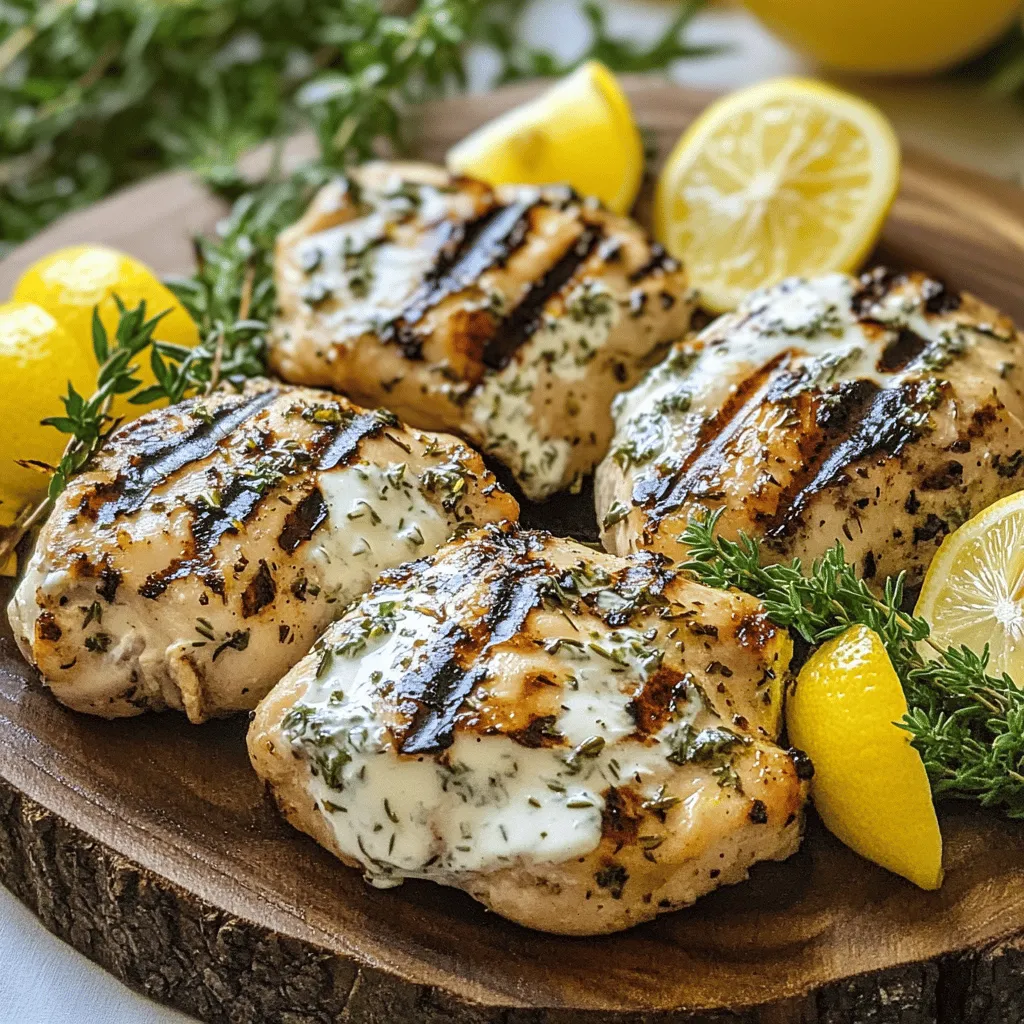
Are you ready to elevate your grilling game? The Ultimate Grilled Chicken Marinade can turn ordinary chicken into a delicious meal. With simple ingredients and easy steps, you’ll achieve flavor that impresses everyone. Whether you crave a spicy kick or a fresh herb twist, I’ve got variations for you. Get ready to discover tips that ensure juicy, tasty results every time. Let’s dive into the flavors that will transform your chicken!
Ingredients
Required Ingredients for the Ultimate Marinade
To make your ultimate grilled chicken marinade, gather these key items:
– 1 cup plain Greek yogurt
– 2 tablespoons extra virgin olive oil
– 3 tablespoons freshly squeezed lemon juice
– 3 cloves garlic, finely minced
– 1 tablespoon fresh rosemary, finely chopped
– 1 tablespoon fresh thyme, finely chopped
– 1 teaspoon smoked paprika
– 1 teaspoon chili powder
– Salt and freshly ground black pepper to taste
These ingredients work together to create a creamy, tangy, and flavorful base. The Greek yogurt adds depth, while the herbs bring fresh notes.
Optional Ingredients to Enhance Flavor
You can take your marinade to the next level with these optional ingredients:
– 1 tablespoon honey for sweetness
– 1 teaspoon Dijon mustard for zest
– A splash of soy sauce for umami
Adding these extras can give your chicken a unique twist. Honey balances the acidity, while mustard adds a lovely kick. Soy sauce brings in a savory depth that complements the chicken.
Ingredient Substitutions
If you need to swap any ingredients, don’t worry! Here are some easy substitutions:
– Use sour cream instead of Greek yogurt for tanginess.
– Swap the herbs with Italian seasoning for a different flavor.
– Lemon juice can be replaced with lime juice for a citrus twist.
These swaps will still keep your marinade delicious. Feel free to mix and match based on what you have at home. The goal is to create a marinade that suits your taste.
Step-by-Step Instructions
Preparing the Marinade
To make the marinade, start with a medium bowl. Add 1 cup of plain Greek yogurt. This yogurt gives a creamy base and helps tenderize the chicken. Next, pour in 2 tablespoons of extra virgin olive oil. This adds richness and depth to the flavor. Squeeze in 3 tablespoons of fresh lemon juice. The acidity brightens the taste. Now, finely mince 3 cloves of garlic and add them to the bowl. Garlic brings a wonderful aroma and flavor.
Next, chop 1 tablespoon each of fresh rosemary and fresh thyme. These herbs add a nice herbal note. Then, sprinkle in 1 teaspoon of smoked paprika and 1 teaspoon of chili powder. These spices bring warmth and a hint of smokiness. Finally, season with salt and freshly ground black pepper to taste. Mix everything well until smooth. The marinade should look creamy and inviting.
Marinating the Chicken
Now it’s time to marinate the chicken. Choose your chicken parts, like breasts, thighs, or drumsticks. Place them in a large zip-top bag or a shallow dish. Pour the marinade over the chicken, ensuring every piece gets coated. This helps lock in flavor. Seal the bag or cover the dish with plastic wrap. Refrigerate the chicken for at least 1 hour. For even better taste, marinate it for 4 to 6 hours or overnight. The longer the chicken sits, the more flavorful it becomes.
Grilling the Chicken to Perfection
When you are ready to grill, preheat your grill to medium-high heat. This ensures a good sear on the chicken. Take the chicken out of the marinade and let any excess drip off. Place the chicken on the hot grill. Cook for about 6 to 8 minutes on each side. The time may vary based on thickness. Use a meat thermometer to check for doneness. The internal temperature should reach 165°F (75°C).
Once cooked, remove the chicken from the grill. Let it rest on a cutting board for about 5 minutes. This resting period helps the juices settle, making the chicken juicy. Serve the chicken whole or sliced, and enjoy the flavors you created with your Ultimate Grilled Chicken Marinade!
Tips & Tricks
Recommended Marinating Times for Optimal Flavor
For the best taste, marinate your chicken for at least one hour. If you have more time, aim for four to six hours. This longer time allows the marinade to soak in and gives your chicken a rich flavor. If you want a super tasty outcome, consider marinating overnight. Just remember, too long can make the chicken mushy.
Best Grilling Techniques for Even Cooking
Start with a hot grill. Preheat to medium-high heat before adding the chicken. This step helps you get a nice sear. Place the chicken on the grill and resist the urge to move it too much. Let it sit for about six to eight minutes on each side. Use a meat thermometer to check that the thickest part hits 165°F (75°C). This ensures even cooking and a safe meal.
How to Ensure Chicken Stays Juicy and Tender
To keep your chicken juicy, let it rest after grilling. Resting for five minutes redistributes the juices inside. Another tip is to avoid overcooking. Use a meat thermometer to monitor the temperature closely. If you feel the chicken is done, take it off the grill right away. These small steps make a big difference.

Variations
Spicy Version with Added Heat
To spice up your chicken, add more heat. You can use cayenne pepper or hot sauce. Just mix these into your marinade. Start with a small amount, like ½ teaspoon of cayenne. Adjust to your taste. You’ll get a nice kick! This spicy version is great for those who love bold flavors.
Herb Variations for Unique Flavors
Herbs can change the whole taste of your chicken. You can try different herbs for variety. Fresh basil, cilantro, or parsley work well. Just chop them up and mix them in the marinade. Each herb gives a unique flavor. This fun twist keeps your meals exciting!
Alternative Cooking Methods (Oven, Skillet)
Grilling is not the only way to cook chicken. You can use your oven or a skillet instead. For oven cooking, preheat to 400°F (200°C). Place the chicken on a baking sheet. Bake for 25-30 minutes, or until it reaches 165°F (75°C). For skillet cooking, heat some oil in a pan. Cook the chicken for about 6-8 minutes on each side. Both methods yield juicy, tasty chicken just like on the grill.
Storage Info
How to Store Leftover Marinade
You may have extra marinade after grilling. You can store it in the fridge. Place it in a clean, airtight jar. Use it within three days for the best flavor. If you want to keep it longer, freeze it in small portions. This way, you can use it later for other dishes.
Reheating Grilled Chicken
To reheat grilled chicken, start by preheating your oven to 350°F (175°C). Place the chicken in a baking dish. Add a splash of water or broth to keep it moist. Cover the dish with aluminum foil. Heat for about 15 to 20 minutes. If you prefer, you can use a microwave. Heat in short bursts, checking every minute to avoid drying it out.
Safe Storage for Marinated Chicken
Marinated chicken must be stored properly. If you don’t cook it right away, keep it in the fridge. Use a sealed container or a zip-top bag. It can stay fresh for up to two days. After that, it’s best to cook it. Once cooked, you can store grilled chicken in the fridge for up to four days. Always check for any off smells before eating.
FAQs
How long should I marinate chicken?
You should marinate chicken for at least 1 hour. This time allows the flavors to soak in well. For a richer taste, aim for 4 to 6 hours. If you can, marinate it overnight. This longer time gives the chicken a tender and juicy texture.
Can I freeze marinated chicken?
Yes, you can freeze marinated chicken! Place the marinated chicken in a zip-top bag. Remove as much air as you can before sealing. Label the bag with the date. You can freeze it for up to 3 months. When you’re ready to cook, thaw it in the fridge overnight.
What is the best way to tell if chicken is done cooking?
The best way to check if chicken is done is by using a meat thermometer. Insert it into the thickest part of the chicken. It should read 165°F (75°C). If you don’t have a thermometer, you can cut into the chicken. The juices should run clear, not pink.
This guide covered all you need for the perfect marinade. We explored key ingredients, cooking steps, and tips to enhance flavor. I shared fun variations to keep meals exciting. Remember to store marinated chicken properly to keep it fresh. Use the grilling tips to ensure your chicken is juicy and tender. With these steps, you can make delicious grilled chicken every time. Enjoy the cooking journey and don’t hesitate to experiment with flavors!


![- Arugula (4 cups) - Cherry tomatoes (1 cup) - Cucumber (1 medium) - Red onion (1/2 medium) - Kalamata olives (1/2 cup) - Feta cheese (1/4 cup) - Sunflower seeds (1/4 cup, optional) - Extra virgin olive oil (1/4 cup) - Fresh lemon juice (2 tablespoons) - Dried oregano (1 teaspoon) - Salt and black pepper to taste Gathering fresh ingredients is key for this salad. Arugula gives it a peppery taste. Cherry tomatoes add sweetness and color. Cucumber brings crunch, while red onion gives a nice bite. Now, let’s talk about the add-ins. Kalamata olives add a briny flavor. Feta cheese gives creaminess and tang. If you want a crunch, add sunflower seeds. They work well with the other flavors. Next, we need the dressing. Extra virgin olive oil is rich and smooth. Fresh lemon juice brightens the salad. Dried oregano adds an earthy touch. Don’t forget salt and black pepper to finish. You can find the complete recipe in the [Full Recipe]. First, wash the arugula well. Rinse it under cold water to remove dirt. After washing, dry it gently with a salad spinner or a clean kitchen towel. This step helps the leaves stay crisp. Next, prepare the vegetables. Slice the cherry tomatoes in half. Dice the cucumber into half-inch cubes. For the red onion, cut it into thin rings. These steps add color and crunch to your salad. Now, it's time to mix the salad. In a large mixing bowl, add the fresh arugula, halved cherry tomatoes, diced cucumber, sliced red onion, and Kalamata olives. Use your hands to toss the salad gently. This method keeps the leaves from bruising. After mixing, sprinkle the crumbled feta cheese on top. This cheese adds a creamy texture and salty flavor. If you want extra crunch, you can also add sunflower seeds at this point. For the dressing, take a small bowl. Whisk together the extra virgin olive oil, fresh lemon juice, and dried oregano. Add a pinch of salt and pepper for taste. Whisk until everything combines well. Drizzle the dressing over the salad mixture. Use a large spoon or salad tongs to toss gently. This ensures every bite is flavorful without crushing the arugula. For a complete meal, check out the Full Recipe for all the details. To keep arugula fresh, handle it gently. Avoid squishing or bruising the leaves. When washing arugula, fill a bowl with cold water. Submerge the leaves and swish them around. This helps remove dirt without damaging them. Lift the arugula out and place it on a clean towel. Pat it dry carefully to keep the leaves crisp. To boost the flavor of your Mediterranean Arugula Salad, add fresh herbs like basil or parsley. These herbs bring bright notes to the dish. You can also sprinkle in a pinch of crushed red pepper for heat. When garnishing, use a few extra olives or a lemon wedge. This adds a pop of color and makes the salad look inviting. Serve your salad right after mixing for the best taste. The freshness of the arugula is key. If you need to prep ahead, wash and dry the arugula first. Store it in a container lined with paper towels. This keeps the leaves dry and crisp. You can chop the other veggies and store them separately. Just combine everything before serving. Enjoy the full flavors of your Mediterranean Arugula Salad! For the full recipe, refer to the earlier section. {{image_4}} You can make your Mediterranean arugula salad even more filling. Adding grilled chicken is a great choice. It brings a nice smoky flavor. If you prefer a plant-based option, try chickpeas. They add protein and a hearty texture. For a seafood twist, consider incorporating shrimp. Lightly sautéed or grilled shrimp works well. It adds a delightful taste that pairs nicely with the fresh ingredients. Feel free to adjust your salad based on the season. In summer, add ripe peaches or strawberries for sweetness. In fall, consider roasted butternut squash for warmth. You can also change up the dressing. Swap traditional vinegar for balsamic or apple cider vinegar. Each type will give the salad a unique flavor profile. If you want to make your Mediterranean arugula salad vegan, simply omit the cheese. The salad will still be fresh and tasty. For those needing gluten-free options, this salad is perfect. All ingredients are gluten-free, making it a safe choice for everyone. Enjoy your meal without worries! To store leftover Mediterranean Arugula Salad, place it in an airtight container. This helps keep the salad fresh and prevents it from drying out. Use glass or plastic containers with tight lids. If you have a lot of salad, consider dividing it into smaller portions. This makes it easy to grab just what you need. The salad stays fresh for about three days in the fridge. After this, the arugula may wilt, and the tomatoes might get mushy. Watch for signs like a slimy texture or off smells. If you see these, it's best to toss the salad. Fresh ingredients are key to a great taste. To refresh the salad, add a splash of lemon juice or olive oil. This can bring back some flavor and zest. You can also mix in fresh arugula or other greens. If you want to repurpose leftover salad, try using it as a filling for wraps or sandwiches. You can also stir it into cooked pasta for a quick meal. Arugula is low in calories but packed with nutrients. It has vitamins A, C, and K. Arugula also contains calcium and iron. These nutrients support bone health and boost immunity. Eating arugula can improve heart health due to its antioxidants. It's a great choice for a Mediterranean diet. This diet focuses on whole foods, healthy fats, and fresh produce. Arugula fits perfectly into this style of eating, enhancing flavors and health. Yes, you can prepare parts of the salad ahead of time. Wash and dry the arugula and veggies first. Store them separately to keep them fresh. Chop the tomatoes, cucumber, and onion in advance. Keep them in airtight containers in the fridge. You can make the dressing ahead too. Just whisk together olive oil, lemon juice, and seasonings. Store the dressing in a jar. When ready to serve, mix everything together for a fresh salad. You can try several dressings with this salad. A classic vinaigrette works well. Use olive oil, vinegar, salt, and pepper. A lemon-tahini dressing adds a creamy touch. You could also use balsamic vinaigrette for sweetness. Another tasty option is yogurt-based dressing for a tangy kick. Each dressing can enhance the salad’s flavors, so experiment to find your favorite. For the full recipe, check out the details above. In this blog post, we explored the Mediterranean Arugula Salad. We discussed fresh produce, flavorful add-ins, and the best dressing to bring it all together. You learned how to prepare, mix, and serve the salad with tips for freshness and flavor enhancement. Remember, this salad is versatile—you can change the protein or vegetables based on the season. Enjoy making your own tasty versions and store leftovers properly. With the right care, your salad can stay fresh and delicious for days.](https://fastmealmate.com/wp-content/uploads/2025/06/6fae422d-07df-4724-84de-c8edab5789ea-768x768.webp)
![To make these tasty bars, you need a few simple ingredients: - 1 cup creamy peanut butter - 1/2 cup honey or maple syrup - 1 1/2 cups rolled oats - 1/2 cup almond flour - 1/4 cup unsweetened cocoa powder - 1/2 teaspoon vanilla extract - A pinch of salt - 1/3 cup dark chocolate chips (optional) These ingredients blend well together. The peanut butter gives a rich flavor. Honey or maple syrup adds sweetness. Oats provide a hearty base, making them filling. You may want to add some extra touches for more flavor: - A sprinkle of cinnamon for warmth - Chopped nuts for crunch - Dried fruits for sweetness These options can change the taste and texture. Feel free to mix and match based on your preferences. If you have allergies, here are some easy swaps: - Use sunflower seed butter instead of peanut butter - Substitute maple syrup for honey if needed - Replace almond flour with oat flour or coconut flour These substitutions keep the recipe safe and delicious. You can still enjoy the bars while avoiding allergens. Just remember to follow the same steps, and you’ll be good to go! Start by gathering your ingredients. Place the creamy peanut butter and honey in a large bowl. Use a spatula or wooden spoon to mix them. Stir until the mix is smooth and creamy. This step is key to a tasty bar. Next, add the rolled oats, almond flour, cocoa powder, vanilla, and salt. Mix everything together well. You want to see no dry spots. This creates a thick and sticky dough that holds together nicely. Now, take an 8x8 inch baking dish and line it with parchment paper. Leave some paper hanging over the edges. This makes it easy to lift out the bars later. Transfer your peanut butter mixture into the dish. Use your hands or a spatula to press it down. Make sure it’s even and firm across the bottom. If you want to add a chocolate drizzle, melt the dark chocolate chips next. Place them in a microwave-safe bowl. Heat in 15-second bursts, stirring each time. Once melted, drizzle the chocolate over the pressed mixture. Use a spoon or piping bag for a nice look. Finally, place your baking dish in the fridge. Chill for at least 1-2 hours. This helps the bars set firmly. Once ready, lift them out by the parchment paper. Cut into squares or bars as you like. You can find the full recipe [Full Recipe]. To get the best texture, mix the peanut butter and honey well. You want it smooth and creamy. If your mixture seems too dry, add a bit more honey or a splash of water. This helps bind everything together. The rolled oats should be well coated to hold the bars nicely. When you press the mixture into the dish, use damp hands. This prevents sticking. Start at the center and push outward. Press firmly and evenly to avoid air pockets. A flat spatula can help smooth the top. Make sure the layer is compact and even for better bars. For a great look, cut the bars into squares or rectangles. Place them on a colorful plate. You can add fresh fruit like berries or banana slices on the side. For a fun touch, sprinkle some extra cocoa powder or crushed nuts on top. This makes your treat look even more inviting. {{image_4}} You can make these bars even better with fun mix-ins. Chopped nuts add crunch. Walnuts or almonds work great. Dried fruits like cranberries or raisins give a sweet touch. Mix in about 1/2 cup of these before you press the mixture into the dish. This way, each bite has a surprise! Want to change the flavor? Use coconut or almond extract! Just add a teaspoon to the mix. Coconut gives a tropical twist. Almond makes it rich and nutty. You can also add shredded coconut for extra texture. It’s easy to make each batch unique! You can swap honey for maple syrup if you want. Both sweeteners work well, but they taste different. Maple syrup has a deep flavor. Honey is sweeter and lighter. You can also use agave nectar if you prefer. Just remember, the texture may change slightly with each choice. Use the one that you love best for your no-bake peanut butter bars. For the full recipe, check the details above! To keep your no-bake peanut butter bars fresh, use an airtight container. This helps lock in moisture. Place a piece of parchment paper between layers if you stack them. This prevents sticking and makes them easy to grab. Store them in the refrigerator for the best taste and texture. You can freeze these bars for later. Cut them into squares first and wrap each one in plastic wrap. Then, place them in a freezer-safe bag. Squeeze out as much air as you can before sealing. They will last up to three months in the freezer. When you're ready to enjoy, thaw them in the fridge overnight. These bars can last up to one week in the fridge. Keep them cool and away from heat. Check for any changes in smell or texture before eating. If you notice anything off, it's best to toss them. Following these tips ensures you always have a tasty treat on hand. If you want the full recipe, you can check it out for more details! Yes, you can use crunchy peanut butter. It will add some nice texture to the bars. The flavor will be the same, but the crunch gives a fun bite. If you like a little crunch, go for it! The bars need to chill for at least 1-2 hours. This time helps them set well. If you can wait longer, they will be even firmer and easier to cut. Just make sure they are cold before slicing. They can be vegan if you use maple syrup instead of honey. Just check your peanut butter, too, to ensure it doesn’t have added ingredients. With the right swaps, you can enjoy this treat without any animal products! You can use any nut flour, like hazelnut or cashew flour. If you need a nut-free option, try oat flour or even whole wheat flour. Just remember that different flours may change the texture a bit. The bars are set when they are firm to the touch. They should hold their shape when you lift them out of the pan. If they feel soft, give them more time in the fridge. Once set, they are ready to cut into pieces. These no-bake peanut butter bars are simple and tasty. We covered ingredients, steps, and great tips. You can customize them with different flavors and mix-ins. Remember to store them well for freshness. Feel free to experiment with substitutes and variations. Enjoy making these treats for yourself or to share. They are quick to whip up, perfect for any snack. Now, it’s your turn to enjoy this easy, delicious recipe!](https://fastmealmate.com/wp-content/uploads/2025/07/4c36effc-71ba-4d9d-bf30-f4c7732f2b92-768x768.webp)

. Enjoy your cooking! To boost flavor, use fresh herbs. Fresh basil adds a bright note. You can also try parsley or thyme. Adding lemon zest brings a nice zing. For a kick, sprinkle in some red pepper flakes. If you want more depth, use vegetable broth instead of water. You can even roast the zucchini and corn first to enhance their sweetness. One common mistake is overcooking the orzo. Keep a close eye on it as it simmers. If you let it cook too long, it can become mushy. Another mistake is not seasoning enough. Taste and adjust with salt and pepper during cooking. Lastly, don’t skip the resting time after cooking. This helps the flavors blend better. To serve, use a large bowl for a family-style look. Spoon the orzo into the center, leaving some space around it. Top with fresh basil leaves for color. You can also add a sprinkle of cheese for richness. Serve with a lemon wedge on the side. This adds a pop of color and lets guests brighten their dish as they like. For the full recipe, be sure to check out the detailed cooking steps. {{image_4}} This dish shines as a vegetarian option. It uses fresh veggies and orzo, making it filling. To make it vegan, simply ensure your vegetable broth is plant-based. You can also add more protein by including chickpeas or tofu. These additions will keep the dish hearty and satisfying. If you need a gluten-free version, swap the orzo for gluten-free pasta. There are many types available, like rice or quinoa pasta. Just check the cooking time, as it may vary from regular orzo. This way, you can enjoy the flavors without worrying about gluten. Feel free to get creative with seasonal veggies! Try adding diced tomatoes, spinach, or bell peppers. You could also include peas or carrots for extra color and nutrition. Just remember to adjust the cooking time, so everything remains tender and vibrant. These changes can make the dish fun and new each time you prepare it. For the complete recipe, check the Full Recipe section. To keep your One Pan Summer Corn Zucchini Orzo fresh, let it cool first. Transfer the dish into an airtight container. Store it in the fridge for up to three days. This helps maintain its flavors and textures. When you are ready to enjoy leftovers, you can reheat them easily. Place the orzo in a skillet over low heat. Add a splash of vegetable broth or water to prevent sticking. Stir occasionally until it is heated through. This should take about 5 to 7 minutes. You can also use a microwave. Heat for one minute, then stir and check if it's warm. Repeat until heated. If you want to save your dish for later, freezing is a great option. Allow the orzo to cool completely. Portion it into freezer-safe bags or containers. Make sure to remove as much air as possible. Label the bags with the date. You can freeze it for up to three months. For best results, thaw it overnight in the fridge before reheating. For the full recipe, check out the detailed instructions above. To cook orzo perfectly, start with plenty of water. Use a ratio of 1 cup of orzo to 2 cups of water or broth. Bring the liquid to a boil, then add the orzo. Stir it gently to prevent sticking. Cook for about 8 to 10 minutes. Taste it a minute or two before the time is up. You want it al dente, firm but not hard. If there’s excess liquid, drain it off. This method keeps your orzo from getting mushy. Yes, you can use frozen vegetables in this dish. They save time and are often just as healthy. For the One Pan Summer Corn Zucchini Orzo, frozen corn works great. Just add it directly to the skillet. You may need to cook it a bit longer. Frozen zucchini can also work, but fresh zucchini gives a nicer texture. If using frozen, make sure to thaw it first if you want even cooking. Many sides go well with this dish. Here are some ideas: - Grilled Chicken: Adds protein and a nice char. - Garlic Bread: Perfect for soaking up extra broth. - Simple Salad: A light salad with lemon dressing complements the dish. - Roasted Vegetables: A mix of seasonal veggies enhances the meal. These sides make your meal more complete and satisfying. For the full recipe, check out the details above! You learned about the key ingredients and how to cook them. I covered steps, tips, and tricks for a great dish. You also found ways to adapt the recipe for special diets. Storing and reheating leftovers will help cut waste. Always aim for flavor and avoid common mistakes. With these insights, you'll create a tasty one-pan summer corn zucchini orzo. Enjoy your cooking journey and impress your guests!](https://fastmealmate.com/wp-content/uploads/2025/07/e3382d29-f029-483c-a1d1-82293022c013-768x768.webp)