Sugar-Free Pumpkin Spice Syrup Flavorful Fall Treat

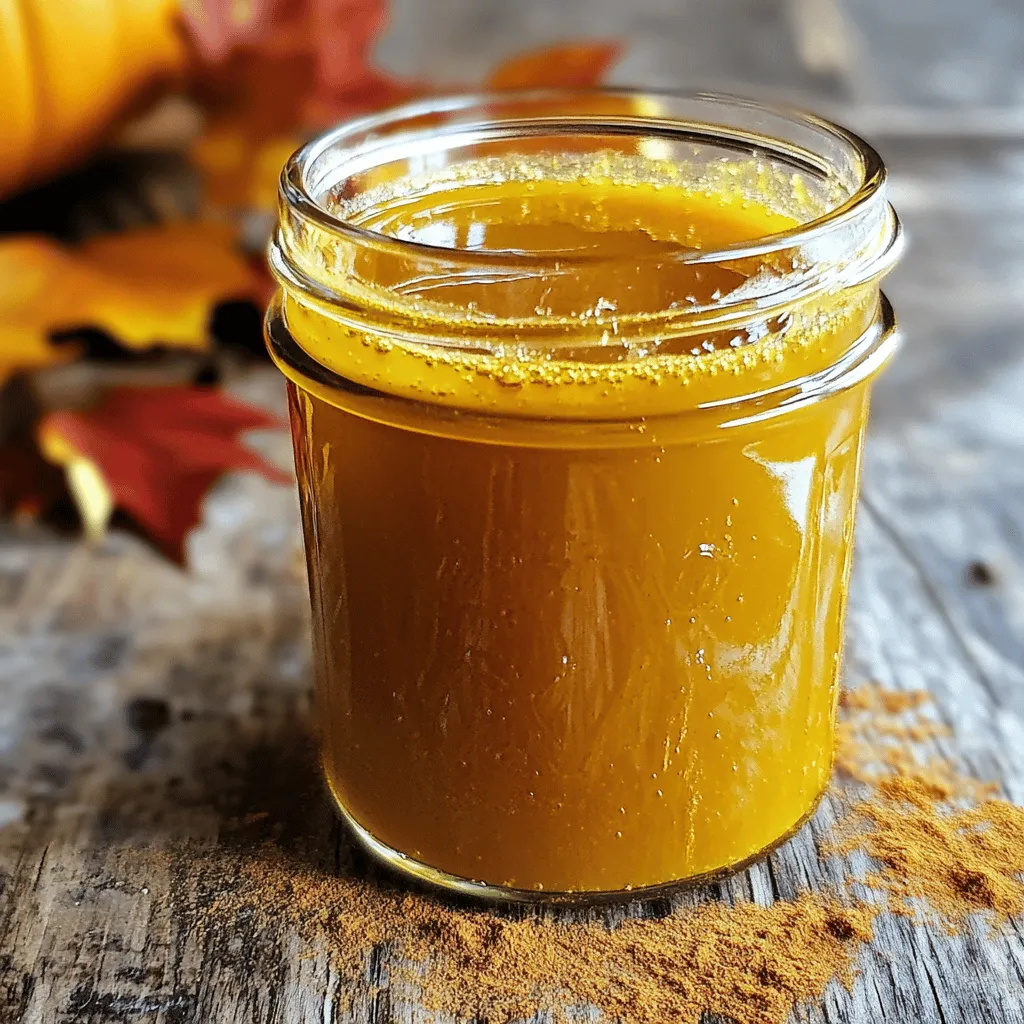
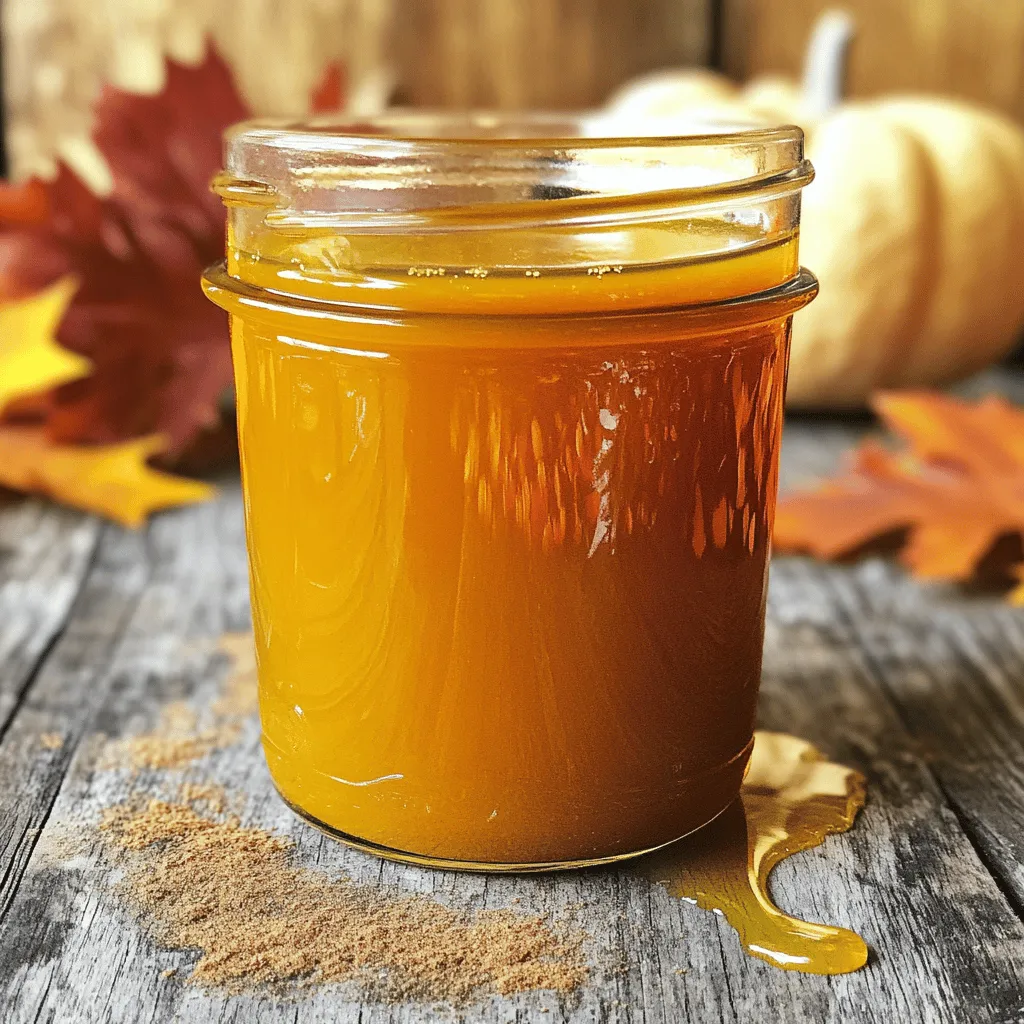
Looking for a tasty way to enjoy fall flavors without the sugar? You’ve come to the right place! My recipe for Sugar-Free Pumpkin Spice Syrup gives you that warm, cozy taste we all love, without the guilt. Packed with simple ingredients, it’s easy to make and can enhance your drinks and desserts. Let’s dive into how you can whip up this flavorful fall treat and savor the season!
Ingredients
Main Ingredients for Sugar-Free Pumpkin Spice Syrup
To make Sugar-Free Pumpkin Spice Syrup, you need simple ingredients. Here’s what you’ll need:
– 2 cups water
– 1 cup pure pumpkin puree
– 1 tablespoon pumpkin pie spice
– 1 teaspoon pure vanilla extract
– ½ cup erythritol (or your choice of sugar substitute)
– A pinch of sea salt
These ingredients come together to create a rich, sweet syrup. The pumpkin puree gives a lovely texture and flavor. Erythritol adds sweetness without sugar. The pumpkin pie spice brings warmth and classic fall notes.
Health Benefits of Key Ingredients
Each ingredient in this syrup offers health benefits. Pumpkin puree is low in calories and high in fiber. It helps keep you full and supports digestion. Plus, it’s packed with vitamins A and C, which boost your immune system.
Erythritol, the sweetener I recommend, has low calories and does not spike blood sugar. This makes it a great choice for people watching their sugar intake. Pumpkin pie spice can also help with digestion and has antioxidants that fight free radicals.
Alternative Sweeteners and Their Benefits
If you want to try other sweeteners, there are great options. Stevia is a popular choice. It is very sweet, so you need less of it. Monk fruit sweetener is another good pick. It has zero calories and is safe for diabetics.
These sweeteners can also provide health benefits. They are low in calories and do not raise blood sugar levels. You can choose any of these sweeteners based on your taste and health needs.
Step-by-Step Instructions
Preparation Overview
To make this syrup, gather your ingredients. You will need:
– 2 cups water
– 1 cup pure pumpkin puree
– 1 tablespoon pumpkin pie spice
– 1 teaspoon pure vanilla extract
– ½ cup erythritol (or your choice of sugar substitute)
– A pinch of sea salt
This simple list of items creates a great fall treat. You’ll have a tasty syrup ready in only 15 minutes.
Cooking Steps for Optimal Flavor
1. Start by pouring the water into a medium saucepan.
2. Add the pure pumpkin puree to the water.
3. Place the saucepan over medium heat. Stir gently until mixed well.
4. Once mixed, sprinkle in the erythritol. Keep stirring until it dissolves fully.
5. Now, add the pumpkin pie spice and a pinch of sea salt.
6. Let the mixture simmer for about 10 minutes. This step makes the flavors pop.
7. After 10 minutes, remove the saucepan from the heat.
8. Stir in the pure vanilla extract to mix in that lovely flavor.
Tips for Straining the Syrup
Let the syrup cool for a few minutes. Then, strain it through a fine mesh sieve or cheesecloth. This step is key to a smooth syrup. Discard any solids left behind. Make sure to use a clean glass jar or bottle for storage. Seal it up and keep it in the fridge. It stays fresh for two weeks. You can enjoy this syrup in many ways, like in coffee or on pancakes.
Remember, this is just a quick guide to making the best syrup.Enjoy your fall treat!
Tips & Tricks
How to Perfect Your Syrup Flavor
To get the best flavor from your syrup, use fresh pumpkin puree. Canned pumpkin can work, but fresh gives a brighter taste. Also, let the syrup simmer. This helps the spices blend. Stir often to keep it smooth. Taste as you go. Adjust sweetness to your liking.
Common Mistakes to Avoid
One mistake is not measuring the pumpkin pie spice. Too much can overpower the syrup. Another mistake? Skipping the salt. A small pinch brings out the flavors. Avoid cooking it too long. Overcooking can lead to a burnt taste. Lastly, don’t rush the cooling step. This helps the syrup thicken perfectly.
Serving Suggestions for Various Recipes
This syrup works magic on pancakes and waffles. Drizzle it over oatmeal for a fall twist. You can also mix it into coffee or tea. It adds warmth and flavor to both. Try it in yogurt or smoothies for a tasty treat. You can even use it in baking for added flavor.

Variations
Other Flavor Additions
You can add fun flavors to your syrup. Try a dash of nutmeg for warmth. A little maple extract can bring a nice twist. If you like a kick, add a pinch of cayenne pepper. This adds spice that balances the sweet. Want a richer taste? Use brown sugar flavoring for depth. Each addition can create a unique syrup just for you!
Using Different Sweeteners
Erythritol works well, but other sweeteners can shine too. Stevia is a great choice for low-calorie lovers. Monk fruit sweetener gives a nice, sweet taste without the sugar. If you prefer honey, try a small amount. Just remember, honey is not sugar-free. Each sweetener can change the taste and texture, so experiment to find what you love best.
Adapting the Recipe for Different Dietary Needs
This syrup can fit many diets. For keto, use erythritol or stevia. If you are vegan, the recipe is already plant-based. Just ensure your sweetener is vegan-friendly. Gluten-free? No worries; all the ingredients are safe. This syrup is versatile, so feel free to adapt it. You can enjoy the flavors without worry!
Storage Info
Best Practices for Storing Syrup
To keep your sugar-free pumpkin spice syrup fresh, use a clean glass jar. Make sure the jar has a tight lid. Store the syrup in the refrigerator. This keeps the flavors bright and tasty. Avoid leaving it out at room temperature. Heat can spoil the syrup faster.
Shelf Life and Freshness Tips
Your syrup will last about two weeks in the fridge. After two weeks, check for any changes in smell or color. If it smells off, throw it away. If you want to enjoy it longer, try freezing it.
Freezing for Longer Storage
You can freeze the syrup for up to six months. Pour the syrup into ice cube trays. Once frozen, pop the cubes into a freezer bag. This helps you use just what you need. When ready to use, thaw the cubes in the fridge overnight. This gives you a quick and tasty way to enjoy your syrup anytime!
FAQs
Can I make this syrup vegan?
Yes, you can make this syrup vegan! The ingredients are already plant-based. Use water, pumpkin puree, and a sugar substitute like erythritol. You do not need any animal products. This makes it perfect for everyone.
How do I use Sugar-Free Pumpkin Spice Syrup?
You can use the syrup in many ways. Drizzle it over pancakes or waffles for a tasty breakfast. Add it to coffee or tea for a warm drink. You can even use it in smoothies for extra flavor. It’s a versatile treat to enjoy!
Where can I buy Sugar-Free Pumpkin Spice Syrup?
You can find sugar-free pumpkin spice syrup at many grocery stores. Look in the baking aisle or near coffee products. If you prefer online shopping, check websites like Amazon or specialty food stores. Many brands offer their versions, so choose one that fits your taste.You’ll find easy steps to create this delightful syrup at home!
This post covered how to make sugar-free pumpkin spice syrup. We explored key ingredients, their health benefits, and various sweeteners. I shared step-by-step cooking tips for great flavor and how to store it well. We also discussed variations to suit your taste and diet.
In summary, making this syrup is easy and fun. You can enjoy it in many recipes. Now, get started on your own batch and savor the seasonal taste without the sugar!


![- 1 tablespoon olive oil - 1 medium onion, finely diced - 2 cloves garlic, minced - 2 medium carrots, peeled and diced - 1 medium zucchini, diced - 1 cup green peas (fresh or frozen) - 1 cup cauliflower florets, chopped - 4 cups vegetable broth - 1 cup coconut milk To make a creamy vegetable soup, start with olive oil, onion, and garlic. The olive oil adds a nice richness. The onion gives a sweet base flavor. Garlic brings a warm, aromatic touch. Next, choose fresh vegetables like carrots, zucchini, and cauliflower. Carrots add sweetness and color. Zucchini brings a mild flavor and a tender texture. Cauliflower gives the soup a creamy feel when blended. For the broth and creaminess, use vegetable broth and coconut milk. Vegetable broth adds depth. Coconut milk makes the soup rich and smooth. Together, these ingredients create a lovely balance of flavors. - 1 teaspoon dried thyme - ½ teaspoon smoked paprika - Salt and freshly ground black pepper to taste - Fresh parsley, chopped (for garnish) Now, season your soup with dried thyme and smoked paprika. Thyme adds a warm herbal note. Smoked paprika gives a hint of smokiness. Use salt and pepper to taste, adjusting as you go. Finally, top your soup with fresh parsley. It adds a pop of color and a fresh taste. This simple garnish makes the soup look inviting and bright. For the complete recipe, check the [Full Recipe]. Start by heating 1 tablespoon of olive oil in a large pot over medium heat. Once the oil is hot, add 1 medium onion, finely diced, and 2 cloves of minced garlic. Sauté these for about 3-4 minutes. Keep stirring until the onion is soft and clear. This step builds a strong flavor base for your soup. Next, add 2 medium carrots, peeled and diced, along with 1 medium zucchini, diced, and 1 cup of chopped cauliflower florets. Cook these vegetables for an additional 5 minutes. Stir often until they begin to soften. This mix of veggies adds color and nutrition to your dish. Now, pour in 4 cups of vegetable broth. This broth acts as the heart of the soup. Add 1 cup of green peas, 1 teaspoon of dried thyme, and ½ teaspoon of smoked paprika. Bring this mixture to a boil. After it boils, lower the heat and let it simmer uncovered for about 15 minutes. The goal is to cook until all the vegetables are tender and full of flavor. Once the soup has simmered, remove it from the heat. Use an immersion blender to carefully purée the soup until it is smooth and creamy. If you prefer, you can also transfer the soup in batches to a countertop blender. Blend until the mixture is silky. This step is key for achieving that creamy texture we all love. Return the pot to low heat. Now, stir in 1 cup of coconut milk. This ingredient adds a rich creaminess and a hint of sweetness. Season the soup with salt and freshly ground black pepper to taste. Gently warm the soup for about 5 minutes. This will make sure everything is hot without boiling. Serve the soup hot in bowls. Garnish with fresh chopped parsley for a pop of color. Enjoy your creamy vegetable soup, made with love and fresh ingredients! For the complete recipe, check out the Full Recipe section. Choosing the right vegetables is key to great flavor. I love using fresh carrots, zucchini, and cauliflower. Each adds a unique taste. You can also add sweet potatoes or bell peppers for a twist. Always pick vegetables that are in season. They taste better and have more nutrients. Adjusting the creaminess level is easy. For a lighter soup, use less coconut milk. If you like it rich, add more. You can also blend in some white beans for extra creaminess without extra calories. Garnishing the soup makes it look stunning. I like to sprinkle fresh parsley on top. It adds a pop of color and fresh taste. You can also drizzle a bit of coconut milk for a fancy touch. Serving suggestions are just as important. A slice of crusty bread pairs well with the soup. You can also serve it with a side salad. This makes for a filling meal. For the full recipe, check out the complete guide! {{image_4}} You can change your creamy vegetable soup by using different veggies. Try seasonal vegetables for fresh flavors. For spring, add asparagus or green beans. In summer, use ripe tomatoes and corn. In fall, butternut squash and sweet potatoes shine. You can also experiment with bases. Instead of coconut milk, try almond milk for a nutty twist. This gives the soup a different taste and texture. Each change brings a new layer of flavor to your soup. Adding protein can make your soup heartier. Beans and lentils are great options. They add fiber and keep you full. For example, black beans or chickpeas blend well with the soup. You can add them when you simmer the broth. Another option is chicken or sausage. Cooked chicken pieces are tasty and satisfying. If you like sausage, slice it and sauté it with the onions. This adds a savory kick to the soup. Enjoy making it your own! Check out the Full Recipe for more ideas. To keep your creamy vegetable soup fresh, allow it to cool before storing. Place it in airtight containers to avoid air exposure. This helps maintain its flavor and texture. Store the soup in the fridge for up to three days. If you want to keep it longer, freezing is a great option. For freezing, use freezer-safe containers or bags. Make sure to leave some space for expansion. The soup can last up to three months in the freezer. When reheating the soup, you want to keep it creamy. The best method is to use the stove over low heat. Stir it gently to avoid burning. If you want to use the microwave, do so in short bursts. Stir the soup in between each burst to ensure even heating. To prevent separation, add a splash of water or vegetable broth if it thickens too much. This keeps the texture smooth and enjoyable. Can I make creamy vegetable soup vegan? Yes, you can easily make this soup vegan. Just use vegetable broth and coconut milk. Skip any dairy products. How do I make the soup spicier? To add heat, sprinkle in red pepper flakes or cayenne pepper. You can also add fresh jalapeños for a kick. What are the best side dishes to serve with the soup? Serve the soup with crusty bread, a fresh salad, or grilled cheese. These pair well and add more flavor. What to do if the soup is too thick? If your soup is too thick, add more vegetable broth. Stir well to combine and adjust until you reach your desired texture. How can I add more flavor? For extra flavor, try adding herbs like basil or dill. A splash of lemon juice can also brighten the taste. If you want, use the Full Recipe to explore more options. This blog post covered how to make a creamy vegetable soup from scratch. We explored essential ingredients like olive oil, fresh veggies, and broth. You learned step-by-step instructions, from sautéing to blending the soup. Tips for perfecting flavor and presentation will enhance your dish. Remember, you can change the recipe to suit your taste and store leftovers for later. With this knowledge, you can create a warm, comforting dish that you and others will enjoy. Happy cooking!](https://fastmealmate.com/wp-content/uploads/2025/07/74153262-6d82-4db7-a8c8-a4016c29ccdc-768x768.webp)


![For a tasty creamy chicken stroganoff, gather these key ingredients: - 500g boneless chicken breast, sliced into thin strips - 2 cups mushrooms, sliced (button or cremini work well) - 1 medium onion, finely chopped - 3 cloves garlic, minced - 1 tablespoon olive oil - 1 tablespoon unsalted butter - 2 cups chicken broth - 1 cup sour cream - 1 tablespoon Dijon mustard - 1 teaspoon smoked paprika - Salt and freshly ground black pepper to taste - Fresh parsley, finely chopped (for garnish) - 300g egg noodles or pasta of your choice Each ingredient plays a role in making the dish creamy and flavorful. The chicken adds protein, while the mushrooms bring earthy notes. The onion and garlic create a sweet base when cooked. For a garnish, fresh parsley brightens up the dish. You can serve the stroganoff with a side of steamed vegetables or crusty bread. This adds more texture and flavor to your meal. Check [Full Recipe] for all the details on how to put this comfort food together! To start, fill a big pot with water. Add a pinch of salt and bring it to a boil. Once the water is boiling, drop in 300g of egg noodles. Cook them according to the package instructions. This usually takes around 8-10 minutes. You want them al dente, which means they should be tender but still firm. After they are cooked, carefully drain the noodles in a colander. To stop them from sticking, drizzle a bit of olive oil on them. Toss gently to coat. Now, grab a large skillet and heat it over medium heat. Add 1 tablespoon of olive oil. Once hot, add the sliced chicken breast. Season it well with salt and pepper. Cook the chicken for about 5-7 minutes. Stir it often to ensure it cooks evenly. You want that nice golden-brown color. When it is done, remove the chicken from the skillet and place it on a plate. In the same skillet, add 1 tablespoon of unsalted butter. Let it melt over medium heat. Once melted, toss in the chopped onion. Sauté it for about 3-4 minutes until it turns translucent. Next, add 3 cloves of minced garlic and 2 cups of sliced mushrooms. Cook this mixture for around 5-6 minutes. Stir it often until the mushrooms soften and release their moisture. Then, sprinkle in 1 teaspoon of smoked paprika. Mix it well. Gradually pour in 2 cups of chicken broth and bring it to a gentle simmer. Let it cook for about 5 minutes to enhance the flavor. Now it’s time to bring it all together! Return the cooked chicken to the skillet. Stir in 1 cup of sour cream and 1 tablespoon of Dijon mustard. Mix everything until it is well combined and heated through, about 2-3 minutes. Taste the sauce and adjust the seasoning with more salt and black pepper if needed. Finally, add the cooked noodles to the sauce, tossing gently until they are fully coated. If you prefer a fancier look, you can plate the noodles first and then ladle the sauce over them. Don’t forget to garnish with some fresh parsley for a burst of color and flavor. Enjoy this comforting meal! When making creamy chicken stroganoff, avoid a few common mistakes. - Overcooking chicken or noodles: Overcooked chicken can become dry. Noodles can turn mushy. Keep an eye on cooking times. - Insufficient seasoning: Under-seasoned dishes lack flavor. Always taste your sauce and adjust the salt and pepper. You can easily boost the taste of your stroganoff with a few simple changes. - Suggestions for additional spices: Try adding thyme or rosemary for extra depth. A pinch of cayenne adds a nice kick. - Using homemade vs. store-bought broth: Homemade broth gives a richer taste. Store-bought is convenient and still works well. If you or your guests have special diets, there are great options. - Gluten-free alternatives: Use gluten-free pasta or rice instead of egg noodles. This ensures everyone can enjoy the dish. - Dairy-free options: Substitute sour cream with coconut cream or a dairy-free yogurt. These keep the creaminess without the dairy. For the full recipe, check out the complete guide to making creamy chicken stroganoff. Enjoy! {{image_4}} You can switch up the protein in this creamy chicken stroganoff. Beef, pork, or tofu work well. For beef, use tender cuts like sirloin. Cook it for about 10 minutes until browned. For pork, tenderloin is great. Cook it for 7-8 minutes. If you choose tofu, press it first to remove moisture. Sauté it for 5-6 minutes until golden. To add a twist to your dish, consider using wine or mustard. A splash of white wine adds depth to the sauce. Just remember to let it simmer for a few minutes to cook off the alcohol. If you like mustard, try using whole grain or spicy mustard. It brings a unique flavor. You can also add more veggies. Peas, bell peppers, or spinach can enhance the dish. Just sauté them with the onions and mushrooms. This not only adds color but also boosts nutrition. Each variation makes your creamy chicken stroganoff special and fits your taste. For the full recipe, check the linked instructions above. To keep your creamy chicken stroganoff fresh, store it in proper containers. Use airtight containers to prevent moisture loss. It stays good in the fridge for up to three days. Make sure the dish cools down before sealing it. This helps maintain the best flavor and texture. If you want to save some for later, freezing is a great option. Let the stroganoff cool completely before transferring it to freezer-safe containers. Use heavy-duty bags or containers to prevent freezer burn. It can last in the freezer for up to three months. To thaw, place it in the fridge overnight. This slow thawing keeps flavors intact. When ready to eat, reheat it on the stove over low heat. Stir occasionally to ensure even heating. You can also add a splash of broth or water to restore creaminess. Enjoy your stored creamy chicken stroganoff like it’s fresh! You can serve creamy chicken stroganoff with many sides. Here are a few great options: - Steamed green beans - Garlic bread - A fresh green salad - Mashed potatoes These sides add color and balance to your meal. Yes, you can make creamy chicken stroganoff ahead of time. Simply cook the dish, let it cool, and store it in the fridge. It will stay fresh for about three days. When ready to eat, reheat it gently on the stove. Add a splash of chicken broth if it seems too thick. If your sauce is too thin, you can thicken it easily. Here are some methods: - Simmer the sauce longer to reduce it. - Mix a bit of cornstarch with water and stir it in. - Add more sour cream for a richer texture. These tips help you achieve the perfect creamy sauce. Yes, you can make a vegetarian version! Use mushrooms and tofu instead of chicken. Replace chicken broth with vegetable broth. This keeps the flavor while making it meat-free. You can still enjoy that creamy texture with sour cream or a plant-based alternative. Absolutely! You can use different types of noodles for creamy chicken stroganoff. Here are some options: - Egg noodles - Fettuccine - Penne - Gluten-free pasta Each type brings its own texture, making the dish fun and varied. Check the cooking time for each type to ensure they cook perfectly. For the full recipe, refer to the earlier section in this article. You learned how to make Creamy Chicken Stroganoff with fresh ingredients and simple steps. Remember the key points: cook noodles properly, achieve golden-brown chicken, and adjust flavors to your taste. Avoid common mistakes like overcooking and under-seasoning. You can also explore variations with different proteins and flavors. With proper storage, enjoy this dish later too. Now, you have all the tools to create a delicious meal that suits your needs and preferences. Enjoy cooking and sharing this tasty dish with others!](https://fastmealmate.com/wp-content/uploads/2025/06/35ebe0d3-ac06-4ed6-8d84-88d4bff41ffa-768x768.webp)

![- 1 cup unsalted butter, softened to room temperature - 1/2 cup powdered sugar, plus additional for dusting - 1 teaspoon pure vanilla extract - 1/2 teaspoon almond extract - 2 cups all-purpose flour - 1/2 cup finely chopped almonds - 1/4 teaspoon salt - 1/2 cup raspberry preserves When making Raspberry Almond Snowball Cookies, each ingredient plays a key role. The butter makes the cookies rich and tender. Powdered sugar adds a sweet touch and helps with that snowy look. Vanilla and almond extracts give the cookies a warm, nutty flavor. The flour gives structure to the cookies. Chopped almonds add a nice crunch. Salt balances the sweetness. Finally, raspberry preserves are the surprise inside. They burst with flavor when you take a bite. - For a different sweet taste, try using honey or maple syrup instead of powdered sugar. - If you want a dairy-free option, use vegan butter. It works well in this recipe. - For a gluten-free treat, swap all-purpose flour with almond flour or a gluten-free mix. These substitutions can change the flavor and texture, but they keep the spirit of the cookies alive. Experimenting with these ingredients can lead to fun and tasty variations! For the full recipe, check out the detailed steps to create this delightful treat. First, preheat your oven to 350°F (175°C). This step helps your cookies bake evenly. While the oven heats, line a baking sheet with parchment paper. This keeps the cookies from sticking, making cleanup easy. Next, in a large bowl, mix 1 cup of softened butter with 1/2 cup of powdered sugar. Then, add 1 teaspoon of pure vanilla extract and 1/2 teaspoon of almond extract. Beat this mixture with an electric mixer until light and fluffy. This takes about 2-3 minutes. Now, gradually add 2 cups of all-purpose flour and 1/4 teaspoon of salt to the butter mixture. Mix on low speed until just combined. Be careful not to overmix; we want a nice texture. Gently fold in 1/2 cup of finely chopped almonds. For the fun part, scoop about 1 tablespoon of dough. Flatten it slightly in your hand. Add 1/2 teaspoon of raspberry preserves in the center. Carefully fold the dough edges around the preserves, sealing it tightly into a ball. Place the cookie balls on your prepared baking sheet. Make sure they are about 2 inches apart. This spacing allows them to spread while baking. Bake the cookies for 12-15 minutes. Keep an eye on them; you want the bottoms to turn lightly golden. After baking, let the cookies cool on the baking sheet for about 5 minutes. This helps them firm up a bit. Then, gently transfer them to a wire rack to cool completely. Once cool, take some extra powdered sugar and dust it generously over the cookies. This adds a lovely snowy look. Enjoy these delightful treats with your friends or family! For the full recipe, check out the details provided. To make the best cookies, start with room temperature butter. Soft butter mixes well, creating a light and fluffy dough. Cold butter makes it hard to blend. Another tip is to prevent cookies from spreading too much. Chill your cookie dough for at least 30 minutes before baking. This helps them keep their shape while baking. When you arrange your cookies, think about a nice display. Use a decorative plate to showcase them beautifully. You can also garnish with fresh raspberries or a sprinkle of almond slices. This adds color and makes them look even more inviting. A light-colored dish contrasts nicely with the snowy dusting of sugar. Want to boost the flavor? Try adding a pinch of cinnamon or a dash of lemon zest. This can give your cookies a unique twist. You can also adjust the sweetness by using different types of raspberry preserves. For a tart flavor, opt for low-sugar preserves. For a sweeter taste, choose regular preserves. You can find the full recipe [here]. {{image_4}} You can play with flavors in your Raspberry Almond Snowball Cookies. Try different fruit preserves like strawberry or apricot. Each fruit adds a unique twist. You might also add chocolate chips or cocoa powder. This makes the cookies richer and more indulgent. Mixing in these flavors can make each batch fun and exciting. For those with dietary needs, there are great options. You can make gluten-free cookies by using almond flour or a gluten-free flour blend. These swaps keep the cookies light and tasty. If you want a vegan version, substitute the butter with coconut oil or vegan butter. Use a plant-based milk in place of any dairy. These changes keep the spirit of the cookies while catering to different diets. You can make themed cookies for special occasions. For holidays, add colorful sprinkles or food coloring to the dough. This gives the cookies a festive touch. For parties, consider making mini cookie versions. Smaller cookies are great for sharing and look lovely on a platter. Each theme allows you to share the joy of baking with your loved ones. If you want the full recipe, check out the details above! To keep your Raspberry Almond Snowball Cookies fresh, store them in an airtight container. This helps to lock in moisture and flavor. You can use glass jars or plastic containers with tight lids. Place parchment paper between layers of cookies to prevent sticking. Keep the cookies at room temperature for up to a week. If you want to keep them longer, then freezing is a great option. You can freeze both unbaked and baked cookies. For unbaked cookies, scoop them onto a baking sheet lined with parchment paper. Freeze until solid, then transfer them to a freezer bag. This way, you can bake fresh cookies anytime. For baked cookies, let them cool completely first. Place them in a freezer-safe container or bag, separating layers with parchment paper. When you are ready to enjoy them, thaw baked cookies at room temperature. If you want a warm treat, pop them in the oven at 350°F for a few minutes. Reheating brings back their delightful texture. For unbaked cookies, just bake them straight from the freezer. Add a couple of extra minutes to the bake time to ensure they cook through. How long do Raspberry Almond Snowball Cookies last? These cookies stay fresh for about one week. Store them in an airtight container. If you want them to last longer, you can freeze them. Can I make the dough ahead of time? Yes, you can make the dough and chill it in the fridge. Wrap it tightly in plastic. This way, you can bake them later. What can I do if my cookies turn out too crumbly? If your cookies are too crumbly, you might need more butter. Add a little melted butter to the dough. Mix gently until it holds together. Can I substitute almond extract with something else? Yes, you can use vanilla extract or even a bit of coconut extract. Each will give a different flavor but will still taste great. What is the best way to measure flour for this recipe? Use the spoon and level method. Scoop flour into a measuring cup, then level it off with a knife. Don’t pack it down for the best results. What to serve with these cookies? These cookies pair well with fresh fruit, like raspberries or strawberries. You can also serve them with vanilla ice cream for a tasty treat. Ideal beverages to pair with Raspberry Almond Snowball Cookies Enjoy these cookies with a warm cup of tea or coffee. A glass of milk also complements their sweet and nutty flavor nicely. In this blog post, I covered how to make Raspberry Almond Snowball Cookies. We explored the key ingredients and tips for perfecting texture and flavor. You can use alternatives like vegan butter and gluten-free flour too. I shared storage methods for keeping cookies fresh and ways to freeze them. Try different fruit preserves or chocolate chips for fun variations. Remember, cookies taste best when shared and enjoyed fresh. Give this recipe a try, and I bet you will love it!](https://fastmealmate.com/wp-content/uploads/2025/07/7fd5f108-97a5-4fb0-86b3-b9219b799aa8-768x768.webp)