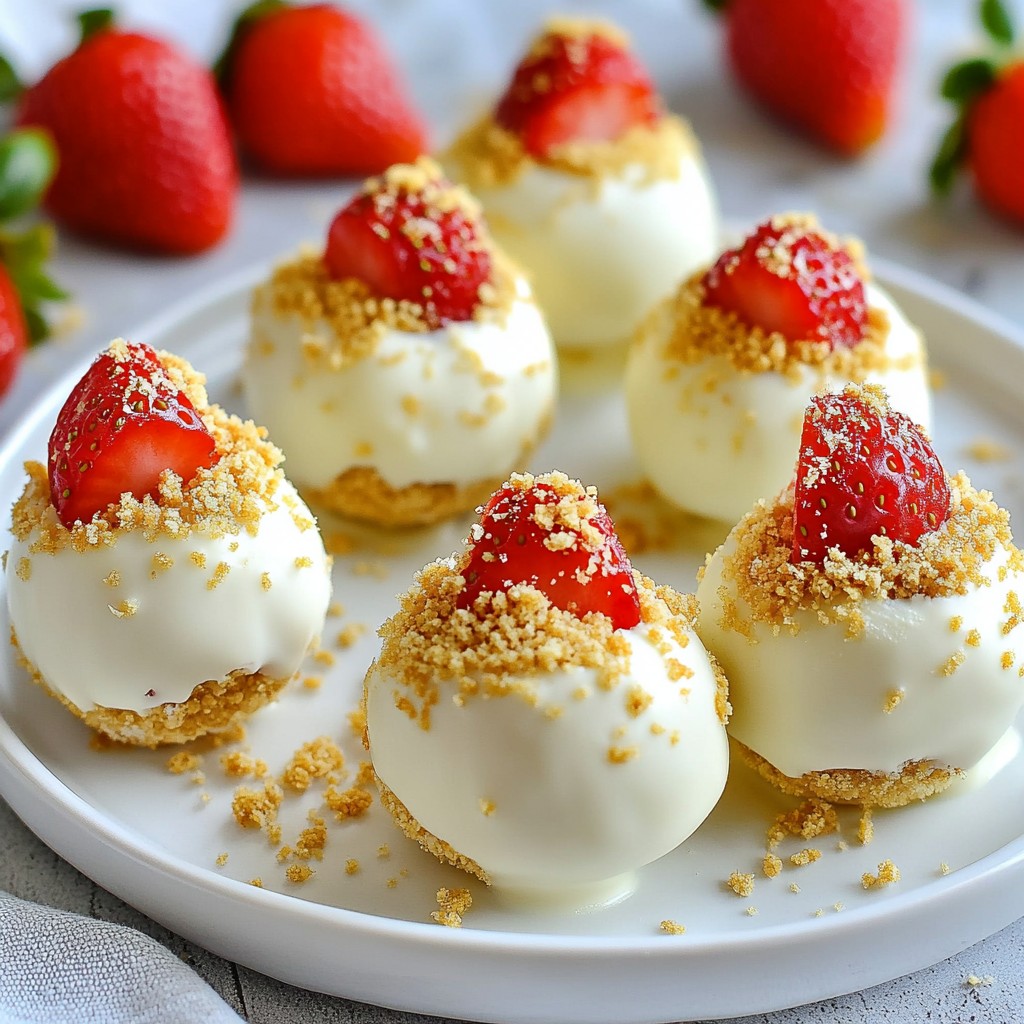
Are you craving a sweet treat that’s easy to make? If you love strawberry cheesecake, you'll adore these no-bake Strawberry Cheesecake Truffle Balls! They are simple to whip up and perfect to enjoy anytime. With fresh strawberries, cream cheese, and a hint of vanilla, each bite is a burst of flavor. Join me as I guide you step-by-step through this fun and delicious recipe. You’ll impress your friends and family in no time!
Why I Love This Recipe
- Fresh and Fruity: The combination of fresh strawberries with creamy cheesecake creates a delightful burst of flavor in every bite.
- No-Bake Delight: This recipe doesn’t require any baking, making it a quick and easy treat to whip up for any occasion.
- Customizable Coating: You can easily switch up the chocolate or toppings to suit your taste preferences for a personalized treat.
- Perfect for Any Occasion: These truffles are great for parties, holidays, or just a sweet treat to enjoy at home.
Ingredients
Fresh Ingredients
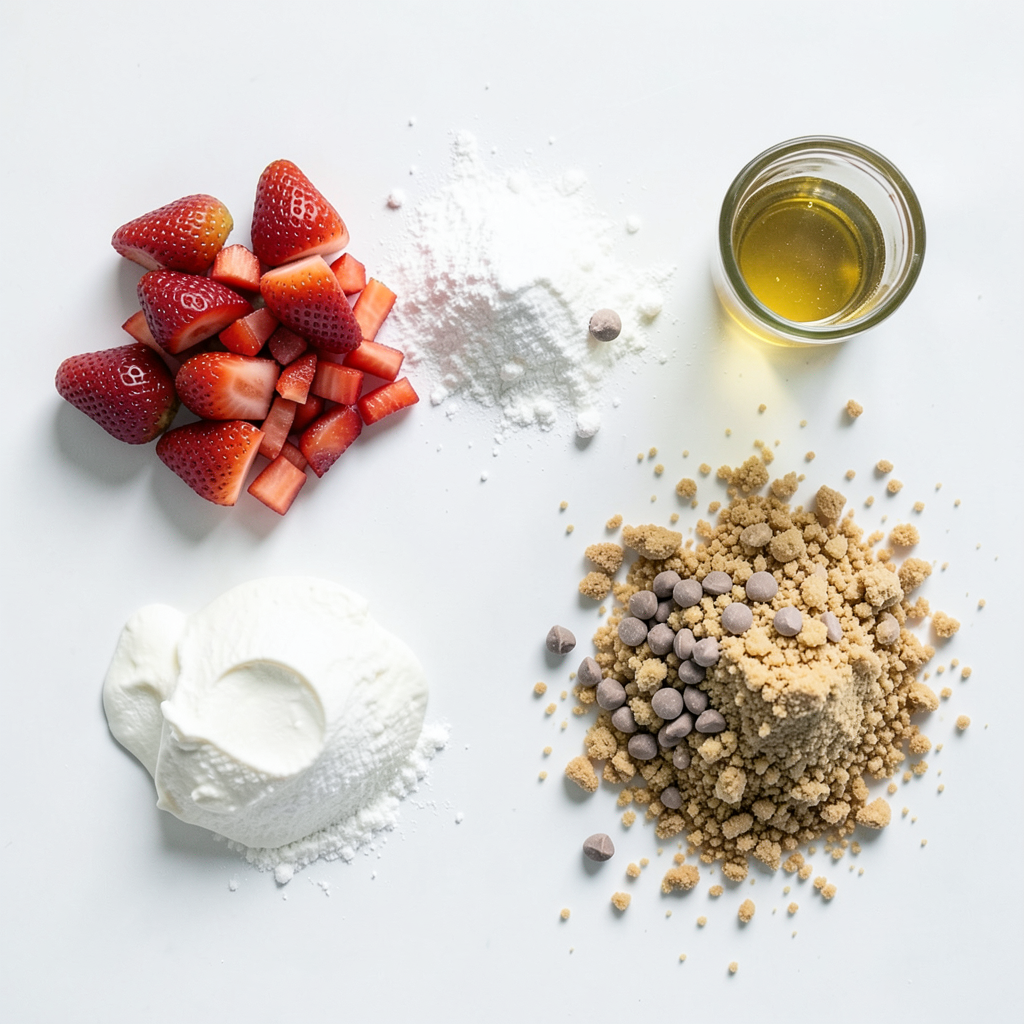
- 1 cup fresh strawberries, hulled and finely chopped
- 8 oz cream cheese, softened to room temperature
To start, fresh strawberries bring a bright flavor to these truffles. Choose ripe strawberries for the best taste. Cream cheese provides the rich, creamy base that makes this treat feel like a dessert.
Dry Ingredients
- ½ cup powdered sugar, sifted
- 1 cup graham cracker crumbs, plus extra for rolling
Powdered sugar adds sweetness and smoothness. The graham cracker crumbs give that classic cheesecake crust flavor. Make sure to reserve some crumbs for rolling the truffles.
Flavor Enhancements
- 1 teaspoon pure vanilla extract
- ½ cup white chocolate chips, melted
- 1 tablespoon coconut oil
- Pinch of salt
Vanilla extract enhances the overall flavor. White chocolate adds a sweet, creamy coating. Coconut oil helps the chocolate melt smoothly and gives a slight sheen. The pinch of salt balances the sweetness perfectly.
Step-by-Step Instructions
Preparation of the Filling
Start by beating the cream cheese, powdered sugar, and vanilla extract. Use an electric mixer on medium speed. Mix until it is smooth and creamy. This step is key for a great texture. Next, fold in the finely chopped strawberries. Use a spatula to be gentle. You want to keep the strawberries intact while mixing them in well.
Incorporating the Crust
In a separate bowl, mix the graham cracker crumbs and a pinch of salt. This will add flavor to the truffles. Then, slowly combine this crumb mixture with the cream cheese mixture. Stir until everything is well blended. The mixture should feel cohesive and ready to form into truffles.
Forming the Truffles
With clean hands, scoop out about 1 tablespoon of the mixture. Roll it into a ball, about 1 inch in size. Place these truffles on a tray lined with parchment paper. Make sure they are evenly spaced. Once all the mixture is rolled into truffles, chill them in the freezer for about 30 minutes. This helps them firm up so they are easier to coat.
Coating the Truffles
While the truffles are freezing, prepare the white chocolate coating. In a microwave-safe bowl, mix the white chocolate chips and coconut oil. Microwave in 30-second intervals. Stir after each interval until melted and smooth. Be careful not to overheat the chocolate. After the truffles have set, take them out of the freezer. Dip each truffle into the melted white chocolate, ensuring it is fully coated. Let any extra chocolate drip off. Immediately roll the coated truffle in graham cracker crumbs. This gives them the look of a cheesecake crust. Place the truffles on the tray again and let them sit for 10 to 15 minutes to harden.
Tips & Tricks
Achieving the Perfect Texture
To get the best texture for your truffles, start with softened cream cheese. This makes it easy to mix and avoids lumps. If your cream cheese is cold, it will not blend well. Leave it out for about 30 minutes before you start.
When mixing, beat the cream cheese, sugar, and vanilla until smooth. Use an electric mixer for a creamy texture. If you see lumps, keep mixing. You want a smooth base with no chunks.
Melting White Chocolate
Melting white chocolate can be tricky. To do it right in the microwave, use a microwave-safe bowl. Heat the chocolate in 30-second bursts. Stir after each burst to avoid burning. This keeps the chocolate nice and smooth.
You can also use a double boiler if you prefer. Fill a pot with water and bring it to a simmer. Place a heat-safe bowl with the chocolate on top, making sure it does not touch the water. Stir until the chocolate melts evenly.
Serving Suggestions
Presentation makes a big difference! Serve your truffle balls on a nice plate. You can add whole strawberries around the truffles for color. A light sprinkle of graham cracker crumbs on top adds a nice touch too.
For pairings, consider serving them with a glass of cold milk or some fresh whipped cream. These options enhance the flavor and make your treat even more special!
Pro Tips
- Chill the Cream Cheese: Ensure your cream cheese is at room temperature for easier mixing. If you forget to take it out, you can microwave it for about 10 seconds to soften it quickly.
- Strawberry Selection: Use fresh, ripe strawberries for the best flavor. Avoid overripe ones as they might make the mixture too watery.
- Rolling Technique: Wet your hands slightly before rolling the truffles to prevent the mixture from sticking to your palms, making the process much smoother.
- Coating Consistency: If the melted white chocolate is too thick, add a bit more coconut oil to achieve a smoother coating that adheres better to the truffles.
Variations
Flavor Customizations
You can change the flavor of your truffle balls easily. Try using different berries like raspberries or blueberries. These fruits add a new twist and taste. You can also add extracts like almond or lemon. These flavors can brighten up your treats and surprise your taste buds.
Healthier Options
If you want a lighter version, use low-fat cream cheese. This swap keeps the creamy texture but cuts some calories. You can also use yogurt instead of cream cheese. This option gives a tangy flavor and makes the truffles a bit lighter and more refreshing.
Dietary Considerations
For those with gluten issues, choose gluten-free graham crackers. They taste great and work well in this recipe. If you follow a vegan diet, you can make a plant-based version. Use dairy-free cream cheese and coconut cream for a tasty alternative. These changes let everyone enjoy this sweet treat.
Storage Info
Short-Term Storage
Store your truffle balls in the refrigerator. Use an airtight container to keep them fresh. Place a piece of parchment paper between layers if you stack them. This helps prevent sticking. They will stay tasty for up to a week. Keep the temperature below 40°F (4°C) for best results.
Long-Term Storage
To save your truffle balls for later, you can freeze them. First, place them on a tray in a single layer. Freeze them for about an hour until firm. Then, transfer the truffles to a freezer-safe bag or container. Try to remove as much air as possible. They can last for up to three months in the freezer.
When you want to enjoy them, take the truffles out and let them thaw in the fridge overnight. This keeps them from getting too soft. You can also leave them at room temperature for about 30 minutes before serving.
Shelf Life
In the fridge, the truffle balls last about a week. In the freezer, they can go up to three months. Check for signs of spoilage. If you see any mold or if they smell off, it’s best to throw them away. Trust your senses; they will guide you.
FAQs
How to make strawberry cheesecake truffle balls from scratch?
To make strawberry cheesecake truffle balls, follow these steps:
1. Mix Cream Cheese: In a large bowl, beat softened cream cheese with powdered sugar and vanilla until smooth.
2. Add Strawberries: Gently fold in finely chopped strawberries, being careful to keep them whole.
3. Combine Crumbs: In another bowl, mix graham cracker crumbs with a pinch of salt, then add this to the cheese mix.
4. Form Balls: Take about 1 tablespoon of mixture and roll it into a ball. Place on a tray.
5. Chill: Freeze the tray of truffles for about 30 minutes until firm.
6. Melt Chocolate: Melt white chocolate chips with coconut oil in the microwave, stirring often.
7. Coat Truffles: Dip each chilled ball in melted chocolate, then roll in extra graham crumbs.
8. Set: Let the chocolate harden for 10-15 minutes on the tray.
This process makes delicious, no-bake treats that everyone will love.
Can I make these truffle balls ahead of time?
Yes, you can make these truffle balls ahead of time. I recommend storing them in the fridge for up to one week. For longer storage, freeze them for up to three months. Just be sure to wrap them well to avoid freezer burn.
Where can I buy pre-made strawberry cheesecake truffle balls?
You can find pre-made strawberry cheesecake truffle balls at local bakeries or specialty dessert shops. Some larger grocery stores may also carry them. If you prefer to shop online, websites like Etsy often have small businesses that make and sell these treats.
What can I substitute for cream cheese in this recipe?
If you need a cream cheese substitute, try using Greek yogurt or mascarpone cheese. Both will give a creamy texture. For a dairy-free option, use a vegan cream cheese alternative made from nuts or soy.
In this blog post, we explored how to make delicious strawberry cheesecake truffle balls. We covered the fresh and dry ingredients needed, offered step-by-step instructions, and shared tips for perfect texture. You can customize flavors and even make healthier versions. Remember to store your truffles properly for the best taste. I hope you feel inspired to try this easy dessert. Enjoy the sweet, creamy taste in every bite!