S’mores Brownie Skillet Dip Irresistible Dessert Treat
![For a delicious S'mores Brownie Skillet Dip, gather the following ingredients: - 1 cup all-purpose flour - 1 cup granulated sugar - 1/2 cup unsweetened cocoa powder - 1/2 teaspoon baking powder - 1/4 teaspoon salt - 1/2 cup unsalted butter, melted - 2 large eggs - 1 teaspoon vanilla extract - 1 cup semi-sweet or dark chocolate chips - 1 cup mini marshmallows - 1/2 cup graham cracker crumbs - Extra graham crackers for serving These ingredients blend together to create a rich, chocolatey dip. The all-purpose flour and cocoa give it a brownie base. The sugar adds sweetness, while the baking powder helps it rise slightly. The melted butter keeps it rich and moist. The eggs and vanilla extract add flavor and structure. Chocolate chips provide bursts of chocolatey goodness. Mini marshmallows, when baked, become soft and gooey, adding that classic S'mores taste. Finally, the graham cracker crumbs create a crunchy topping, perfect for dipping. Use this list to prepare your dip. Following these steps ensures you get the best flavor and texture. For full details, check out the Full Recipe. - Preheat oven to 350°F (175°C). This helps the dip cook evenly. - In a large bowl, mix the dry ingredients: flour, sugar, cocoa powder, baking powder, and salt. Stir well to combine. - In another bowl, combine the wet ingredients: melted butter, eggs, and vanilla extract. Mix gently until they blend together. - Pour the wet mix into the dry mix. Stir until just combined. Do not overmix; a few lumps are okay. - Now, fold in the chocolate chips. This adds rich flavor and texture to the dip. - Grease a 10-inch cast-iron skillet or oven-safe dish. Pour the brownie batter into the skillet. Spread it evenly. - Top the batter with mini marshmallows and graham cracker crumbs. This gives the dip that classic s'mores taste. - Place the skillet in the preheated oven. Bake for 20-25 minutes. The edges should be set, and the center should be soft. The marshmallows will puff up and turn golden. - Once baked, take the skillet out of the oven. Let it cool for a few minutes. This makes it safe to eat. Enjoy this warm dip with extra graham crackers for a fun treat! To avoid overmixing the batter, mix just until the wet and dry ingredients blend. You want some lumps for that fudgy texture. Too much mixing makes the brownies tough. For the perfect marshmallow topping, add them during the last few minutes of baking. This lets them brown nicely without burning. Keep an eye on them. You want golden, not charred! The best snacks for dipping are graham crackers, of course! You can also use fruit like strawberries or bananas. They add a nice, fresh taste to the rich dip. For a great presentation, drizzle melted chocolate on top before serving. Add some colorful fruit on the side. It makes the dish look fun and inviting. {{image_4}} You can make this dessert fit your needs with some easy swaps. If you want a gluten-free option, use gluten-free flour. It works well and keeps the taste great. You can also switch the chocolate. Dark chocolate gives a rich taste, while milk chocolate is sweeter. Choose what you like best! Add more fun to your dip with flavor extras. Chopped nuts add crunch and taste. Walnuts or pecans work best. If you love sweetness, drizzle some caramel over the top. It makes the dip even more special. You can also try different extracts. Almond extract gives a nice twist. Coconut extract can add a tropical touch. Just use a little bit to taste and enjoy! To keep your S'mores Brownie Skillet Dip fresh, store it in the fridge. First, let it cool completely. Then, cover the skillet tightly with plastic wrap or transfer it to an airtight container. When stored this way, it can last for about 3 days. If you have more than you can eat, freezing is an option. Scoop the dip into a freezer-safe container. Leave a little space at the top, as it may expand. It can last up to 2 months in the freezer. Just remember to label the container with the date for easy tracking. When it's time to enjoy your leftovers, reheating is simple. You can warm it up in the oven. Preheat the oven to 350°F (175°C). Place the skillet in the oven for about 10-15 minutes. This helps keep the dip gooey and warm. You can also reheat in the microwave if you're short on time. Use a microwave-safe bowl and heat in short bursts. Stir between each burst to ensure even warming. This way, the marshmallows remain soft and fluffy, just like when it was first made. Can I make this dish ahead of time? Yes, you can prepare the batter ahead. Just store it in the fridge. Bake it right before serving for best results. What can I use if I don’t have a cast-iron skillet? You can use any oven-safe dish. A glass or ceramic baking dish works well too. Just make sure to grease it well. How can I make it less sweet? To cut back on sweetness, use less sugar or dark chocolate. You can also add a pinch of salt to balance the flavors. What is the best way to serve this dip? Serve it warm with extra graham crackers. You can also add fresh fruit like strawberries or bananas for dipping. - Check out the [Full Recipe] for detailed instructions. This blog post covers a fun and tasty s'mores brownie skillet dip. You learned how to mix the right ingredients and bake this treat perfectly. I shared tips to make it even better and suggestions for serving. With storage info, you can save leftovers too. Enjoy making this sweet dip for your next gathering! It’s easy, fun, and sure to impress. Remember that you can personalize it with your favorite flavors. Happy baking!](https://fastmealmate.com/wp-content/uploads/2025/07/00705dfa-6977-4536-b8b9-b3715ee69892.webp)
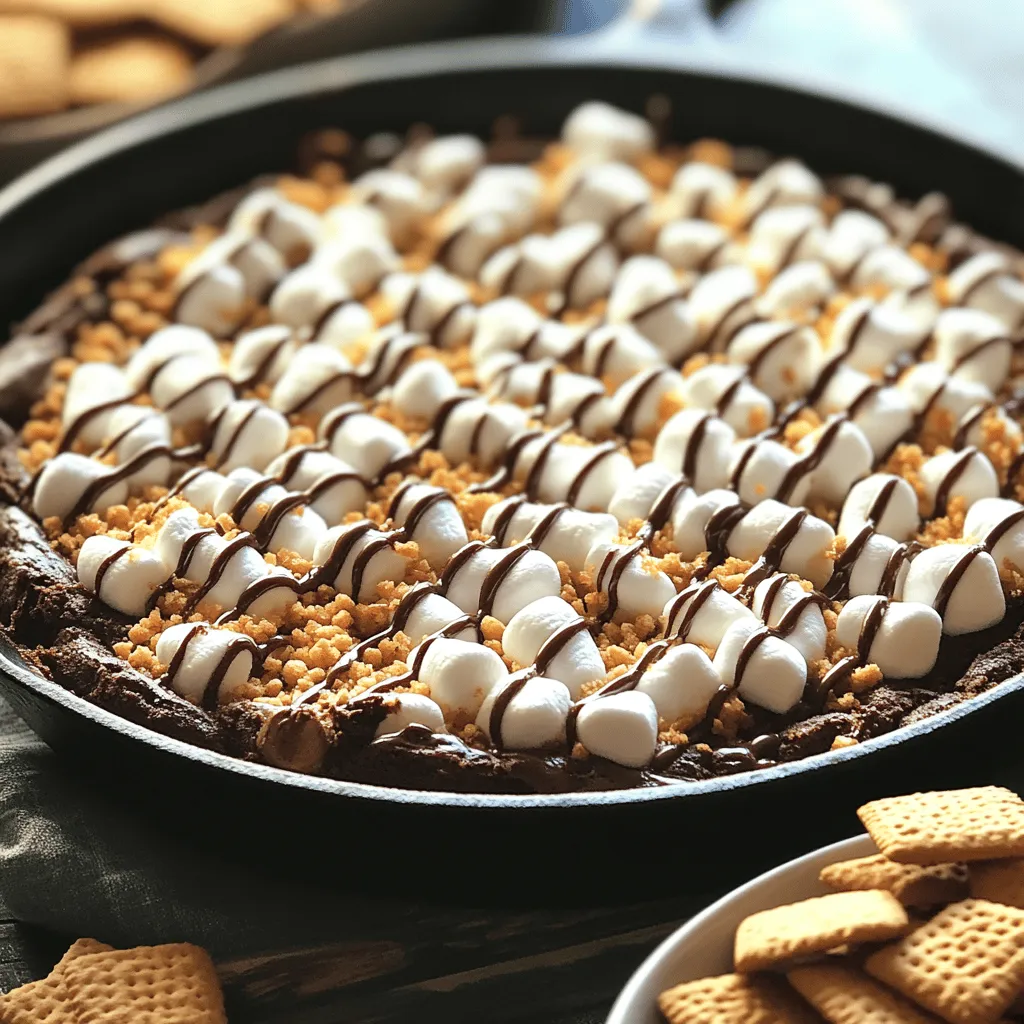
Indulge in the ultimate dessert experience with my S’mores Brownie Skillet Dip! This warm, gooey treat combines all the flavors of classic s’mores with the rich taste of brownies. Perfect for sharing (or not!), this dip will impress friends and family alike. Grab your skillet, and let’s dive into a sweet adventure that’s both easy to make and hard to resist! Ready to explore the ingredients and steps? Let’s get started!
Ingredients
For a delicious S’mores Brownie Skillet Dip, gather the following ingredients:
– 1 cup all-purpose flour
– 1 cup granulated sugar
– 1/2 cup unsweetened cocoa powder
– 1/2 teaspoon baking powder
– 1/4 teaspoon salt
– 1/2 cup unsalted butter, melted
– 2 large eggs
– 1 teaspoon vanilla extract
– 1 cup semi-sweet or dark chocolate chips
– 1 cup mini marshmallows
– 1/2 cup graham cracker crumbs
– Extra graham crackers for serving
These ingredients blend together to create a rich, chocolatey dip. The all-purpose flour and cocoa give it a brownie base. The sugar adds sweetness, while the baking powder helps it rise slightly. The melted butter keeps it rich and moist.
The eggs and vanilla extract add flavor and structure. Chocolate chips provide bursts of chocolatey goodness. Mini marshmallows, when baked, become soft and gooey, adding that classic S’mores taste. Finally, the graham cracker crumbs create a crunchy topping, perfect for dipping.
Use this list to prepare your dip. Following these steps ensures you get the best flavor and texture.
Step-by-Step Instructions
Preparation Steps
– Preheat oven to 350°F (175°C). This helps the dip cook evenly.
– In a large bowl, mix the dry ingredients: flour, sugar, cocoa powder, baking powder, and salt. Stir well to combine.
– In another bowl, combine the wet ingredients: melted butter, eggs, and vanilla extract. Mix gently until they blend together.
Mixing and Baking
– Pour the wet mix into the dry mix. Stir until just combined. Do not overmix; a few lumps are okay.
– Now, fold in the chocolate chips. This adds rich flavor and texture to the dip.
– Grease a 10-inch cast-iron skillet or oven-safe dish. Pour the brownie batter into the skillet. Spread it evenly.
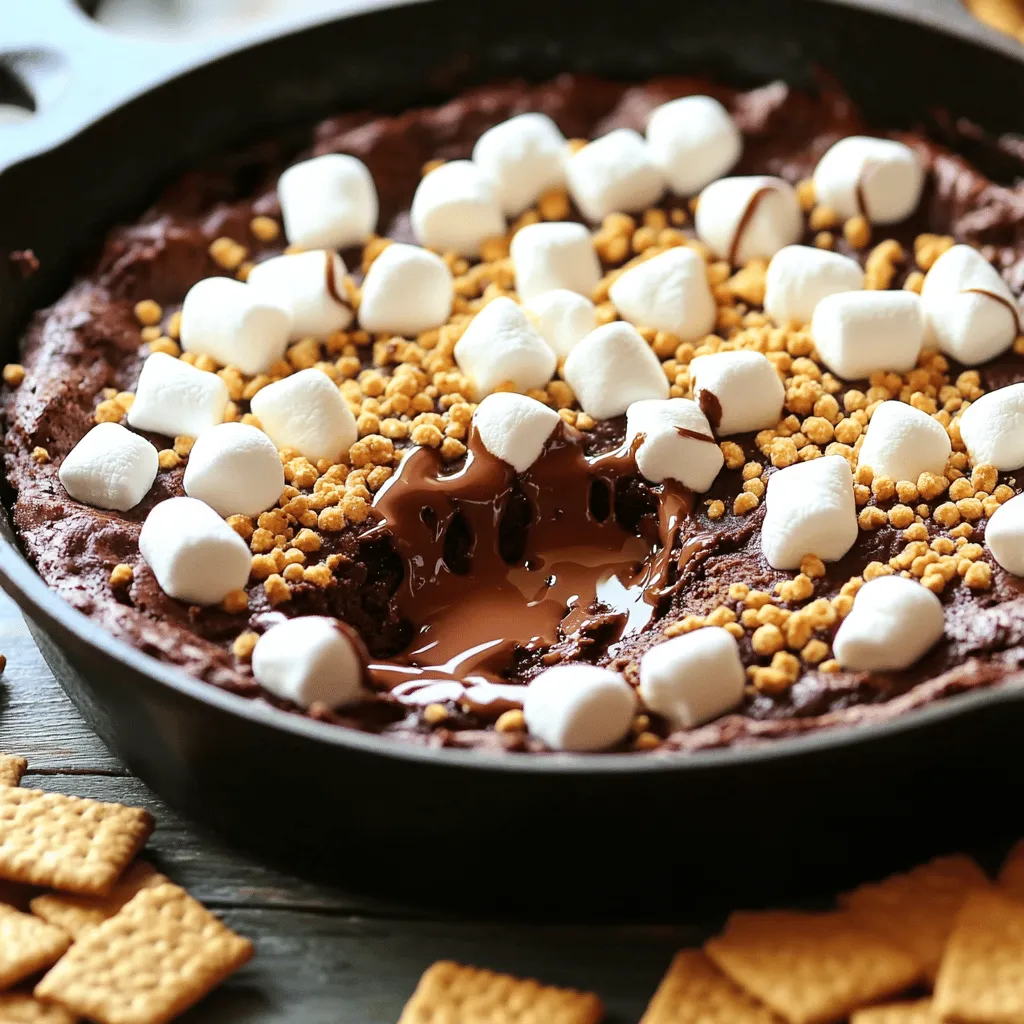
– Top the batter with mini marshmallows and graham cracker crumbs. This gives the dip that classic s’mores taste.
Baking Process
– Place the skillet in the preheated oven. Bake for 20-25 minutes. The edges should be set, and the center should be soft. The marshmallows will puff up and turn golden.
– Once baked, take the skillet out of the oven. Let it cool for a few minutes. This makes it safe to eat.
Enjoy this warm dip with extra graham crackers for a fun treat!
Tips & Tricks
Baking Tips
To avoid overmixing the batter, mix just until the wet and dry ingredients blend. You want some lumps for that fudgy texture. Too much mixing makes the brownies tough.
For the perfect marshmallow topping, add them during the last few minutes of baking. This lets them brown nicely without burning. Keep an eye on them. You want golden, not charred!
Serving Suggestions
The best snacks for dipping are graham crackers, of course! You can also use fruit like strawberries or bananas. They add a nice, fresh taste to the rich dip.
For a great presentation, drizzle melted chocolate on top before serving. Add some colorful fruit on the side. It makes the dish look fun and inviting.

Variations
Ingredient Swaps
You can make this dessert fit your needs with some easy swaps. If you want a gluten-free option, use gluten-free flour. It works well and keeps the taste great. You can also switch the chocolate. Dark chocolate gives a rich taste, while milk chocolate is sweeter. Choose what you like best!
Flavor Additions
Add more fun to your dip with flavor extras. Chopped nuts add crunch and taste. Walnuts or pecans work best. If you love sweetness, drizzle some caramel over the top. It makes the dip even more special.
You can also try different extracts. Almond extract gives a nice twist. Coconut extract can add a tropical touch. Just use a little bit to taste and enjoy!
Storage Info
Leftover Storage
To keep your S’mores Brownie Skillet Dip fresh, store it in the fridge. First, let it cool completely. Then, cover the skillet tightly with plastic wrap or transfer it to an airtight container. When stored this way, it can last for about 3 days.
If you have more than you can eat, freezing is an option. Scoop the dip into a freezer-safe container. Leave a little space at the top, as it may expand. It can last up to 2 months in the freezer. Just remember to label the container with the date for easy tracking.
Reheating Guidelines
When it’s time to enjoy your leftovers, reheating is simple. You can warm it up in the oven. Preheat the oven to 350°F (175°C). Place the skillet in the oven for about 10-15 minutes. This helps keep the dip gooey and warm.
You can also reheat in the microwave if you’re short on time. Use a microwave-safe bowl and heat in short bursts. Stir between each burst to ensure even warming. This way, the marshmallows remain soft and fluffy, just like when it was first made.
FAQs
Common Questions About S’mores Brownie Skillet Dip
Can I make this dish ahead of time?
Yes, you can prepare the batter ahead. Just store it in the fridge. Bake it right before serving for best results.
What can I use if I don’t have a cast-iron skillet?
You can use any oven-safe dish. A glass or ceramic baking dish works well too. Just make sure to grease it well.
How can I make it less sweet?
To cut back on sweetness, use less sugar or dark chocolate. You can also add a pinch of salt to balance the flavors.
What is the best way to serve this dip?
Serve it warm with extra graham crackers. You can also add fresh fruit like strawberries or bananas for dipping.
This blog post covers a fun and tasty s’mores brownie skillet dip. You learned how to mix the right ingredients and bake this treat perfectly. I shared tips to make it even better and suggestions for serving. With storage info, you can save leftovers too. Enjoy making this sweet dip for your next gathering! It’s easy, fun, and sure to impress. Remember that you can personalize it with your favorite flavors. Happy baking!
![For a delicious S'mores Brownie Skillet Dip, gather the following ingredients: - 1 cup all-purpose flour - 1 cup granulated sugar - 1/2 cup unsweetened cocoa powder - 1/2 teaspoon baking powder - 1/4 teaspoon salt - 1/2 cup unsalted butter, melted - 2 large eggs - 1 teaspoon vanilla extract - 1 cup semi-sweet or dark chocolate chips - 1 cup mini marshmallows - 1/2 cup graham cracker crumbs - Extra graham crackers for serving These ingredients blend together to create a rich, chocolatey dip. The all-purpose flour and cocoa give it a brownie base. The sugar adds sweetness, while the baking powder helps it rise slightly. The melted butter keeps it rich and moist. The eggs and vanilla extract add flavor and structure. Chocolate chips provide bursts of chocolatey goodness. Mini marshmallows, when baked, become soft and gooey, adding that classic S'mores taste. Finally, the graham cracker crumbs create a crunchy topping, perfect for dipping. Use this list to prepare your dip. Following these steps ensures you get the best flavor and texture. For full details, check out the Full Recipe. - Preheat oven to 350°F (175°C). This helps the dip cook evenly. - In a large bowl, mix the dry ingredients: flour, sugar, cocoa powder, baking powder, and salt. Stir well to combine. - In another bowl, combine the wet ingredients: melted butter, eggs, and vanilla extract. Mix gently until they blend together. - Pour the wet mix into the dry mix. Stir until just combined. Do not overmix; a few lumps are okay. - Now, fold in the chocolate chips. This adds rich flavor and texture to the dip. - Grease a 10-inch cast-iron skillet or oven-safe dish. Pour the brownie batter into the skillet. Spread it evenly. - Top the batter with mini marshmallows and graham cracker crumbs. This gives the dip that classic s'mores taste. - Place the skillet in the preheated oven. Bake for 20-25 minutes. The edges should be set, and the center should be soft. The marshmallows will puff up and turn golden. - Once baked, take the skillet out of the oven. Let it cool for a few minutes. This makes it safe to eat. Enjoy this warm dip with extra graham crackers for a fun treat! To avoid overmixing the batter, mix just until the wet and dry ingredients blend. You want some lumps for that fudgy texture. Too much mixing makes the brownies tough. For the perfect marshmallow topping, add them during the last few minutes of baking. This lets them brown nicely without burning. Keep an eye on them. You want golden, not charred! The best snacks for dipping are graham crackers, of course! You can also use fruit like strawberries or bananas. They add a nice, fresh taste to the rich dip. For a great presentation, drizzle melted chocolate on top before serving. Add some colorful fruit on the side. It makes the dish look fun and inviting. {{image_4}} You can make this dessert fit your needs with some easy swaps. If you want a gluten-free option, use gluten-free flour. It works well and keeps the taste great. You can also switch the chocolate. Dark chocolate gives a rich taste, while milk chocolate is sweeter. Choose what you like best! Add more fun to your dip with flavor extras. Chopped nuts add crunch and taste. Walnuts or pecans work best. If you love sweetness, drizzle some caramel over the top. It makes the dip even more special. You can also try different extracts. Almond extract gives a nice twist. Coconut extract can add a tropical touch. Just use a little bit to taste and enjoy! To keep your S'mores Brownie Skillet Dip fresh, store it in the fridge. First, let it cool completely. Then, cover the skillet tightly with plastic wrap or transfer it to an airtight container. When stored this way, it can last for about 3 days. If you have more than you can eat, freezing is an option. Scoop the dip into a freezer-safe container. Leave a little space at the top, as it may expand. It can last up to 2 months in the freezer. Just remember to label the container with the date for easy tracking. When it's time to enjoy your leftovers, reheating is simple. You can warm it up in the oven. Preheat the oven to 350°F (175°C). Place the skillet in the oven for about 10-15 minutes. This helps keep the dip gooey and warm. You can also reheat in the microwave if you're short on time. Use a microwave-safe bowl and heat in short bursts. Stir between each burst to ensure even warming. This way, the marshmallows remain soft and fluffy, just like when it was first made. Can I make this dish ahead of time? Yes, you can prepare the batter ahead. Just store it in the fridge. Bake it right before serving for best results. What can I use if I don’t have a cast-iron skillet? You can use any oven-safe dish. A glass or ceramic baking dish works well too. Just make sure to grease it well. How can I make it less sweet? To cut back on sweetness, use less sugar or dark chocolate. You can also add a pinch of salt to balance the flavors. What is the best way to serve this dip? Serve it warm with extra graham crackers. You can also add fresh fruit like strawberries or bananas for dipping. - Check out the [Full Recipe] for detailed instructions. This blog post covers a fun and tasty s'mores brownie skillet dip. You learned how to mix the right ingredients and bake this treat perfectly. I shared tips to make it even better and suggestions for serving. With storage info, you can save leftovers too. Enjoy making this sweet dip for your next gathering! It’s easy, fun, and sure to impress. Remember that you can personalize it with your favorite flavors. Happy baking!](https://fastmealmate.com/wp-content/uploads/2025/07/00705dfa-6977-4536-b8b9-b3715ee69892-300x300.webp)

![- 1 cup coconut milk - 1 tablespoon chai tea leaves (or 1 chai tea bag) - 1/4 cup granulated sugar (adjust based on desired sweetness) - 1/2 teaspoon pure vanilla extract - 1 cup sparkling water - 1/4 teaspoon ground cinnamon - Ice cubes - Toasted coconut flakes, for garnish To make Coconut Chai Cream Soda, you need a few simple ingredients. Each one plays a key role in the drink's flavor. First, coconut milk gives a creamy base. I love how it adds a rich taste. You can find it in cans or cartons at most stores. Next, chai tea leaves, or a tea bag, bring warmth and spice. Chai is a blend of tea and spices like cinnamon and cardamom. It makes the drink cozy and inviting. Sugar sweetens the drink. You can adjust the amount based on your taste. A little sugar goes a long way in balancing the flavors. Vanilla extract adds depth. It mixes well with the coconut and chai. Sparkling water brings a fizzy lift. It makes the drink refreshing and fun. Ground cinnamon adds a lovely aroma. It also enhances the chai's spice notes. Lastly, ice cubes cool the drink down. To top it off, toasted coconut flakes add a crunchy texture. They also make the drink look beautiful. Gather these ingredients, and you're ready to make this lovely drink. For the full recipe, check out the [Full Recipe]. - First, gently heat 1 cup of coconut milk in a small saucepan. Use medium heat, making sure it doesn’t boil. Stir it occasionally. - Once warm, add 1 tablespoon of chai tea leaves or 1 chai tea bag to the coconut milk. Let it steep for 5-7 minutes. This helps get the best flavor. If you used loose tea, strain it through a fine mesh sieve after steeping. - Now, stir in 1/4 cup of granulated sugar and 1/2 teaspoon of pure vanilla extract. Mix until fully dissolved. This creates a creamy and sweet base. - After the mixture cools to room temperature, fill two glasses with ice cubes. - Pour the cooled coconut chai mixture over the ice, filling each glass halfway. - Carefully add 1 cup of sparkling water to each glass. Stir gently to mix the flavors. - To finish, sprinkle a dash of ground cinnamon on top of each drink. - Garnish with toasted coconut flakes for a crunchy touch. This adds both flavor and a nice look to your drink. For the full recipe, refer to the earlier section. Enjoy your refreshing Coconut Chai Cream Soda! Adjusting sweetness levels Start with the basic recipe. Use 1/4 cup of sugar. If you like it sweeter, add more. If you prefer it less sweet, use less sugar. You can also try honey or maple syrup instead. Each sweetener gives a different taste. Taste as you go to find your perfect level. Choosing the right chai blend Not all chai is the same. Some blends are spicier, while others are milder. I love using a masala chai blend. It adds warmth and depth. You can use loose tea leaves or tea bags. Try different brands to find your favorite. Ideal glassware for presentation Use clear glasses to showcase the drink. The layers and colors look beautiful. Tall glasses are great for a refreshing look. You can also use mason jars for a rustic vibe. Add a colorful straw for fun. Pairing with snacks or light bites This drink pairs well with light snacks. Think about coconut macaroons or cinnamon cookies. Cheese and crackers also work nicely. These snacks enhance the flavors of the drink. Nutritional aspects of coconut milk Coconut milk is creamy and rich. It contains healthy fats that are good for your heart. It also has vitamins and minerals. Coconut milk can help with hydration. It's a great dairy-free option for many recipes. Benefits of chai tea Chai tea is packed with spices. These spices have health benefits. Ginger can help digestion, while cinnamon may help with blood sugar. Chai also contains antioxidants that protect your body. Enjoying this drink not only tastes good, but it can also be good for you. {{image_4}} You can switch coconut milk for almond or oat milk. Each option adds its own flavor. For a nut-free choice, oat milk works great. It keeps the drink creamy without the nut taste. Want to spice things up? Add a pinch of nutmeg or cardamom. These spices bring warmth and depth. You might also try adding fruit flavors. Pineapple adds a tropical twist that pairs well with chai. Just blend it into the coconut milk before serving. You can serve Coconut Chai Cream Soda hot for a cozy drink. Just skip the ice and pour it warm into your glass. For iced versions, use plenty of ice. The ice helps keep it cool and refreshing. You can even blend it for a frosty treat. For more details, be sure to check the Full Recipe. To keep your coconut milk fresh, store it in the fridge. Use an airtight container. It lasts about 5 to 7 days. Always shake well before use since it can separate. For spices like chai tea, store them in a cool, dark place. A sealed jar works best. This keeps them flavorful and fresh. Check the expiration dates regularly to avoid stale spices. You can make the coconut chai mixture ahead of time. Just follow the recipe steps, then cool the mixture. Transfer it to a clean container. Store it in the fridge for up to three days. When you’re ready to serve, pour it over ice and add sparkling water. This keeps the drink bubbly and fresh. You can also prepare the drink one day ahead. Just store it without ice. Add ice right before serving for the best taste. For the full recipe, check the earlier section. Enjoy your Coconut Chai Cream Soda! Coconut Chai Cream Soda is a fun and fizzy drink. It combines rich coconut milk with the warm spices of chai tea. The key flavors come from: - Coconut milk - Chai tea (with spices like cinnamon and cardamom) - Sweet sugar - Sparkling water This drink is creamy, sweet, and refreshing. It’s perfect for warm days or as a unique treat. Yes, you can easily make Coconut Chai Cream Soda vegan. The main ingredient, coconut milk, is already vegan. Just use a plant-based sweetener if needed. You can swap the sugar for agave or maple syrup. This way, you keep the drink tasty and plant-based. You can find coconut milk at most grocery stores. Look in the international aisle or near dairy alternatives. For chai tea, visit the tea section. If you prefer online shopping, websites like Amazon or specialty tea shops have both coconut milk and chai tea. This makes it easy to get the best ingredients. Coconut Chai Cream Soda is best enjoyed fresh. If you store it, keep it in the fridge for up to two days. The flavors may change a bit, but it will still taste good. Just give it a stir before serving again. Enjoy this drink right after making it for the best taste. Coconut Chai Cream Soda blends rich flavors into a refreshing drink. We looked at the key ingredients and the simple steps to create it. I shared tips for enhancing the taste and health benefits of each component. You can even adjust recipes for your preferences. Have fun experimenting with variations, and store leftovers correctly for future enjoyment. This drink can delight your taste buds and impress guests. Enjoy making it today!](https://fastmealmate.com/wp-content/uploads/2025/06/117a7c4a-19db-4251-9c08-7fd2f96708ea-768x768.webp)
. To reheat grilled chicken sliders, I suggest using an oven. Preheat your oven to 350°F. Place the sliders on a baking sheet. Cover them with foil to keep moisture in. Heat for about 10-15 minutes. This keeps the chicken juicy and the buns soft. You can also use a microwave, but they might get soggy. If you choose the microwave, cover the sliders with a damp paper towel. Heat in short bursts of 30 seconds. Check often to avoid overcooking. Yes, you can prep these sliders in advance. First, cook the chicken and let it cool. Then, store it in the fridge for up to two days. To save time, you can also bread the chicken and freeze it. When you're ready to cook, just thaw and grill. This way, you’ll have tasty sliders ready in no time. Assemble them just before serving for the best flavor and texture. Definitely! You can use eggplant or portobello mushrooms instead of chicken. Slice the eggplant or mushrooms thickly. Bread and grill them just like the chicken. Use the same marinara and cheese for that classic taste. You can also try store-bought veggie patties as a quick option. This way, everyone can enjoy delicious sliders, no matter their diet. You now know how to make delicious grilled chicken Parmesan sliders. We covered the ingredients, cooking steps, and tips to ensure success. Remember to use fresh ingredients and monitor the grill for perfect results. These sliders can impress at any meal or gathering. Feel free to experiment with variations to suit your taste. When stored properly, leftovers taste great, too. Enjoy trying this recipe and make it your own. Happy cooking!](https://fastmealmate.com/wp-content/uploads/2025/06/2b1da996-745c-44b5-a796-c9c3c581ce53-768x768.webp)


![- 1 pound boneless, skinless chicken thighs, cut into 1-inch cubes - 1/4 cup soy sauce - 1/4 cup honey - 2 tablespoons rice vinegar - 1 tablespoon sesame oil - 2 cloves garlic, finely minced - 1 teaspoon fresh ginger, grated - 1 red bell pepper, cut into 1-inch squares - 1 yellow bell pepper, cut into 1-inch squares - 1 zucchini, sliced into thick rounds The main ingredients are key to a great teriyaki dish. Chicken thighs are juicy and flavorful. The soy sauce and honey create a sweet and salty marinade. Rice vinegar adds a slight tang. Garlic and ginger bring warmth and depth to the flavor. The colorful veggies add crunch and a fresh touch. - 1 teaspoon cornstarch mixed with 1 tablespoon cold water (optional, for thickening the sauce) - Sesame seeds, for garnish - Fresh cilantro, for garnish Cornstarch helps thicken the teriyaki sauce. This makes it stick better to the chicken. Sesame seeds and cilantro are perfect for garnishing. They add a nice look and extra flavor. - Bamboo skewers (soaked in water for at least 30 minutes) - Grill or grill pan You need skewers to hold the chicken and veggies. Soaking them in water prevents burning. A grill or grill pan cooks the skewers evenly. It gives the chicken those beautiful grill marks. For the full recipe and more tips, check out the Full Recipe section. To start, we need to mix the marinade. In a medium bowl, combine the soy sauce, honey, rice vinegar, sesame oil, minced garlic, and grated ginger. Whisk these ingredients together until they blend well. This mixture is key to our teriyaki chicken skewers. Marinating is very important. It lets the chicken soak up all the nice flavors. Aim for at least 30 minutes. For the best taste, try to marinate for 1 to 2 hours. This makes a big difference in flavor. Now, it’s time to thread the chicken and veggies onto the skewers. First, take your soaked bamboo skewers and start with a piece of chicken. Then, add a square of red bell pepper, followed by a piece of yellow pepper. Next, add a thick slice of zucchini. Repeat this pattern. This colorful arrangement is not just tasty; it looks great too! Make sure the pieces fit snugly but not so tightly that they can't cook well. A nice visual appeal will impress everyone at the table. When it’s time to cook, we can grill the skewers. Preheat your grill or grill pan to medium-high heat. Place the skewers on the grill and cook them for about 10 to 12 minutes. Turn them occasionally for even cooking. If you prefer, you can also bake or broil the skewers. Just adjust the cooking time. Cook until the chicken is fully done and has lovely grill marks. For added flavor, brush the skewers with the thickened teriyaki sauce while they cook. Check the Full Recipe for more details on each step! To make a great teriyaki marinade, you need balance. Start with soy sauce for saltiness. Add honey for sweetness. Rice vinegar brings in acidity, which brightens the flavors. Garlic and ginger give depth. Ensure you mix these well. A good marinade coats the chicken evenly. For extra flavor, let the chicken sit in the marinade for longer. Aim for 1 to 2 hours for the best taste. If you want more richness, try adding a splash of orange juice. This will enhance the flavor profile. Grilling your skewers right is key. First, preheat your grill to medium-high heat. This helps get those beautiful grill marks. Place the skewers on the grill and leave them alone for a few minutes. Avoid moving them too much; let them sear. Flip them only once or twice. If you brush them with the thickened sauce, it adds a nice glaze. Keep an eye on the time; cook them for about 10-12 minutes. Common mistakes include overcrowding the grill. Give each skewer space so they cook evenly. Also, don’t skip the resting time after grilling; it helps the juices redistribute. When serving, presentation matters. Lay the skewers on a big platter. Drizzle with any leftover teriyaki sauce for extra flavor. Sprinkle sesame seeds and chopped cilantro on top. It adds color and looks inviting. For side dishes, think simple. Steamed rice or a fresh salad pairs well. You could also serve grilled veggies for a complete meal. These combinations elevate your dish and make for a delicious feast. Remember, the Full Recipe will guide you through the process! {{image_4}} You can swap chicken for other proteins like beef or tofu. Beef gives a rich, hearty taste. Tofu offers a plant-based option that absorbs flavors well. Adjust cooking times depending on what you use. Beef may need longer than chicken, while tofu cooks quicker. Always check for doneness to keep your meal safe. Feel free to include seasonal vegetables. Bell peppers, zucchini, and onions add color and crunch. Try mushrooms or cherry tomatoes for even more variety. These colorful additions not only taste great but also make your dish visually appealing. Mixing different veggies can create a vibrant plate that excites the eyes. You can use store-bought teriyaki sauce for speed. Homemade sauce allows you to control flavors better. If you want a kick, try adding chili flakes for spice. For a sweeter twist, mix in some pineapple juice. These variations help you customize the sauce to fit your taste. Check the [Full Recipe] for details on how to make your own sauce! After enjoying your teriyaki chicken skewers, you may have some leftovers. It’s best to store them right away. Place the skewers in an airtight container. This keeps them fresh and prevents odors. You can refrigerate them for up to four days. For longer storage, wrap them tightly in plastic wrap and place them in a freezer bag. You can freeze them for up to three months. Just remember to label the bag with the date. When it’s time to enjoy leftovers, reheating correctly matters. You want to keep the chicken moist. The oven works best for this. Preheat it to 350°F (175°C). Place the skewers on a baking sheet and cover them with foil. Heat for about 10-15 minutes until warm. The microwave is quicker but can dry out the chicken. If you use it, heat in short bursts of 30 seconds. Check often to avoid overcooking. Leftover teriyaki chicken skewers can last up to four days in the fridge. If frozen, they remain safe for three months. Always check for signs of spoilage before eating. If the chicken smells bad or looks off, don’t eat it. Look for a change in color or texture too. When in doubt, throw it out. Enjoying your teriyaki chicken skewers fresh is the best way to experience their flavor. For the full recipe, refer to the earlier sections. The best chicken for skewers is thighs. They stay juicy and tender when cooked. Breasts can dry out quickly. They have less fat, which makes them less forgiving. Thighs are more flavorful and can handle marinating well. Yes, you can make teriyaki chicken skewers in advance. Marinate the chicken for at least 30 minutes. For the best taste, marinate for 1 to 2 hours. You can even marinate them overnight. Cook them right before serving for the best results. You can serve teriyaki chicken skewers with many tasty sides. Rice, like jasmine or brown rice, pairs well. You can also offer stir-fried veggies for crunch. A fresh salad with sesame dressing adds a nice touch. Consider serving with grilled pineapple for a sweet twist. Explore these options to find what you love! This article covered making delicious teriyaki chicken skewers. We explored key ingredients like chicken, marinade, and vegetables. You learned how to prepare the marinade, assemble skewers, and cook on the grill. We also shared tips for flavor, grilling techniques, and serving ideas. You can mix in different proteins or vegetables and make it your own. Remember to store any leftovers properly to enjoy later. Now, get ready to impress with your new skewering skills!](https://fastmealmate.com/wp-content/uploads/2025/06/9b1dc869-68dc-4727-be9c-b0e6615ca1ac-768x768.webp)
