Slow Cooker Crockpot Candy Delightful Sweet Treat

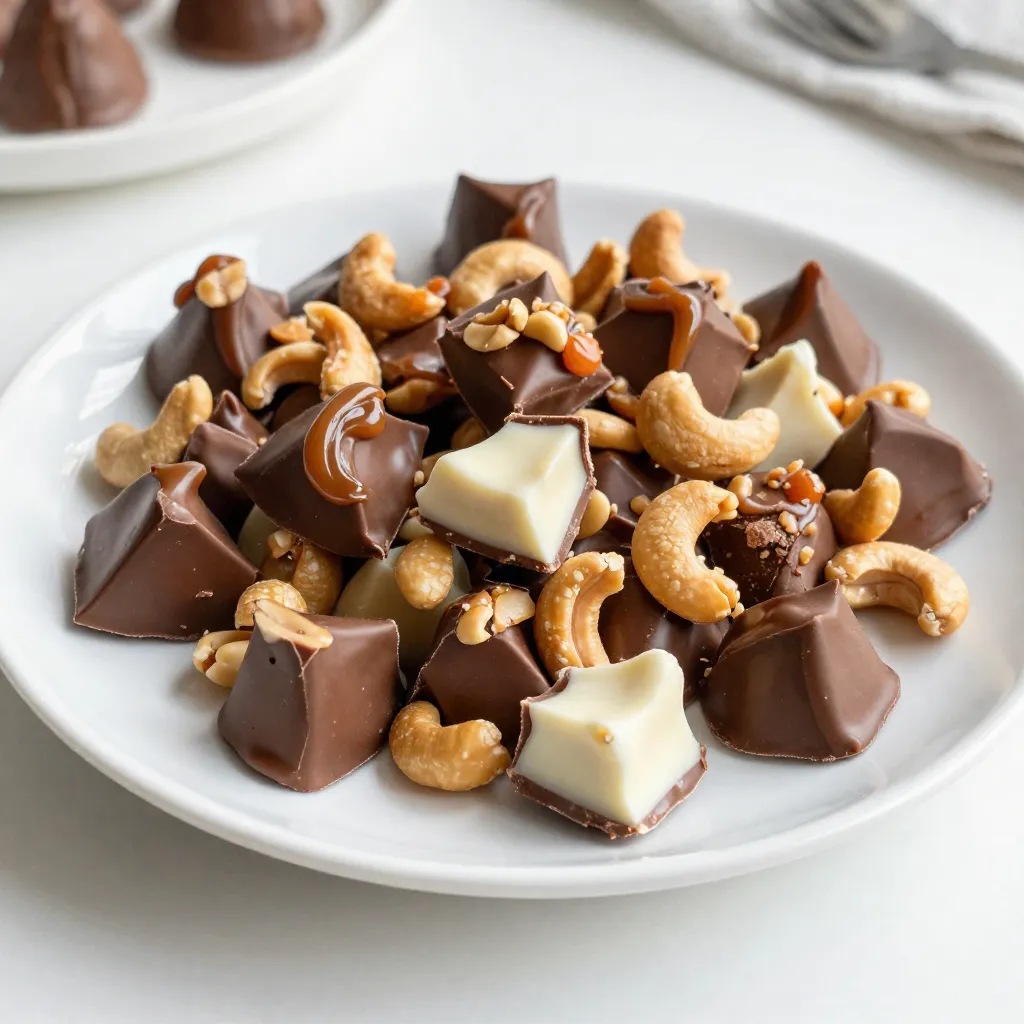
Indulging in sweet treats is easy with this Slow Cooker Crockpot Candy recipe! You’ll combine simple ingredients like peanuts, chocolate, and crunchy snacks to create a delightful candy mix. Perfect for parties or cozy nights at home, this recipe yields a tasty and fun dessert you can customize. Follow me as I guide you step-by-step to whip up this delicious treat that everyone will love!
Why I Love This Recipe
- Decadent Flavor: This recipe combines a variety of chocolates and nuts, creating a rich and satisfying treat that appeals to every sweet tooth.
- Easy to Make: With minimal prep time and a slow cooker doing most of the work, this recipe is perfect for busy days or last-minute gatherings.
- Customizable: You can easily swap out nuts or add different snacks, making it versatile for any occasion or personal preference.
- Perfect for Gifting: This candy delight makes a wonderful gift, whether in decorative jars or festive boxes, adding a personal touch to any celebration.
Ingredients
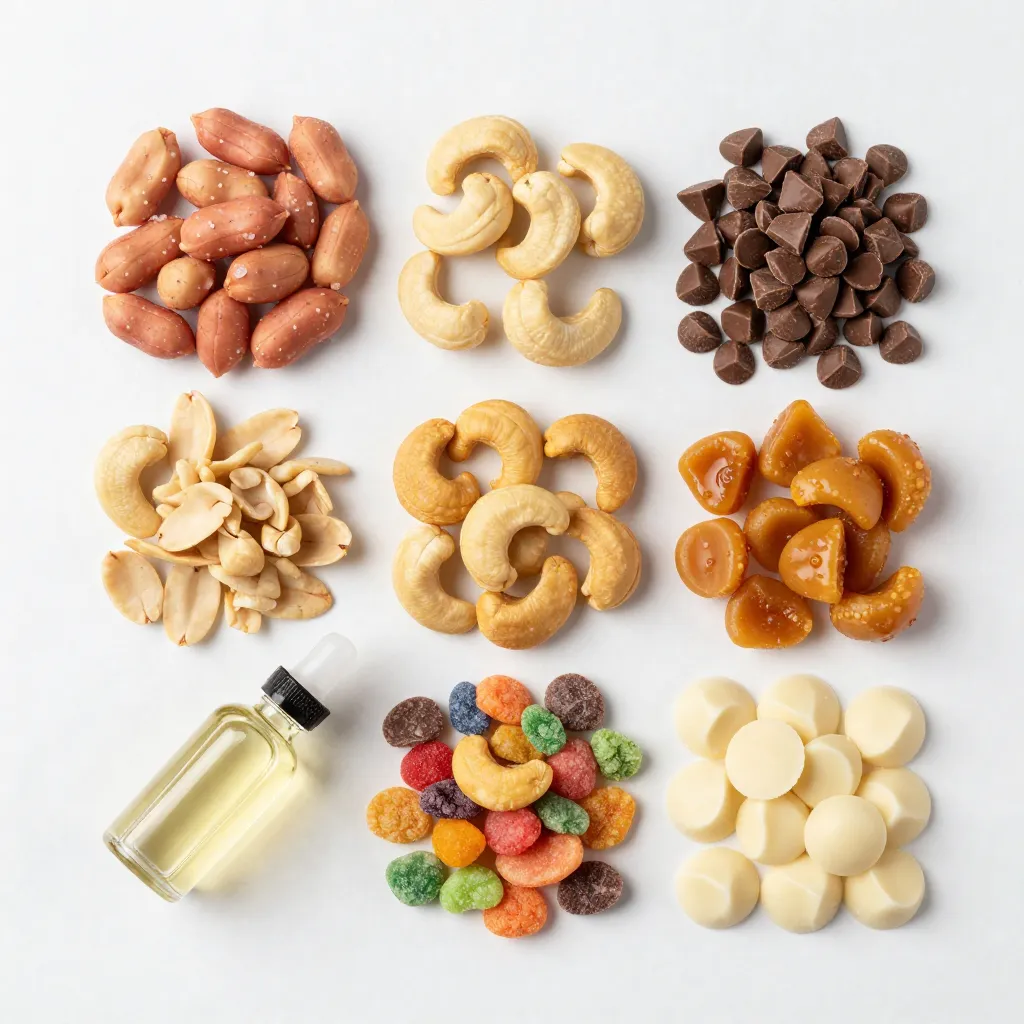
Full Ingredient List
– 1 cup salted peanuts
– 1 cup unsalted cashews
– 1 cup chocolate chips (milk or dark)
– 1 cup butterscotch chips
– 1 cup white chocolate chips
– 1 cup crunchy snack mix (Chex, Bugles, etc.)
– 1 teaspoon pure vanilla extract
To make Slow Cooker Crockpot Candy, you need a mix of nuts and chocolates. The salted peanuts and unsalted cashews give a nice crunch. You can use any chocolate chips you like. Milk chocolate is sweet, while dark chocolate has a rich taste. Butterscotch chips add a creamy, buttery flavor.
Adding white chocolate chips makes the mix even sweeter. The crunchy snack mix adds an extra layer of texture. You can choose from Chex, Bugles, or any favorite mix. Finally, pure vanilla extract brings all the flavors together.
This blend of sweet and salty will make your candy a hit. It’s easy to find these ingredients at your local store. Gather them all, and you are ready to start!

Step-by-Step Instructions
Preparing the Slow Cooker
To start, plug in your crockpot. Set it to low heat. This low setting melts the ingredients slowly. It helps keep the flavors intact.
Layering the Ingredients
Next, add salted peanuts and unsalted cashews to the bottom of the crockpot. This nutty base gives great flavor and crunch. Spread them evenly for the best results.
Melting the Chocolates
Now, it’s time to add the fun part! Carefully pour in the chocolate chips, butterscotch chips, and white chocolate chips. Make sure they cover the nuts well. This mix creates a sweet, creamy blend.
Cooking Process
Cover the crockpot with its lid. Let it cook on low for 1 to 2 hours. Stir the mixture every 30 minutes. This helps everything melt evenly and prevents burning.
Finalizing the Candy Mix
When the chocolate is smooth, add the crunchy snack mix. Gently fold it in until every piece is coated. This adds extra crunch and fun to your candy.
Next, line a baking sheet with parchment paper. Carefully pour the mixture onto the sheet. Spread it out evenly with a spatula. Let it cool at room temperature. For quicker results, you can chill it in the fridge for about 30 minutes.
When set, break it into bite-sized pieces. Enjoy your sweet creation!
Tips & Tricks
Cooking Time and Consistency
The melting time for chocolate in a slow cooker is key. Generally, you should cook it on low for 1 to 2 hours. Milk chocolate melts faster than dark chocolate. If using dark chocolate, check it around the 1-hour mark. Butterscotch and white chocolate need close attention too, as they can burn easily.
Stirring Techniques
Stir the candy mix every 30 minutes. This keeps the chocolate from burning. Use a wooden spoon or a silicone spatula to stir gently. Make sure to scrape the sides and bottom of the pot. This action mixes the chocolate evenly and helps it melt smoothly.
Presentation Suggestions
Once your candy is ready, display it in fun ways. Use clear jars to show off the colorful layers. For gifts, pack the candy in boxes with ribbons. You can even make labels for a personal touch. This way, your candy not only tastes good but looks great too!
Pro Tips
- Choose Your Chocolate Wisely: Select high-quality chocolate chips for the best flavor and texture. This will enhance the overall taste of your candy delight.
- Mix Up the Nuts: Feel free to experiment with different nuts or even add some dried fruits for a unique twist. Almonds, walnuts, or dried cranberries can add delightful flavors.
- Stir Gently: When incorporating the crunchy snack mix, stir gently to avoid breaking the pieces. You want to keep the texture intact for the perfect bite.
- Storage Matters: Store the finished candy in an airtight container to keep it fresh. This will prevent it from becoming stale and maintain its delicious crunch.
Variations
Flavor Combinations
You can mix and match flavors to make your Crockpot candy unique. Here are some ideas:
– Chocolate Types: Use milk, dark, or even semi-sweet chocolate chips. Each will give a different taste.
– Nut Choices: Swap salted peanuts and cashews for almonds, walnuts, or pecans. Each nut adds its own crunch and flavor.
Alternative Add-ins
Feel free to get creative with your add-ins. Here are some fun ideas:
– Dried Fruits: Add chopped dried cherries, apricots, or cranberries. They add a sweet and chewy texture.
– Candies: Toss in mini marshmallows, M&Ms, or crushed toffee for extra sweetness.
– Seasoning: A pinch of sea salt or a sprinkle of cinnamon can enhance the flavor profile.
Dietary Adjustments
Want to make this treat suit your diet? Here are some tips:
– Vegan: Use dairy-free chocolate chips instead of regular ones. Ensure any nuts or mixes are also vegan-friendly.
– Gluten-Free: Check that your crunchy snack mix is gluten-free. Many brands offer safe options.
These variations will help you create a candy that fits your taste and dietary needs!
Storage Info
Best Storage Practices
To keep your Crockpot Candy fresh, store it in an airtight container. This helps lock in moisture and flavor. You can layer the candy between sheets of wax paper. This prevents the pieces from sticking together. Make sure the container is completely sealed. This way, your candy stays tasty for longer.
Recommended Locations
Store the candy in a cool, dry place. A pantry works well. Avoid direct sunlight and heat sources. Too much heat can melt the chocolate. A kitchen cabinet is a great spot. If it’s warm, you can keep it in the fridge. Just let it sit at room temp before eating. This keeps the candy from being too hard.
Shelf Life
Crockpot Candy can last about 2 to 3 weeks. If stored well, it stays fresh and tasty. After this time, it may lose flavor or texture. Always check for signs of spoilage, like an off smell. If it looks good and smells fine, enjoy your sweet treat!
FAQs
Can I use a different type of nut?
Yes, you can. Feel free to swap nuts based on your taste. Almonds, walnuts, or pecans work well too. You might even mix different nuts for extra crunch. Just keep the total amount the same, one cup each. This way, the candy stays balanced and tasty.
How long does it take for the candy to set?
The candy needs time to cool. At room temperature, it can take about an hour. If you want it faster, pop it in the fridge. It should set in about 30 minutes. Just check to make sure it hardens all the way through before breaking it apart.
Can I double the recipe?
Doubling the recipe is easy! Just use two cups of each ingredient. Make sure your crockpot is big enough. You may need to cook it a bit longer, maybe an extra 30 minutes. Stir well to help everything melt and mix evenly. Enjoy your larger batch!
To make this candy mix, you need simple ingredients and easy steps. We covered the full list of ingredients, from peanuts to chocolate chips. With a slow cooker, melting the chocolate is straightforward. Remember to stir often to avoid burning. Try different nuts and flavors for fun. Store your mix properly to keep it fresh. This treat is great for sharing or gifting. Enjoy making this tasty candy mi

Crockpot Candy Delight
Ingredients
- 1 cup salted peanuts
- 1 cup unsalted cashews
- 1 cup chocolate chips
- 1 cup butterscotch chips
- 1 cup white chocolate chips
- 1 cup crunchy snack mix
- 1 teaspoon pure vanilla extract
Instructions
- Prepare the Crockpot: Plug in your crockpot and set it to the low heat setting.
- Create the Base: In the bottom of the crockpot, evenly layer the salted peanuts and unsalted cashews.
- Add the Chocolates: Carefully pour the chocolate chips, butterscotch chips, and white chocolate chips over the nut mixture.
- Flavor it Up: Drizzle the pure vanilla extract over the layered chips and nuts.
- Cooking Process: Cover the crockpot with its lid and allow it to cook on low for 1 to 2 hours, stirring gently every 30 minutes.
- Incorporate the Crunch: When the chocolate is fully melted, add the crunchy snack mix and gently fold it into the mixture.
- Prepare for Setting: Line a baking sheet with parchment paper and pour the mixture onto the sheet, spreading it out evenly.
- Cool it Down: Let the candy mixture cool at room temperature until set, or refrigerate for about 30 minutes.
- Final Touch: Once set, break the candy into bite-sized pieces and enjoy.


![This Chocolate Tres Leches Cake uses simple ingredients. Each one works together to create a rich flavor. - 1 cup all-purpose flour - 1/2 cup unsweetened cocoa powder - 1 1/2 teaspoons baking powder - 1/2 teaspoon baking soda - 1/4 teaspoon salt - 1/2 cup unsalted butter, softened - 1 cup granulated sugar - 3 large eggs, at room temperature - 1 teaspoon vanilla extract - 1/2 cup buttermilk, at room temperature - 1 cup sweetened condensed milk - 1 cup evaporated milk - 1 cup whole milk - 1 cup heavy cream, chilled - 2 tablespoons powdered sugar (for whipped cream) - Chocolate shavings or cocoa powder for garnish (optional) These ingredients create a soft cake soaked in a sweet milk mixture. The heavy cream topping adds a light and airy touch. Using room temperature ingredients helps everything mix well. I recommend using fresh milk for the best taste. For a unique twist, sprinkle chocolate shavings on top before serving. Enjoy making this delicious treat! For the complete recipe, check the [Full Recipe]. Start by preheating your oven to 350°F (175°C). Grab a 9x13 inch baking pan. Grease it with butter to make sure your cake won’t stick. Dust the pan lightly with flour. This quick step helps the cake come out clean and perfect. In a medium bowl, sift together the all-purpose flour, cocoa powder, baking powder, baking soda, and salt. This helps mix everything well. In a large bowl, use an electric mixer to beat the softened butter and sugar until it is light and fluffy. This takes about 3-5 minutes. Then, add the eggs one at a time. Mix well after each egg. Finally, stir in the vanilla extract. Slowly fold the dry ingredients into the wet mixture. Alternate with the buttermilk. Start and finish with the dry mix. Be gentle; mix until you see no flour streaks. Pour the batter into your prepared pan. Smooth the top with a spatula. Bake for 30-35 minutes. Check if it’s done by inserting a toothpick into the center; it should come out clean. Let it cool for 10 minutes, then turn it out onto a wire rack. In a separate bowl, mix the sweetened condensed milk, evaporated milk, and whole milk. Whisk this mixture until blended. This will soak into your cake, making it rich and moist. Once the cake is cool, poke holes in the top with a fork. Pour the tres leches mixture evenly over the cake. This helps the cake absorb the milk. Cover it with plastic wrap and let it soak for at least one hour. This step is key for flavor. In a large bowl, beat the chilled heavy cream with powdered sugar until stiff peaks form. Spread this whipped cream over the soaked cake. For a nice touch, sprinkle chocolate shavings or cocoa powder on top. Refrigerate the cake for at least 2 hours before serving. This waiting time mixes the flavors and makes each bite delicious. For the full recipe, check the details in the earlier sections. To get a moist cake, follow a few simple steps. Start by using room temperature ingredients. This helps the batter mix well. Next, do not overmix the batter. Mix until just combined. Overmixing adds air, which can dry the cake out. Finally, bake the cake just until a toothpick comes out clean. If you bake too long, the cake will dry out. Soaking the cake properly is key. First, let the cake cool completely before soaking it. This helps the cake absorb the milk mixture better. Use a fork to poke holes all over the top of the cake. This allows the milk to seep in. Then, pour the tres leches mixture evenly over the cake. Let it sit for at least one hour. For best results, cover it with plastic wrap and refrigerate. This ensures the cake soaks up all the flavor. Whipped cream adds a light touch to the cake. Start by chilling your mixing bowl and beaters. This keeps the cream cold and helps it whip better. Beat the heavy cream until it forms stiff peaks. This means it should hold its shape when you lift the whisk. Add the powdered sugar gradually for sweetness. Spread the whipped cream gently over the soaked cake. For a fun twist, add chocolate shavings or a sprinkle of cocoa powder on top. For the complete recipe, check the Full Recipe section. {{image_4}} You can make a gluten-free version of this cake easily. Just swap the all-purpose flour for a gluten-free flour blend. Look for a blend that works well for baking. This change keeps the cake moist and delicious. You may also add a pinch of xanthan gum to help the texture. To create a vegan chocolate tres leches cake, replace the eggs with flax eggs. Mix 1 tablespoon of ground flaxseed with 2.5 tablespoons of water for each egg. For the milk mixture, use coconut milk, almond milk, or any plant-based milk. Use coconut cream instead of heavy cream for topping. This way, you keep the rich flavor while going dairy-free. You can also play with flavors to make this cake unique. For a minty twist, add mint extract to the batter and whipping cream. Just a teaspoon will do. If you love coffee, add espresso powder to the batter for a rich, coffee flavor. You can also fold in chocolate chips for more texture and taste. Each variation brings a new fun experience to this classic dessert. For the full recipe, check the source to get all the details you need. To keep your Chocolate Tres Leches Cake fresh, always store it in the fridge. Use an airtight container to prevent it from drying out. If you have not yet topped it with whipped cream, store the cream separately. This keeps the cake moist and the cream fluffy. When stored properly, the cake lasts about 3 to 5 days in the fridge. The flavors will continue to blend, making each bite even better. Always check for any signs of spoilage, like a strange smell or changes in texture. You can freeze the cake if you want to keep it longer. Wrap it tightly in plastic wrap, then place it in a freezer-safe bag. This way, it can last up to 3 months in the freezer. When you're ready to enjoy it, let it thaw in the fridge overnight. Add the whipped cream topping just before serving for the freshest taste. For the complete recipe, you can refer to the Full Recipe section. Yes, you can! This cake is great for planning ahead. You can bake the cake, soak it, and then chill it in the fridge. It tastes even better after a day. Just cover it well so it stays fresh. Tres leches cake is soaked in three types of milk. Regular cake usually has no soaking. Tres leches is moist and rich. Regular cake is often lighter. The extra milk makes tres leches creamy and sweet. To keep the cake from being too soggy, let it cool completely first. After soaking, cover the cake and chill it. Serve it within a few days. This way, it stays moist without getting overly wet. Yes, you can use cake mix. Just follow the package instructions for baking. Make sure to adjust the milk mixture. This way, you get the rich flavor of tres leches without starting from scratch. You can use sweetened condensed milk, evaporated milk, and whole milk. If you want, you can try alternatives like almond milk or oat milk. Each choice will give a different taste, but they will still work well. For the full recipe, check out the Heavenly Chocolate Tres Leches Cake recipe above! In this post, we covered the essential steps to make a Chocolate Tres Leches Cake. You learned about the key ingredients and how to mix them. We detailed how to bake the cake and prepare the soaking mix. You got tips on keeping your cake moist and explored tasty variations. Finally, we discussed storing leftovers to enjoy later. Baking is fun and rewarding. Try this recipe to impress friends and family. Enjoy every delicious bite!](https://fastmealmate.com/wp-content/uploads/2025/06/83784e58-e7f6-4d4b-aebc-0bf8177d26de-768x768.webp)

![When making zucchini brownies, you need simple and quality ingredients. Here’s what you will need: - 1 cup shredded zucchini - 1/2 cup unsweetened applesauce - 1/3 cup pure maple syrup or agave nectar - 1/4 cup vegetable oil or melted coconut oil - 1 teaspoon pure vanilla extract - 1/2 cup all-purpose flour or gluten-free flour - 1/4 cup unsweetened cocoa powder - 1/2 teaspoon baking soda - 1/2 teaspoon baking powder - 1/4 teaspoon fine sea salt - 1/2 cup chocolate chips These ingredients come together to create a rich and moist brownie. The zucchini adds moisture without a strong taste. Applesauce keeps the brownies soft. The maple syrup or agave nectar sweetens them naturally. You can use vegetable oil or coconut oil, depending on your preference. Using high-quality cocoa powder makes a big difference in flavor. The baking soda and baking powder help the brownies rise. Finally, the chocolate chips give a delightful chocolate burst in every bite. For the full recipe, check out the [Full Recipe]. - Set temperature to 350°F (175°C). - Prepare your baking pan by greasing it or lining it with parchment paper. - In a large bowl, combine shredded zucchini, applesauce, maple syrup, oil, and vanilla. - Mix until the mixture is smooth and well blended. - In a separate bowl, whisk together flour, cocoa powder, baking soda, baking powder, and salt until mixed well. - Gradually add the dry ingredients to the wet mixture. - Mix gently to avoid overmixing, which can make the brownies dense. - Fold in the chocolate chips. - Make sure they are evenly spread throughout the batter for a rich flavor. - Pour the batter into the prepared pan. - Bake for 25-30 minutes. - After baking, cool in the pan for at least 15 minutes before cutting. Enjoy the delightfully unexpected zucchini boost hidden in every bite with this full recipe! To make your brownies moist, avoid overmixing the batter. Overmixing adds air, which can make them dry. Mix until just combined for a fudgy treat. Using ripe zucchini is key too. Ripe zucchini has more water, which adds moisture and flavor. Shred the zucchini and squeeze out excess water. This keeps your brownies rich and tasty. You can add nuts or spices to boost flavor. Chopped walnuts or pecans add crunch. A sprinkle of cinnamon or nutmeg makes them warm and cozy. You could also mix in chocolate chunks for extra gooeyness. For toppings, serve with ice cream or whipped cream. A scoop of vanilla ice cream on warm brownies is heavenly! Check your brownies for doneness by inserting a toothpick in the center. It should come out with a few moist crumbs. If you live at a high altitude, bake for less time. High altitude can change how baked goods rise and cook. Start checking at the lower end of baking time, around 25 minutes. Adjust as needed. {{image_4}} You can make these brownies gluten-free. Just swap the all-purpose flour for a gluten-free flour blend. Many blends work well. Look for ones that contain rice flour or almond flour. These blends give the brownies a nice texture. Make sure to check the package for the right measurements. This way, you still get that rich, fudgy taste. For a vegan version, you can replace the eggs. Use a flaxseed or chia seed mixture instead. To make this, mix one tablespoon of ground flaxseed or chia seeds with three tablespoons of water. Let it sit for five minutes until it thickens. This works great in the recipe. Your brownies will still be moist and delicious without eggs. If you want a healthier treat, try different sweeteners. You can use stevia or coconut sugar instead of maple syrup. Both options lower the sugar content. Stevia is quite sweet, so use less. Coconut sugar adds a nice caramel flavor. These substitutes keep your brownies tasty while making them a bit healthier. For the full recipe, check out the main article. To keep your zucchini brownies fresh, use an airtight container. This helps seal in moisture and flavor. You can store them at room temperature for up to two days. If you want to keep them longer, refrigerate them for up to a week. If you want to save some for later, freezing is a great option. First, cut the brownies into squares. Wrap each square in plastic wrap, and then place them in a freezer-safe bag. This way, they won’t stick together. You can freeze them for up to three months. When you’re ready to enjoy, take them out and thaw at room temperature. For the best texture, you can also warm them in the microwave for a few seconds. These tips will help you enjoy your zucchini brownies at their best! For the complete recipe, check out the [Full Recipe]. Yes, you can use yellow squash. The texture will be similar, but the flavor differs. Yellow squash has a slightly sweeter taste. Zucchini tends to have a more neutral flavor. This can change how the brownies taste. If you like sweetness, yellow squash is a great choice. To check if brownies are done, insert a toothpick into the center. If it comes out with a few moist crumbs, they are ready. If it comes out wet with batter, they need more time. Brownies should look set but still soft. These brownies can be made ahead of time. Bake them, let them cool, then store them. Wrap them in plastic wrap or place them in an airtight container. They keep well for about three days at room temperature. You can also refrigerate them for up to a week. If your brownies are dense, try a few tips. First, check your mixing. Overmixing can cause density. Mix until just combined. You can also add a bit more liquid. Adding an extra tablespoon of applesauce can help. Lastly, ensure your baking powder is fresh for proper rise. These zucchini brownies are easy to make and taste great. We covered the ingredients, step-by-step instructions, and tips to boost flavor and texture. You learned how to store them and gave answers to common questions. Experiment with different flours or sweeteners to fit your needs. Enjoy these tasty treats that offer a fun twist on the classic brownie! Happy baking!](https://fastmealmate.com/wp-content/uploads/2025/06/384a547d-f08a-42f3-b5f4-9a38b6c4e0e7-768x768.webp)
