Savory Slow Cooker Maple Dijon Chicken Thighs Recipe

Looking for a meal that’s both savory and sweet? You’ve come to the right place! My Slow Cooker Maple Dijon Chicken Thighs will make your taste buds dance. With just a few simple steps, you can prepare a mouthwatering dish that’s perfect for busy nights. Plus, I’ll share easy tips for flavorful chicken and even some tasty variations. Trust me; this is a recipe you won’t want to miss!
Ingredients
List of Ingredients
– 6 chicken thighs, bone-in, skin-on
– 1/3 cup pure maple syrup
– 1/4 cup Dijon mustard
– 3 cloves garlic, finely minced
– 1 tablespoon soy sauce (or tamari for a gluten-free option)
– 1 teaspoon dried thyme
– 1 teaspoon smoked paprika
– Salt and freshly ground pepper to taste
– Fresh parsley, finely chopped (for garnish)
Ingredient Substitutions
If you need a gluten-free option, use tamari instead of soy sauce. You can also swap maple syrup with honey for a different sweet flavor. If you want less fat, use boneless, skinless chicken thighs. This option still turns out juicy and tasty. For a unique twist, try adding fresh herbs like rosemary or oregano instead of thyme.
Nutritional Information per Serving
Each serving includes approximately:
– Calories: 370
– Protein: 30g
– Carbohydrates: 28g
– Fat: 16g
– Fiber: 1g
– Sugar: 12g
This meal is rich in protein and has a nice balance of sweet and savory flavors. It’s a great choice for a healthy dinner.
Step-by-Step Instructions
Preparation of the Marinade
To start, grab a mixing bowl. Add the following ingredients:
– 1/3 cup pure maple syrup
– 1/4 cup Dijon mustard
– 3 cloves garlic, finely minced
– 1 tablespoon soy sauce
– 1 teaspoon dried thyme
– 1 teaspoon smoked paprika
– Salt and freshly ground pepper to taste
Whisk these ingredients together until smooth. The goal is to mix flavors well. The sweet maple and tangy mustard create a great base.
Arranging Chicken Thighs in the Slow Cooker
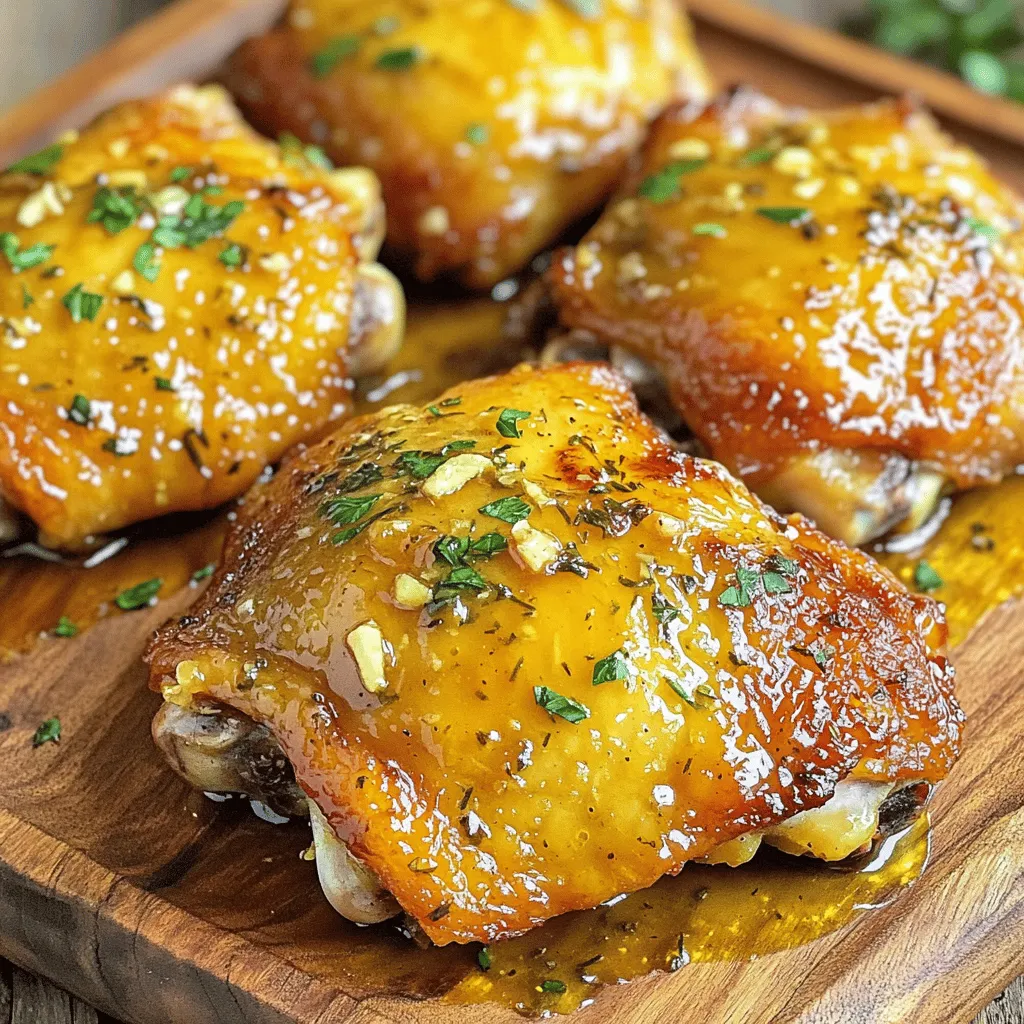
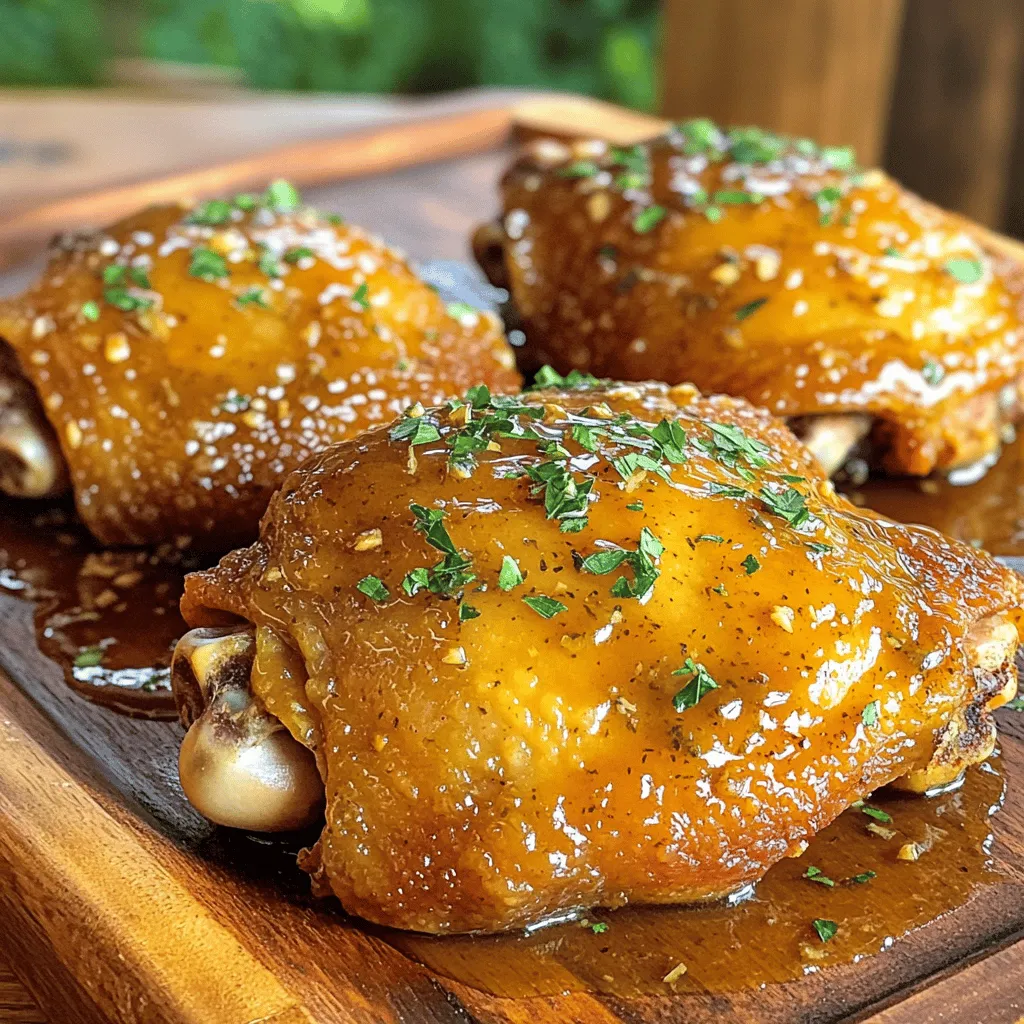
Now, take your slow cooker. Place 6 chicken thighs inside, skin-side up. This helps make the skin crispy. Make sure the thighs fit snugly but are not crowded. This allows for even cooking.
Next, pour the marinade over the chicken. Be sure each piece is well coated. This step is key for flavor.
Cooking Times and Temperature Settings
Cover the slow cooker tightly with its lid. Set the cooker to “Low” for 6-7 hours or “High” for 3-4 hours. Check the chicken’s temperature with a meat thermometer. It should reach 165°F (75°C). This ensures the chicken is safe to eat. When finished, the chicken will be tender and juicy.
Transfer the chicken to a serving plate using tongs. For extra flavor, you can thicken the remaining sauce. Simply simmer it in a saucepan for about 5-7 minutes. Pour this sauce over the chicken before serving. Enjoy this savory dish!
Tips & Tricks
How to Achieve Crispy Skin
To get crispy skin on your chicken thighs, start with skin-on pieces. This keeps the moisture in while cooking. Place the thighs skin-side up in the slow cooker. If you want extra crispiness, you can sear them in a hot pan before slow cooking. Just cook them for a few minutes on each side. This helps to get that nice golden color.
Ensuring Maximum Flavor Infusion
For the best flavor, coat the chicken well with the maple Dijon mixture. Let it marinate for at least 30 minutes before cooking. The longer it sits, the more the flavors blend. If you can, let it marinate overnight in the fridge. This allows the garlic and spices to really soak in. Also, make sure to pour any leftover sauce over the chicken before serving.
Serving Suggestions for Pairing
These chicken thighs pair great with rice or mashed potatoes. The rich sauce complements the creamy texture of both. You can also serve it with a side of green beans or a fresh salad. For extra flair, sprinkle some fresh parsley on top. This adds a pop of color and freshness to your dish. Enjoy!

Variations
Adding Vegetables for One-Pot Meal
You can make this dish even better by adding vegetables. Carrots, potatoes, and green beans work great. Simply chop your veggies into bite-sized pieces. Add them to the slow cooker with the chicken. They will soak up the tasty sauce as they cook. Plus, you’ll have a complete meal!
Alternative Sweeteners
If you want a different flavor, try using honey or agave syrup instead of maple syrup. Each sweetener brings its own twist. Honey adds a floral note, while agave gives a mild sweetness. Adjust the amount to your taste. You might find a new favorite!
Spices to Enhance Flavor
Boost the flavor by adding spices. Rosemary works well with chicken and adds a fresh taste. Garlic powder gives a nice kick, enhancing the savory profile. You can also try a sprinkle of crushed red pepper for heat. Mix and match spices to find your perfect blend!
Storage Info
Storing Leftovers
After enjoying your meal, let the chicken cool down. Place it in an airtight container. Store it in the fridge for up to 3 days. If you can’t finish it, don’t worry! This dish stores well and keeps its flavor.
Reheating Tips for Best Results
To reheat, use the microwave or oven. If using the microwave, cover the chicken with a damp paper towel. This keeps it moist. Heat in 30-second intervals until warm. For the oven, preheat it to 350°F (175°C). Place the chicken in a baking dish, cover with foil, and heat for 15-20 minutes.
Freezing Chicken Thighs for Later
If you want to save some for later, freezing is a great option. First, let the chicken cool completely. Then, wrap each thigh tightly in plastic wrap. Place them in a freezer-safe bag. Label the bag with the date. You can freeze them for up to 3 months. When ready to eat, thaw in the fridge overnight before reheating.
FAQs
Can I use boneless chicken thighs?
Yes, you can use boneless chicken thighs. They will cook faster than bone-in thighs. Adjust cooking time to about 4-5 hours on low or 2-3 hours on high. The flavor will still shine through, but you may miss some of that rich, juicy texture from the bones.
What’s the best way to know when chicken is done?
The best way to check if the chicken is done is with a meat thermometer. The internal temperature should reach 165°F (75°C). If you don’t have a thermometer, check that the juices run clear and the meat is no longer pink.
Can I cook this on a stovetop instead?
Yes, you can cook this recipe on the stovetop. Start by searing the chicken thighs in a pan for extra flavor. Then, add the maple Dijon mixture and cover. Simmer on low heat for about 30-40 minutes. Make sure to check the chicken’s internal temperature to ensure it is fully cooked.
This article covered everything you need to know for a great chicken dish. We went through the ingredients, tips for cooking, and ways to make it your own. You learned about storage and how to reheat your leftovers. Remember, you can swap ingredients to fit your needs. Follow these steps, and you will enjoy a tasty meal. Keep experimenting with flavors, textures, and servings. Happy cooking!


![To make Tie Dye Funfetti Cake Pops, you need a few simple ingredients. Here’s what you’ll need: - 1 box Funfetti cake mix - 3 large eggs - 1 cup water - 1/2 cup vegetable oil - 1 cup icing (store-bought or homemade) - 1 cup white chocolate or candy melts - Food coloring (red, blue, yellow, green) - Sprinkles (for decoration) - Lollipop sticks These ingredients come together to create a fun, colorful treat. The Funfetti cake mix adds a sweet flavor and a joyful look. Eggs and water help bind the cake mix for a soft texture. Icing brings sweetness and moisture, while white chocolate adds a smooth coat. You can customize your colors with food coloring. This makes each pop look unique! Finally, sprinkles add that extra sparkle. To see the full process, check out the Full Recipe. Baking the Funfetti Cake First, preheat your oven to 350°F (175°C). In a large bowl, mix the Funfetti cake mix with three eggs, one cup of water, and half a cup of vegetable oil. Stir until the batter is smooth. Pour the batter into a greased 9x13 inch baking pan and bake for 25 to 30 minutes. Check with a toothpick; it should come out clean. Once done, let the cake cool completely in the pan. Crumbling the Cake After the cake is cool, break it apart into a large bowl. Use your hands to crumble the cake into fine pieces. Make sure there are no large chunks left. This step is key for good texture. Incorporating Icing Next, add half a cup of icing to your crumbled cake. Use your hands or a spatula to mix it all together. The cake crumbs should be moist and hold together when squeezed. If it feels dry, add a bit more icing. Dividing and Coloring the Mixture Now, split the moist cake mixture into four bowls. Add a few drops of food coloring to each one—red, blue, yellow, and green. Mix well until the colors are bright and even. This is where the fun begins! Rolling Cake Balls Take a tablespoon of each colored mixture and roll it into a ball. Alternate the colors to create a tie-dye look. Place the cake balls on a baking sheet lined with parchment paper. Make sure they look fun and colorful. Chilling the Cake Pops Put the baking sheet with the cake balls in the fridge for at least 30 minutes. This helps them firm up and hold their shape. While they chill, you can prepare the chocolate for coating. For the complete instructions, check the Full Recipe. Mixing Techniques To get that fun tie-dye look, I recommend using a swirling method. Take small amounts of each color and gently mix without fully blending. This keeps the colors distinct. Use a spoon or your hands, and be gentle. If you mix too hard, you lose the fun swirls. Color Combination Ideas For vibrant pops, try red, blue, yellow, and green. These colors stand out well together. You can also experiment with pastel shades for a softer look. Imagine a light pink, mint green, and baby blue blend. The key is to choose colors that excite you. Best Practices for Melting When melting chocolate or candy melts, use a microwave-safe bowl. Heat in short bursts of 20 seconds, stirring in between. This prevents burning. If the chocolate is too thick, add a small amount of coconut oil. This will help it coat the pops smoothly. Alternate Coating Options If you want a twist, try using dark or milk chocolate instead of white. You can also use colored candy melts for a fun effect. Each option adds a unique flavor and look. Don't forget to sprinkle on some fun toppings right after dipping while the chocolate is still wet! For the full recipe, check out the instructions above. {{image_4}} You can switch up the flavor of your Tie Dye Funfetti Cake Pops. Here are some ideas: - Different Cake Mixes: Try other cake mixes like vanilla or chocolate. Each mix gives a unique taste. You can even find gluten-free options to suit different diets. Experiment with flavors that you love. - Alternative Icing Flavors: Use different icing flavors for fun twists. Chocolate, cream cheese, or even peanut butter can add a delightful kick. Choose flavors that match your cake mix for the best taste. Making your cake pops look great is just as fun as eating them. Here are some ways to jazz them up: - Themed Sprinkles: Choose sprinkles that match your event. Use holiday-themed sprinkles for parties or bright colors for birthdays. You can mix and match to create a fun look. - Decorative Wrapping Options: Wrap each cake pop in colorful cellophane. Tie with a ribbon for a nice touch. You can also use clear bags for a simple, yet stylish look. These make great gifts or party favors. For the full recipe, check out the [Full Recipe]. You want your tie-dye funfetti cake pops to stay fresh and tasty. Here’s how to store them properly: - Room Temperature vs. Refrigeration: You can keep cake pops at room temperature for up to two days. Just place them in an airtight container. If it’s warm outside, it’s best to keep them in the fridge. They can last in the fridge for up to a week. - Freezing Cake Pops for Later: If you want to save some for later, freezing is a great option. Wrap each cake pop in plastic wrap or foil. Then, place them in a freezer-safe bag. They can stay in the freezer for up to three months. When you’re ready to eat them, let them thaw in the fridge overnight. - How Long They Last: Tie-dye funfetti cake pops can last about 5 to 7 days in the fridge. If you freeze them, they can last up to three months. - Signs of Spoilage: Check for any changes in smell or appearance. If they smell off or have a strange texture, it’s time to toss them. Mold is a clear sign they should not be eaten. Always trust your senses! To keep your cake pops moist, add more icing. Start with half a cup and mix until the crumbs hold together. If the mix feels dry, add more icing, a little at a time. Baking time also matters. Bake the cake for 25 to 30 minutes. Check with a toothpick; it should come out clean. Overbaking can dry out your cake, so keep an eye on it. Yes! You can use any colors you like. I recommend gel food coloring. It gives bright and bold colors without making the batter too runny. To create unique palettes, mix colors. For example, mix blue and yellow for green. Let your imagination run wild! If you want alternatives to icing, consider cream cheese or whipped cream. Both add flavor and moisture. For healthier options, try yogurt or a fruit puree. They can keep your cake pops moist while reducing sugar content. You now know how to make fun Tie-Dye Funfetti Cake Pops. We discussed the simple ingredients needed, from cake mix to chocolate. I shared step-by-step instructions to guide you through baking and shaping. You learned tips for a great tie-dye effect and how to melt chocolate properly. We explored fun variations, storage tips, and answered common questions. Now, get creative and enjoy making these tasty treats for any occasion. Let your imagination run wild with flavors and colors!](https://fastmealmate.com/wp-content/uploads/2025/07/83373fa8-848b-4df7-80a1-d15ce22469bd-768x768.webp)


