Rotisserie Chicken Tostadas Crispy and Flavorful Meal

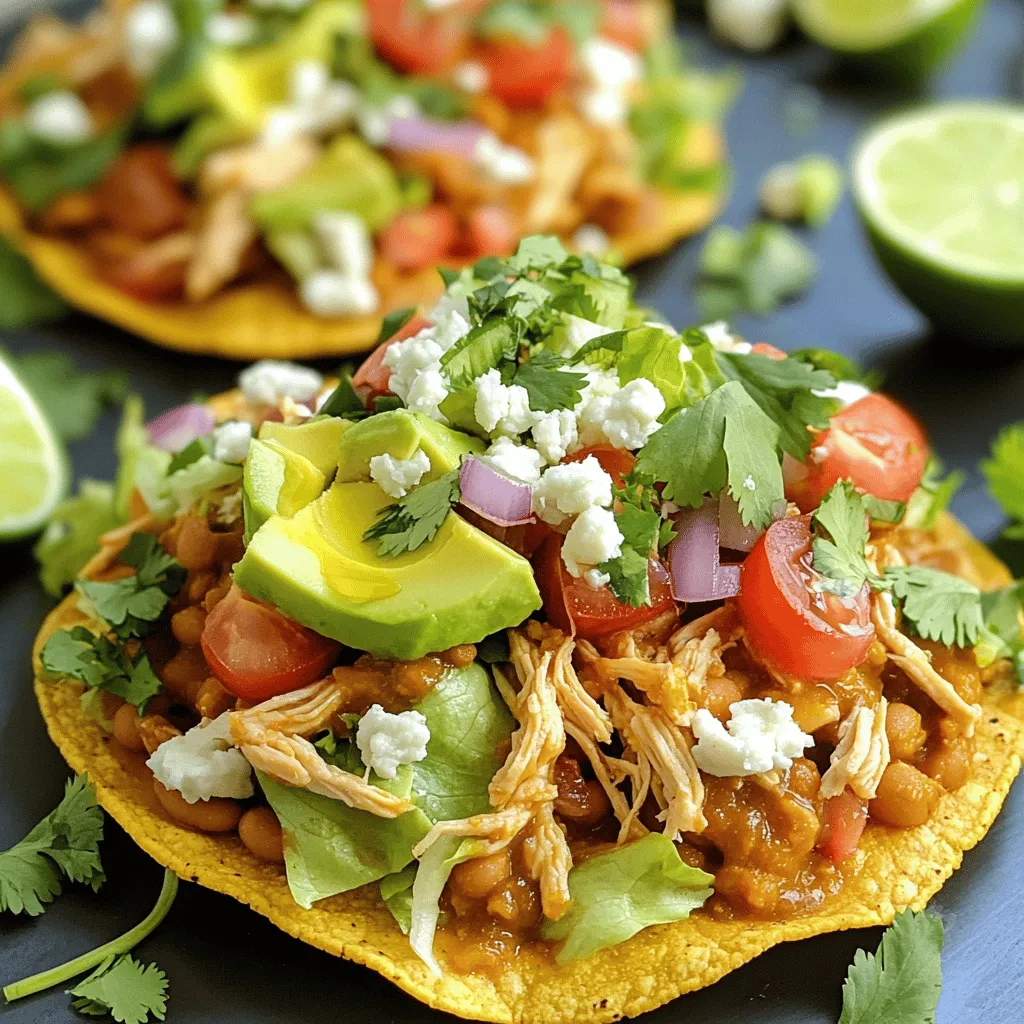
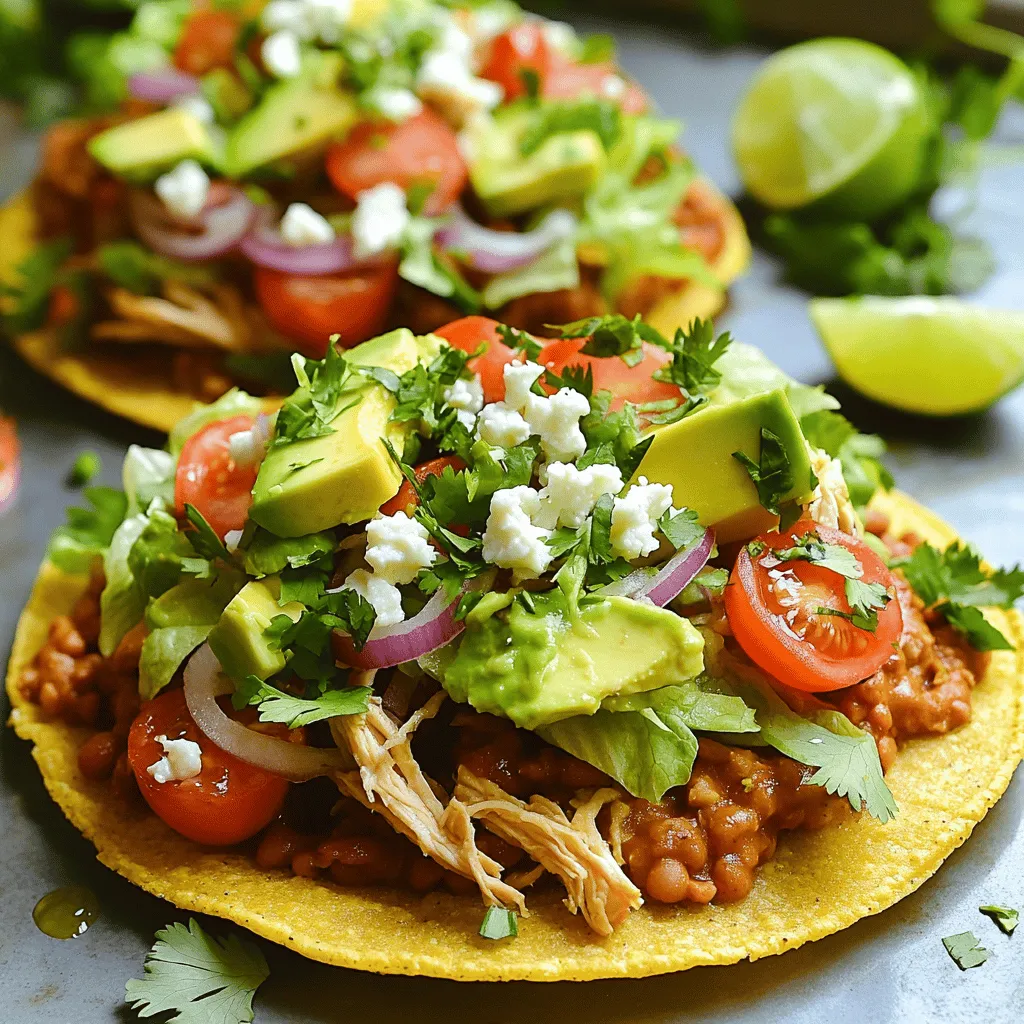
Looking for a quick and tasty meal? Try my Rotisserie Chicken Tostadas! These crispy delights combine crunchy tostada shells with savory shredded chicken and fresh toppings. You can whip these up in no time, making dinner fun and easy. Whether you want a simple weeknight dinner or a crowd-pleasing party dish, these tostadas are sure to please. Let’s dive into this flavorful recipe you won’t want to miss!
Ingredients
Main Ingredients
– 4 tostada shells
– 2 cups shredded rotisserie chicken
– 1 cup refried beans
Fresh Toppings
– 1 cup shredded lettuce
– 1 cup diced tomatoes
– ½ cup diced red onion
Garnishes and Seasoning
– ½ cup crumbled queso fresco
– 1 ripe avocado, sliced
– ¼ cup fresh cilantro, finely chopped
– 1 lime, juiced
– 1 teaspoon ground cumin
– 1 teaspoon chili powder
– Salt and pepper to taste
– Olive oil, for drizzling
For this recipe, I love using crispy tostada shells. They give a great crunch. The shredded rotisserie chicken adds flavor and makes prep easy. I also use refried beans; they help hold everything together.
Fresh toppings are a must! I always add shredded lettuce for a nice crunch. Diced tomatoes add sweetness and color. Diced red onion gives a sharp bite that balances the dish.
For garnishes, I like crumbled queso fresco. It adds a creamy texture. Sliced avocado brings a rich, buttery flavor. Fresh cilantro adds brightness, and lime juice gives a zesty kick.
I use ground cumin and chili powder for a warm spice blend. Don’t forget salt and pepper! A drizzle of olive oil adds a finishing touch.
With these ingredients, you’ll create a tasty and colorful meal. Enjoy the mix of flavors and textures in every bite!
Step-by-Step Instructions
Prepping the Tostada Shells
– Preheat your oven to 375°F (190°C). This step is key for crispy tostadas.
– Arrange the tostada shells on a baking sheet. Bake for 5-7 minutes. Watch for a light golden color.
Preparing the Filling
– In a bowl, mix the shredded rotisserie chicken with ground cumin, chili powder, lime juice, salt, and pepper.
– Stir well to coat the chicken evenly. This seasoning adds a lot of flavor.
Assembling the Tostadas
– Use a spoon to spread about 2 tablespoons of refried beans on each tostada shell.
– Pile on the seasoned chicken mixture. Make sure each tostada is full.
– Top with shredded lettuce, diced tomatoes, and red onions. Spread them evenly.
– Add sliced avocado for creaminess and color.
– Sprinkle crumbled queso fresco and chopped cilantro on top for freshness.
– Drizzle a little olive oil over each tostada. This adds a nice touch.
– Serve the tostadas right away. Add lime wedges on the side for a zesty kick.
Tips & Tricks
Ensuring Crispiness
To get crispy tostada shells, bake them at 375°F (190°C). Place them on a baking sheet. Bake for 5 to 7 minutes until they turn golden. Keep an eye on them to avoid burning. Choose high-quality tostada shells. Look for ones that are thick and sturdy. Thinner shells may break easily.
Flavor Enhancements
Add flavor with spices and herbs. Ground cumin and chili powder add warmth. You can also try smoked paprika for a deeper taste. For some heat, add jalapeños or diced serrano peppers. Fresh herbs like cilantro brighten the dish. Don’t be shy; experiment with your favorite spices!
Presentation Ideas
Serve the tostadas on a colorful platter. Arrange them in a circle or line. This makes them look inviting. For garnish, add lime wedges and extra cilantro. A squeeze of lime adds a zesty touch. You can also sprinkle some extra queso fresco on top.

Variations
Vegetarian Option
You can make a tasty vegetarian tostada by using beans and veggies. Instead of rotisserie chicken, use refried beans as the base. Add black beans or pinto beans for more protein. You can mix in corn, bell peppers, and zucchini for extra flavor and texture.
Some great plant-based proteins include:
– Tofu
– Tempeh
– Lentils
These options give you a hearty meal without meat.
Flavor Twist Ideas
For a fun twist, try Mexican-inspired toppings. You can add pickled jalapeños, corn salsa, or chipotle crema for extra heat. Want to mix it up? Consider fusion variations. Add Thai peanut sauce or Indian chutney for a unique flavor.
Feel free to experiment with your favorite flavors. The sky is the limit!
Serving Suggestions
Pair your tostadas with delicious sides. Mexican rice or a fresh guacamole works well. You can also serve them with a side of black beans or corn salad.
For drinks, margaritas are a classic choice. A refreshing limeade or iced tea also complements the meal. Enjoy your tostadas with a fun drink!
Storage Info
Storing Leftovers
To keep your tostadas fresh, store them in the fridge. Place the tostadas in an airtight container. This helps keep them from getting soggy. It’s best to store the toppings separately. This way, the tostadas stay crispy. You can freeze leftover rotisserie chicken, but avoid freezing the tostada shells. They can lose their crunch when thawed.
Reheating Instructions
When reheating tostadas, you want to keep them crispy. The best method is to use the oven. Preheat the oven to 350°F (175°C). Place the tostadas on a baking sheet. Heat for about 5-10 minutes. This works better than the microwave, which can make them chewy. If you must use the microwave, do so for just a few seconds.
Shelf Life
Leftover tostadas will last in the fridge for about 3 days. Always check for signs of spoilage. If the tostadas look or smell off, it’s best to throw them out. Look for mold or unusual textures, especially on the toppings. Staying safe with food is important!
FAQs
Can I use cooked chicken instead of rotisserie chicken?
Yes, you can use cooked chicken. Any cooked chicken works well. Shredded or diced chicken is best. Just make sure it is seasoned. You might want to add some spices for extra flavor. This way, your tostadas stay tasty and fun to eat.
How can I make tostadas ahead of time?
You can make tostadas in advance easily. Bake the tostada shells and store them. Keep them in an airtight container to stay crisp. You can also prepare the filling early. Mix the chicken, beans, and spices together. Just assemble everything before serving for the best taste.
What are the best toppings for tostadas?
The best toppings are fresh and colorful. Here are some popular choices:
– Shredded lettuce
– Diced tomatoes
– Diced red onion
– Sliced avocado
– Crumbled queso fresco
– Fresh cilantro
Feel free to mix and match. Your favorite toppings can make each tostada special.
How do I make my tostadas spicier?
To add spice, consider these tips:
– Use spicy chili powder or add diced jalapeños.
– Drizzle with hot sauce before serving.
– Mix in some diced green chiles with your chicken.
These simple changes will give your tostadas a nice kick. Enjoy the heat!
We covered the key steps to make delicious tostadas, from fresh ingredients to assembly tips. Remember, crispy shells and tasty fillings set the stage for a great meal. Get creative with toppings, and don’t shy away from trying new flavors. With proper storage, your leftovers will stay fresh, too. Enjoy your tostada-making adventure and share them with friends or family for a fun meal together.


![- 2 cups all-purpose flour - 1 ½ cups granulated sugar - ½ cup unsalted butter, softened - 1 cup creamy ricotta cheese - 3 large eggs, at room temperature - 1 tsp pure vanilla extract - 1 tsp baking powder - ½ tsp baking soda - ½ tsp salt - 1 tsp ground cinnamon - 1 cup mini chocolate chips - ½ cup crushed pistachios (for topping) - Powdered sugar (for dusting) To create a Cannoli Cake, use fresh ingredients. Fresh items bring out the best taste. Quality ricotta makes the cake creamy and rich. Fresh eggs help the cake rise well. I always suggest using high-quality vanilla extract. It enhances the flavor. You can make some substitutions if needed. For a dairy-free option, try almond or coconut milk yogurt instead of ricotta. You can also use dairy-free butter. These swaps keep the taste close to the original. Another option is to switch out regular flour for gluten-free flour. This helps those with gluten sensitivities enjoy the cake too. Whatever you choose, keep it fresh to ensure the best Cannoli Cake experience. Check the [Full Recipe] for more details. 1. Preheat the Oven: Start by preheating your oven to 350°F (175°C). 2. Prepare Cake Pans: Grease two 9-inch round cake pans with butter. Dust them with flour to help the cakes come out easily. 3. Cream the Butter and Sugar: In a large bowl, mix the softened butter and granulated sugar. Use an electric mixer for about 3-4 minutes until light and fluffy. 4. Incorporate Ricotta: Add the ricotta cheese to this mixture. Blend until it is smooth and free of lumps. 5. Mix in Eggs and Vanilla: Crack three large eggs into the bowl, mixing well after each. Add in the pure vanilla extract and combine. 6. Combine Dry Ingredients: In a separate bowl, whisk together the flour, baking powder, baking soda, salt, and cinnamon. 7. Combine Wet and Dry Mixtures: Gradually add the dry mix to the ricotta mix. Stir gently until just combined. Don’t overmix; some lumps are fine! 8. Fold in Chocolate Chips: With a spatula, fold in mini chocolate chips until they are spread throughout the batter. 9. Divide the Batter: Pour the batter evenly into the prepared pans. Smooth the tops with a spatula. - Baking Time and Temperature: Place the pans in the oven and bake for 25-30 minutes. - Check Doneness: To check if the cakes are done, insert a toothpick in the center. It should come out clean. 1. Cool the Cakes: After baking, take the cakes out and let them cool in the pans for about 10 minutes. Then, invert them onto wire racks to cool completely. 2. Layer the Cakes: Once cool, put one cake layer on a serving plate. Spread a layer of ricotta filling on top. You can mix powdered sugar with ricotta for sweetness. Place the second layer on top. 3. Frost: Use any leftover ricotta filling or whipped cream to frost the top and sides of the cake. 4. Garnish: For a lovely finish, sprinkle crushed pistachios on top. Dust it with powdered sugar before serving. For more details on the ingredients and the full recipe, check the [Full Recipe]. To get the best texture in your Cannoli Cake, avoid overmixing. Mix until the wet and dry ingredients just come together. You want some lumps to keep it light. Using room temperature ingredients is key. It helps everything blend smoothly, which gives the cake a fluffy texture. You can add spices or extracts for a unique twist. Try adding a pinch of nutmeg or almond extract for extra flavor. These small changes can make your cake stand out. For serving, consider pairing it with fresh berries or a scoop of vanilla ice cream. These sides brighten the cake and add freshness. For the full flavor experience, try my Full Recipe for Cannoli Cake. {{image_4}} You can have fun with Cannoli Cake by changing the filling. While the classic ricotta is great, try adding chocolate or fruit. - Chocolate Filling: Mix in cocoa powder or melted chocolate for a rich taste. - Fruit Filling: Use pureed strawberries or raspberries for a fresh twist. You can also switch up the cake flavors. A lemon or almond cake base adds a new layer of taste. Want to mix up the frosting? Use whipped cream, cream cheese, or even a flavored buttercream. If you want a gluten-free version, swap regular flour for almond or coconut flour. You can also find gluten-free cake mixes. For a vegan Cannoli Cake, replace eggs with flax eggs and use vegan butter. Substitute ricotta with cashew cream or a store-bought vegan alternative. If you're cutting back on sugar, reduce the granulated sugar by half. You can also use natural sweeteners like honey or maple syrup. Just keep in mind that these may change the cake's texture. These variations help you enjoy Cannoli Cake while meeting different dietary needs. For the full recipe, check out the Cannoli Cake Delight section. To keep your Cannoli Cake fresh, store it in an airtight container. This will help prevent it from drying out and losing flavor. If you have leftovers, place them in the fridge. It is best to wrap each slice in plastic wrap before putting it in the container. For freezing, slice the cake first. Wrap each slice tightly in plastic wrap, then place them in a freezer-safe bag. This way, you can take out one slice at a time. When you want to enjoy a slice, let it thaw in the fridge overnight. Cannoli Cake can stay fresh in the fridge for about 4 to 5 days. If frozen, it can last up to 3 months. Always look for signs of spoilage. If the cake smells off or has a change in texture, it's best to toss it. Mold is a clear sign that the cake is no longer safe to eat. Enjoy your Cannoli Cake while it's fresh for the best taste! What is Cannoli Cake? Cannoli cake is a delightful dessert inspired by the classic Italian cannoli. It features layers of moist cake filled with a rich ricotta mixture. The cake often includes mini chocolate chips and hints of cinnamon, giving it a sweet and creamy flavor. Can I make Cannoli Cake ahead of time? Yes! You can make cannoli cake a day or two in advance. Just store it in the fridge. Keep it covered to maintain freshness. This also allows the flavors to blend nicely. How long does Cannoli Cake last in the refrigerator? Cannoli cake lasts about 3 to 5 days in the refrigerator. Make sure to cover it well. Check for any signs of spoilage before serving. Can I use other cheeses instead of ricotta? You can use mascarpone cheese if you want a richer taste. Cream cheese is another option for a different flavor. However, ricotta provides the classic cannoli texture you crave. Pairing Cannoli Cake with beverages Cannoli cake pairs well with coffee or espresso. A glass of sweet dessert wine also complements its flavors. For a non-alcoholic option, try a chilled almond milk or vanilla soda. Ideal occasions for serving Cannoli Cake Serve cannoli cake at birthday parties, family gatherings, or holidays. It's perfect for any celebration. You can also enjoy it as a special treat on a cozy night in. Making a Cannoli Cake is fun and rewarding. You learned about fresh ingredients, step-by-step baking, and cooling tips. We explored variations and storage methods, too. Remember, fresh tastes best, and small changes can make a big difference. You can adapt this cake to fit any diet or preference. Now it’s time to gather your ingredients and start baking. Enjoy each bite of your tasty creation! This cake is a treat everyone will love.](https://fastmealmate.com/wp-content/uploads/2025/06/6e5f8d9a-9791-42a1-9598-f56c39528743-768x768.webp)
