Rosemary Parmesan Cheese Straws Crunchy and Flavorful

Welcome to a savory snack adventure! Today, I’m excited to share my recipe for Rosemary Parmesan Cheese Straws. These crunchy and flavorful treats are perfect for gatherings or a cozy night in. With just a few simple ingredients and easy steps, you’ll be impressing your friends and family in no time. Get ready to elevate your snack game with these cheesy delights that are simply irresistible!
Why I Love This Recipe
- Unique Flavor Combination: The blend of rosemary and Parmesan creates an irresistible savory snack that’s perfect for any occasion.
- Easy to Make: This recipe comes together quickly, making it a great option for last-minute gatherings or snacking.
- Versatile Snack: These cheese straws can be served warm or at room temperature, making them ideal for parties, picnics, or casual get-togethers.
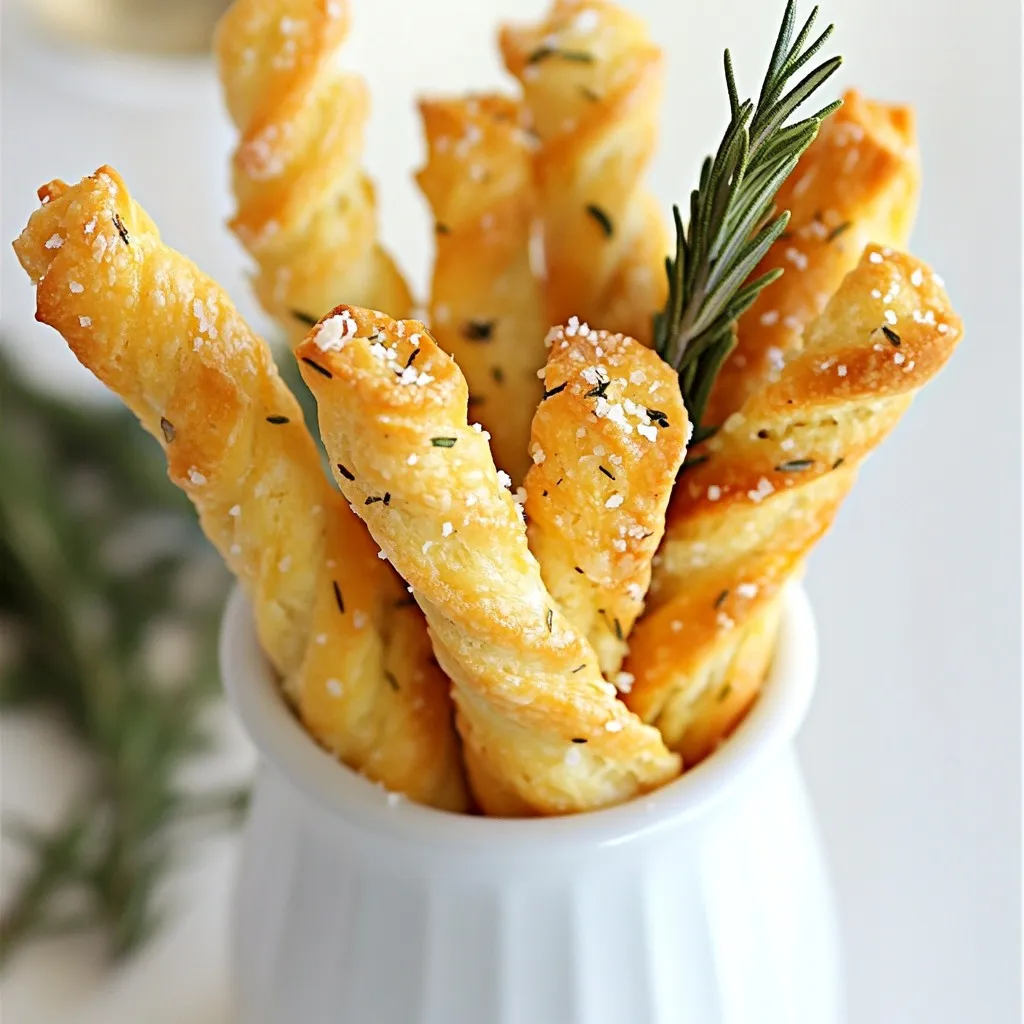
- Beautiful Presentation: With their golden color and elegant shape, they add a touch of sophistication to any platter or display.
Ingredients
Detailed List of Ingredients
– 1 cup all-purpose flour
– 1/2 cup unsalted butter, chilled and diced
– 1 cup finely grated Parmesan cheese
– 1 tablespoon fresh rosemary, finely chopped
– 1/4 teaspoon garlic powder
– 1/4 teaspoon sea salt
– 1/4 teaspoon freshly cracked black pepper
– 1 egg, beaten (for egg wash)
The right ingredients make all the difference in this recipe. First, I use all-purpose flour for a sturdy base. This flour brings the right texture. Next, the unsalted butter adds rich flavor and helps the straws puff up. I always chill and dice the butter first. It makes it easier to mix into the flour.
Parmesan cheese plays a big role in this recipe. I recommend using finely grated cheese. It melts well and gives a strong flavor. Fresh rosemary adds a bright note. I chop it finely to spread its flavor throughout the dough. Garlic powder, sea salt, and black pepper add a savory kick. They enhance the cheese and rosemary.
Finally, I use a beaten egg for an egg wash. This egg wash gives the cheese straws a nice golden color when baked. Make sure you have all these ingredients ready. It helps the process go smoothly. Each ingredient works together to create a crunchy and flavorful snack.

Step-by-Step Instructions
Preheating and Preparation
– Preheat the oven to 400°F (200°C).
– Line baking sheets with parchment paper.
Preparing the Dough
– In a large bowl, whisk together 1 cup of all-purpose flour, 1/4 teaspoon of sea salt, 1/4 teaspoon of garlic powder, and 1/4 teaspoon of black pepper. This mix gives flavor to the straws.
– Next, add 1/2 cup of chilled, diced butter. Use your hands or a pastry cutter to work it in. Aim for a crumbly texture. It should look like coarse breadcrumbs.
– Now, fold in 1 cup of finely grated Parmesan cheese and 1 tablespoon of finely chopped fresh rosemary. Mix well until everything is combined.
Shaping and Baking the Cheese Straws
– Gradually add 2 to 3 tablespoons of cold water. Mix gently until the dough starts to come together. Be careful not to overmix; you want it light and flaky.
– Turn the dough onto a floured surface. Roll it into a rectangle, about 1/4 inch thick.
– Cut the dough into strips, about 1/2 inch wide and 4 inches long. Use a sharp knife or pastry cutter for clean edges.
– Place the strips on the prepared baking sheets. Make sure they are spaced apart to puff up while baking.
– Brush the tops of each strip with 1 beaten egg. This helps them turn golden brown.
– Bake in the preheated oven for 12 to 15 minutes. Look for a rich golden color and puffed shape.
– Once baked, take them out and cool for a few minutes on the baking sheet. Then move them to a wire rack to cool completely.
Tips & Tricks
Achieving the Perfect Texture
– How to handle the dough
When you mix the dough, be gentle. Overworking it makes the straws tough. Use your fingertips to mix the butter into the flour. This helps keep the dough light. After adding water, mix until it just holds together. This short mixing time keeps the straws flaky.
– Importance of chilled ingredients
Always chill your butter before use. Cold butter creates steam while baking. This steam helps the straws puff up nicely. If the dough warms too much, the cheese straws can flatten. Keep everything cool, and you will achieve that perfect crunch.
Flavor Enhancements
– Suggestions for additional herbs or spices
Want to add more flavor? Try mixing in thyme or oregano. These herbs pair well with rosemary. A pinch of cayenne pepper can add a fun kick. You can also use smoked paprika for a rich taste.
– Ideas for dipping sauces
Cheese straws taste great on their own, but dipping sauces add fun. Try a simple marinara or a spicy aioli. A creamy ranch dip also works well. For a fresh twist, serve with a tangy yogurt dip. These sauces bring out the flavors of the cheese and herbs.
Pro Tips
- Chill the Dough: Make sure to chill the dough for at least 30 minutes before rolling it out. This helps maintain the flaky texture and makes it easier to handle.
- Experiment with Cheese: Feel free to mix different cheeses like cheddar or gouda with Parmesan for a unique flavor twist in your cheese straws.
- Ensure Even Baking: Rotate the baking sheets halfway through the baking time to ensure even browning and puffing of the cheese straws.
- Serve Fresh: These cheese straws are best served fresh out of the oven but can be stored in an airtight container for up to three days.

Variations
Alternative Cheeses
You can switch up the cheese in this recipe. Try using sharp cheddar for a bold taste. Gruyère offers a nutty flavor that pairs well with rosemary. For something creamier, use mozzarella. Mixing cheeses can create unique flavors. Blend Parmesan with feta for a tangy twist. Experiment with smoked cheeses for added depth.
Dietary Modifications
If you need a gluten-free option, use a blend of gluten-free flours. Almond flour or rice flour can work well. For dairy-free, replace Parmesan with a vegan cheese alternative. Nutritional yeast can add a cheesy flavor without dairy. Always check labels to ensure products fit your diet. These options let everyone enjoy the snack!
Storage Info
Best Practices for Storing
To keep your cheese straws fresh, store them in an airtight container. This helps retain their crunch. Place a piece of parchment paper between layers to avoid sticking. You can store them at room temperature for up to three days. If you want to keep them longer, consider freezing.
For refrigeration, put the cheese straws in the fridge if you plan to eat them within a week. Use a container that seals well. This keeps them from absorbing odors from other foods.
Reheating Instructions
When you’re ready to enjoy your cheese straws again, reheating is key. The best method is to use an oven. Preheat it to 350°F (175°C). Place the cheese straws on a baking sheet. Heat them for about 5 to 7 minutes. This will restore their crunch and flavor.
You can also use a toaster oven if you have one. It works the same way as the oven. Just be sure to watch them closely. You want to avoid burning. Enjoy your tasty cheese straws as if they were fresh from the oven again!
FAQs
Common Questions about Rosemary Parmesan Cheese Straws
– How long do these cheese straws last?
These cheese straws stay fresh for about a week when stored in an airtight container. If you want them to last longer, you can freeze them. They keep well in the freezer for up to three months.
– Can I make the dough ahead of time?
Yes, you can make the dough ahead. Wrap it tightly in plastic wrap and store it in the fridge for up to two days. This saves time and lets the flavors meld together.
– What to serve with cheese straws?
Cheese straws pair well with a variety of dips. Try serving them with marinara sauce, pesto, or a creamy cheese dip. They also make a great snack with a glass of wine or a refreshing drink.
This blog post covered the key ingredients, steps, and tips for making delicious Rosemary Parmesan Cheese Straws. We explored how to prepare the dough, shape the cheese straws, and achieve the right texture. I also shared ways to customize your recipe with different cheeses and dietary options.
Now, you can enjoy flavorful snacks that impress. With the right techniques, these cheese straws can be a fun treat for any gathering. Happy bakin

Rosemary Parmesan Cheese Straws
Ingredients
- 1 cup all-purpose flour
- 0.5 cup unsalted butter, chilled and diced into small cubes
- 1 cup finely grated Parmesan cheese
- 1 tablespoon fresh rosemary, finely chopped
- 0.25 teaspoon garlic powder
- 0.25 teaspoon sea salt
- 0.25 teaspoon freshly cracked black pepper
- 1 egg beaten (for egg wash)
Instructions
- Begin by preheating your oven to 400°F (200°C). Prepare two baking sheets by lining them with parchment paper to ensure the cheese straws do not stick.
- In a large mixing bowl, whisk together the all-purpose flour, sea salt, garlic powder, and black pepper until well combined.
- Add the chilled, diced butter into the flour mixture. Using either a pastry cutter or your fingertips, work the butter into the flour until the mixture resembles coarse breadcrumbs, creating a crumbly texture.
- Gently fold in the finely grated Parmesan cheese and the chopped fresh rosemary, mixing until the ingredients are evenly distributed throughout the dough.
- Gradually add 2 to 3 tablespoons of cold water to the mixture, combining until the dough begins to come together. Take care not to overmix; the goal is to maintain a light and flaky texture.
- Turn the dough out onto a lightly floured surface and roll it gently into a rectangle shape, aiming for a thickness of about 1/4 inch.
- Using a sharp knife or pastry cutter, slice the dough into strips approximately 1/2 inch wide and 4 inches long.
- Place the cut strips onto the prepared baking sheets, ensuring they are spaced apart to allow for puffing during baking.
- For a beautifully golden finish, brush the tops of each strip with the beaten egg wash, making sure to cover them evenly.
- Bake in the preheated oven for 12 to 15 minutes, or until the cheese straws are puffed up and a rich golden brown in color.
- Once baked, remove the cheese straws from the oven and allow them to cool for a few minutes on the baking sheet before transferring them to a wire rack to cool completely.


![- 16 oz firm tofu, pressed and cubed - 1 cup plant-based milk (almond or soy) - 1 tablespoon apple cider vinegar - 1 cup all-purpose flour - 1 cup cornmeal - 2 teaspoons garlic powder - 2 teaspoons onion powder - 1 teaspoon smoked paprika - 1 teaspoon cayenne pepper (adjust to your spice preference) - 1 teaspoon salt - 1 teaspoon black pepper - 1 tablespoon maple syrup - ¼ cup hot chili oil - Fresh pickles and sliced bread for serving I love using firm tofu for this recipe. It holds its shape and gives a nice bite. Pressing the tofu is key. It removes excess water and helps the nuggets get crispy. The buttermilk mixture is easy to make. Just mix plant-based milk with apple cider vinegar. Let it sit for five minutes. It thickens and works well for coating. For the dry ingredients, I use all-purpose flour and cornmeal. The cornmeal adds a crunchy texture. The spices pack on the flavor. Garlic powder and onion powder make the nuggets taste savory. Smoked paprika adds a lovely depth. Cayenne pepper is what brings the heat. Adjust it to make it milder or spicier based on your taste. Maple syrup in the hot oil glaze gives a sweet touch. It balances the spice perfectly. Don't forget the fresh pickles! They add a refreshing crunch when served with the nuggets. Sliced bread is optional but makes a great sandwich. Enjoy your Vegan Nashville Hot Tofu Nuggets! For the complete step-by-step guide, check out the Full Recipe. - Preheat the oven to 400°F (200°C). - Press the tofu to remove water, then cut it into nugget-sized pieces. - In a bowl, combine 1 cup of plant-based milk with 1 tablespoon of apple cider vinegar. - Let it sit for 5 minutes. This thickens and curdles the milk. - In one dish, mix 1 cup of flour with garlic powder, onion powder, smoked paprika, salt, and black pepper. - In another dish, pour in 1 cup of cornmeal and mix in cayenne pepper. - Dip each nugget in the flour mix, coating it well. - Next, dip it in the buttermilk, letting excess drip off. - Finally, roll it in the cornmeal mix, pressing gently for a thick coating. - Arrange the coated nuggets on a baking sheet lined with parchment paper. - Lightly oil the nuggets to help them crisp up. - Bake for 25-30 minutes, flipping them halfway for even browning. - In a small bowl, mix hot chili oil with 1 tablespoon of maple syrup for the glaze. - Toss the baked nuggets in the glaze to coat them evenly. Enjoy these spicy treats with fresh pickles for extra flavor! To get the best texture with tofu, pressing is key. Start by using a tofu press or a simple method. Wrap your tofu in a clean towel and place a heavy object on top. Let it press for at least 30 minutes. This step gets rid of extra moisture. It helps your nuggets become crispy. For that perfect crisp, ensure a solid coating. After you coat each nugget in the flour mix, dip it in the buttermilk mixture. Then, roll it in the cornmeal mix. The cornmeal gives a crunchy bite. Lightly spray the nuggets with oil before baking. This adds to their crispiness. Adjusting spice levels is easy. If you want more heat, add more cayenne pepper. Just remember, start small. You can always add more later. For milder nuggets, reduce the cayenne to suit your taste. You can also mix in other spices. Try smoked paprika for a deep flavor. Add some cumin for a warm touch. Garlic powder and onion powder boost the taste without extra heat. Experiment to find your perfect blend. Presentation matters! Arrange your nuggets on a large, colorful platter. Add fresh pickles on top for a pop of color. A sprig of parsley also brightens the dish. You can serve with a side of dipping sauce for added flavor. Consider using sliced bread or buns for a sandwich. It makes for a fun meal. This way, your Vegan Nashville Hot Tofu Nuggets look as good as they taste. {{image_4}} You can change the flavor of your Vegan Nashville Hot Tofu Nuggets by using different spices. Try adding cumin for a warm taste or chili powder for a kick. You can also mix in herbs like thyme or oregano. Fresh herbs add brightness and depth to each bite. These nuggets pair well with many sides. Serve them with crispy fries or a fresh salad. You can also create a delicious sandwich. Place the tofu nuggets in a bun and add your favorite toppings. Think lettuce, tomatoes, and a drizzle of vegan mayo for extra flavor. If you need a gluten-free version, swap out the all-purpose flour and cornmeal. Use almond flour instead of regular flour for the breading. For cornmeal, try using gluten-free breadcrumbs. These changes keep the nuggets tasty and the texture just right. To keep your Vegan Nashville Hot Tofu Nuggets fresh, cool them first. Let them sit at room temperature for about 30 minutes. This helps avoid steam buildup, which makes them soggy. Once cooled, pack them in airtight containers. Glass or BPA-free plastic works best. Make sure to store them in the fridge. They stay good for up to four days. To reheat your tofu nuggets, the oven is best. Preheat it to 375°F (190°C). Place the nuggets on a baking sheet. Bake them for about 10-15 minutes. This method keeps them crispy. You can also use an air fryer. Set it at 350°F (175°C) and cook for about 5-8 minutes. Avoid microwaving as it makes them soft and chewy. You can freeze these nuggets, both baked and unbaked. For unbaked nuggets, arrange them on a baking sheet. Freeze until solid, then transfer to a freezer bag. This saves space. For baked nuggets, let them cool first. Then, place them in a freezer-safe container. They last up to three months. When ready to eat, thaw overnight in the fridge. Bake or air fry them again for best results. You should use firm or extra-firm tofu. Silken tofu is too soft for nuggets. Firm tofu holds its shape well. Extra-firm tofu gives a nice texture. Press it to remove moisture for the best results. This step helps the nuggets get crispy. Yes, this recipe is nut-free. The main ingredients do not include nuts. If you want to add a creamy dip, use tahini or sunflower seed butter. Both options are safe and tasty. Always check labels to ensure all ingredients are nut-free. To kick up the heat, add more cayenne pepper. You can also mix in hot sauce for extra spice. Try using a spicy chili oil instead of regular oil. Red pepper flakes are another good option. Adjust the heat to fit your taste. Yes, you can fry the nuggets! Heat oil in a deep pan for frying. Coat the tofu nuggets well for a crispy crust. Fry in batches to keep the oil hot. This method gives a crunchy texture and rich flavor. Just be careful with hot oil. These nuggets pair well with fresh pickles and sliced bread. You can also serve them with coleslaw for a cool crunch. Dipping sauces like ranch or hot sauce add more flavor. Sweet potato fries make a great side, too! You can find the [Full Recipe] for Vegan Nashville Hot Tofu Nuggets online. In this blog post, we explored how to make Vegan Nashville Hot Tofu Nuggets. We covered key ingredients, like firm tofu and spices, and detailed how to prepare, bread, and bake them to get that perfect crunch. I shared tips for adjusting spice levels and achieving great texture. You now have ideas for serving and storing leftovers too. Enjoy creating this tasty dish, and don’t be afraid to experiment with new flavors! Dive in and make these nuggets your own.](https://fastmealmate.com/wp-content/uploads/2025/06/1c2352f9-cf3e-44e9-8ce8-a5cbad64ddd1-768x768.webp)

