Quick Watermelon Sorbet Refreshing Summer Delight

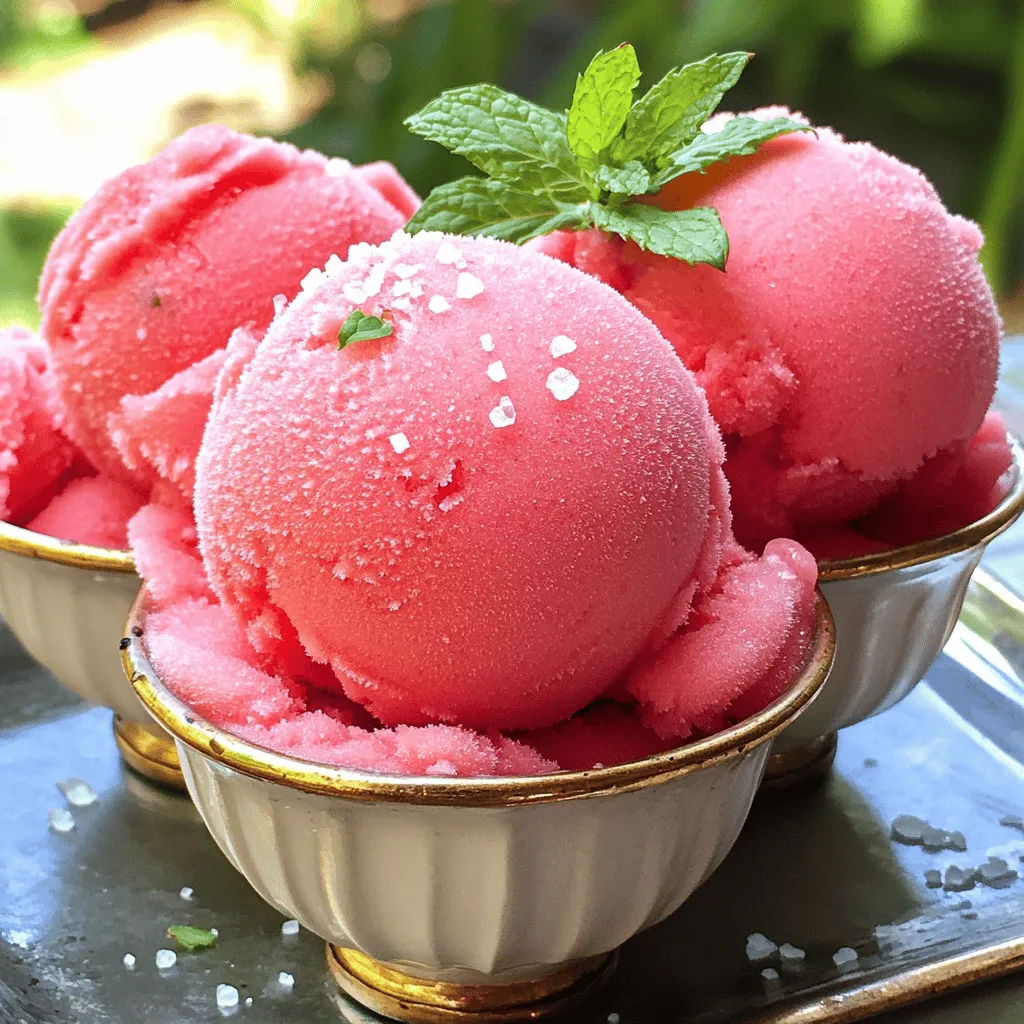
Looking for a refreshing treat this summer? I’ve got just the solution: Quick Watermelon Sorbet! This easy recipe combines just four simple ingredients, including sweet watermelon and a splash of lime. In just a few steps, you can enjoy a cool, creamy dessert that’s perfect for hot days. Let’s dive into how to whip up this summer delight without spending hours in the kitchen!
Ingredients
Key Ingredients
– 4 cups frozen seedless watermelon cubes
– 2 tablespoons honey or agave syrup
– Juice of 1 lime
– Pinch of sea salt
– Optional garnishes: fresh mint leaves
The main star of this quick watermelon sorbet is the frozen seedless watermelon. You want to make sure to cut it into small cubes before freezing. This helps it blend smoothly later on. Use ripe, sweet watermelon for the best flavor.
Next, add two tablespoons of honey or agave syrup. This sweetener will enhance the natural sweetness of the watermelon. You can adjust the amount based on your taste. If you like it sweeter, add a bit more!
Then, squeeze the juice of one lime. Lime adds a bright zing that makes the sorbet refreshing. A pinch of sea salt will balance the sweetness and enhance all the flavors.
Lastly, if you want to be extra fancy, fresh mint leaves work great as a garnish. They add a pop of color and a hint of freshness.
Step-by-Step Instructions
Preparation Steps
To start, cut your seedless watermelon into small cubes. Aim for pieces about one inch. Next, lay those cubes out on a baking sheet. Spread them evenly to help them freeze fast. Pop the baking sheet in the freezer for at least four hours. You want the watermelon to freeze solid.
Blending Process
After the watermelon freezes, it’s time to blend. Put the frozen cubes into a high-powered blender. Add the flavor enhancers: honey or agave syrup, lime juice, and a pinch of sea salt. The lime juice adds a zing, and the salt lifts the flavor. Blend on high until you get a smooth and creamy mix. If needed, stop and scrape the sides of the blender.
Next, taste your sorbet. Is it sweet enough? If not, add more honey or lime juice. Blend again to mix in any extras.
Finalizing the Sorbet
Now, transfer the smooth sorbet into an airtight container. Spread it out evenly for better freezing. Place the container back in the freezer for 1 to 2 hours. This step helps the sorbet firm up to the perfect texture.
Tips & Tricks
Sweetness Adjustments
Finding the right sweetness is key for your sorbet. Start with 2 tablespoons of honey or agave syrup. Blend this with the juice of one lime. The lime adds a nice zing and balances the sweet taste of the watermelon. After blending, taste your sorbet. If you want it sweeter, add a little more honey. Blend again to mix it well. This way, you control the sweetness to fit your taste.
Texture Improvements
A creamy sorbet is a joy to eat. To make your watermelon sorbet creamier, blend the ingredients long enough. This ensures a smooth texture. If it’s too icy, try adding a little more honey or lime juice. Another tip is to let the frozen watermelon sit for a few minutes before blending. It makes it easier to blend and gives a softer texture.
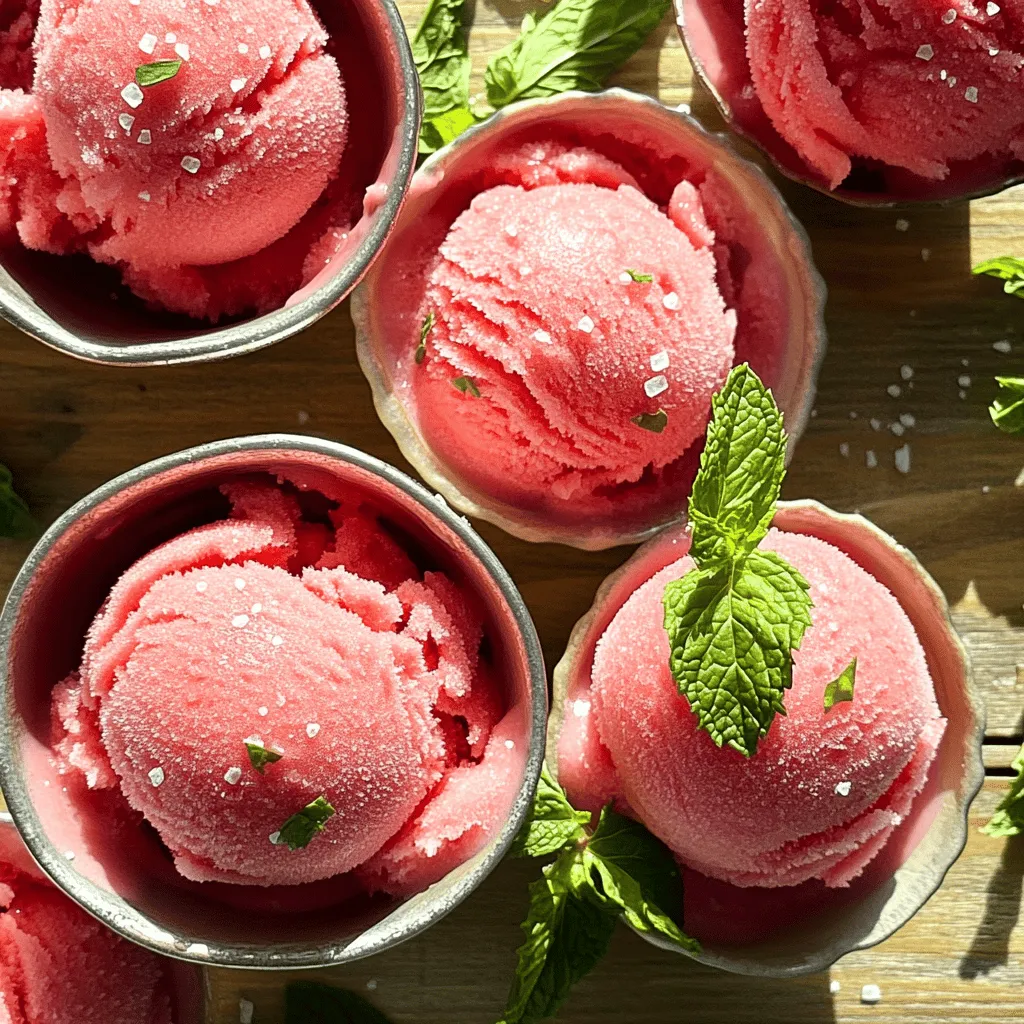
Serving Suggestions
Serve your watermelon sorbet in fun ways! Use hollowed watermelon halves for a cute bowl. This not only looks great but also adds more watermelon flavor. You can also pair the sorbet with colorful fruit skewers. For a pop of color, add fresh mint leaves on top. This makes your dish look beautiful and inviting. Enjoy serving this refreshing treat at your summer parties!

Variations
Flavor Enhancements
You can make this sorbet even more fun! Adding other fruits like strawberries works great. Just blend them in with the frozen watermelon. You can also toss in some fresh mint leaves. Mint adds a cool taste that goes well with watermelon.
Sweeteners are another way to change the flavor. You can use honey or agave syrup. If you want something less sweet, try using mashed bananas. Each sweetener gives a different taste, so experiment to find what you like best.
Dietary Adjustments
If you want to make this sorbet vegan, it’s easy! Just skip the honey and use agave syrup or maple syrup instead. These options are plant-based and still sweet.
To make it low-sugar, use ripe bananas or stevia. These will cut down on sugar while keeping the taste yummy. You can adjust the sweetness to fit your diet. Remember, it is all about enjoying your treat while staying healthy!Enjoy your creative sorbet journey!
Storage Info
Proper Storage Techniques
Choose an airtight container for your sorbet. I like using plastic containers or glass jars. These keep out air and moisture, which can spoil your treat. Make sure the lid fits tightly. Avoid using containers that are too big. If there is extra space, ice crystals can form and ruin the texture.
Recommended Freezing Duration
You can store the sorbet in the freezer for up to three months. After that, it may lose flavor and texture. For best results, eat it within one month. The sooner you enjoy it, the better it tastes.
Signs of Quality
Check for icy crystals on the top of your sorbet. If you see them, the texture may change. Also, sniff the sorbet. If it smells off or strange, it is best to throw it away. If you scoop some out and it feels hard or grainy, it may have gone bad. Trust your senses!
FAQs
How do I make Quick Watermelon Sorbet without a blender?
You can still make sorbet without a blender! Start by mashing your frozen watermelon cubes with a fork. Break them down until they are small and fluffy. Next, mix in honey, lime juice, and a pinch of sea salt. Stir well until all ingredients blend nicely. This method takes longer but can work. It will not be as smooth as using a blender. However, it will still taste great!
Can I use fresh watermelon instead of frozen?
Using fresh watermelon is possible, but it will change the texture. You need to freeze fresh watermelon cubes first. Cut the watermelon into cubes and spread them on a baking sheet. Freeze them for at least 4 hours until solid. This gives your sorbet a nice, icy texture. If you skip this step, your sorbet may come out too soft.
How long does it take to freeze watermelon for the sorbet?
Freezing watermelon cubes takes about 4 hours. To ensure they freeze well, spread them evenly on a baking sheet. This helps them freeze faster and avoids clumping. Check to see if they are solid before blending. For the best results, you can freeze them overnight. This way, you will always have frozen watermelon ready for sorbet.
In this post, we covered how to make a refreshing watermelon sorbet with just a few ingredients. We explored each step, from prepping frozen watermelon cubes to blending and freezing the mixture. Tips for improving texture and sweetness help you make it perfect. We also shared variations and storage tips for long-lasting enjoyment.
Now you’re ready to create this delicious treat at home. Enjoy the process and the tasty results!


![For this no-bake strawberry cheesecake cups, you will need: - 1 cup graham cracker crumbs - 2 tablespoons granulated sugar - 1/2 cup unsalted butter, melted - 1 cup cream cheese, softened - 1/2 cup powdered sugar - 1 teaspoon pure vanilla extract - 1 cup heavy whipping cream - 1 cup fresh strawberries, diced - Additional fresh strawberries, sliced for topping You can swap some ingredients if needed: - Use chocolate cookies instead of graham crackers for a twist. - Swap granulated sugar with brown sugar for a deeper flavor. - Low-fat cream cheese works well if you're watching calories. - Coconut cream can replace heavy cream for a dairy-free option. - If fresh strawberries are not available, try using raspberries or blueberries. When using fresh strawberries, choose ripe ones for the best taste. Look for bright red berries without any green spots. Wash them gently and pat them dry before dicing. If you want to enhance their flavor, sprinkle a little sugar on the diced strawberries and let them sit for about 10 minutes. This draws out the juices and creates a sweet syrup, making your cheesecake cups even more delicious. For the full recipe and step-by-step instructions, check out the [Full Recipe]. To make the crust, start with a mixing bowl. Add 1 cup of graham cracker crumbs and 2 tablespoons of granulated sugar. Pour in 1/2 cup of melted unsalted butter. Mix it well until the crumbs look like wet sand. This will give your crust a great flavor and texture. Next, take about two tablespoons of this crumb mixture and spoon it into each cup. Use your fingers or the back of a spoon to press it down gently. This step helps form a solid base for your cheesecake. For the cream cheese filling, grab another bowl. Beat 1 cup of softened cream cheese with an electric mixer. Keep mixing until it is smooth and creamy. Once it looks good, add 1/2 cup of powdered sugar and 1 teaspoon of pure vanilla extract. Mix until everything is silky and combined. In a separate bowl, whip 1 cup of heavy cream. Use the mixer until stiff peaks form. Be careful not to over-whip it. You want the cream to be light and fluffy. Now, gently fold the whipped cream into the cream cheese mixture. Use a spatula and mix until just combined. This folding keeps the mixture airy. Spoon the cream cheese filling over the crust in each cup. Fill them about three-quarters full. Use the spatula to smooth the tops. Next, top each cup with diced strawberries. Press them gently into the cream cheese layer. This step spreads their flavor throughout the dessert. For the final touch, add a dollop of remaining cream cheese mixture on top. Garnish each cup with a fresh strawberry slice. Now, place the cups in the refrigerator. Chill them for at least 2 hours. This step lets the layers set and enhances the flavors. Enjoy your no-bake strawberry cheesecake cups! For the full recipe, refer to the section above. To get a smooth and creamy filling, make sure your cream cheese is at room temperature. If it’s too cold, it will clump. Use an electric mixer to beat the cream cheese until it is silky. Slowly add in the powdered sugar and vanilla while mixing. This step helps blend everything perfectly. When whipping the heavy cream, stop when you see stiff peaks. Over-whipping makes it grainy. Finally, gently fold the whipped cream into the cream cheese mixture. This keeps it light and fluffy. Serve these cheesecake cups in clear glass dishes. This way, everyone can see the beautiful layers. For a fun twist, try adding a layer of chocolate sauce or a fruit puree. You can also sprinkle crushed graham crackers on top for added crunch. If you want to impress your guests, use fresh mint leaves as a garnish. It adds a nice pop of color and flavor. You’ll need a few basic tools. A mixing bowl is key for combining ingredients. An electric mixer is best for whipping the cream and mixing the filling. Use a spatula to gently fold mixtures together. For serving, small glass cups or jars work wonderfully. They show off the layers and make for a pretty presentation. Lastly, have a measuring cup and spoons on hand for accuracy. Don't forget to check out the Full Recipe to perfect your technique! {{image_4}} You can switch up the flavor of your no-bake cheesecake cups. Try chocolate by adding cocoa powder to the cream cheese mix. For mango, blend fresh mango into the cream cheese before mixing. You can even use lemon zest for a bright, citrusy kick. These simple changes keep your dessert fun and fresh. Want a lighter cheesecake? Use low-fat cream cheese instead of regular cream cheese. You can also swap out heavy cream for Greek yogurt. This keeps the taste rich but lowers the fat. Using honey or agave syrup instead of sugar can add sweetness without the extra calories. Layering is key to a stunning dessert. Start with a crust layer, then add your creamy filling. You can add a layer of fruit between the cream cheese and whipped cream. This adds texture and flavor. For a fun twist, try layering different fillings. You could alternate between plain and flavored mixes. This creates a beautiful, colorful effect in your cups. For the full recipe, check out the [Full Recipe]. To store your no-bake strawberry cheesecake cups, use airtight containers. Place the cups in the fridge right after they set. This keeps them fresh and tasty. If you make them ahead of time, cover each cup with plastic wrap or a lid. This helps avoid any weird smells from other foods in the fridge. These cheesecake cups last in the fridge for about 3 to 5 days. After that, the texture may change. You want to enjoy them when they are at their best. Always check for any signs of spoilage before serving. If you see any mold or the smell seems off, it’s best to throw them away. You can freeze these cheesecake cups if you want to save them for later. First, let them chill in the fridge for at least 2 hours. After that, cover each cup tightly with plastic wrap and foil. This extra layer helps prevent freezer burn. You can freeze them for up to 2 months. When you’re ready to enjoy, take them out and let them thaw in the fridge overnight. Remember, the texture may change a bit after thawing. For the full recipe, check back for more details! No-Bake Strawberry Cheesecake Cups last about three days in the fridge. Store them in an airtight container to keep them fresh. You want to enjoy the creamy texture and berry flavor at their best. After three days, the strawberries may lose their crispness and the filling might not be as fresh. Yes, you can use frozen strawberries. Just make sure to thaw and drain them first. This helps avoid extra moisture in your cups. Frozen strawberries can still taste great and add sweetness. However, fresh strawberries give a better texture and brightness to the dish. If you need a substitute for heavy cream, you can use coconut cream or Greek yogurt. Coconut cream adds a rich flavor, while Greek yogurt keeps it light. You may also mix milk with butter for a quick fix. Use a 3:1 ratio of milk to butter for a creamy texture. Just remember, these swaps may change the overall taste slightly. You learned how to make no-bake strawberry cheesecake cups. We covered ingredients, tips, and storage methods. Remember to choose fresh berries for the best taste. Use my tips for a creamy texture and fun flavor twists. Store them right to enjoy later. With these steps, you can craft a delicious treat easily. Embrace your creativity, and have fun making these cheesecake cups!](https://fastmealmate.com/wp-content/uploads/2025/06/462f42fe-2b9d-4e42-aace-05b4fd02c510-768x768.webp)
