Pumpkin Spice Latte Tiramisu Cups Easy and Delicious

Get ready to indulge in a fall favorite with my Pumpkin Spice Latte Tiramisu Cups! This easy, no-bake treat blends rich coffee, creamy mascarpone, and warm spices for a delightful dessert that’s perfect for any gathering. Whether you’re a novice or a pro in the kitchen, I’ll guide you through the steps to create these tasty cups. Dive in, and let’s make your dessert game shine this season!
Ingredients
Main Ingredients for Pumpkin Spice Latte Tiramisu Cups
– 1 cup strong brewed coffee, cooled to room temperature
– 1 tablespoon pumpkin pie spice
– 1 cup mascarpone cheese, softened
– 1 cup heavy cream, chilled
– 1/2 cup powdered sugar
– 1 teaspoon vanilla extract
– 1 cup pumpkin puree
– 12 ladyfinger cookies
– Cocoa powder, for dusting
– Dark chocolate shavings, optional for garnish
These ingredients come together to make a rich and creamy dessert. The strong brewed coffee gives a bold flavor. Pumpkin pie spice adds warmth and sweetness. Mascarpone cheese creates a smooth texture. Heavy cream lightens the mix and adds fluffiness. Powdered sugar sweetens the overall dish perfectly. Vanilla extract enhances all the flavors. Pumpkin puree brings a lovely color and taste. Ladyfingers soak up the coffee and help build layers. Finally, cocoa powder and dark chocolate shavings finish it off with a touch of elegance.
Common Substitutions
– Alternatives for mascarpone cheese: If you can’t find mascarpone, you can use cream cheese. Mix it with a bit of sour cream to get a similar taste.
– Low-sugar options for powdered sugar: For a healthier twist, consider using a sugar substitute like erythritol or stevia. Just make sure to check the conversion ratio for sweetness.
– Dairy-free substitutes for heavy cream: Use coconut cream or a nut-based cream. Both options will give a nice texture without dairy.
These substitutions help you stay flexible while making this delicious dessert.
Step-by-Step Instructions
Preparing the Coffee Mixture
To make the coffee mixture, start with strong brewed coffee. Let it cool to room temp. Add one tablespoon of pumpkin pie spice to the coffee. Stir well to mix the flavors. This spice adds warmth and depth. Be careful not to make the coffee too bitter. The right brew will balance the sweet cream later.
Creating the Cream Mixture
For the cream mixture, grab a large bowl. Add one cup of mascarpone cheese. Then, add one cup of chilled heavy cream and half a cup of powdered sugar. Don’t forget one teaspoon of vanilla extract! Use an electric mixer on medium speed. Beat until you see soft peaks form, which takes about 2 to 3 minutes. This mixture should be thick and creamy.
Layering the Tiramisu Cups
Now, let’s soak the ladyfingers. Dip each one quickly into the spiced coffee. Be sure they are coated but not too soggy. If they soak too long, they will fall apart. Start layering in your serving cups. Place two soaked ladyfingers at the bottom of each cup. Then, spoon a layer of the pumpkin mascarpone mixture over them. Smooth it out gently. Repeat this process until you fill each cup, finishing with the creamy mixture on top.
Chilling and Setting
Chilling is key for this dessert. Cover the cups tightly with plastic wrap. Place them in the fridge for at least four hours. For the best flavor, let them chill overnight. This allows all the flavors to blend well. Before serving, dust the tops lightly with cocoa powder. Add dark chocolate shavings for a nice touch if you like.
Tips & Tricks
Achieving the Best Flavor
Using fresh pumpkin puree makes a big difference. It gives the tiramisu a rich taste. Fresh puree adds depth and sweetness. You can roast a pumpkin or buy canned puree. If you buy canned, choose a brand with no added sugar.
To enhance flavors, consider adding a pinch of nutmeg or cinnamon. These spices pair well with pumpkin. You can also mix in a dash of espresso powder. This adds a bold coffee flavor that complements the latte.
Perfecting the Texture
For creamy tiramisu, whip the heavy cream until soft peaks form. This gives the dessert a light and airy feel. Be gentle when folding the pumpkin puree into the cream. You want a smooth mix, not a deflated one.
To avoid soggy ladyfingers, dip them quickly into the coffee mixture. Just a brief soak is all you need. If they get too wet, they lose their shape. Layer them quickly in the cups for the best texture.
Presentation Ideas
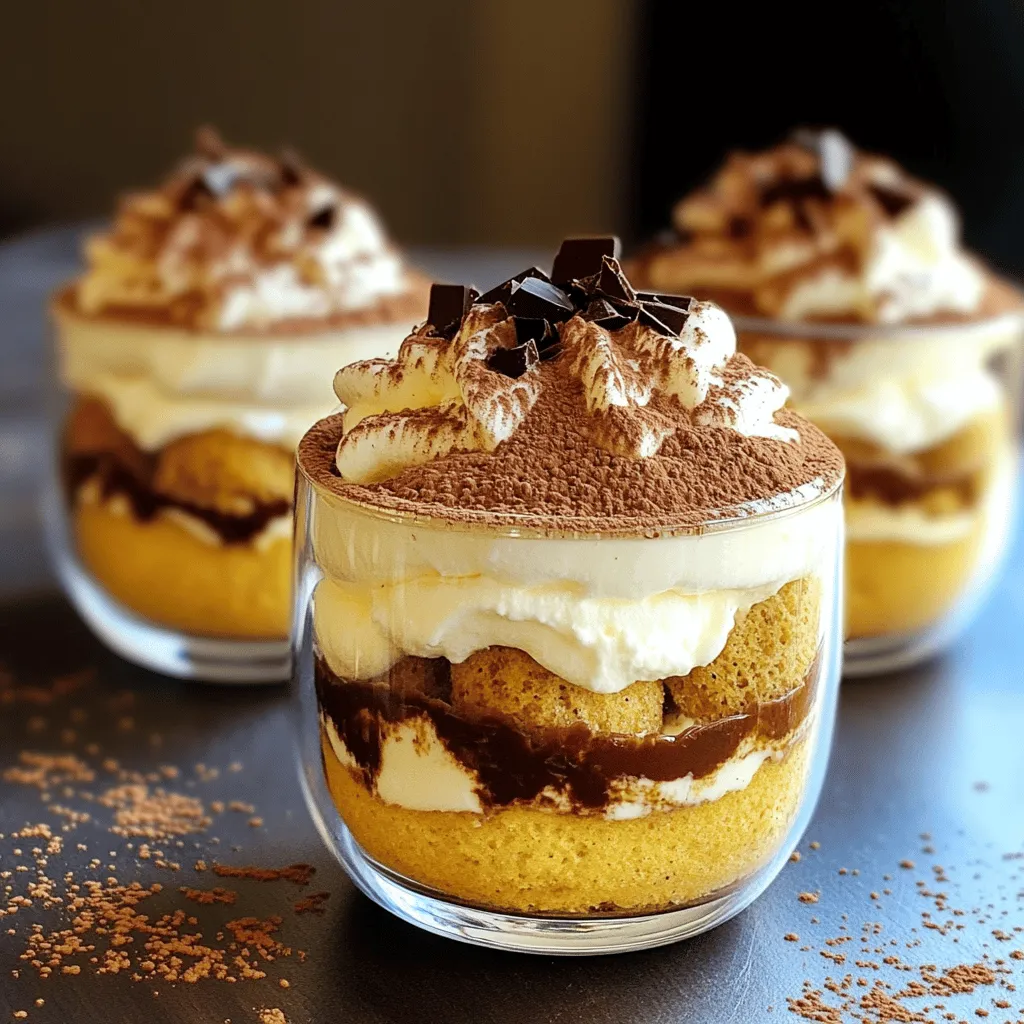
Serving tiramisu in cups is fun and easy. Use clear glasses to show off the layers. You can also use small jars for a rustic look. This adds charm to your dessert.
For garnishing, dust cocoa powder on top for a classic finish. Add dark chocolate shavings for a touch of elegance. A sprinkle of extra pumpkin pie spice can also impress your guests. Small touches make a big difference in how your tiramisu looks.

Variations
Flavor Modifications
You can enhance your Pumpkin Spice Latte Tiramisu Cups in fun ways. Adding layers of caramel or chocolate can take this dessert to the next level. A drizzle of caramel on top adds sweetness. Dark chocolate shavings provide a rich, bitter note that balances the sweetness. You can also spice up the flavor by using different extracts. Instead of vanilla, try almond or hazelnut extract for a twist.
Dietary Adaptations
If you want a vegan version of these cups, use dairy-free cream cheese and coconut cream. You can also swap ladyfingers for vegan cookies. For gluten-free options, look for gluten-free ladyfingers. They are often found in specialty stores. Make sure to check the label to confirm they are gluten-free. This way, everyone can enjoy this tasty treat!
Seasonal Variations
To make your tiramisu cups feel festive, you can adapt them for the holidays. Add peppermint extract for a winter flavor. You can also incorporate spices like nutmeg or ginger for a warm twist. These adjustments keep your dessert in tune with the season. They also make it fun and exciting for your guests.
Storage Info
Refrigeration Guidelines
You can store your pumpkin spice latte tiramisu cups in the fridge for up to three days. Always cover the cups with plastic wrap to keep them fresh. This helps avoid drying out and keeps the flavors strong. Before serving, check that they still look creamy and taste great.
Freezing Options
You can freeze tiramisu cups, but it may change the texture. To freeze, wrap each cup tightly in plastic wrap and then foil. This keeps out air and prevents freezer burn. When you’re ready to eat, transfer the cups to the fridge to thaw overnight. Avoid the microwave, as it can ruin the creamy layers. Once thawed, enjoy your delicious dessert!
FAQs
How can I make this recipe in advance?
You can easily prepare Pumpkin Spice Latte Tiramisu Cups ahead of time. Here are some tips:
– Make the cream mixture: Prepare the mascarpone mixture and store it in the fridge.
– Soak ladyfingers: You can soak the ladyfingers a few hours before serving.
– Assemble cups: Layer the cups and chill them overnight. This helps the flavors blend well.
– Garnish last: Add cocoa powder and chocolate shavings just before serving for freshness.
What can I substitute for mascarpone if I can’t find it?
If you can’t find mascarpone cheese, don’t worry! Here are some great alternatives:
– Cream cheese: Soften it and mix with heavy cream for a similar texture.
– Ricotta cheese: Blend it smooth to mimic mascarpone’s creaminess.
– Cottage cheese: Blend cottage cheese until smooth for a lighter option.
These substitutes work well, but the flavor may change slightly.
How can I ensure my tiramisu sets properly?
To ensure your tiramisu sets just right, follow these key points:
– Chill time: Refrigerate for at least 4 hours, but overnight is best.
– Layering: Make sure your layers are even and not too thick.
– Soaking: Dip ladyfingers quickly in coffee so they don’t get too soggy.
– Use fresh ingredients: Fresh mascarpone and pumpkin puree enhance flavor and texture.
By keeping these tips in mind, you’ll serve up a perfect Pumpkin Spice Latte Tiramisu Cup every time!
This blog explored how to make delicious Pumpkin Spice Latte Tiramisu Cups. We covered the main ingredients, like strong coffee, mascarpone cheese, and pumpkin puree. You learned helpful tips for flavor and texture, plus fun presentation ideas.
For best results, use fresh pumpkin puree and layer well. You can even adapt this recipe to fit dietary needs. Enjoy creating this tasty treat, and don’t hesitate to experiment with flavors. Your guests will love it!


![To make homemade pumpkin spice creamer, you need a few key ingredients. Here’s the list: - 1 cup whole milk (or your favorite milk alternative) - 1 cup heavy cream - 1/2 cup pumpkin puree (canned or homemade) - 1/4 cup pure maple syrup - 1 teaspoon vanilla extract - 1 teaspoon pumpkin pie spice (or a blend of cinnamon, nutmeg, and ginger) - 1/4 teaspoon ground cinnamon - A pinch of fine sea salt Each ingredient brings its own flavor and texture. The milk and cream create a rich base. The pumpkin puree gives that warm autumn flavor. Maple syrup adds sweetness, while vanilla adds depth. The spices create that perfect pumpkin spice blend we all love. If you have dietary needs, don’t worry! You can easily swap some ingredients. For a dairy-free option, use almond milk or oat milk instead of whole milk. Coconut cream works well if you want a dairy-free alternative to heavy cream. You can also use agave syrup if you need a different sweetener. Just make sure to taste as you go! Choosing the right ingredients makes a big difference. Always pick fresh pumpkin puree. If you can, opt for pure pumpkin without extra sugar or additives. Look for real maple syrup, not the imitation kind. It tastes better and is healthier. When it comes to spices, fresher is always better. Check the expiration dates on your spices for maximum flavor. To start, gather your ingredients. You will need: - 1 cup whole milk (or your favorite milk alternative) - 1 cup heavy cream - 1/2 cup pumpkin puree - 1/4 cup pure maple syrup - 1 teaspoon vanilla extract - 1 teaspoon pumpkin pie spice - 1/4 teaspoon ground cinnamon - A pinch of fine sea salt Next, grab a medium saucepan. Pour in the whole milk and heavy cream. Add the pumpkin puree and whisk it together. Make sure the mixture is smooth and blended. Set your heat to medium. As it warms, keep whisking gently. Be careful not to let it boil. When the mixture is warm, add in the maple syrup, vanilla extract, pumpkin pie spice, ground cinnamon, and salt. Whisk it all together until it’s mixed well. This step makes your creamer rich and flavorful. Keep an eye on your heat. If it gets too hot, the creamer can curdle. You want to heat it through, not cook it. Stir often to help it heat evenly. The goal is to create a cozy, warm mix that smells like fall. Once heated, take the saucepan off the heat. Let the creamer cool for about 10 to 15 minutes. This cooling time lets the flavors come together nicely. To make sure your creamer is smooth, strain it through a fine-mesh sieve. This removes any lumps from the pumpkin puree. Pour the strained creamer into a clean jar or pitcher. After that, let the creamer cool to room temperature. Once cooled, seal it with a lid and put it in the fridge. It will thicken a bit as it cools. Before use, give it a gentle shake. Now, it’s ready to add to your favorite coffee or tea for that perfect fall touch! For the full recipe, check out the instructions above. Enjoy your homemade treat! To get the best taste, focus on high-quality ingredients. Use fresh pumpkin puree for a rich flavor. If you prefer sweet, adjust the maple syrup to your liking. Adding a bit more pumpkin pie spice can enhance the fall flavor. Always taste as you mix. This helps you find your perfect balance. One big mistake is letting the mixture boil. Boiling can change the texture and flavor. Also, don’t skip the straining step. Straining helps remove any lumps, giving you a smooth creamer. Lastly, avoid using stale spices. Fresh spices make a huge difference in taste. For a thicker creamer, use more heavy cream and less milk. You can also let the creamer cool longer before storing. This allows it to thicken. If you find it too thick later, just whisk in a bit of milk until you reach your desired consistency. {{image_4}} You can make your pumpkin spice creamer even better! Try adding a few drops of almond extract for a nutty twist. If you want a richer flavor, add a spoonful of cocoa powder. This change adds depth and a hint of chocolate. You can also adjust the sweetness. If you love it sweeter, add more maple syrup or a bit of brown sugar. You have many options for milk alternatives. Almond milk, oat milk, and coconut milk all work well. Almond milk gives a light, nutty taste. Oat milk adds creaminess, making it feel rich. Coconut milk offers a tropical vibe that pairs well with spices. Just remember to choose unsweetened versions if you want more control over the sweetness. Want to switch things up with the seasons? Use fresh pumpkin puree in the fall for a vibrant flavor. In winter, try adding a touch of peppermint extract for a festive twist. During the summer, you can swap pumpkin for ripe bananas to make a banana spice creamer. Each change brings new flavors and keeps your coffee exciting. For the complete recipe, check out the [Full Recipe]. To keep your homemade pumpkin spice creamer fresh, pour it into a clean jar. Make sure the jar has a tight lid. This helps keep out air and light, which can spoil the creamer. Always let it cool to room temperature first. Once it’s cool, seal it and place it in the fridge. Store the creamer on a middle shelf in your fridge. This spot usually stays at a safe, stable temperature. Avoid putting it in the door, where temperatures change often. Always shake the jar gently before using. This helps mix the ingredients that may settle. Homemade pumpkin spice creamer lasts about one week in the fridge. After that, it may start to spoil. Look for signs like a sour smell or changes in color. If you see any lumps or strange texture, throw it away. Always trust your senses when it comes to food safety. For the full recipe, check the provided details above. Yes, you can! Non-dairy milk works great in this recipe. Almond, oat, or coconut milk will all add unique flavors. Just keep in mind that each milk has a different texture. Some may be creamier, while others are lighter. Choose one that you enjoy! Homemade pumpkin spice creamer lasts about one week in the fridge. Store it in an airtight container to keep it fresh. Always check for any off smells or changes in texture before using it. Yes, you can freeze pumpkin spice creamer! Pour it into ice cube trays for easy use later. When you need some, just pop a cube into your coffee. It will add flavor as it melts. Maple syrup is my favorite sweetener for this creamer. It adds a nice depth of flavor. You can also use sugar, honey, or agave syrup. Start with a small amount, then taste and adjust to your liking. Enjoy experimenting with different sweeteners! In this post, we explored how to make pumpkin spice creamer. We covered key ingredients, optional substitutes, and tips for choosing quality items. You learned step-by-step instructions to prepare, cook, and store your creamer. I shared tips to perfect flavor and avoid common mistakes. You can also discover ways to vary the recipe with different flavors and milk. Proper storage ensures your creamer stays fresh. Now you’re ready to create a delicious, customized pumpkin spice creamer that fits your needs! Enjoy your coffee or dessert with this tasty treat.](https://fastmealmate.com/wp-content/uploads/2025/07/58885fb5-0183-4e31-91f9-f6f3ea6e6529-768x768.webp)
![To make Greek Chickpea Cucumber Feta Salad, you will need: - 1 can (15 oz) chickpeas, thoroughly drained and rinsed - 1 medium cucumber, diced into bite-sized pieces - 1 cup cherry tomatoes, halved - 1/2 medium red onion, finely chopped - 1 cup feta cheese, crumbled - 1/4 cup Kalamata olives, pitted and halved - 1/4 cup fresh parsley, finely chopped - 3 tablespoons extra virgin olive oil - 2 tablespoons red wine vinegar (or substitute with apple cider vinegar) - 1 teaspoon dried oregano - Salt and freshly ground black pepper to taste You can swap out some ingredients based on what you have. No feta cheese? Use goat cheese or a dairy-free option. If you don’t like Kalamata olives, green olives work well too. For a crunchier salad, add bell peppers or radishes. You can also mix in some avocados for a creamy twist. Don't have red wine vinegar? Use lemon juice or apple cider vinegar instead. Fresh ingredients make this salad shine. When you use ripe tomatoes and crisp cucumbers, you enhance the flavor and texture. Fresh herbs like parsley brighten the dish. They add a pop of color and a burst of flavor. The quality of your olive oil matters too. A good extra virgin olive oil brings depth to the dressing. Using fresh produce not only boosts taste but also adds vital nutrients. Enjoying this salad means savoring the vibrant flavors of the Mediterranean. Start by gathering all your ingredients. You will need: - 1 can (15 oz) chickpeas, thoroughly drained and rinsed - 1 medium cucumber, diced into bite-sized pieces - 1 cup cherry tomatoes, halved - 1/2 medium red onion, finely chopped - 1 cup feta cheese, crumbled - 1/4 cup Kalamata olives, pitted and halved - 1/4 cup fresh parsley, finely chopped In a large mixing bowl, add the chickpeas, cucumber, cherry tomatoes, and red onion. Stir gently to mix everything well. Next, it’s time to add flavor and texture. Carefully fold in the crumbled feta cheese, Kalamata olives, and fresh parsley. Use a gentle hand to keep the feta intact. This adds creaminess to the salad. Now, let’s whip up the dressing. In a small bowl, combine: - 3 tablespoons extra virgin olive oil - 2 tablespoons red wine vinegar (or apple cider vinegar) - 1 teaspoon dried oregano - Salt and freshly ground black pepper to taste Whisk these ingredients together until the mixture is smooth and well blended. The dressing will enhance the salad's taste. Drizzle the dressing over the salad mixture in the large bowl. Using a gentle folding motion, toss everything together. You want all the ingredients to be nicely coated. Let the salad sit at room temperature for 10-15 minutes. This resting time allows the flavors to meld beautifully. For the full recipe, check the Mediterranean Chickpea Cucumber Feta Delight. To keep your Greek Chickpea Cucumber Feta Salad fresh, choose the best ingredients. Use ripe cherry tomatoes and crisp cucumbers. Look for bright green, firm cucumbers. Always rinse canned chickpeas well to remove any canning liquid. This step helps reduce sodium and enhances flavor. Store leftover salad in an airtight container in the fridge. This will help maintain its freshness for up to 2 days. Serve your salad at room temperature for the best taste. This allows the flavors to shine. If you store it in the fridge, take it out about 20 minutes before serving. Letting it warm slightly helps enhance the taste and makes for a more enjoyable meal. To boost the flavor of your salad, try adding fresh herbs. Basil or mint can add a nice twist. A squeeze of fresh lemon juice can brighten the dish even more. For a spicy kick, add a pinch of red pepper flakes. Mixing in different olives can also create a unique taste. If you want to change the dressing, add a touch of honey or Dijon mustard for extra depth. These small changes can make your salad even more exciting. For the full recipe, check out the Mediterranean Chickpea Cucumber Feta Delight. {{image_4}} You can easily boost the protein in your Greek chickpea cucumber feta salad. Grilled chicken, shrimp, or even tofu work well. Just cut them into bite-sized pieces. Mix them in with the chickpeas. This adds flavor and makes the salad more filling. If you want a vegan version, swap the feta cheese for avocado or a plant-based cheese. Avocado gives a creamy texture and healthy fats. You can also add hemp seeds for more protein. This keeps the salad fresh and tasty without any animal products. Feel free to change up the ingredients based on the season. In spring, add fresh radishes for a crunchy bite. In summer, diced bell peppers add sweetness. In fall, try roasted butternut squash for warmth. Each swap keeps your salad exciting and full of flavor. Explore the [Full Recipe] for more ideas on how to make this dish your own! To keep your Greek chickpea cucumber feta salad fresh, store it in an airtight container. This will help keep the flavors strong and the ingredients crisp. If you have leftovers, it’s best to separate the dressing from the salad. This way, the salad won’t get soggy. Just toss the dressing in when you’re ready to enjoy it again. When stored properly, the salad lasts about 3 to 5 days in the fridge. The chickpeas and feta cheese hold up well. However, the cucumber and tomatoes start to lose their crunch after a couple of days. Make sure to check for any signs of spoilage, like a funky smell or slimy texture. I do not recommend freezing this salad. The textures change, and the fresh ingredients do not thaw well. If you want to prep ahead, consider freezing the chickpeas separately. They can last up to 3 months in the freezer. Just thaw them in the fridge overnight before mixing them back into your salad. For the best taste, always enjoy your salad fresh! For the full recipe, refer back to the Mediterranean Chickpea Cucumber Feta Delight. Yes, you can make this salad the night before. Just keep it in the fridge. The flavors will blend well overnight. However, the salad may lose some crunch. To keep it fresh, add the cucumber and feta just before serving. If you don’t have feta, try using goat cheese or ricotta. Both options bring a creamy taste. You can also use a dairy-free cheese for a vegan twist. Just choose a cheese that crumbles well to mimic feta. To spice up your salad, add chopped jalapeños or red pepper flakes. You can also mix in a spicy dressing. Try adding a dash of hot sauce to the olive oil and vinegar mix. This will give your salad a nice kick. Yes, this salad is gluten-free! All the ingredients are naturally free of gluten. Chickpeas, cucumber, tomatoes, and feta are all safe for a gluten-free diet. It's a great choice for those with gluten sensitivity. Enjoy this fresh and tasty salad without worry. In this blog post, I covered the core ingredients and their importance. We explored how to prepare, mix, and dress the salad. I also shared tips for freshness and serving. You learned about different variations to suit your taste and how to store your salad properly. Eating fresh, tasty food is fun and easy. Enjoy your Greek Chickpea Cucumber Feta Salad, and don’t be afraid to experiment with new flavors!](https://fastmealmate.com/wp-content/uploads/2025/07/24431354-d8c0-436c-9845-ce85b88e9160-768x768.webp)
. Prepare to impress your friends and family! - In a medium saucepan, combine diced Granny Smith apples, brown sugar, ground cinnamon, ground nutmeg, and fresh lemon juice. - Cook over medium heat for 5-7 minutes. Stir occasionally until the apples are tender and caramelized. Cooking the apples is key. The sugar helps them become sweet, while the spices add warmth. The lemon juice brightens the flavor, making it pop. You want the apples to be soft but not mushy. The perfect mix will smell heavenly! - Take a large serving board and spread softened butter evenly across the surface. - Carefully layer the warm caramelized apples over the butter. The butter acts as a rich base. It helps the apples stick and adds creaminess. Make sure to cover the board well. This step sets the stage for the sweet treats to come. - Generously drizzle caramel sauce over the apples. - If you like, sprinkle chopped pecans or walnuts on top. Finish with a pinch of flaky sea salt. The caramel sauce enhances the sweetness and creates a lovely glossy finish. The nuts give a nice crunch, while the sea salt balances the flavor. This dish looks amazing and tastes even better! You can serve it with toasted crostini or crisp apple slices. Don't forget to check out the Full Recipe for more details! For this recipe, I recommend using tart apple varieties. Granny Smith apples work great. Their tartness balances the sweet caramel. Honeycrisp apples are another excellent choice. They add a nice crunch and flavor. Make sure your butter is at room temperature. Softened butter spreads easily on the board. This creates a smooth base for the apples. If the butter is too cold, it will not spread well. Feel free to experiment with spices. Add a pinch of cloves for warmth. You could also try vanilla extract for extra depth. These little tweaks can elevate the taste. Each bite can become even more delightful. {{image_4}} You can easily add a twist to your butter board. Incorporate chocolate chips. Just sprinkle them over the caramelized apples. You can also drizzle melted chocolate on top. This adds rich flavor and a fun look. Do you have nut allergies? No problem! Replace the nuts with seeds like pumpkin or sunflower seeds. If you prefer, you can skip the nuts entirely. Your butter board will still taste amazing! Feel free to switch up the flavors! Use different nut butters, like almond or cashew. You can also try flavored butter spreads. Each variation brings a new taste and experience. Keep your Caramel Apple Pie Butter Board in the refrigerator. Use an airtight container to keep it fresh. This helps to maintain the flavors and textures. For the best taste, enjoy this treat within 2-3 days. After that, the apples may lose their crispness. If you want to serve it warm, gently warm it in the microwave. Heat it in short bursts to avoid cooking the apples again. This helps to bring back the cozy, warm flavors that make this dish so special. A butter board is a fun and tasty way to serve butter. You take a large board and spread softened butter across it. Then, you add delicious toppings. It’s like a charcuterie board, but with butter! You can use sweet or savory toppings. The Caramel Apple Pie Butter Board uses caramelized apples, cinnamon, and nuts for a sweet treat. It’s perfect for sharing at parties or family gatherings. Yes, you can prep this butter board ahead! Make the caramelized apples and store them in the fridge. Just keep them in an airtight container. You can spread the butter on the board when you are ready to serve. Then, layer the apples and drizzle the caramel sauce. This way, you save time and still enjoy a fresh dish. Yes, you can make a vegan version! For the butter, use coconut oil or vegan butter. You can also make your own caramel using coconut milk and brown sugar. This way, you keep the same flavors but make it vegan-friendly. Enjoy the same delicious taste while being kind to dietary needs! This butter board recipe is simple, fun, and full of flavor. We started with caramelized apples and buttery goodness, then added our favorite toppings. You can adjust the recipe to fit your taste. Use different apples, add nuts, or go nut-free. Remember, store leftovers well to keep them fresh. This dish is perfect for sharing and can fit any diet with easy swaps. Enjoy making your own version of this tasty treat!](https://fastmealmate.com/wp-content/uploads/2025/07/ddf5207e-0125-4d49-a59c-c6b722e82f52-768x768.webp)


![To make Minute Cajun Shrimp and Corn Chowder, you need some key ingredients: - 1 lb large shrimp, peeled and deveined - 2 cups corn kernels (fresh or frozen) - 1 medium onion, diced - 2 cloves garlic, minced - 1 red bell pepper, diced - 2 medium potatoes, peeled and diced These ingredients form the base of your chowder. The shrimp give it a nice protein punch. The corn adds sweetness, while the onion and garlic bring out savory flavors. Next, we need our liquids to make this chowder rich and tasty: - 4 cups chicken or vegetable broth - 1 cup coconut milk The broth adds depth, while coconut milk gives creaminess. You can use chicken broth for a richer taste, or vegetable broth if you want a lighter option. Now, let's spice things up! - 2 tablespoons Cajun seasoning - 1 teaspoon smoked paprika - Salt and fresh cracked pepper to taste - 2 tablespoons olive oil - Fresh parsley, chopped (for garnish) Cajun seasoning brings the heat and flavor. Smoked paprika adds a nice touch, giving a warm, smoky flavor. Salt and pepper are essential for balance. Olive oil helps to sauté the veggies, and parsley makes it pretty. For the full recipe, check out [Full Recipe]. 1. Heat 2 tablespoons of olive oil in a large pot over medium heat. 2. Once the oil shimmers, add 1 diced onion, 2 minced garlic cloves, and 1 diced red bell pepper. 3. Sauté these ingredients for about 4-5 minutes until the onions are soft and fragrant. 4. Next, add 2 diced potatoes to the pot. Cook for another 5 minutes, stirring often. 1. Sprinkle in 2 tablespoons of Cajun seasoning and 1 teaspoon of smoked paprika. 2. Stir well to coat the vegetables with the spices. 3. Pour in 4 cups of chicken or vegetable broth and bring the mixture to a gentle simmer. 4. Cook for 10-15 minutes until the potatoes are fork-tender. 1. Add 2 cups of corn and 1 pound of peeled shrimp to the pot. 2. Gradually stir in 1 cup of coconut milk until blended. 3. Cook for an additional 5 minutes until the shrimp turn pink and opaque. 4. Taste the chowder and adjust the seasoning with salt and fresh cracked pepper as needed. 5. Let it rest for a few minutes to thicken before serving. This process ensures you create a delicious and comforting chowder that captures the essence of Cajun cooking. For the full recipe, check the earlier section. For this chowder, I recommend sautéing the vegetables rather than boiling them. Sautéing brings out the sweet flavors in the onion and red bell pepper. Use medium heat and keep an eye on them. Avoid letting them brown too much, as this can change the taste. To avoid overcooking the shrimp, add them near the end of cooking. They only need about five minutes to cook through. When they turn pink and opaque, they are done. Remove them from the heat right away to keep them tender. To boost the taste, consider adding a pinch of cayenne pepper or paprika. Both will add depth without overwhelming the dish. Fresh herbs like thyme or cilantro can also brighten the chowder. If you want a different creamy texture, you can swap coconut milk for heavy cream or even Greek yogurt. Each option adds richness while changing the flavor slightly. Serve the chowder in deep bowls for a cozy feel. A sprinkle of fresh parsley on top adds color and freshness. You could also add a dash of extra Cajun seasoning for a nice touch. Pair your chowder with crusty bread or cornbread. Both make great sides for dipping. They also complement the rich flavors of the chowder. For a refreshing twist, serve with a light salad on the side. {{image_4}} You can easily make this chowder fit your diet. - Gluten-free options: Use gluten-free broth and check labels on your seasonings. They should not have gluten. - Dairy alternatives: Swap coconut milk with almond milk or oat milk. This keeps it creamy without dairy. Feeling creative? Here are some fun swaps. - Other seafood options: You can use crab or lobster instead of shrimp. Both add a rich flavor. - Additional vegetables to include: Try adding diced carrots or celery. They add crunch and more flavor. Adjusting the flavors can make this dish your own. - Changing the spice level: If you like it mild, use less Cajun seasoning. For a spicy kick, add more! - Using different types of broth for variations: Chicken broth gives a warm taste, but vegetable broth offers a lighter flavor. Try both to see which you prefer. For the full recipe, refer to the original instructions to get started! To store leftovers, let the chowder cool first. Pour it into an airtight container. This keeps it fresh longer. I recommend using glass or BPA-free plastic containers. They seal well and do not absorb odors. If you want to freeze the chowder, follow these steps: 1. Cool the chowder completely. 2. Divide it into portions in freezer-safe bags or containers. 3. Remove as much air as possible before sealing. For reheating frozen chowder, thaw it in the fridge overnight. Heat it gently on the stove over low heat. Stir often to prevent sticking. In the fridge, you can keep the chowder for about 3 to 4 days. If you freeze it, it lasts for up to 3 months. Always check for freshness before eating. Making Minute Cajun shrimp and corn chowder takes just 30 minutes. You spend about 10 minutes prepping the ingredients. Then, you cook everything for 20 minutes. It's a quick meal for busy days. Yes, you can use frozen shrimp. Just make sure to thaw them first. Frozen shrimp are often easier to find and save time. They cook just as well in the chowder. If you don't have Cajun seasoning, you can use a mix of spices. Try paprika, cayenne pepper, garlic powder, and onion powder. You can also make a simple blend at home. This helps you customize the flavors to your taste. For a milder chowder, reduce the cayenne pepper. This blog post shared a simple recipe for Cajun shrimp and corn chowder. You learned about the main ingredients, broths, and seasonings that bring flavor. I also outlined step-by-step instructions for perfect results. Helpful tips and dietary variations enhance your chowder experience. In the end, this chowder is flexible and easy to make. Enjoy experimenting with flavors and ingredients your way. Make it your own, and savor every bite.](https://fastmealmate.com/wp-content/uploads/2025/07/c6449679-e116-43ab-bcba-93cf12d2671e-768x768.webp)