Orange Clove Sugar Cookies Sweet and Simple Treat

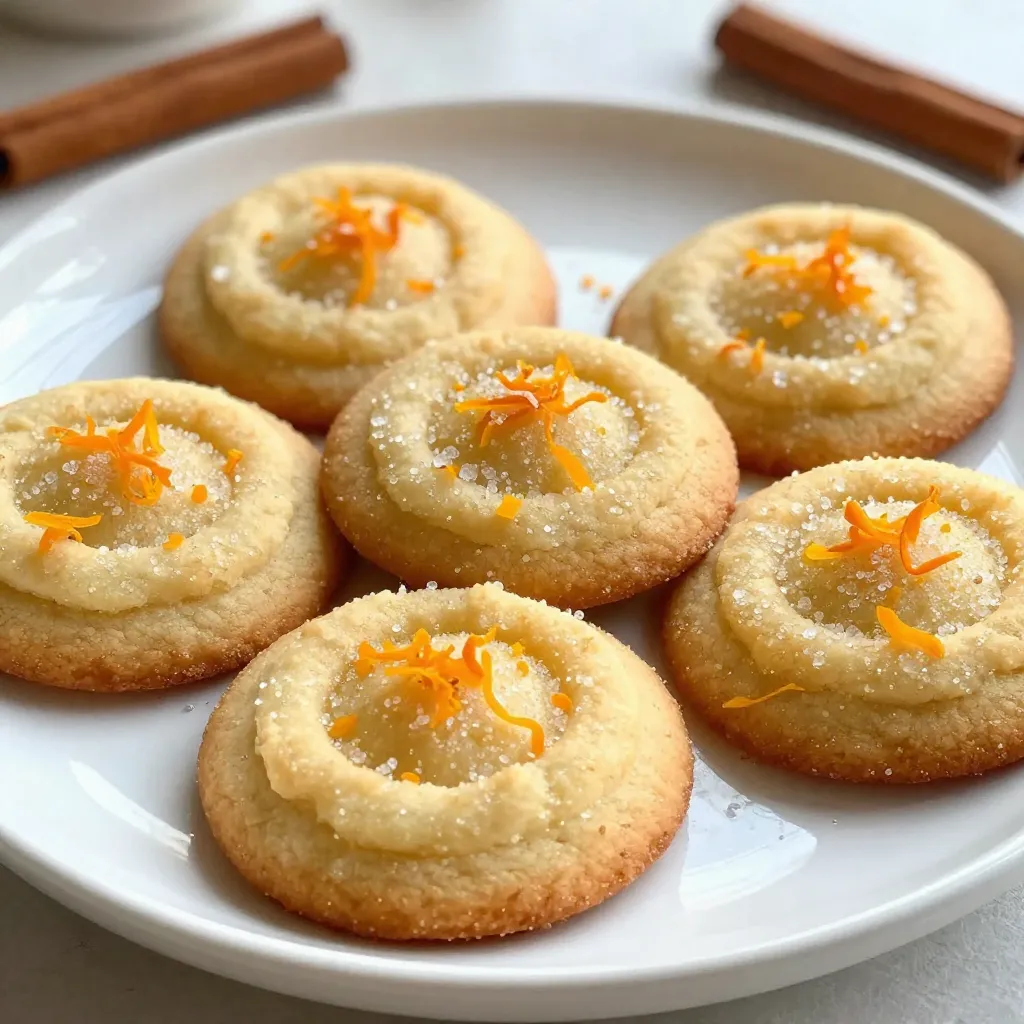
Welcome to a delightful baking adventure where vibrant orange meets warm clove! My Orange Clove Sugar Cookies are not just sweet; they’re a simple treat bursting with holiday spirit. Perfect for sharing or enjoying yourself, these cookies are easy to make and sure to impress. Follow me through each step, and let’s bake something special together that fills your home with welcoming scents and cozy flavors!
Why I Love This Recipe
- Delightful Flavor Combination: The blend of orange zest and warming spices like cloves and cinnamon creates a uniquely festive flavor that’s perfect for any occasion.
- Easy to Make: This recipe is straightforward and requires simple ingredients, making it accessible even for novice bakers.
- Perfect Texture: The cookies come out soft in the center with slightly crispy edges, offering a delightful contrast in every bite.
- Versatile Treat: These cookies are not only great for holiday gatherings, but they also make a charming snack for any afternoon tea or coffee break.
Ingredients
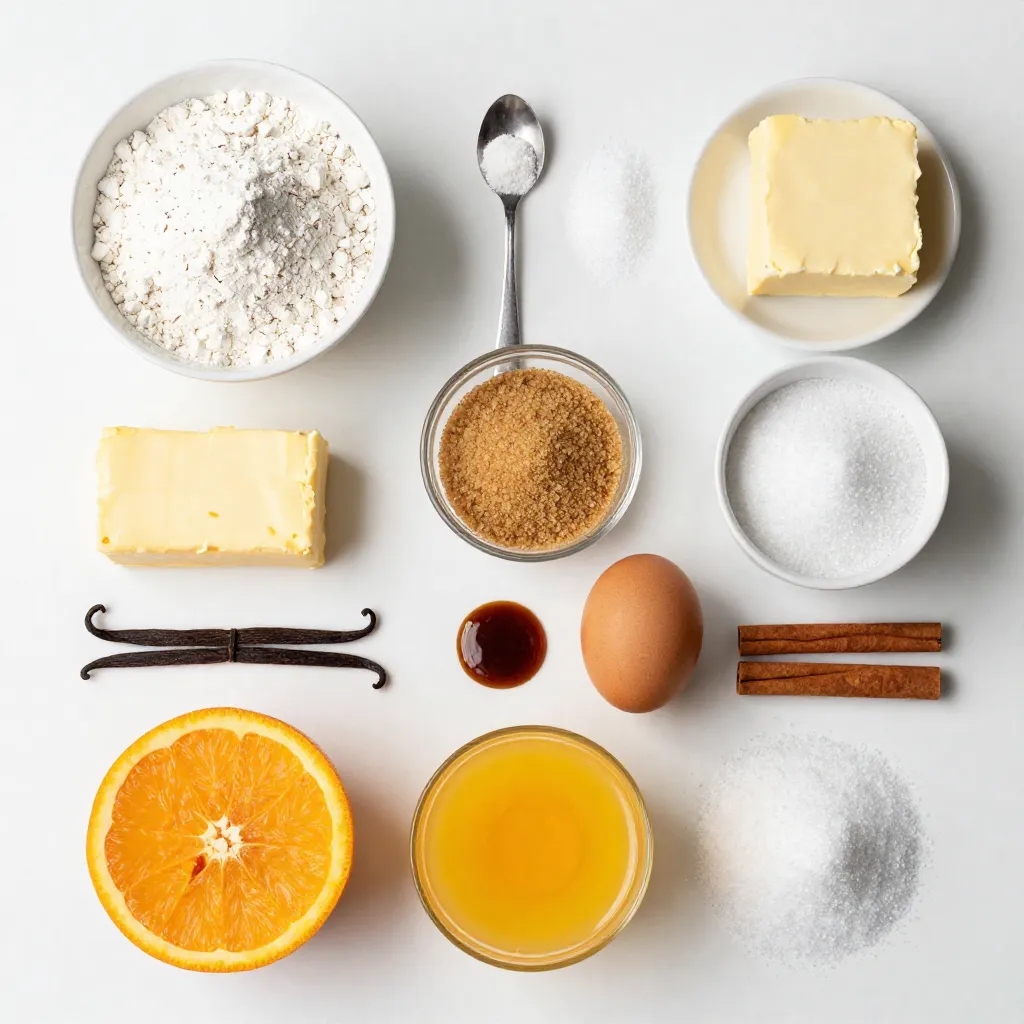
List of Required Ingredients
– 2 ¾ cups all-purpose flour
– 1 teaspoon baking powder
– ½ teaspoon baking soda
– ¼ teaspoon salt
– 1 teaspoon ground cloves
– 1 teaspoon ground cinnamon
– 1 cup unsalted butter
– 1 cup granulated sugar
– ½ cup packed brown sugar
– 1 large egg
– 2 teaspoons pure vanilla extract
– Zest of 1 large orange
– 3 tablespoons fresh orange juice
– Extra granulated sugar for rolling
These ingredients create a delightful mix of flavors. The all-purpose flour forms the base, giving the cookies structure. Baking powder and baking soda help them rise, while salt enhances the taste. Ground cloves and cinnamon add warmth and spice, making these cookies special.
Unsalted butter is key for a rich flavor. The mix of granulated and brown sugar adds sweetness and moisture. The egg binds everything together, ensuring a soft texture. Vanilla extract brings a lovely aroma.
The zest and juice from the orange give these cookies their fresh, bright flavor. Finally, rolling them in extra sugar adds a delightful crunch. Each ingredient plays a part in making these cookies a treat you’ll love!

Step-by-Step Instructions
Preheat and Prepare Baking Sheets
First, preheat your oven to 350°F (175°C). This heat makes the cookies rise well. Next, grab two baking sheets. Line them with parchment paper. This helps stop the cookies from sticking.
Mix Dry Ingredients
In a medium bowl, add 2 ¾ cups of all-purpose flour. Then, mix in 1 teaspoon of baking powder, ½ teaspoon of baking soda, and ¼ teaspoon of salt. Finally, add 1 teaspoon of ground cloves and 1 teaspoon of ground cinnamon. Whisk these dry ingredients together until they blend well. Set this bowl aside for now.
Cream Butter and Sugars
In a large bowl, take 1 cup of softened unsalted butter. Add 1 cup of granulated sugar and ½ cup of brown sugar. Use an electric mixer on medium speed. Mix until the mixture is light and fluffy, about 3 to 4 minutes. This step adds air to your cookies.
Combine Wet Ingredients
Once fluffy, add 1 large egg to the butter-sugar mix. Then, pour in 2 teaspoons of pure vanilla extract. Next, add the zest of 1 large orange and 3 tablespoons of fresh orange juice. Keep mixing on medium speed until the mixture is smooth and well combined.
Incorporate Dry Ingredients
Now, take your bowl of dry ingredients. Gradually add it to the wet mixture. Mix on low speed. This helps keep the flour from flying everywhere. Mix until just combined. Be careful not to overmix, or the cookies may not be soft.
Shape and Bake Cookies
Using your hands or a cookie scoop, roll the dough into 1-inch balls. After rolling, coat each ball with extra granulated sugar. This gives them a sweet crunch. Place the sugar-coated balls on the baking sheets, spacing them about 2 inches apart. Bake in the oven for 10 to 12 minutes. The cookies should have lightly golden edges, with soft centers. Let them cool on the baking sheets for 5 minutes before moving them to a wire rack.
Tips & Tricks
Avoiding Overmixing
To keep your cookies light, avoid overmixing the dough. When you add the dry mix to the wet mix, only stir until you see no flour. Overmixing makes cookies tough, not soft. This is key for a great texture. Take your time and mix gently.
Ensuring Soft Centers
For soft centers, bake the cookies until the edges are golden but the middle looks a bit undercooked. This will ensure they stay soft while cooling. After baking, let them rest on the sheet for five minutes. This helps them firm up just right without losing that chewy center.
Perfecting the Sugar Coating
For that sweet crunch, roll each dough ball in granulated sugar. This gives a nice finish and adds extra sweetness. Make sure to coat evenly. You can also use a mix of sugar and orange zest for added flavor and a pop of color. This small step makes a big difference!
Pro Tips
- Use Fresh Spices: Freshly ground spices can significantly enhance the flavor of your cookies. Consider grinding your cloves and cinnamon just before use for a more vibrant taste.
- Chill the Dough: If you have time, chill the dough for 30 minutes before rolling it into balls. This will help the cookies maintain their shape and prevent excessive spreading during baking.
- Check for Doneness: Cookies will continue to cook slightly after being removed from the oven. Look for lightly golden edges and soft centers to achieve that perfect chewy texture.
- Storage Tip: Store your cookies in an airtight container at room temperature. For longer freshness, consider adding a slice of bread to help keep them moist.
Variations
Substitute Ingredients
– Gluten-free option
You can make these cookies gluten-free. Replace the all-purpose flour with gluten-free flour blend. Ensure it has xanthan gum for better texture. This helps the cookies stay soft and chewy.
– Vegan modification
To make these cookies vegan, swap the unsalted butter for coconut oil or vegan butter. Use a flax egg instead of a regular egg. Mix one tablespoon of ground flaxseed with three tablespoons of water. Let it sit for five minutes before adding it to the mix.
Flavor Enhancements
– Additional spices or zest
You can enhance the flavor by adding more spices. Try a pinch of nutmeg or ginger for warmth. You can also add more orange zest for a brighter taste. This will make the cookies even more fragrant.
– Different citrus options
While orange is great, you can use other citrus fruits. Lemon or lime zest can add a nice twist. They will give a fresh, zesty flavor to the cookies. Explore these options to create your own unique treats!
Storage Info
Storing Baked Cookies
Once your Orange Clove Sugar Cookies cool, store them in an airtight container. This keeps them fresh and soft. Layer parchment paper between the cookies to avoid sticking. You can keep them at room temperature for up to one week. If you want them to last longer, refrigerate them.
Freezing Cookie Dough
Freezing cookie dough is a great option. Shape the dough into balls and freeze them on a baking sheet. Once they are solid, transfer them to a freezer bag. This way, you can bake fresh cookies anytime! The dough will stay good for up to three months. Just remember to thaw it in the fridge before baking.
Shelf Life of Cookies
These cookies have a good shelf life. At room temperature, they last about one week. In the fridge, they stay fresh for two weeks. If you freeze them, they last up to three months. That means you can enjoy these cookies later without losing flavor!
FAQs
What do Orange Clove Sugar Cookies taste like?
Orange Clove Sugar Cookies have a warm, sweet flavor. The orange zest adds a bright, citrusy note. Ground cloves and cinnamon bring a cozy spice to each bite. Together, these flavors create a unique taste that feels like a warm hug.
Can I make these cookies in advance?
Yes, you can make these cookies in advance. You can either bake them and store them in an airtight container. They will stay fresh for about a week. Alternatively, you can prepare the dough and freeze it. When you’re ready, just thaw and bake.
How do I know when the cookies are done baking?
You can tell the cookies are done by looking at the edges. They should be lightly golden. The centers will look soft and slightly underbaked. This gives them the perfect chewy texture once cooled.
What should I serve with Orange Clove Sugar Cookies?
These cookies pair well with many drinks. A hot cup of tea or coffee complements their sweet flavor. You can also serve them with milk for a classic treat. They make a great snack for any time of day.
How can I decorate these cookies?
Decorating these cookies is simple and fun. You can sprinkle extra orange zest on top for color. A light glaze made of powdered sugar and orange juice adds shine. You can also use colored sugar or sprinkles for a festive touch.
You now have a complete guide to making delicious Orange Clove Sugar Cookies. We covered the key ingredients, step-by-step instructions, and useful tips. You learned about ingredient substitutions and flavor options to suit your taste. Proper storage methods help keep your cookies fresh longer.
Enjoy baking these cookies and sharing them with friends and family. The flavors will surprise you, and the process is simple. Happy bakin

Orange Clove Sugar Cookies
Ingredients
- 2.75 cups all-purpose flour
- 1 teaspoon baking powder
- 0.5 teaspoon baking soda
- 0.25 teaspoon salt
- 1 teaspoon ground cloves
- 1 teaspoon ground cinnamon
- 1 cup unsalted butter, softened to room temperature
- 1 cup granulated sugar
- 0.5 cup packed brown sugar
- 1 large egg
- 2 teaspoons pure vanilla extract
- 1 large orange zest
- 3 tablespoons fresh orange juice
- to taste granulated sugar for rolling
Instructions
- Begin by preheating your oven to 350°F (175°C). Prepare two baking sheets by lining them with parchment paper to prevent sticking.
- In a medium mixing bowl, combine the all-purpose flour, baking powder, baking soda, salt, ground cloves, and ground cinnamon. Whisk these dry ingredients together until they are well blended, then set the bowl aside.
- In a separate large mixing bowl, use an electric mixer to beat the softened butter together with the granulated sugar and brown sugar. Mix on medium speed until the mixture is light and fluffy, approximately 3-4 minutes.
- Once the butter-sugar mixture is airy, add in the egg, pure vanilla extract, zest of the orange, and fresh orange juice. Continue mixing on medium speed until everything is well combined and smooth.
- Gradually incorporate the dry ingredient mixture into the wet mixture, adding it slowly while mixing on low speed. This will help to prevent any flour from flying out of the bowl. Mix until just combined; be careful not to overmix.
- Using your hands or a cookie scoop, roll the dough into 1-inch balls. After rolling, coat each ball with granulated sugar for a delightful crunch and sweetness.
- Arrange the sugar-coated dough balls on the prepared baking sheets, making sure to space them about 2 inches apart to allow for spreading while baking.
- Place the baking sheets in the preheated oven and bake for 10-12 minutes. The cookies should have lightly golden edges, while the centers remain soft and slightly underbaked.
- After baking, allow the cookies to sit on the baking sheets for about 5 minutes. This will help them firm up a bit before transferring to a wire rack to cool completely.


![- Grated zucchini (approximately 1 medium-sized) - 1 cup all-purpose flour - ½ cup unsweetened cocoa powder - ½ cup granulated sugar - ½ cup packed brown sugar - 2 large eggs - ½ cup vegetable oil Zucchini is the star of this recipe. It adds moisture, making the brownies soft and fudgy. I love using about one medium-sized zucchini, grated. This amount will give you the right texture without making the brownies too wet. Next, we need flour and cocoa powder. The flour gives structure, while cocoa powder adds a rich chocolate flavor. These two ingredients work together for a perfect balance of taste and texture. Sugar is essential for sweetness. I use both granulated and brown sugar. Granulated sugar gives a nice crunch, while brown sugar adds depth and moisture. Eggs are crucial in binding the ingredients and providing lift, making the brownies fluffy. Lastly, vegetable oil adds richness and keeps the brownies soft. - Dark chocolate chips - Additional toppings or mix-ins Dark chocolate chips are an optional treat. They add extra chocolatey goodness to each bite. If you want some crunch, consider adding nuts or even shredded coconut. You can also top the brownies with a sprinkle of sea salt or powdered sugar for a touch of elegance. For the full recipe, refer to the section above. First, preheat your oven to 350°F (175°C). This step is key for even baking. Next, take a 9x9 inch baking pan. Lightly grease it or line it with parchment paper. This makes it easier to remove the brownies later. In a medium bowl, combine the following dry ingredients: - 1 cup all-purpose flour - ½ cup unsweetened cocoa powder - 1 teaspoon baking powder - ½ teaspoon baking soda - ½ teaspoon salt Whisk these together until well mixed. This helps to blend the flavors and ensures the brownies rise nicely. In a large bowl, whisk together these wet ingredients: - ½ cup granulated sugar - ½ cup packed brown sugar - 2 large eggs - ½ cup vegetable oil - 1 teaspoon vanilla extract Mix until smooth and creamy. This will create a rich base for your brownies. Now, carefully fold the grated zucchini into the wet mixture. Make sure it’s evenly spread throughout. Then, gradually add the dry mixture. Stir gently until just combined. Avoid overmixing, as this can make your brownies dense. Pour the brownie batter into your prepared pan. Spread it evenly for uniform baking. Bake in your preheated oven for 25-30 minutes. To check for doneness, insert a toothpick in the center. If it comes out with a few moist crumbs, they are ready! Let the brownies cool in the pan for about 15 minutes. After that, transfer them to a wire rack. This helps them cool completely and set the texture. Once fully cooled, cut them into squares for serving. Enjoy your delicious zucchini brownies! For the full recipe, check out the details above. To make light and fluffy brownies, avoid overmixing your batter. After adding the dry ingredients to the wet mix, stir gently. This keeps the brownies soft. When you overmix, air gets trapped, and they can become dense. Just mix until you see no dry flour. Trust me, this simple step makes a big difference! Boost the flavor of your brownies with spices or extracts. Try adding a pinch of cinnamon or nutmeg for warmth. You can also use almond or peppermint extract for a unique twist. These small additions can elevate your brownies into something special. Experiment with what you like! Garnishing your brownies can make them look and taste better. Lightly dust the top with powdered sugar for a sweet touch. You might also serve them with a scoop of vanilla ice cream. The cold ice cream pairs well with warm brownies. Add fresh berries on the side for a pop of color and flavor. Enjoy these little extras to make your dessert shine. For the complete recipe, check out [Full Recipe]. {{image_4}} You can make your zucchini brownies even better with a few swaps. Instead of regular flour, try whole wheat flour. This change adds fiber and nutrients. You can also use alternative sweeteners like honey or maple syrup. These options cut down on refined sugars while keeping the taste sweet. Want to mix it up? Add some fun flavors! Chopped nuts like walnuts or pecans add crunch. Dried fruits, such as cranberries or raisins, give a nice chew. If you love chocolate, try using milk or white chocolate chips instead of dark chocolate. Each option creates a unique twist on the classic recipe. If you prefer plant-based meals, you can still enjoy these brownies. Replace the eggs with flaxseed meal or applesauce. For oil, use coconut oil or unsweetened applesauce. This way, you create a delicious vegan treat without losing flavor. You can find the full recipe to get started on these delightful variations. To keep your zucchini brownies fresh, store them in an airtight container. This will help prevent them from drying out. If you have leftover brownies, place a piece of parchment paper between layers. This keeps them from sticking together. Make sure to store them at room temperature for the best taste. Freezing is a great way to save zucchini brownies for later. First, let the brownies cool completely. Then, cut them into squares. Wrap each square in plastic wrap. After that, place them in a freezer-safe bag or container. Label the bag with the date. When you want to eat one, take a brownie out and let it thaw in the fridge overnight. You can also warm it in the microwave for about 15 seconds. Zucchini brownies last about 3 days at room temperature. If refrigerated, they can stay fresh for up to a week. However, for the best flavor and texture, enjoy them within the first few days. Keeping them in the fridge helps maintain their moisture and taste. For a delicious treat, don’t forget to check out the Full Recipe! Yes, you can use frozen zucchini. Just remember to thaw it first. After thawing, squeeze out extra water using a clean cloth. This step helps keep your brownies from getting too soggy. Frozen zucchini works well and keeps the flavor intact. To check for doneness, look for a shiny top. The edges should pull away from the pan slightly. You can also gently press the center; it should spring back. For a more precise test, use a toothpick. If it comes out with a few moist crumbs, your brownies are ready. Yes, you can make egg-free brownies! Replace each egg with 1/4 cup of unsweetened applesauce or 1/4 cup of mashed banana. You can also use flaxseed meal. Mix one tablespoon of flaxseed with three tablespoons of water. Let it sit for five minutes before using. These substitutes keep your brownies moist and tasty. Leftover zucchini has many uses. You can add it to soups and salads for extra crunch. You can also make zucchini fritters or stir-fry it with your favorite veggies. Grate it into pasta sauces or bake it in muffins. You can even freeze it for future recipes. Zucchini brownies bring joy with tasty flavors and fun textures. We explored key ingredients, from fresh zucchini to eggs and cocoa. You learned simple steps for mixing and baking that ensure success. Tips helped perfect your texture and flavor, while variations showed how to customize your treat. Storage info means you can enjoy these brownies longer. Remember, these healthy delights are versatile and easy. Enjoy making them for friends and family; they will love your tasty creations!](https://fastmealmate.com/wp-content/uploads/2025/07/63aaaf19-4868-4bd4-a247-41567a0bfd7d-768x768.webp)


![- Arugula (4 cups) - Cherry tomatoes (1 cup) - Cucumber (1 medium) - Red onion (1/2 medium) - Kalamata olives (1/2 cup) - Feta cheese (1/4 cup) - Sunflower seeds (1/4 cup, optional) - Extra virgin olive oil (1/4 cup) - Fresh lemon juice (2 tablespoons) - Dried oregano (1 teaspoon) - Salt and black pepper to taste Gathering fresh ingredients is key for this salad. Arugula gives it a peppery taste. Cherry tomatoes add sweetness and color. Cucumber brings crunch, while red onion gives a nice bite. Now, let’s talk about the add-ins. Kalamata olives add a briny flavor. Feta cheese gives creaminess and tang. If you want a crunch, add sunflower seeds. They work well with the other flavors. Next, we need the dressing. Extra virgin olive oil is rich and smooth. Fresh lemon juice brightens the salad. Dried oregano adds an earthy touch. Don’t forget salt and black pepper to finish. You can find the complete recipe in the [Full Recipe]. First, wash the arugula well. Rinse it under cold water to remove dirt. After washing, dry it gently with a salad spinner or a clean kitchen towel. This step helps the leaves stay crisp. Next, prepare the vegetables. Slice the cherry tomatoes in half. Dice the cucumber into half-inch cubes. For the red onion, cut it into thin rings. These steps add color and crunch to your salad. Now, it's time to mix the salad. In a large mixing bowl, add the fresh arugula, halved cherry tomatoes, diced cucumber, sliced red onion, and Kalamata olives. Use your hands to toss the salad gently. This method keeps the leaves from bruising. After mixing, sprinkle the crumbled feta cheese on top. This cheese adds a creamy texture and salty flavor. If you want extra crunch, you can also add sunflower seeds at this point. For the dressing, take a small bowl. Whisk together the extra virgin olive oil, fresh lemon juice, and dried oregano. Add a pinch of salt and pepper for taste. Whisk until everything combines well. Drizzle the dressing over the salad mixture. Use a large spoon or salad tongs to toss gently. This ensures every bite is flavorful without crushing the arugula. For a complete meal, check out the Full Recipe for all the details. To keep arugula fresh, handle it gently. Avoid squishing or bruising the leaves. When washing arugula, fill a bowl with cold water. Submerge the leaves and swish them around. This helps remove dirt without damaging them. Lift the arugula out and place it on a clean towel. Pat it dry carefully to keep the leaves crisp. To boost the flavor of your Mediterranean Arugula Salad, add fresh herbs like basil or parsley. These herbs bring bright notes to the dish. You can also sprinkle in a pinch of crushed red pepper for heat. When garnishing, use a few extra olives or a lemon wedge. This adds a pop of color and makes the salad look inviting. Serve your salad right after mixing for the best taste. The freshness of the arugula is key. If you need to prep ahead, wash and dry the arugula first. Store it in a container lined with paper towels. This keeps the leaves dry and crisp. You can chop the other veggies and store them separately. Just combine everything before serving. Enjoy the full flavors of your Mediterranean Arugula Salad! For the full recipe, refer to the earlier section. {{image_4}} You can make your Mediterranean arugula salad even more filling. Adding grilled chicken is a great choice. It brings a nice smoky flavor. If you prefer a plant-based option, try chickpeas. They add protein and a hearty texture. For a seafood twist, consider incorporating shrimp. Lightly sautéed or grilled shrimp works well. It adds a delightful taste that pairs nicely with the fresh ingredients. Feel free to adjust your salad based on the season. In summer, add ripe peaches or strawberries for sweetness. In fall, consider roasted butternut squash for warmth. You can also change up the dressing. Swap traditional vinegar for balsamic or apple cider vinegar. Each type will give the salad a unique flavor profile. If you want to make your Mediterranean arugula salad vegan, simply omit the cheese. The salad will still be fresh and tasty. For those needing gluten-free options, this salad is perfect. All ingredients are gluten-free, making it a safe choice for everyone. Enjoy your meal without worries! To store leftover Mediterranean Arugula Salad, place it in an airtight container. This helps keep the salad fresh and prevents it from drying out. Use glass or plastic containers with tight lids. If you have a lot of salad, consider dividing it into smaller portions. This makes it easy to grab just what you need. The salad stays fresh for about three days in the fridge. After this, the arugula may wilt, and the tomatoes might get mushy. Watch for signs like a slimy texture or off smells. If you see these, it's best to toss the salad. Fresh ingredients are key to a great taste. To refresh the salad, add a splash of lemon juice or olive oil. This can bring back some flavor and zest. You can also mix in fresh arugula or other greens. If you want to repurpose leftover salad, try using it as a filling for wraps or sandwiches. You can also stir it into cooked pasta for a quick meal. Arugula is low in calories but packed with nutrients. It has vitamins A, C, and K. Arugula also contains calcium and iron. These nutrients support bone health and boost immunity. Eating arugula can improve heart health due to its antioxidants. It's a great choice for a Mediterranean diet. This diet focuses on whole foods, healthy fats, and fresh produce. Arugula fits perfectly into this style of eating, enhancing flavors and health. Yes, you can prepare parts of the salad ahead of time. Wash and dry the arugula and veggies first. Store them separately to keep them fresh. Chop the tomatoes, cucumber, and onion in advance. Keep them in airtight containers in the fridge. You can make the dressing ahead too. Just whisk together olive oil, lemon juice, and seasonings. Store the dressing in a jar. When ready to serve, mix everything together for a fresh salad. You can try several dressings with this salad. A classic vinaigrette works well. Use olive oil, vinegar, salt, and pepper. A lemon-tahini dressing adds a creamy touch. You could also use balsamic vinaigrette for sweetness. Another tasty option is yogurt-based dressing for a tangy kick. Each dressing can enhance the salad’s flavors, so experiment to find your favorite. For the full recipe, check out the details above. In this blog post, we explored the Mediterranean Arugula Salad. We discussed fresh produce, flavorful add-ins, and the best dressing to bring it all together. You learned how to prepare, mix, and serve the salad with tips for freshness and flavor enhancement. Remember, this salad is versatile—you can change the protein or vegetables based on the season. Enjoy making your own tasty versions and store leftovers properly. With the right care, your salad can stay fresh and delicious for days.](https://fastmealmate.com/wp-content/uploads/2025/06/6fae422d-07df-4724-84de-c8edab5789ea-768x768.webp)