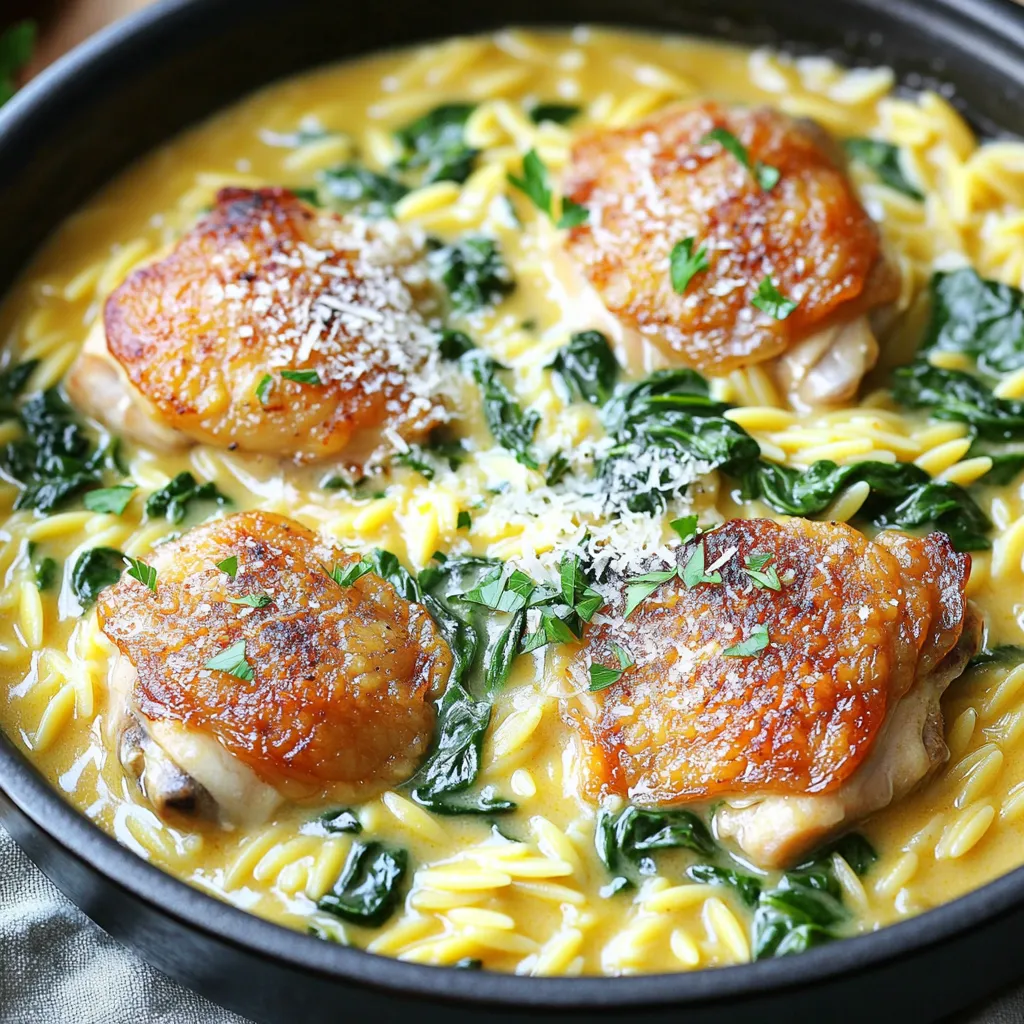
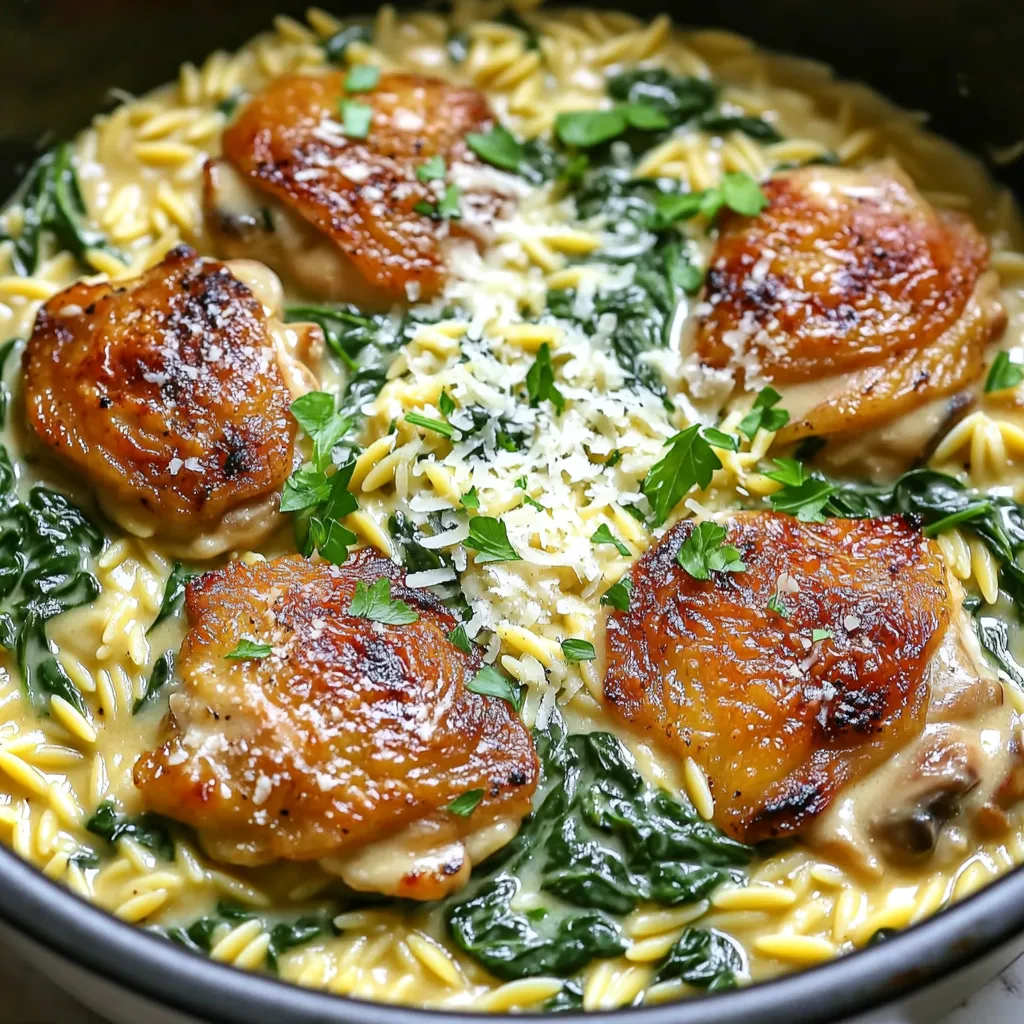
Craving a meal that feels like a warm hug? You’ll love this One-Pot Creamy Garlic Butter Chicken Orzo Delight! It’s rich, comforting, and oh-so-simple to make. With just a few key ingredients, you can whip up a delicious dish that satisfies your hunger and warms your soul. Let me guide you through the steps to create this creamy, dreamy dinner in no time! Get ready for a cooking adventure that will impress everyone!
Ingredients
List of Main Ingredients
– 1 lb (450g) boneless, skinless chicken thighs, chopped into bite-sized pieces
– 1 tablespoon olive oil
– 4 cloves garlic, finely minced
– 1 cup orzo pasta
– 4 cups low-sodium chicken broth
– 1 cup heavy cream
– 1 teaspoon mixed dried Italian herbs (oregano, thyme, basil)
– Salt and freshly ground pepper to taste
– 1 cup fresh spinach, roughly chopped
– ½ cup grated Parmesan cheese
– Fresh parsley, finely chopped (for garnish)
Each ingredient plays a key role. The chicken provides protein. The garlic adds depth. The orzo gives a nice texture. The cream brings richness, making every bite a delight.
Optional Ingredients for Enhanced Flavor
– Lemon zest for brightness
– Red pepper flakes for heat
– Sun-dried tomatoes for sweetness
– Fresh basil or thyme for extra herbs
These optional ingredients can take your dish to the next level. A bit of lemon zest can brighten the flavors. Red pepper flakes can add a nice kick. Sun-dried tomatoes give a subtle sweetness that balances well.
Recommended Cooking Tools
– Large pot or Dutch oven for cooking
– Slotted spoon for easy chicken removal
– Wooden spoon for stirring
– Measuring cups for accuracy
Using the right tools makes cooking easier. A large pot helps everything cook evenly. A slotted spoon lets you remove the chicken without excess liquid. A wooden spoon is great for stirring and won’t scratch your pot.
Step-by-Step Instructions
Sautéing the Chicken
Start by heating olive oil in a large pot over medium heat. Once the oil is hot, add the chopped chicken thighs. Season them with salt and pepper. Cook for about 6 to 8 minutes. Stir occasionally until they turn golden brown and are cooked through. Use a slotted spoon to remove the chicken and place it on a plate.
Cooking the Garlic and Preparing the Orzo
Next, add the minced garlic to the same pot. Sauté the garlic for about 1 minute. Stir it constantly until it becomes fragrant. Be careful not to burn it. Then, add the orzo pasta and stir well, coating it with the garlic oil. Pour in the chicken broth and bring it to a rapid boil. Once boiling, reduce the heat to a simmer. Cook for 10 to 12 minutes while stirring occasionally. The orzo should be tender and most of the liquid should be absorbed.
Combining Ingredients and Final Cooking Steps
Now, stir in the heavy cream and dried Italian herbs. Mix it all well. Return the cooked chicken to the pot. Then, add the chopped spinach and grated Parmesan cheese. Stir gently until the spinach wilts and everything is mixed together. Taste the dish and adjust the salt and pepper as needed. Remove the pot from the heat. Serve the creamy chicken orzo hot, and garnish with fresh parsley for extra flavor.
Tips & Tricks
Tips for Perfectly Cooked Orzo
To cook orzo just right, use plenty of water. The orzo needs space to move. Stir it often while it cooks. This keeps it from sticking. Check for doneness a minute before the time ends. It should be tender but still firm. If it gets too soft, it can turn mushy.
How to Make it Creamier
To boost creaminess, add more heavy cream. You can also stir in cream cheese for a rich texture. Mixing in some grated cheese helps too. Parmesan adds flavor and creaminess. For a hint of tang, try a splash of lemon juice. This elevates the taste and adds brightness.
Useful Kitchen Hacks for Faster Prep
Prep your ingredients first. Chop the chicken and mince the garlic ahead of time. This saves you stress while cooking. Use a one-cup measuring cup for orzo and broth. This helps you pour quickly. If you have a pot with a lid, use it. It speeds up cooking by trapping heat.
Variations
Adding Vegetables for Extra Nutrition
You can easily boost the nutrition of your One-Pot Creamy Garlic Butter Chicken Orzo by adding vegetables. Try adding chopped carrots or bell peppers. These veggies add color and taste. You could also use broccoli or zucchini. Just toss them in with the orzo. They will cook nicely and stay crisp. Spinach is already in the recipe, but you can add more for extra greens.
Substituting Proteins
If you want to change the protein, you have options. You can use chicken breast instead of thighs. Chicken breast cooks fast and stays juicy. For a twist, try shrimp or scallops. Just add them in during the last few minutes of cooking. If you want a meatless dish, use chickpeas or tofu. Both are great sources of protein and will soak up the flavors well.
Alternative Seasoning Options
Switching up the seasonings can make your dish exciting. Instead of Italian herbs, try a mix of paprika and cumin for a smoky flavor. Adding a pinch of red pepper flakes can spice things up. You could also use fresh herbs like basil or cilantro for a fresh touch. Experiment with lemon zest for a bright note that pairs well with the cream. Each option gives a new vibe to the same dish.
Storage Info
How to Store Leftovers
After you enjoy your One-Pot Creamy Garlic Butter Chicken Orzo, let it cool. Use an airtight container for storage. This dish stays fresh in the fridge for about 3-4 days. Make sure to keep it sealed tight to lock in flavors.
Reheating Tips
To reheat, place the orzo in a pot over low heat. Add a splash of chicken broth or cream to avoid drying it out. Stir gently until it warms up. You can also use the microwave, but cover the dish to keep moisture in. Heat in short bursts, checking often.
Freezing Instructions
You can freeze this dish for later. Let it cool completely, then transfer to a freezer-safe container. It can last in the freezer for up to 3 months. When you’re ready to eat, thaw it overnight in the fridge. Reheat as mentioned above for the best taste.
FAQs
Can I use chicken breast instead of thighs?
Yes, you can use chicken breast instead of thighs. Chicken breast is leaner and cooks faster. Just be careful not to overcook it. This can lead to dry meat. Cut the chicken into small pieces for even cooking. The flavor will still be great!
How can I make this recipe gluten-free?
To make this dish gluten-free, swap out the orzo pasta. Use gluten-free orzo or another gluten-free pasta. You will still get the same creamy texture. Just check the broth for gluten. Use low-sodium chicken broth labeled gluten-free.
What are good side dishes to serve with One-Pot Creamy Garlic Butter Chicken Orzo?
Great side dishes include a simple green salad. A fresh cucumber salad works well too. You can also serve crusty bread to soak up the sauce. Roasted veggies add color and nutrition. Try steamed broccoli or green beans for something light and tasty.
This blog post covered the key elements to create a great One-Pot Creamy Garlic Butter Chicken Orzo. We explored essential and optional ingredients, effective cooking steps, and clever tips. You learned how to customize the dish with vegetables and proteins, plus how to store leftovers for later use. Remember, cooking is all about trying new things and enjoying the process. With these insights, you can make a satisfying meal everyone will love. Enjoy your cooking adventure!


