Are you craving a sweet treat without the hassle of baking? No-Bake Strawberry Cheesecake Cups are your perfect answer! They’re easy to make, delicious, and look stunning on any table. In this guide, I’ll share simple steps and tips to create these irresistible cups that everyone will love. Get ready to delight your taste buds with a creamy, fruity dessert that’s sure to impress! Let’s dive in!
Ingredients
Complete List of Ingredients
For this no-bake strawberry cheesecake cups, you will need:
– 1 cup graham cracker crumbs
– 2 tablespoons granulated sugar
– 1/2 cup unsalted butter, melted
– 1 cup cream cheese, softened
– 1/2 cup powdered sugar
– 1 teaspoon pure vanilla extract
– 1 cup heavy whipping cream
– 1 cup fresh strawberries, diced
– Additional fresh strawberries, sliced for topping
Ingredient Substitutions
You can swap some ingredients if needed:
– Use chocolate cookies instead of graham crackers for a twist.
– Swap granulated sugar with brown sugar for a deeper flavor.
– Low-fat cream cheese works well if you’re watching calories.
– Coconut cream can replace heavy cream for a dairy-free option.
– If fresh strawberries are not available, try using raspberries or blueberries.
Fresh Strawberry Tips
When using fresh strawberries, choose ripe ones for the best taste. Look for bright red berries without any green spots. Wash them gently and pat them dry before dicing. If you want to enhance their flavor, sprinkle a little sugar on the diced strawberries and let them sit for about 10 minutes. This draws out the juices and creates a sweet syrup, making your cheesecake cups even more delicious.
Step-by-Step Instructions
Preparing the Crust
To make the crust, start with a mixing bowl. Add 1 cup of graham cracker crumbs and 2 tablespoons of granulated sugar. Pour in 1/2 cup of melted unsalted butter. Mix it well until the crumbs look like wet sand. This will give your crust a great flavor and texture.
Next, take about two tablespoons of this crumb mixture and spoon it into each cup. Use your fingers or the back of a spoon to press it down gently. This step helps form a solid base for your cheesecake.
Making the Cream Cheese Filling
For the cream cheese filling, grab another bowl. Beat 1 cup of softened cream cheese with an electric mixer. Keep mixing until it is smooth and creamy. Once it looks good, add 1/2 cup of powdered sugar and 1 teaspoon of pure vanilla extract. Mix until everything is silky and combined.
In a separate bowl, whip 1 cup of heavy cream. Use the mixer until stiff peaks form. Be careful not to over-whip it. You want the cream to be light and fluffy.
Now, gently fold the whipped cream into the cream cheese mixture. Use a spatula and mix until just combined. This folding keeps the mixture airy.
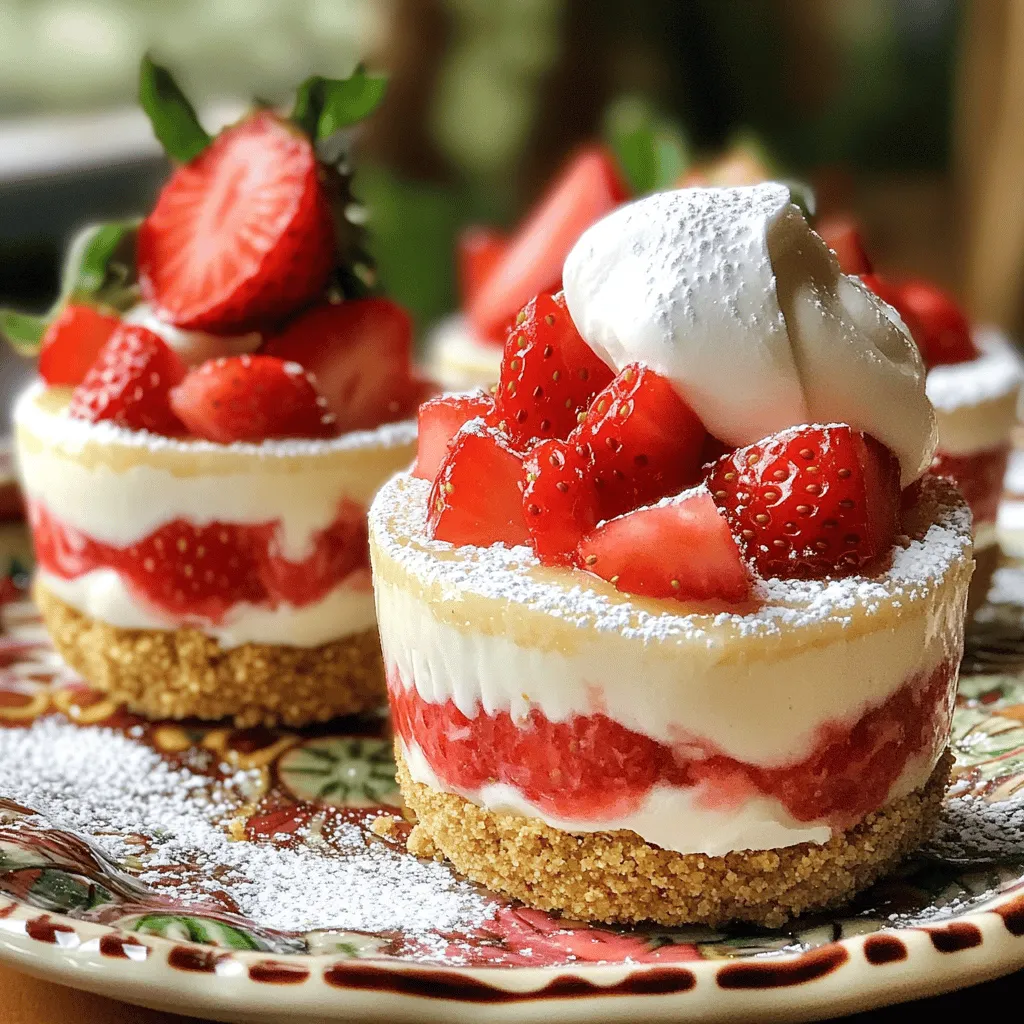
Layering and Chilling the Cups
Spoon the cream cheese filling over the crust in each cup. Fill them about three-quarters full. Use the spatula to smooth the tops.
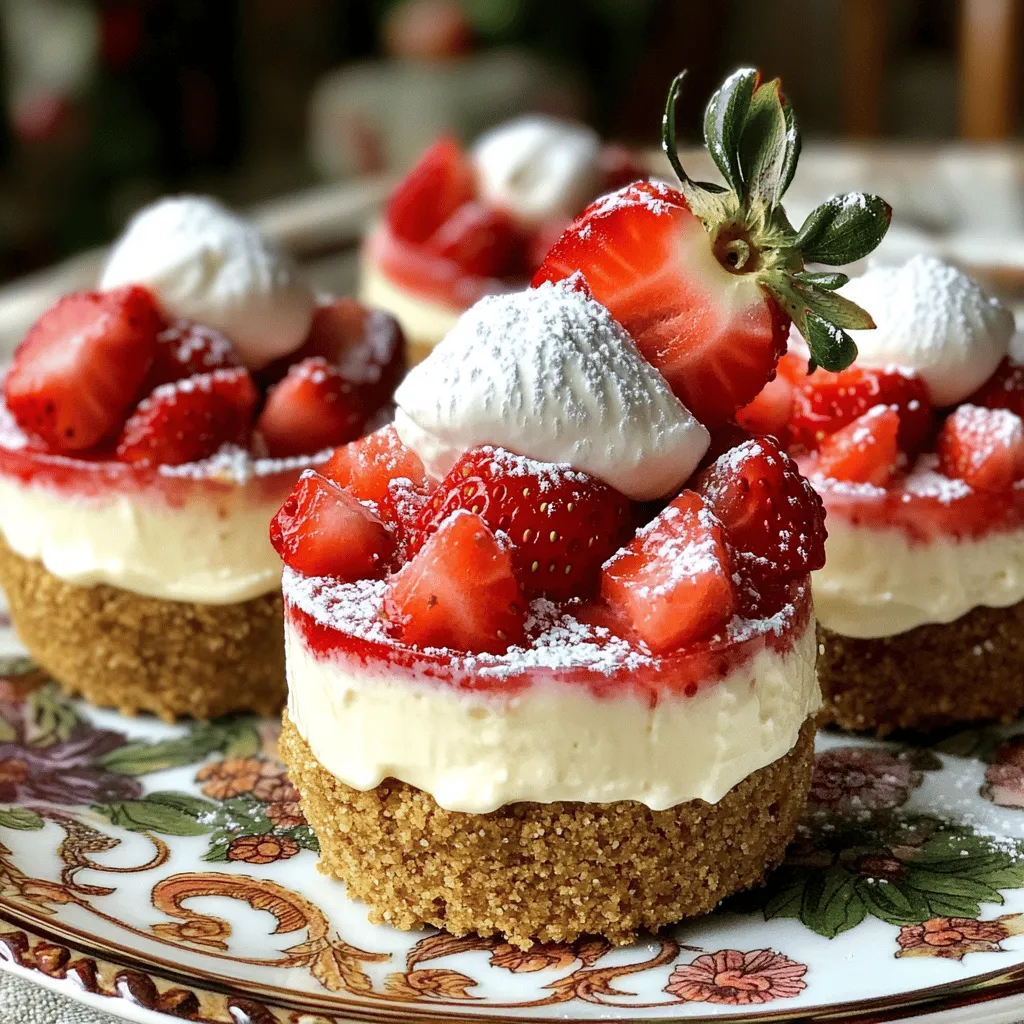
Next, top each cup with diced strawberries. Press them gently into the cream cheese layer. This step spreads their flavor throughout the dessert.
For the final touch, add a dollop of remaining cream cheese mixture on top. Garnish each cup with a fresh strawberry slice.
Now, place the cups in the refrigerator. Chill them for at least 2 hours. This step lets the layers set and enhances the flavors. Enjoy your no-bake strawberry cheesecake cups!
Tips & Tricks
Achieving the Perfect Creamy Texture
To get a smooth and creamy filling, make sure your cream cheese is at room temperature. If it’s too cold, it will clump. Use an electric mixer to beat the cream cheese until it is silky. Slowly add in the powdered sugar and vanilla while mixing. This step helps blend everything perfectly. When whipping the heavy cream, stop when you see stiff peaks. Over-whipping makes it grainy. Finally, gently fold the whipped cream into the cream cheese mixture. This keeps it light and fluffy.
Serving Suggestions
Serve these cheesecake cups in clear glass dishes. This way, everyone can see the beautiful layers. For a fun twist, try adding a layer of chocolate sauce or a fruit puree. You can also sprinkle crushed graham crackers on top for added crunch. If you want to impress your guests, use fresh mint leaves as a garnish. It adds a nice pop of color and flavor.
Recommended Tools and Equipment
You’ll need a few basic tools. A mixing bowl is key for combining ingredients. An electric mixer is best for whipping the cream and mixing the filling. Use a spatula to gently fold mixtures together. For serving, small glass cups or jars work wonderfully. They show off the layers and make for a pretty presentation. Lastly, have a measuring cup and spoons on hand for accuracy.
Variations
Flavor Variations
You can switch up the flavor of your no-bake cheesecake cups. Try chocolate by adding cocoa powder to the cream cheese mix. For mango, blend fresh mango into the cream cheese before mixing. You can even use lemon zest for a bright, citrusy kick. These simple changes keep your dessert fun and fresh.
Healthier Alternatives
Want a lighter cheesecake? Use low-fat cream cheese instead of regular cream cheese. You can also swap out heavy cream for Greek yogurt. This keeps the taste rich but lowers the fat. Using honey or agave syrup instead of sugar can add sweetness without the extra calories.
No-Bake Cheesecake Layering Techniques
Layering is key to a stunning dessert. Start with a crust layer, then add your creamy filling. You can add a layer of fruit between the cream cheese and whipped cream. This adds texture and flavor. For a fun twist, try layering different fillings. You could alternate between plain and flavored mixes. This creates a beautiful, colorful effect in your cups.
Storage Info
How to Properly Store Cheesecake Cups
To store your no-bake strawberry cheesecake cups, use airtight containers. Place the cups in the fridge right after they set. This keeps them fresh and tasty. If you make them ahead of time, cover each cup with plastic wrap or a lid. This helps avoid any weird smells from other foods in the fridge.
Shelf Life Details
These cheesecake cups last in the fridge for about 3 to 5 days. After that, the texture may change. You want to enjoy them when they are at their best. Always check for any signs of spoilage before serving. If you see any mold or the smell seems off, it’s best to throw them away.
Freezing Instructions
You can freeze these cheesecake cups if you want to save them for later. First, let them chill in the fridge for at least 2 hours. After that, cover each cup tightly with plastic wrap and foil. This extra layer helps prevent freezer burn. You can freeze them for up to 2 months. When you’re ready to enjoy, take them out and let them thaw in the fridge overnight. Remember, the texture may change a bit after thawing.
FAQs
How long do No-Bake Strawberry Cheesecake Cups last in the fridge?
No-Bake Strawberry Cheesecake Cups last about three days in the fridge. Store them in an airtight container to keep them fresh. You want to enjoy the creamy texture and berry flavor at their best. After three days, the strawberries may lose their crispness and the filling might not be as fresh.
Can I use frozen strawberries for this recipe?
Yes, you can use frozen strawberries. Just make sure to thaw and drain them first. This helps avoid extra moisture in your cups. Frozen strawberries can still taste great and add sweetness. However, fresh strawberries give a better texture and brightness to the dish.
What can I substitute for heavy cream?
If you need a substitute for heavy cream, you can use coconut cream or Greek yogurt. Coconut cream adds a rich flavor, while Greek yogurt keeps it light. You may also mix milk with butter for a quick fix. Use a 3:1 ratio of milk to butter for a creamy texture. Just remember, these swaps may change the overall taste slightly.
You learned how to make no-bake strawberry cheesecake cups. We covered ingredients, tips, and storage methods. Remember to choose fresh berries for the best taste. Use my tips for a creamy texture and fun flavor twists. Store them right to enjoy later. With these steps, you can craft a delicious treat easily. Embrace your creativity, and have fun making these cheesecake cups!


