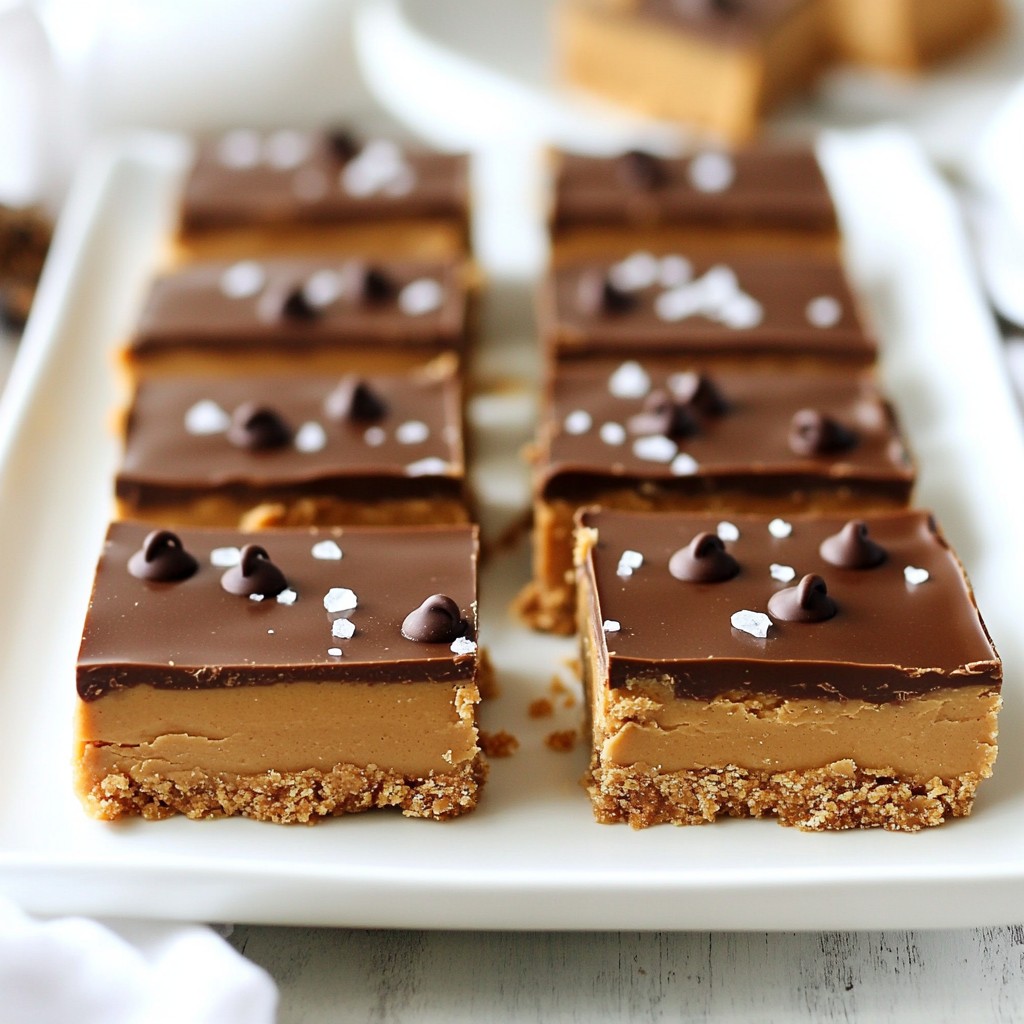
If you're craving a sweet treat without the hassle of baking, you're in for a real delight! My No-Bake Peanut Butter Chocolate Bars are the perfect solution. They come together in minutes with simple ingredients like peanut butter, chocolate chips, and rolled oats. This recipe is easy enough for anyone to follow, making it a fun activity for kids and satisfying for adults. Ready to indulge? Let's dive into the quick steps!
Why I Love This Recipe
- Quick and Easy: This recipe requires no baking, making it a hassle-free treat to whip up in just 10 minutes!
- Healthy Ingredients: With peanut butter, oats, and natural sweeteners, these bars are a nutritious snack option.
- Customizable: You can easily swap ingredients like honey for maple syrup or choose your favorite chocolate chips.
- Deliciously Satisfying: The combination of chocolate and peanut butter creates a rich and indulgent flavor that's hard to resist!
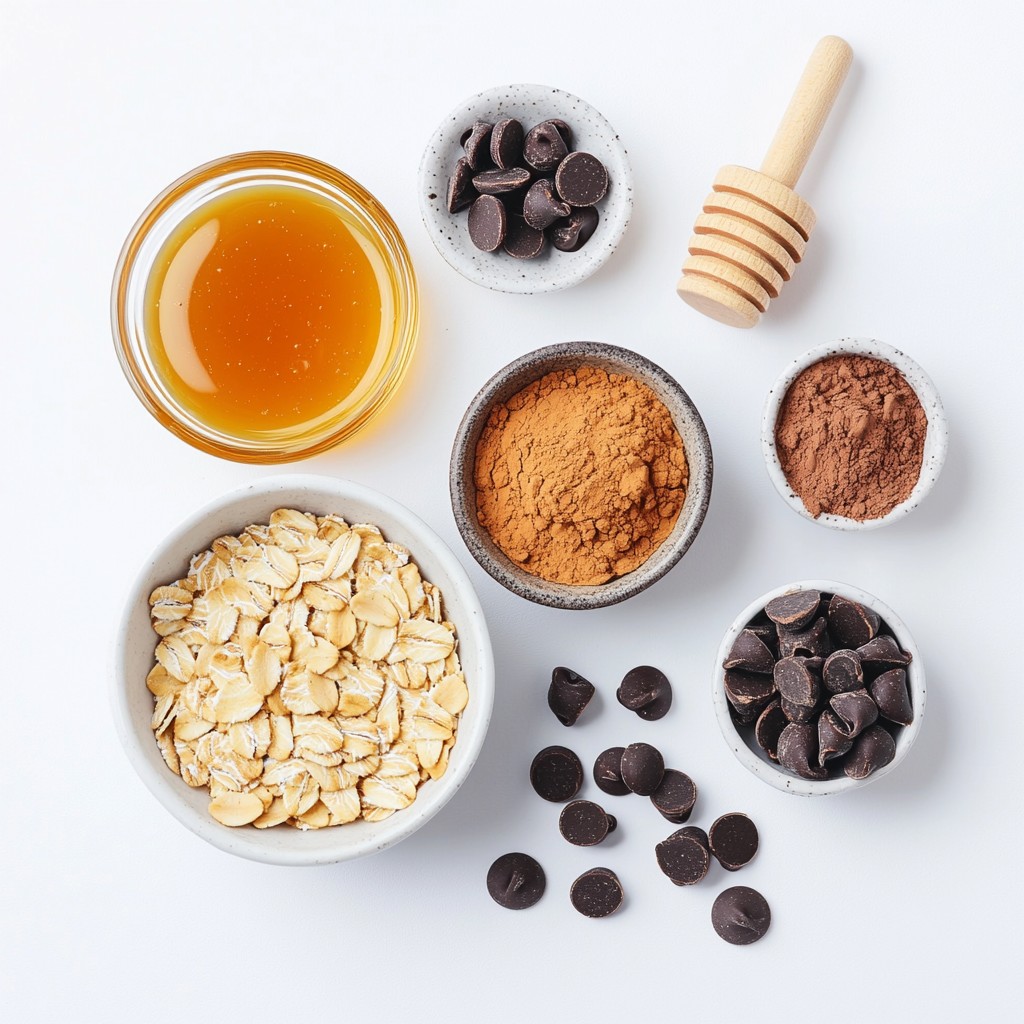
Ingredients
Required Ingredients
- 1 cup peanut butter (smooth or crunchy)
- 1/2 cup honey or maple syrup
- 2 cups rolled oats (old-fashioned)
- 1/2 cup chocolate chips (dark or semi-sweet)
- 1/4 cup unsweetened cocoa powder
- 1 teaspoon vanilla extract
- A pinch of salt
- Optional: Sea salt for topping
These ingredients come together to create a rich and tasty treat. Peanut butter gives these bars a creamy and nutty flavor. You can choose smooth peanut butter for a velvety texture or crunchy for added texture. The sweetener, honey or maple syrup, helps bind the bars and adds natural sweetness.
Rolled oats provide a hearty base. I recommend using old-fashioned oats for the best texture. They hold up well and give the bars a satisfying chew. Chocolate chips bring a burst of flavor, while cocoa powder deepens the chocolate taste, making it truly indulgent.
A hint of vanilla extract adds complexity to the flavor. The pinch of salt balances the sweetness, enhancing all the tastes. If you like a little extra savory kick, sprinkle sea salt on top for a delightful contrast.
These simple ingredients make no-bake peanut butter chocolate bars a breeze to create. With just a few steps, you can have a nutritious treat ready to enjoy!
Step-by-Step Instructions
Melting the Base Mixture
Combining Peanut Butter and Sweetener Start by taking a medium saucepan. Add 1 cup of peanut butter and 1/2 cup of your sweetener. You can use honey or maple syrup. Place the saucepan over low heat. Stir slowly until the mix melts and becomes smooth. This process takes just a few minutes.
Adding Cocoa Powder and Flavorings Once the mix is smooth, take it off the heat. Now, add 1/4 cup of unsweetened cocoa powder, 1 teaspoon of vanilla extract, and a pinch of salt. Stir well until everything blends together. The cocoa adds rich flavor. The salt balances the sweetness.
Mixing the Oat Mixture
Incorporating Oats and Chocolate Chips Grab a large mixing bowl and add 2 cups of rolled oats. Pour the warm peanut butter mixture over the oats. Mix them well. Make sure every oat is coated in this tasty blend. Now, fold in 1/2 cup of chocolate chips. This will add a gooey texture.
Ensuring Even Coating While mixing, be gentle. You want to keep the chocolate chips intact. Make sure each bite will have that lovely chocolate flavor. A uniform mix ensures every bar tastes great.
Setting the Bars
Preparing the Baking Dish Take an 8x8 inch baking dish. Line it with parchment paper, leaving some paper hanging over the sides. This makes it easy to lift the bars out later.
Pressing Mixture into the Dish Transfer your oat mixture into the prepared dish. Use a spatula or your hands to press it down firmly. You want an even layer that is compact. This step is key for nice, clean bars.
Refrigeration Time Now, if you want extra flavor, sprinkle some sea salt on top. Then, cover the dish and place it in the fridge. Let it chill for about 1 to 2 hours. This helps the bars set and become firm. After that, they will be ready to cut and enjoy!
Tips & Tricks
Choosing the Right Peanut Butter
When picking peanut butter, you have options.
- Smooth vs. Crunchy: Smooth peanut butter blends well for a creamy bar. Crunchy adds fun texture, giving each bite a little crunch. Choose based on your taste.
- Organic vs. Conventional: Organic peanut butter has no added chemicals. It often tastes fresher. Conventional peanut butter can be more affordable. Both work well in this recipe.
Enhancing Flavor and Texture
You can make these bars even better with a few tweaks.
- Adding Extra Ingredients: Try mixing in nuts or seeds for added crunch. You can also stir in some dried fruit for a sweet touch. This makes each bite unique.
- Adjusting Sweetness Preference: If you like a sweeter treat, add more honey or maple syrup. For less sweetness, reduce the amount. Taste as you go to find your perfect balance.
Perfecting Consistency
Getting the right texture is key to great bars.
- Tips on Pressing Mixture: Make sure to press the mixture down firmly in the baking dish. This helps the bars hold together. Use a spatula or your hands to pack it tightly.
- Setting Time Adjustment: If your bars aren’t firm after 2 hours, give them more time in the fridge. Sometimes, a longer chill helps them set better. Check them after an additional 30 minutes.
Pro Tips
- Choose Quality Ingredients: Selecting high-quality peanut butter and chocolate will elevate the flavor of your bars, making them taste gourmet.
- Experiment with Sweeteners: Try different sweeteners like agave or coconut nectar for a unique taste profile that suits your preference.
- Customize Your Mix-ins: Add nuts, dried fruits, or seeds to the mixture for extra texture and nutritional benefits.
- Proper Storage: Store the bars in an airtight container in the refrigerator to keep them fresh and prevent them from becoming too soft.
Variations
Flavor Variations
You can easily change the taste of your bars. Try using different nut butters. Almond or cashew butter adds a unique twist. You can also mix in flavored extracts, like almond or coconut. These small changes can create new favorites.
Adding dried fruits or chopped nuts can boost texture and flavor. Raisins, cranberries, or chopped dates work great. If you like crunch, add walnuts or pecans. These additions make your bars even more exciting.
Dietary Adjustments
If you want a vegan version, swap honey for maple syrup. This keeps the bars sweet without using animal products. Check that your chocolate chips are dairy-free, too. Many brands offer great options for a vegan diet.
For gluten-free bars, use certified gluten-free rolled oats. This ensures that everyone can enjoy your treat. Most brands of chocolate chips are also gluten-free. Always check labels to be sure.
Chocolate Options
The type of chocolate chips you use can change your bars. Dark chocolate adds richness, while semi-sweet gives a balanced sweetness. You can even use white chocolate for a different flavor.
If you want to change cocoa powder, try using carob powder. This gives a unique taste and is caffeine-free. You can also mix in melted chocolate for a fudgier texture. Each option opens up new flavors for your bars.
Storage Info
Best Storage Practices
- Container Recommendations: Use an airtight container for storage. Glass or plastic containers work well. Choose one that fits your bars snugly to avoid air exposure. This keeps them fresh and tasty.
- Temperature Guidelines: Store your bars in the fridge. The cool temperature helps maintain their shape and texture. If you want to keep them longer, the freezer is a good option.
Shelf Life
- Refrigerated Storage Time: No-bake peanut butter chocolate bars last about one week in the fridge. They stay firm and delicious when stored properly.
- Freezing Bars for Longer Lasting: To extend their life, freeze the bars. They can last up to three months in the freezer. Just wrap them tightly in plastic wrap before placing them in an airtight container.
Reheating and Serving Suggestions
- How to Serve After Freezing: When you’re ready to enjoy, take the bars out of the freezer. Let them sit at room temperature for a few minutes to soften. This makes them easier to cut and eat.
- Best Pairings with Other Desserts: These bars pair well with ice cream or yogurt. You can also serve them with fresh fruit, like bananas or berries. They add a nice balance of flavors to your dessert spread.
FAQs
How long do No-Bake Peanut Butter Chocolate Bars last?
These bars last up to two weeks when stored properly. To keep them fresh, place them in an airtight container. You can store them in the fridge or at room temperature. If you want to last even longer, freeze them. They can stay good for about three months in the freezer. Just thaw them in the fridge before serving.
Can I use different kinds of sweeteners?
Yes, you can use different sweeteners in this recipe. Honey and maple syrup work well for a natural taste. You can also try agave nectar or brown rice syrup. If you want a low-calorie option, use stevia or erythritol. Just remember, some sweeteners may change the texture of the bars, so adjust your measurements as needed.
What can I use instead of peanut butter?
If you need a substitute for peanut butter, there are plenty of options. Almond butter or cashew butter can work well. For a nut-free option, try sunflower seed butter or soy nut butter. These alternatives give a similar creamy texture and taste. Just make sure to pick one that fits your dietary needs.
In this post, I covered how to make no-bake peanut butter chocolate bars. We discussed key ingredients like peanut butter, oats, and chocolate. I shared easy instructions for mixing and setting the bars. I also gave tips on flavoring and storage options. Remember, you can adjust recipes to fit your taste. Experiment with flavors and enjoy the process! These bars are simple and fun to make. With a bit of creativity, you can make them your own. Enjoy this tasty treat anytime you want!