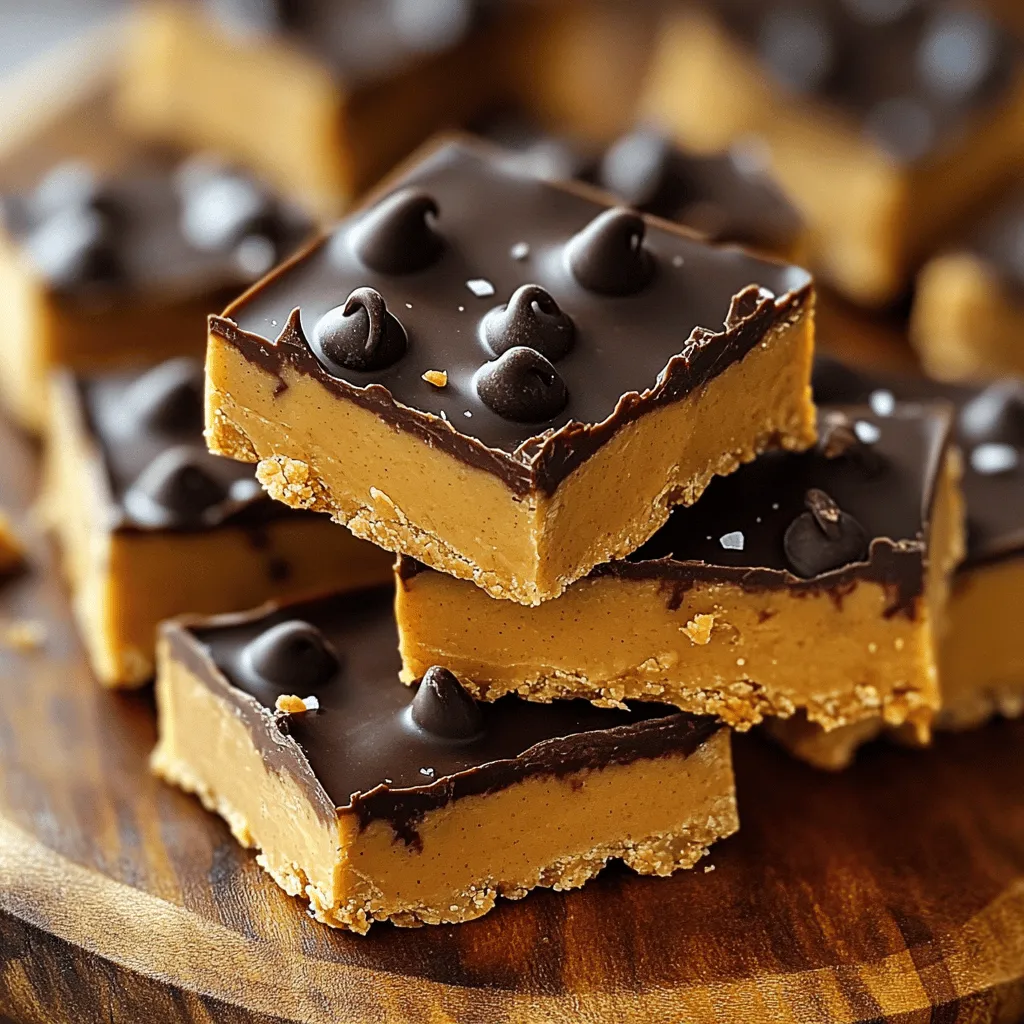
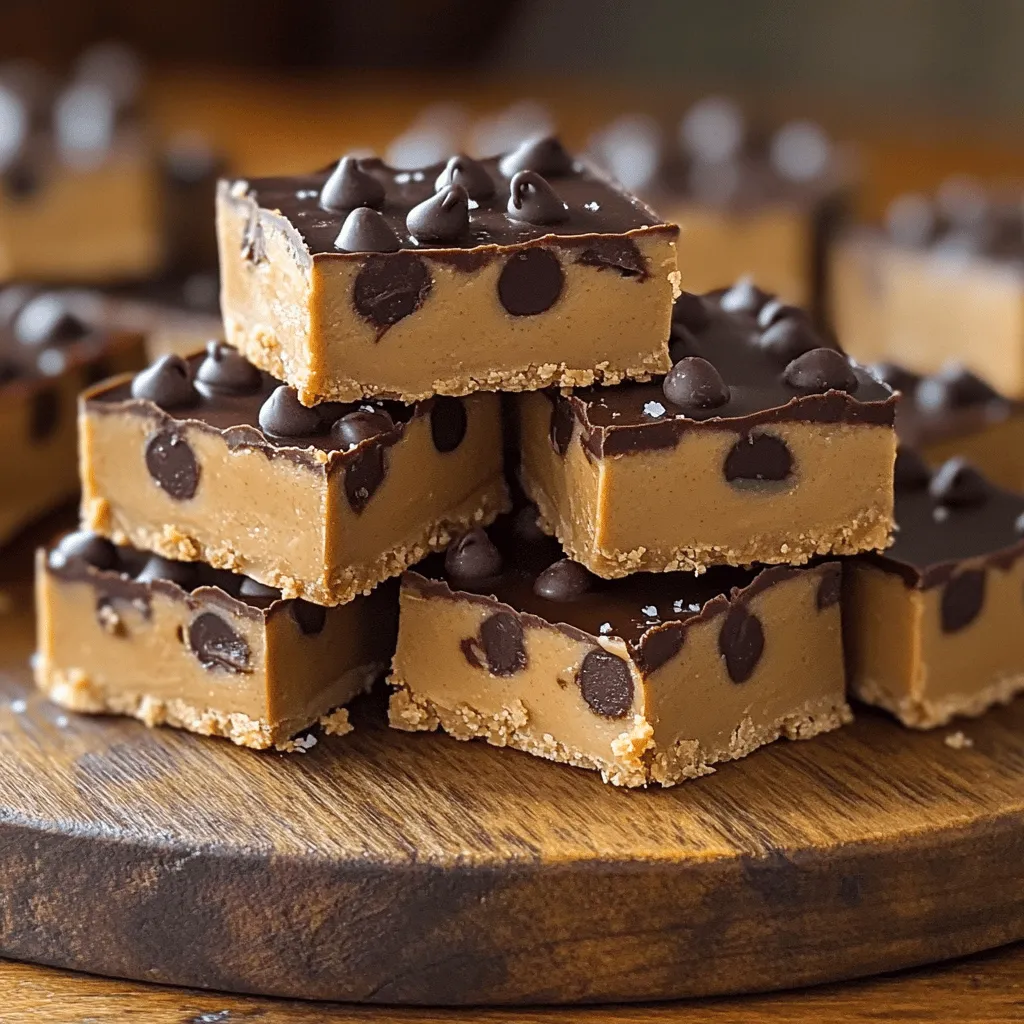
Craving a sweet treat that takes no time to make? You’re in the right place! My No-Bake Peanut Butter Bars are tasty, easy, and ready in just a short while. With simple ingredients and quick steps, you’ll enjoy a delicious reward without the fuss of baking. So, grab your mixing bowl and let’s get started on a delight that everyone will love!
Ingredients
List of Required Ingredients
To make the no-bake peanut butter bars, gather these key items:
– 1 cup natural creamy peanut butter
– 1/2 cup honey or maple syrup
– 2 cups rolled oats
– 1 cup coconut flour
– 1/2 cup dark chocolate chips
– 1/4 teaspoon sea salt
– 1 teaspoon vanilla extract
These ingredients work together to create a sweet and nutty treat. The peanut butter gives a rich flavor, while the oats add texture. Honey or maple syrup brings sweetness, and dark chocolate chips provide a nice contrast.
Optional Add-Ins
You can boost the flavor or nutrition with some fun add-ins:
– 1/2 cup chopped nuts (like almonds or walnuts)
– 1/4 cup shredded coconut
– 1/4 cup dried fruits (like cranberries or raisins)
– 1 tablespoon chia seeds or flaxseeds
These add-ins can change the bars. They give extra crunch and flavor. Feel free to mix and match to suit your taste!
Ingredient Substitutions
Not every ingredient may be on hand, and that’s okay! Here are some swaps you can try:
– If you want a nut-free option, use sun butter instead of peanut butter.
– You can replace honey with agave syrup for a vegan choice.
– Instead of coconut flour, use almond flour or regular flour, but adjust the amount.
– If you prefer milk chocolate, use milk chocolate chips instead of dark.
These substitutions make the recipe flexible. You can still enjoy delicious bars no matter your pantry’s contents.
Step-by-Step Instructions
Detailed Preparation Process
To make these no-bake peanut butter bars, start with the peanut butter. In a medium bowl, add 1 cup of creamy peanut butter and 1/2 cup of honey or maple syrup. Stir this mix until it is smooth. You want it free of lumps. Next, add 2 cups of rolled oats, 1 cup of coconut flour, 1/4 teaspoon of sea salt, and 1 teaspoon of vanilla extract. Mix everything until all dry ingredients blend well. This should give you a thick and even consistency.
Now it’s time for the chocolate! Fold in 1/2 cup of dark chocolate chips. Make sure they spread evenly so every bite has that rich chocolate flavor. Prepare an 8×8 inch baking pan by lining it with parchment paper. Leave some paper hanging over the sides. This will help you lift the bars out later.
Transfer the peanut butter mix into the pan. Press it down firmly and evenly. This creates a solid structure for your bars. Cover the pan with plastic wrap or foil. Place it in the fridge and chill for at least 2 hours. This step is key for firm bars that hold their shape when cut.
Key Techniques for Success
The key to perfect bars lies in the mixing process. Make sure you blend the peanut butter and sweetener well. This ensures a smooth start. When adding dry ingredients, mix until everything is fully integrated. Do not rush this step. Packing the mixture tightly in the pan is also important. This helps the bars stay together.
Tips for Even Mixing
Use a spatula or wooden spoon for mixing. These tools work well to combine everything. To avoid lumps, mix in a circular motion. Start from the edges and move toward the center. This helps distribute ingredients evenly. If you find it hard to mix, consider using your hands. Just make sure they are clean! After mixing, always check for dry spots. Each bite should have a bit of everything for the best taste.
Enjoy making these tasty no-bake peanut butter bars! For the complete recipe, refer to the section above.
Tips & Tricks
Perfecting Texture and Flavor
To get the best texture, use natural creamy peanut butter. This type blends well and gives a smooth finish. Make sure your honey or maple syrup is fresh. This keeps the bars sweet and sticky. You can also adjust the oats for a chewier bite. More oats make the bars denser. If you want a richer taste, add a pinch more sea salt. This simple tweak can elevate the flavor.
Time-Saving Suggestions
If you’re short on time, prepare the bars in stages. Mix the peanut butter and honey first. Set that aside while you gather the dry ingredients. This way, you can save time and keep your workspace neat. You can also make the bars ahead of time. They store well in the fridge. This makes them a quick snack for busy days.
Common Mistakes to Avoid
One common mistake is not pressing the mixture tightly. If you don’t pack it well, the bars may fall apart. Another pitfall is skipping the cooling time. If you cut the bars too soon, they will be too soft. Make sure to chill them for a full two hours. Lastly, don’t forget to line your pan with parchment paper. This makes it easier to lift out the bars later.
Variations
Flavor Pairings
You can mix flavors to make your no-bake peanut butter bars even better. Try adding a dash of cinnamon to bring warmth. If you love chocolate, swap dark chocolate chips for white chocolate or even butterscotch chips. Want a fruity twist? Add dried cranberries or raisins for a sweet surprise. You can also fold in chopped nuts like almonds or pecans for a crunchy texture. Each pairing gives your bars a unique taste that keeps them exciting.
Dietary Adjustments
You can make these bars fit various diets. If you need gluten-free bars, use certified gluten-free oats. For vegan bars, swap honey with maple syrup. You can also choose a plant-based chocolate option. If you are watching sugar, use a sugar-free sweetener instead of honey or maple syrup. These adjustments let everyone enjoy this tasty treat without worry.
Creative Serving Suggestions
Serving your bars can be a fun way to impress friends. Slice the bars into fun shapes using cookie cutters. This makes them great for parties or kids. You can also serve them with a side of fresh fruit or yogurt for a complete snack. Drizzle melted chocolate on top for a fancy look. For a special touch, sprinkle some chopped nuts or sea salt over the bars before serving. These ideas help make your no-bake peanut butter bars a hit at any gathering.
Storage Info
How to Store Bars
To keep your no-bake peanut butter bars fresh, place them in an airtight container. You can store them in the fridge for best results. Make sure they are cool and firm before you put them in the container. This will help maintain their texture.
Freezing Instructions
You can freeze these bars for later use. First, cut them into squares. Then, wrap each square in plastic wrap. After that, place the wrapped bars in a freezer-safe bag or container. They will last up to three months in the freezer. When you want to enjoy them, just thaw them in the fridge.
Shelf Life Tips
These bars stay good in the fridge for about one week. After that, they may lose their taste or texture. If you notice any changes in smell or appearance, it’s best to throw them out. Always check your bars before eating. Keeping them stored well will help you enjoy this tasty treat longer!
FAQs
Can I use crunchy peanut butter instead?
Yes, you can use crunchy peanut butter. It adds nice texture. The bars will still taste great. Just make sure to mix it well with honey or maple syrup. That way, it blends nicely with the oats and flour.
How do I make these bars vegan?
To make these bars vegan, switch honey for maple syrup. Use vegan chocolate chips instead of dark chocolate chips. The other ingredients are already plant-based. This keeps the bars tasty and friendly for vegans.
What can I use instead of coconut flour?
If you don’t have coconut flour, use almond flour or a mix of oat flour. Both options work well in this recipe. Just remember that coconut flour absorbs more liquid. So, you may need to adjust the amount slightly.
How long do no-bake bars last in the fridge?
No-bake bars last about one week in the fridge. Store them in an airtight container. This keeps them fresh and tasty. You can also freeze them for up to three months for longer storage.
Can I add protein powder to the recipe?
Yes, you can add protein powder. Just add about 1/4 cup to the mix. This boosts the protein content without changing the taste much. Make sure to mix it well with the dry ingredients for even flavor.
In this post, we covered essential ingredients and how to prepare your bars. We explored tips to enhance texture and avoid common mistakes. You learned about variations, storage, and FAQs for real-life concerns.
Remember, making your own bars can be fun and easy. Follow these steps to enjoy delicious snacks that suit your taste. Happy cooking!


