No Bake Peanut Butter Bars Simple and Easy Recipe

Are you ready to make a quick and tasty treat? My No Bake Peanut Butter Bars are easy to whip up and require no oven time. With just a few simple ingredients—like creamy peanut butter and oats—you’ll create a delicious snack that everyone will love. Perfect for busy days or sweet cravings, these bars are fun to make and even better to eat. Let’s dive into this simple recipe!
Why I Love This Recipe
- Quick and Easy: This recipe requires no baking, making it perfect for a fast and delicious treat. You can whip it up in just 20 minutes!
- Nutritious Ingredients: With the addition of oats, chia seeds, and natural peanut butter, these bars offer a healthy dose of fiber and protein.
- Customizable: You can easily adjust the sweetness with honey or maple syrup and add your favorite mix-ins like nuts or dried fruit.
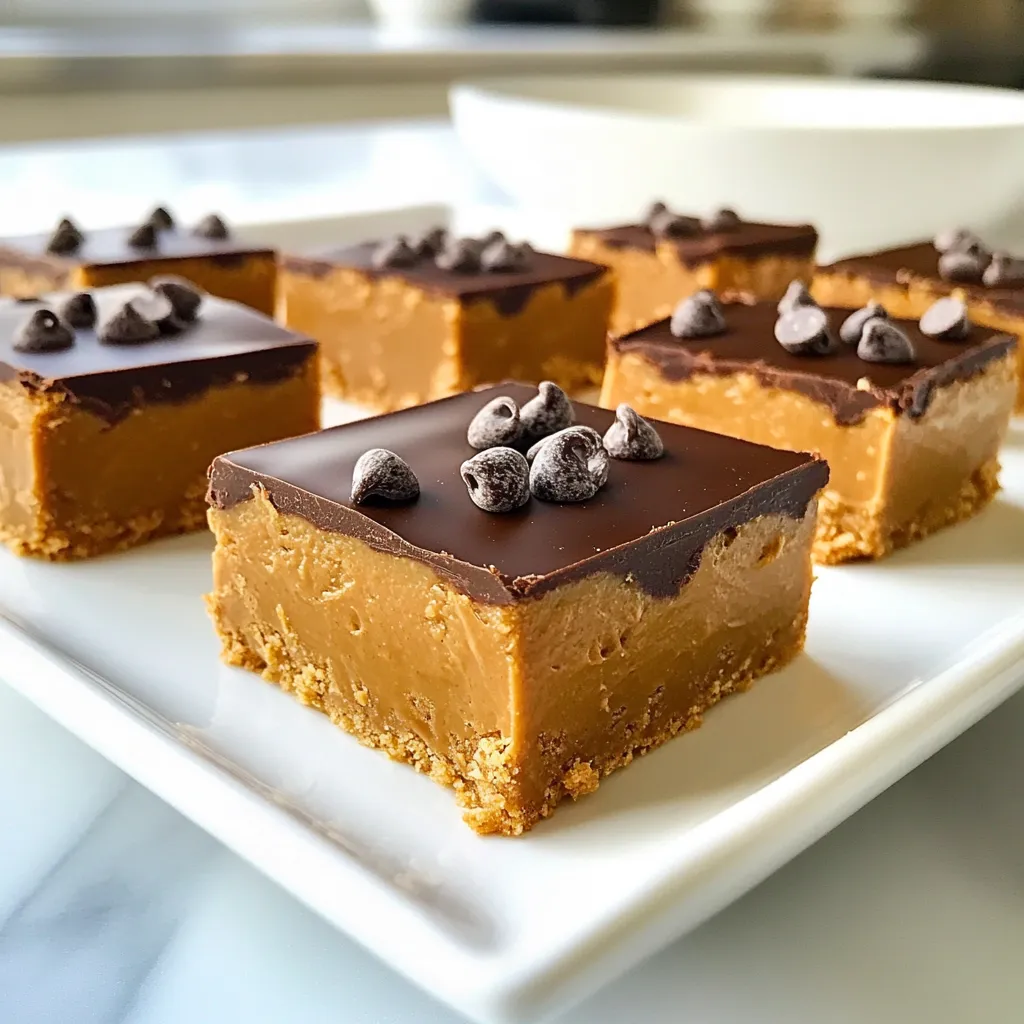
- Irresistible Flavor: The combination of rich peanut butter and smooth dark chocolate creates a decadent treat that satisfies your sweet tooth!
Ingredients
List of Ingredients
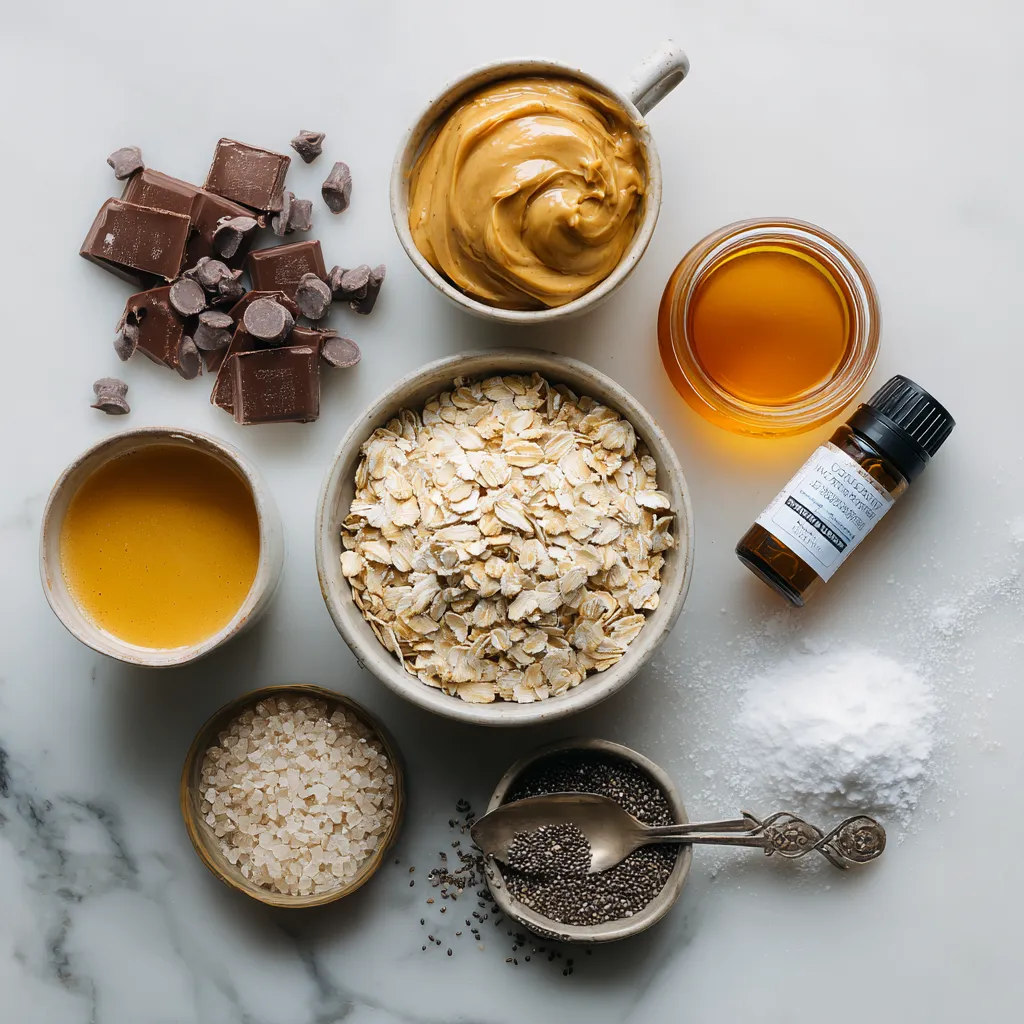
To make these scrumptious no bake peanut butter bars, gather these simple ingredients:
– 1 cup natural peanut butter (creamy or crunchy)
– 1 cup rolled oats
– 1/2 cup honey or maple syrup
– 1/2 cup dark chocolate chips
– 1/4 cup powdered sugar (optional for extra sweetness)
– 1/4 cup chia seeds (optional for texture and nutrition)
– A pinch of fine sea salt
– 1 teaspoon vanilla extract
Each ingredient plays a key role in flavor and texture.
– Peanut Butter: This gives the bars their rich, nutty taste.
– Oats: They provide a hearty base and chewy consistency.
– Honey or Maple Syrup: These sweeteners bind the bars and add sweetness.
– Chocolate Chips: They create a delicious topping that melts beautifully.
– Powdered Sugar: This is optional, but it can make the bars sweeter.
– Chia Seeds: These add crunch and boost nutrition.
– Sea Salt: A pinch enhances all the flavors.
– Vanilla Extract: This adds a warm, sweet aroma.
Feel free to customize! You can swap the sweeteners or add dried fruits for new flavors.

Step-by-Step Instructions
Preparation Steps
First, grab a large mixing bowl. Add 1 cup of natural peanut butter. You can choose creamy or crunchy, based on what you like. Next, pour in 1/2 cup of honey or maple syrup. Add 1 teaspoon of vanilla extract for flavor. Use a spatula or wooden spoon to mix this blend until it looks smooth and creamy.
Now, take a medium bowl and add 1 cup of rolled oats. If you want extra sweetness, add 1/4 cup of powdered sugar. For some nutrition, toss in 1/4 cup of chia seeds. Then, sprinkle in a pinch of fine sea salt. Stir these dry ingredients well to mix them evenly.
Gradually add the dry oat mixture to the peanut butter mix. Stir vigorously until it all comes together. You want a sticky, cohesive dough that holds well.
Assembling the Bars
Now, line an 8×8 inch baking dish with parchment paper. Make sure the paper hangs over the sides. This helps with easy removal later. Pour the combined mixture into the lined dish. Use your spatula to spread it evenly. Press the mixture down firmly into the bottom.
Next, take 1/2 cup of dark chocolate chips and place them in a microwave-safe bowl. Melt them in the microwave. Heat in 20-second intervals, stirring in between. Stop when the chocolate is fully melted and smooth. Drizzle this melted chocolate over the pressed peanut butter mixture. Use your spatula to spread it evenly.
Chilling and Cutting
Now, place the baking dish in the refrigerator. Let it chill for at least 1-2 hours. This helps the bars firm up nicely. Once set, carefully lift the bars out by the parchment overhang. Place them on a cutting board. Cut into squares or bars as you like. Enjoy your delicious no bake peanut butter bars!
Tips & Tricks
Perfecting the Texture
Choosing between creamy or crunchy peanut butter is key. Creamy peanut butter gives a smooth, rich taste. Crunchy peanut butter adds fun bites and texture. Pick what you love!
Pressing the mixture tightly is also crucial. This helps the bars hold together. Use a spatula to really pack it down. The tighter you press, the better they stay firm.
Flavor Enhancements
You can boost the flavor with extra goodies. Try adding mini chocolate chips, dried fruit, or nuts for added crunch. These mix-ins make the bars even more fun and tasty.
Melting chocolate can be tricky. Use short bursts in the microwave. Heat for 20 seconds, then stir. Repeat until it’s smooth. This way, you avoid burning the chocolate.
Serving Suggestions
For a great look, arrange the bars on a wooden board. Garnish with extra chocolate chips or chia seeds on top. This makes your dessert pop with color!
Pair these bars with fresh fruit or yogurt. Slices of banana or strawberries go well. They add a nice, fresh touch and make your plate more inviting.
Pro Tips
- Choose Your Peanut Butter Wisely: Opt for natural peanut butter without added sugars or oils for a healthier option. The flavor and texture will significantly enhance your bars!
- Experiment with Sweeteners: Feel free to adjust the sweetness by using more or less honey or maple syrup. You can also try agave nectar or coconut nectar for a different flavor profile.
- Chill for Perfect Texture: Make sure to let the bars chill in the refrigerator for at least 1-2 hours. This helps them firm up nicely and makes cutting easier.
- Add Variety with Mix-ins: Customize your bars by adding ingredients like dried fruits, nuts, or seeds for extra flavor and nutrition. Just be mindful of the ratios to keep the bars cohesive.

Variations
Healthier Alternatives
You can make these peanut butter bars even healthier. One way is to swap refined sugars for natural sweeteners. Natural sweeteners like honey or maple syrup add flavor and nutrients. They also keep the bars moist. If you want a lower glycemic index, use agave nectar.
Another great option is to substitute with different nut butters. Almond butter, cashew butter, or sunflower seed butter work well. Each nut butter gives a unique taste and texture. Try them out and see which one you like best!
Flavor Combinations
If you want to change the flavor, adding cocoa powder is a great idea. Just a few tablespoons can turn these bars into a chocolate treat. You could also try cinnamon or nutmeg for a warm spice flavor. These additions make your bars more exciting.
You can also include dried fruits or nuts. Chopped dates, cranberries, or raisins add sweetness and texture. Nuts like walnuts or almonds give a nice crunch. Mix and match to find your favorite combo!
Storage Info
Best Storage Practices
To keep your no bake peanut butter bars fresh, use an airtight container. You can stack the bars with parchment paper between layers to prevent sticking. Store them in the refrigerator at a cool temperature. They will stay fresh for up to one week.
Freezing Instructions
For longer shelf life, you can freeze these bars. Wrap each bar in plastic wrap, then place them in a freezer-safe bag. This way, they won’t get freezer burn. They can last for up to three months in the freezer.
When you’re ready to enjoy a bar, take it out and let it thaw in the fridge for a few hours. This helps maintain the creamy texture. If you need it fast, you can let it sit at room temperature for about 30 minutes. Enjoy the soft, delicious flavor!
FAQs
Common Questions about No Bake Peanut Butter Bars
How long do no bake peanut butter bars last?
No bake peanut butter bars can last up to one week in the fridge. Store them in an airtight container. This keeps them fresh and tasty. They may last longer if you freeze them, up to three months.
Can I use different types of nut butter?
Yes! You can use almond butter, cashew butter, or sunflower seed butter. Each nut butter adds a different flavor. Just ensure it has a similar texture to peanut butter for the best results.
What can I substitute for honey or maple syrup?
You can use agave nectar or brown rice syrup. These options give a sweet taste too. If you want a sugar-free choice, consider using stevia or monk fruit syrup. Adjust the amount based on your sweetness preference.
Are no bake peanut butter bars healthy?
Yes! They are rich in healthy fats, fiber, and protein. The oats provide energy, while peanut butter offers good fats. Just watch the sugar content if you add extra sweeteners.
In this post, I covered how to make no-bake peanut butter bars. We talked about the key ingredients and steps for mixing, pressing, and chilling the bars. I shared tips for perfecting texture and flavor, along with storage methods to keep them fresh. Feel free to experiment with variations to match your taste. Making these bars is easy and fun, and you can enjoy them anytime. I hope you feel inspired to try this recipe yourself and make your own tasty treat

No Bake Peanut Butter Bars
Ingredients
- 1 cup natural peanut butter
- 1 cup rolled oats
- 1/2 cup honey or maple syrup
- 1/2 cup dark chocolate chips
- 1/4 cup powdered sugar
- 1/4 cup chia seeds
- a pinch fine sea salt
- 1 teaspoon vanilla extract
Instructions
- In a large mixing bowl, combine the peanut butter, honey or maple syrup, and vanilla extract. Use a spatula or wooden spoon to mix thoroughly until the mixture is smooth and creamy.
- In a separate medium bowl, mix together the rolled oats, powdered sugar (if using), chia seeds, and a pinch of salt. Stir the dry ingredients well to ensure an even distribution.
- Gradually add the dry oat mixture to the peanut butter mixture. Stir vigorously until everything is well combined, creating a sticky, cohesive dough.
- Line an 8x8 inch baking dish with parchment paper, ensuring to leave an overhang on the sides for easy removal later.
- Pour the combined mixture into the lined baking dish. Use a spatula to evenly spread and firmly press the mixture down into the bottom of the dish.
- In a microwave-safe bowl, place the dark chocolate chips. Melt in the microwave in 20-second intervals, stirring between each interval, until fully melted and smooth.
- Drizzle the melted chocolate over the top of the pressed peanut butter mixture. Use a spatula to spread it evenly, ensuring complete coverage.
- Place the baking dish in the refrigerator and let it chill for at least 1-2 hours, or until the bars are nicely firm and set.
- Once set, carefully lift the bars out by the parchment overhang and place them on a cutting board. Cut into squares or bars as desired.


![Caramel apple cookies blend sweet apples and rich caramel in a soft cookie. This recipe makes about 24 cookies. You will love the warm flavors of fall in every bite. - 1 cup unsalted butter, softened to room temperature - 1 cup packed brown sugar - 1/2 cup granulated sugar - 2 large eggs - 1 teaspoon pure vanilla extract - 2 1/4 cups all-purpose flour - 1 teaspoon baking soda - 1/2 teaspoon fine sea salt - 1 teaspoon ground cinnamon - 1 cup fresh apples, diced (peeled and cored) - 1/2 cup caramel sauce (plus extra for drizzling) - 1/2 cup chopped walnuts or pecans (optional) - A pinch of sea salt for garnish You can customize your cookies! Try adding chocolate chips for extra sweetness. Use almond flour for a gluten-free option. If you want a nut-free treat, skip the walnuts or pecans. You can even swap the apples for pears for a unique twist. Enjoy experimenting! Start by preheating your oven to 350°F (175°C). This helps the cookies bake evenly. Next, line a baking sheet with parchment paper. This step prevents the cookies from sticking. In a large bowl, cream together one cup of softened butter, one cup of packed brown sugar, and half a cup of granulated sugar. Use an electric mixer on medium speed until the mix is light and fluffy. Next, add two large eggs. Beat them in one at a time. After that, stir in one teaspoon of pure vanilla extract until it blends in well. In another bowl, whisk together two and a quarter cups of all-purpose flour, one teaspoon of baking soda, half a teaspoon of fine sea salt, and one teaspoon of ground cinnamon. Gradually sift the dry mix into the wet mix. Stir gently until just combined. Be careful not to overmix; this keeps the cookies soft. Now, fold in one cup of diced apples and half a cup of caramel sauce. If you like, add half a cup of chopped walnuts or pecans too. Using a tablespoon or a cookie scoop, drop rounded portions of dough onto the prepared baking sheet. Leave about two inches between each cookie to allow for spreading. Place the baking sheet in the preheated oven. Bake the cookies for 10 to 12 minutes. Keep an eye on them. The edges should turn lightly golden, while the centers may look slightly underbaked. They will set as they cool. Once baked, remove the cookies from the oven. Let them cool on the baking sheet for about five minutes. After that, transfer the cookies to a wire rack to cool completely. For a delightful finish, drizzle extra caramel sauce over the cookies. Sprinkle a tiny pinch of sea salt on top of each one to enhance the flavor. This recipe makes about 24 cookies. Enjoy every bite of your caramel apple cookies! For a full recipe, check out the [Full Recipe]. To get the best texture in your caramel apple cookies, use softened butter. This helps create a nice, soft dough. Mix well but don’t overdo it. Overmixing can lead to tough cookies. When you add the apples, make sure they are diced small, so they blend into the dough. Avoid adding too much caramel sauce; it can make the dough too wet. For making these cookies, you need a few simple tools: - Mixing bowls - Electric mixer - Baking sheets - Parchment paper - Cookie scoop or tablespoon - Wire rack for cooling Using the right tools will make the process easier and more fun. One common mistake is not measuring ingredients correctly. Use proper measuring cups and spoons. Another mistake is baking cookies at the wrong temperature. Always preheat your oven before baking. Watch the cookies closely in the oven. If you take them out too soon, they may fall apart. If you leave them too long, they can get hard. Follow the Full Recipe carefully for the best results. {{image_4}} You can switch up the flavors in your caramel apple cookies. Try adding: - 1/2 cup of chocolate chips for a sweet touch. - 1 teaspoon of nutmeg for a warm spice flavor. - A splash of maple syrup for a unique twist. Experimenting helps you discover new favorites! Want to make these cookies fit your needs? Here are simple swaps: - For gluten-free cookies, use a 1:1 gluten-free flour blend. - To make them vegan, replace the butter with coconut oil and the eggs with flax eggs. - Substitute the caramel sauce with homemade date caramel for a healthy option. These swaps keep the taste delicious while catering to different diets. Make your cookies shine each fall! Add these seasonal spices: - A teaspoon of pumpkin spice for a cozy flavor. - A hint of ginger for a warm, zesty kick. - Chopped pecans or walnuts for a crunch that complements the apples. These twists make your caramel apple cookies perfect for any autumn gathering. For the full recipe, check out the earlier section! To keep your caramel apple cookies fresh, store them properly. Use an airtight container to keep out air and moisture. Place parchment paper between layers to prevent sticking. Store them at room temperature for up to one week. If you want to enjoy them longer, consider freezing them. Freezing your cookies is simple. Wait until they cool completely. Then, wrap them tightly in plastic wrap or foil. Place them in a freezer-safe bag. You can freeze them for up to three months. When you're ready to eat, just thaw them at room temperature. To regain that fresh-baked taste, reheat your cookies. Preheat your oven to 350°F (175°C). Place the cookies on a baking sheet. Heat for about 5 to 7 minutes. Check to avoid overbaking. The cookies should feel warm and soft again. Enjoy them warm with a drizzle of caramel sauce for a delightful touch! To make your caramel apple cookies chewy, focus on a few key steps. First, use brown sugar in your dough. Brown sugar has molasses, which adds moisture. Second, do not overmix the dough. Overmixing can make cookies tough. Third, underbake them slightly. When you take them out, they should look set but soft in the middle. They will continue to cook as they cool. This will give you that perfect chewy texture that you crave. Yes, you can make the dough ahead of time! Just prepare the dough as you normally would. After mixing, cover it tightly with plastic wrap or place it in an airtight container. You can store it in the fridge for up to 2 days. When ready to bake, let it sit at room temperature for about 10-15 minutes before scooping and baking. This makes it easy to enjoy fresh cookies whenever you want. Caramel apple cookies pair well with several treats. A scoop of vanilla ice cream adds creaminess and balances the sweet flavors. You can also serve them with warm caramel sauce for dipping. For a cozy touch, try them with a cup of hot apple cider. This drink brings out the fall flavors and makes for a delightful combination. You can get the full recipe for these tasty cookies to impress your friends and family. This post covered how to make delicious caramel apple cookies. We went through essential ingredients, preparation, and baking. I shared tips to avoid common mistakes and variations for your tastes. You learned how to store and reheat these cookies for the best flavor. With simple steps, you can bake a treat that impresses everyone. Enjoy experimenting with different flavors and adjustments. Happy baking!](https://fastmealmate.com/wp-content/uploads/2025/07/9c1a808e-f093-4e89-97b6-472e42d8d3a6-768x768.webp)