Mini Apple Hand Pies Flavorful Homemade Delight

- Apples: I love using Granny Smith or Honeycrisp apples for their balance of sweet and tart flavors. Granny Smith offers a nice tanginess, while Honeycrisp brings a juicy sweetness. Both hold their shape well when cooked, making them perfect for hand pies. - Pie Crust: You can choose between homemade or store-bought pie crusts. If you're short on time, I recommend using a good quality refrigerated pie crust, like those from Pillsbury. For a fun challenge, make your own crust. This adds a personal touch to your hand pies. - Spices and Flavorings: For the filling, I suggest using 1 teaspoon of ground cinnamon, 1/4 cup of granulated sugar, and 1 tablespoon of fresh lemon juice. The lemon juice brightens the flavor. Adjust sugar to taste, depending on your apples’ sweetness. A pinch of salt enhances all the flavors too. - Properly measuring ingredients: For best results, use a dry measuring cup for sugar and a liquid measuring cup for lemon juice. Level off the sugar with a knife for accuracy. This helps balance the flavors in your filling. - Trustworthy brands for pie crusts: If you decide on store-bought, I often recommend brands like Marie Callender’s or Trader Joe’s. They offer great taste and texture, making your mini pies a breeze to prepare. - Freshness tips for apples: Choose firm apples, free from bruises. Store them in a cool, dry place. If you can, use them within a week of buying for the best flavor and texture in your hand pies. To start, mix the apples with sugar, cinnamon, lemon juice, cornstarch, and a pinch of salt. This step is key. It helps the apples soak up the sugar and spices. Stir until the apples are coated well. Let the mixture sit for about 15 minutes. This waiting time allows the flavors to blend together nicely. Next, roll out the pie crusts. Unroll them on a clean, floured surface. Use a rolling pin to smooth out the crusts. Make them a bit thinner, which helps them bake better. For cutting the dough, use a round cutter or a glass about 4-5 inches wide. Cut circles from the dough. You can gather the scraps. Re-roll them to cut out more circles. This way, you waste less dough. Now, it’s time to fill the pies. Place about 1-2 tablespoons of the apple filling in the center of each circle. Be careful not to overfill. If you do, the pies might burst in the oven. To seal the pies, fold each dough circle over to form a half-moon shape. Press the edges tightly together. Use a fork to crimp the edges. This helps keep the filling inside. Set your oven to 400°F (200°C) to preheat. Line a baking sheet with parchment paper. Space the hand pies apart on the sheet. Bake them for 20-25 minutes. Look for a lovely golden brown color. The sweet aroma of apples will fill your kitchen, letting you know they are almost ready. To get a golden crust, follow these simple steps. First, roll out your pie crust evenly. This helps it bake uniformly. Next, apply an egg wash. Mix one egg with a bit of milk. Brush it on your hand pies before baking. This gives them a lovely shine and color. Mini apple hand pies taste great with ice cream or whipped cream. A scoop of vanilla ice cream adds creaminess. For a festive touch, arrange the pies on a colorful platter. You can sprinkle powdered sugar on top for extra sweetness. A common mistake is overfilling the pies. Keep the filling to 1-2 tablespoons. If you add too much, they may burst open while baking. Another mistake is not preheating the oven. Always set it to 400°F (200°C) before baking. This ensures even cooking and a nice rise. {{image_4}} To make mini apple hand pies healthier, consider using whole wheat crust. Whole wheat adds fiber and a nutty taste. It makes your pies more filling and nutritious. You can also switch out granulated sugar for healthier sweeteners. Try honey or maple syrup. They add a unique flavor and can be less processed. Adding nuts or dried fruit to the filling enhances the taste. Chopped walnuts or pecans give a nice crunch. Dried cranberries or raisins add sweetness and chewiness. You can also experiment with spices like nutmeg or ginger. These spices add warmth and depth to each bite. Just a pinch can make a big difference. You can adapt this recipe for other fruits too. Berries like blueberries or strawberries work well. Stone fruits like peaches and cherries are also great choices. Mixing fruits can create an interesting twist. Try apples with raspberries for a sweet and tart surprise. For the full recipe, check out the detailed steps above. Once you finish your mini apple hand pies, you may have some left. To keep them fresh, place them in an airtight container. This helps avoid moisture and keeps the crust crisp. Store them in the fridge for up to three days. If you want to keep them longer, freezing is a great option. To freeze mini apple hand pies, let them cool completely first. Then, wrap each pie in plastic wrap. After that, place them in a freezer bag or container. This way, you can enjoy them later! They can last up to three months in the freezer. When you’re ready to eat your mini apple hand pies, reheating them is easy. You can use an oven for the best results. Preheat your oven to 350°F (175°C). Place the hand pies on a baking sheet and cover them with foil. This helps keep them warm and prevents over-browning. Heat for about 10-15 minutes. If you want to avoid soggy crusts, skip the microwave. The microwave can make the crust soft. Instead, stick with the oven method. You’ll enjoy a flaky, crispy crust that way. For a fun twist, try serving them with a scoop of vanilla ice cream. This adds a delightful touch to your tasty treats. You can find the full recipe above to make your own mini apple hand pies! To make mini apple hand pies, start with the filling. Mix diced apples with sugar, cinnamon, lemon juice, cornstarch, and salt. Let it sit for 15 minutes to blend flavors. Next, roll out pie crusts and cut circles. Fill each circle with apple filling and fold into half-moons. Seal the edges with a fork. Brush with egg wash and bake at 400°F for 20-25 minutes. For the full recipe, check the section above. Yes, you can prepare mini apple hand pies ahead of time. Make the filling and dough, then store them separately in the fridge for up to 24 hours. You can also assemble the pies and freeze them before baking. Just remember to bake them straight from the freezer, adding a few extra minutes to the baking time. Granny Smith and Honeycrisp apples are excellent choices for pies. Granny Smith offers a nice tartness, while Honeycrisp adds sweetness. Combining these apples gives a balanced flavor. You want a mix of sweet and tart to make your hand pies really pop. Store mini apple hand pies in an airtight container at room temperature for up to two days. For longer storage, freeze them in a zip-top bag. To reheat, place them in a preheated oven at 350°F for about 10-15 minutes. This keeps the crust crispy and the filling warm. You can find ready-made mini apple hand pies at many grocery stores. Brands like Marie Callender's and Trader Joe's often carry them in their frozen sections. Local bakeries may also offer fresh options, especially during apple season. Yes, you can make gluten-free mini apple hand pies. Use gluten-free pie crusts available in stores or make your own with gluten-free flour blends. You may need to adjust the moisture level. The filling can stay the same, as apples and spices are naturally gluten-free. Mini apple hand pies are a delightful treat. You learned about the key ingredients, like sweet apples and pie crust options. I shared tips on measuring, preparing the filling, and baking to perfection. Remember to avoid common mistakes that can ruin your pies. Feel free to explore variations with nuts or different fruits. Store your leftovers wisely to enjoy later. With these steps, it's easy to create delicious hand pies at home. Get ready to impress your family and friends with your baking skills!

WANT TO SAVE THIS RECIPE?

Craving a sweet, portable treat? Mini apple hand pies are the answer! These delightful bites combine tender apples with warm spices in a flaky crust. Whether for a snack, dessert, or party, they’re sure to please. In this guide, I’ll share the best ingredients, easy steps, and tips to make truly mouthwatering mini apple hand pies at home. Get ready to impress your family with this delicious homemade delight!

Ingredients for Mini Apple Hand Pies

Key Ingredients

Apples: I love using Granny Smith or Honeycrisp apples for their balance of sweet and tart flavors. Granny Smith offers a nice tanginess, while Honeycrisp brings a juicy sweetness. Both hold their shape well when cooked, making them perfect for hand pies.

Pie Crust: You can choose between homemade or store-bought pie crusts. If you’re short on time, I recommend using a good quality refrigerated pie crust, like those from Pillsbury. For a fun challenge, make your own crust. This adds a personal touch to your hand pies.

Spices and Flavorings: For the filling, I suggest using 1 teaspoon of ground cinnamon, 1/4 cup of granulated sugar, and 1 tablespoon of fresh lemon juice. The lemon juice brightens the flavor. Adjust sugar to taste, depending on your apples’ sweetness. A pinch of salt enhances all the flavors too.

Measuring and Preparation Tips

Properly measuring ingredients: For best results, use a dry measuring cup for sugar and a liquid measuring cup for lemon juice. Level off the sugar with a knife for accuracy. This helps balance the flavors in your filling.

Trustworthy brands for pie crusts: If you decide on store-bought, I often recommend brands like Marie Callender’s or Trader Joe’s. They offer great taste and texture, making your mini pies a breeze to prepare.

Freshness tips for apples: Choose firm apples, free from bruises. Store them in a cool, dry place. If you can, use them within a week of buying for the best flavor and texture in your hand pies.

Step-by-Step Instructions

Preparing the Apple Filling

To start, mix the apples with sugar, cinnamon, lemon juice, cornstarch, and a pinch of salt. This step is key. It helps the apples soak up the sugar and spices. Stir until the apples are coated well. Let the mixture sit for about 15 minutes. This waiting time allows the flavors to blend together nicely.

Dough Preparation

Next, roll out the pie crusts. Unroll them on a clean, floured surface. Use a rolling pin to smooth out the crusts. Make them a bit thinner, which helps them bake better.

For cutting the dough, use a round cutter or a glass about 4-5 inches wide. Cut circles from the dough. You can gather the scraps. Re-roll them to cut out more circles. This way, you waste less dough.

Assembling the Hand Pies

Now, it’s time to fill the pies. Place about 1-2 tablespoons of the apple filling in the center of each circle. Be careful not to overfill. If you do, the pies might burst in the oven.

To seal the pies, fold each dough circle over to form a half-moon shape. Press the edges tightly together. Use a fork to crimp the edges. This helps keep the filling inside.

Baking Process

Set your oven to 400°F (200°C) to preheat. Line a baking sheet with parchment paper. Space the hand pies apart on the sheet. Bake them for 20-25 minutes. Look for a lovely golden brown color. The sweet aroma of apples will fill your kitchen, letting you know they are almost ready.

Tips & Tricks

Baking Tips

To get a golden crust, follow these simple steps. First, roll out your pie crust evenly. This helps it bake uniformly. Next, apply an egg wash. Mix one egg with a bit of milk. Brush it on your hand pies before baking. This gives them a lovely shine and color.

Serving Suggestions

Mini apple hand pies taste great with ice cream or whipped cream. A scoop of vanilla ice cream adds creaminess. For a festive touch, arrange the pies on a colorful platter. You can sprinkle powdered sugar on top for extra sweetness.

Common Mistakes to Avoid

A common mistake is overfilling the pies. Keep the filling to 1-2 tablespoons. If you add too much, they may burst open while baking. Another mistake is not preheating the oven. Always set it to 400°F (200°C) before baking. This ensures even cooking and a nice rise.
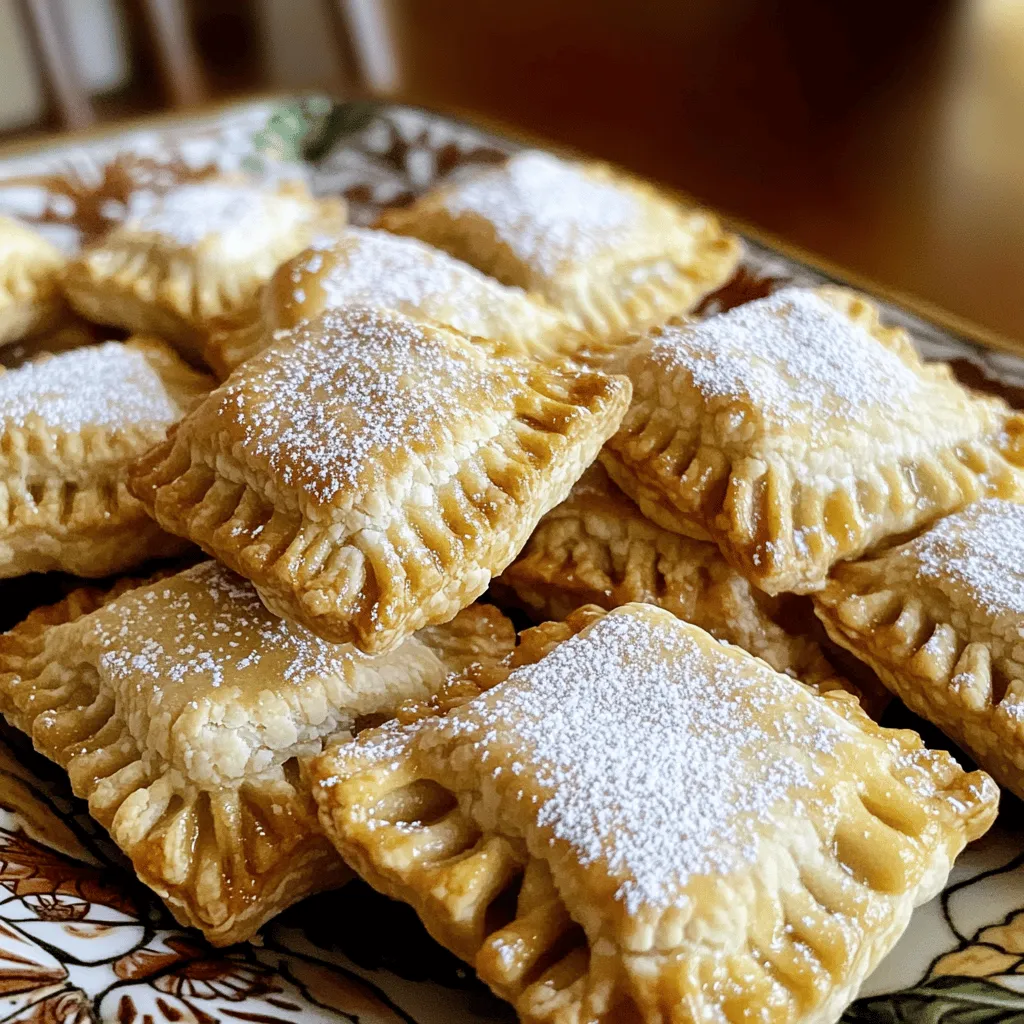
Variations

Ingredient Substitutions

To make mini apple hand pies healthier, consider using whole wheat crust. Whole wheat adds fiber and a nutty taste. It makes your pies more filling and nutritious. You can also switch out granulated sugar for healthier sweeteners. Try honey or maple syrup. They add a unique flavor and can be less processed.

Flavor Variations

Adding nuts or dried fruit to the filling enhances the taste. Chopped walnuts or pecans give a nice crunch. Dried cranberries or raisins add sweetness and chewiness. You can also experiment with spices like nutmeg or ginger. These spices add warmth and depth to each bite. Just a pinch can make a big difference.

Mini Apple Hand Pies with Other Fruits

You can adapt this recipe for other fruits too. Berries like blueberries or strawberries work well. Stone fruits like peaches and cherries are also great choices. Mixing fruits can create an interesting twist. Try apples with raspberries for a sweet and tart surprise.

Storage Info

Storing Leftovers

Once you finish your mini apple hand pies, you may have some left. To keep them fresh, place them in an airtight container. This helps avoid moisture and keeps the crust crisp. Store them in the fridge for up to three days. If you want to keep them longer, freezing is a great option.

To freeze mini apple hand pies, let them cool completely first. Then, wrap each pie in plastic wrap. After that, place them in a freezer bag or container. This way, you can enjoy them later! They can last up to three months in the freezer.

Reheating Tips

When you’re ready to eat your mini apple hand pies, reheating them is easy. You can use an oven for the best results. Preheat your oven to 350°F (175°C). Place the hand pies on a baking sheet and cover them with foil. This helps keep them warm and prevents over-browning. Heat for about 10-15 minutes.

If you want to avoid soggy crusts, skip the microwave. The microwave can make the crust soft. Instead, stick with the oven method. You’ll enjoy a flaky, crispy crust that way.

For a fun twist, try serving them with a scoop of vanilla ice cream. This adds a delightful touch to your tasty treats.

FAQs

How do you make mini apple hand pies from scratch?

To make mini apple hand pies, start with the filling. Mix diced apples with sugar, cinnamon, lemon juice, cornstarch, and salt. Let it sit for 15 minutes to blend flavors. Next, roll out pie crusts and cut circles. Fill each circle with apple filling and fold into half-moons. Seal the edges with a fork. Brush with egg wash and bake at 400°F for 20-25 minutes.

Can mini apple hand pies be made ahead of time?

Yes, you can prepare mini apple hand pies ahead of time. Make the filling and dough, then store them separately in the fridge for up to 24 hours. You can also assemble the pies and freeze them before baking. Just remember to bake them straight from the freezer, adding a few extra minutes to the baking time.

What types of apples are best for pies?

Granny Smith and Honeycrisp apples are excellent choices for pies. Granny Smith offers a nice tartness, while Honeycrisp adds sweetness. Combining these apples gives a balanced flavor. You want a mix of sweet and tart to make your hand pies really pop.

How do you store and reheat mini apple hand pies?

Store mini apple hand pies in an airtight container at room temperature for up to two days. For longer storage, freeze them in a zip-top bag. To reheat, place them in a preheated oven at 350°F for about 10-15 minutes. This keeps the crust crispy and the filling warm.

Where can I find ready-made mini apple hand pies?

You can find ready-made mini apple hand pies at many grocery stores. Brands like Marie Callender’s and Trader Joe’s often carry them in their frozen sections. Local bakeries may also offer fresh options, especially during apple season.

Is it possible to make gluten-free mini apple hand pies?

Yes, you can make gluten-free mini apple hand pies. Use gluten-free pie crusts available in stores or make your own with gluten-free flour blends. You may need to adjust the moisture level. The filling can stay the same, as apples and spices are naturally gluten-free.

Mini apple hand pies are a delightful treat. You learned about the key ingredients, like sweet apples and pie crust options. I shared tips on measuring, preparing the filling, and baking to perfection. Remember to avoid common mistakes that can ruin your pies. Feel free to explore variations with nuts or different fruits. Store your leftovers wisely to enjoy later. With these steps, it’s easy to create delicious hand pies at home. Get ready to impress your family and friends with your baking skills!

- Apples: I love using Granny Smith or Honeycrisp apples for their balance of sweet and tart flavors. Granny Smith offers a nice tanginess, while Honeycrisp brings a juicy sweetness. Both hold their shape well when cooked, making them perfect for hand pies. - Pie Crust: You can choose between homemade or store-bought pie crusts. If you're short on time, I recommend using a good quality refrigerated pie crust, like those from Pillsbury. For a fun challenge, make your own crust. This adds a personal touch to your hand pies. - Spices and Flavorings: For the filling, I suggest using 1 teaspoon of ground cinnamon, 1/4 cup of granulated sugar, and 1 tablespoon of fresh lemon juice. The lemon juice brightens the flavor. Adjust sugar to taste, depending on your apples’ sweetness. A pinch of salt enhances all the flavors too. - Properly measuring ingredients: For best results, use a dry measuring cup for sugar and a liquid measuring cup for lemon juice. Level off the sugar with a knife for accuracy. This helps balance the flavors in your filling. - Trustworthy brands for pie crusts: If you decide on store-bought, I often recommend brands like Marie Callender’s or Trader Joe’s. They offer great taste and texture, making your mini pies a breeze to prepare. - Freshness tips for apples: Choose firm apples, free from bruises. Store them in a cool, dry place. If you can, use them within a week of buying for the best flavor and texture in your hand pies. To start, mix the apples with sugar, cinnamon, lemon juice, cornstarch, and a pinch of salt. This step is key. It helps the apples soak up the sugar and spices. Stir until the apples are coated well. Let the mixture sit for about 15 minutes. This waiting time allows the flavors to blend together nicely. Next, roll out the pie crusts. Unroll them on a clean, floured surface. Use a rolling pin to smooth out the crusts. Make them a bit thinner, which helps them bake better. For cutting the dough, use a round cutter or a glass about 4-5 inches wide. Cut circles from the dough. You can gather the scraps. Re-roll them to cut out more circles. This way, you waste less dough. Now, it’s time to fill the pies. Place about 1-2 tablespoons of the apple filling in the center of each circle. Be careful not to overfill. If you do, the pies might burst in the oven. To seal the pies, fold each dough circle over to form a half-moon shape. Press the edges tightly together. Use a fork to crimp the edges. This helps keep the filling inside. Set your oven to 400°F (200°C) to preheat. Line a baking sheet with parchment paper. Space the hand pies apart on the sheet. Bake them for 20-25 minutes. Look for a lovely golden brown color. The sweet aroma of apples will fill your kitchen, letting you know they are almost ready. To get a golden crust, follow these simple steps. First, roll out your pie crust evenly. This helps it bake uniformly. Next, apply an egg wash. Mix one egg with a bit of milk. Brush it on your hand pies before baking. This gives them a lovely shine and color. Mini apple hand pies taste great with ice cream or whipped cream. A scoop of vanilla ice cream adds creaminess. For a festive touch, arrange the pies on a colorful platter. You can sprinkle powdered sugar on top for extra sweetness. A common mistake is overfilling the pies. Keep the filling to 1-2 tablespoons. If you add too much, they may burst open while baking. Another mistake is not preheating the oven. Always set it to 400°F (200°C) before baking. This ensures even cooking and a nice rise. {{image_4}} To make mini apple hand pies healthier, consider using whole wheat crust. Whole wheat adds fiber and a nutty taste. It makes your pies more filling and nutritious. You can also switch out granulated sugar for healthier sweeteners. Try honey or maple syrup. They add a unique flavor and can be less processed. Adding nuts or dried fruit to the filling enhances the taste. Chopped walnuts or pecans give a nice crunch. Dried cranberries or raisins add sweetness and chewiness. You can also experiment with spices like nutmeg or ginger. These spices add warmth and depth to each bite. Just a pinch can make a big difference. You can adapt this recipe for other fruits too. Berries like blueberries or strawberries work well. Stone fruits like peaches and cherries are also great choices. Mixing fruits can create an interesting twist. Try apples with raspberries for a sweet and tart surprise. For the full recipe, check out the detailed steps above. Once you finish your mini apple hand pies, you may have some left. To keep them fresh, place them in an airtight container. This helps avoid moisture and keeps the crust crisp. Store them in the fridge for up to three days. If you want to keep them longer, freezing is a great option. To freeze mini apple hand pies, let them cool completely first. Then, wrap each pie in plastic wrap. After that, place them in a freezer bag or container. This way, you can enjoy them later! They can last up to three months in the freezer. When you’re ready to eat your mini apple hand pies, reheating them is easy. You can use an oven for the best results. Preheat your oven to 350°F (175°C). Place the hand pies on a baking sheet and cover them with foil. This helps keep them warm and prevents over-browning. Heat for about 10-15 minutes. If you want to avoid soggy crusts, skip the microwave. The microwave can make the crust soft. Instead, stick with the oven method. You’ll enjoy a flaky, crispy crust that way. For a fun twist, try serving them with a scoop of vanilla ice cream. This adds a delightful touch to your tasty treats. You can find the full recipe above to make your own mini apple hand pies! To make mini apple hand pies, start with the filling. Mix diced apples with sugar, cinnamon, lemon juice, cornstarch, and salt. Let it sit for 15 minutes to blend flavors. Next, roll out pie crusts and cut circles. Fill each circle with apple filling and fold into half-moons. Seal the edges with a fork. Brush with egg wash and bake at 400°F for 20-25 minutes. For the full recipe, check the section above. Yes, you can prepare mini apple hand pies ahead of time. Make the filling and dough, then store them separately in the fridge for up to 24 hours. You can also assemble the pies and freeze them before baking. Just remember to bake them straight from the freezer, adding a few extra minutes to the baking time. Granny Smith and Honeycrisp apples are excellent choices for pies. Granny Smith offers a nice tartness, while Honeycrisp adds sweetness. Combining these apples gives a balanced flavor. You want a mix of sweet and tart to make your hand pies really pop. Store mini apple hand pies in an airtight container at room temperature for up to two days. For longer storage, freeze them in a zip-top bag. To reheat, place them in a preheated oven at 350°F for about 10-15 minutes. This keeps the crust crispy and the filling warm. You can find ready-made mini apple hand pies at many grocery stores. Brands like Marie Callender's and Trader Joe's often carry them in their frozen sections. Local bakeries may also offer fresh options, especially during apple season. Yes, you can make gluten-free mini apple hand pies. Use gluten-free pie crusts available in stores or make your own with gluten-free flour blends. You may need to adjust the moisture level. The filling can stay the same, as apples and spices are naturally gluten-free. Mini apple hand pies are a delightful treat. You learned about the key ingredients, like sweet apples and pie crust options. I shared tips on measuring, preparing the filling, and baking to perfection. Remember to avoid common mistakes that can ruin your pies. Feel free to explore variations with nuts or different fruits. Store your leftovers wisely to enjoy later. With these steps, it's easy to create delicious hand pies at home. Get ready to impress your family and friends with your baking skills!

Mini Apple Hand Pies

Indulge in the delightful flavors of these Mini Apple Hand Pies that are perfect for any occasion! Made with fresh apples, a hint of cinnamon, and wrapped in a golden crust, they're a treat everyone will love. Easy to make and perfect for sharing, these hand pies will fill your home with mouthwatering aromas.

Ingredients
  

2 large apples (Granny Smith or Honeycrisp), peeled and diced

1/4 cup granulated sugar

1 teaspoon ground cinnamon

1 tablespoon fresh lemon juice

1 tablespoon cornstarch

1 package of refrigerated pie crusts (contains 2 crusts)

1 egg, beaten (for egg wash)

1 tablespoon milk (for egg wash)

Pinch of salt

Optional: powdered sugar for a delightful dusting upon serving

Instructions
 

Prepare the Apple Filling: In a medium mixing bowl, combine the diced apples with granulated sugar, ground cinnamon, lemon juice, cornstarch, and a pinch of salt. Stir the mixture until the apples are well coated. Let the filling sit for about 15 minutes to allow the flavors to blend beautifully.

    Preheat the Oven: While the filling is resting, preheat your oven to 400°F (200°C). Line a baking sheet with parchment paper to prevent sticking and ensure easy cleanup.

      Roll Out the Dough: Take the refrigerated pie crusts and unroll them onto a lightly floured surface. With a rolling pin, gently roll each crust to smooth out any creases and make it a bit thinner.

        Cut Out the Dough: Using a round cutter or a glass (about 4-5 inches in diameter), cut circles from the rolled-out dough. Collect any scraps, re-roll them, and cut more circles until all the dough is utilized.

          Fill the Hand Pies: Place approximately 1-2 tablespoons of the apple filling in the center of each dough circle. Be cautious not to overfill, as this can cause the pies to burst during baking.

            Seal the Pies: Fold each dough circle over to create a delightful half-moon shape. Press the edges firmly together to seal. Use a fork to crimp the edges, ensuring the delicious filling stays securely inside the pies.

              Prepare the Egg Wash: In a small bowl, whisk together the beaten egg and milk. Use a pastry brush to apply this mixture evenly over the top of each hand pie, giving them a beautiful golden finish when baked.

                Bake the Pies: Arrange the filled hand pies on the prepared baking sheet, ensuring they are spaced apart. Bake in the preheated oven for 20-25 minutes, or until the pies are a lovely golden brown and your kitchen is filled with enticing aromas.

                  Cool and Serve: Once baked, remove the hand pies from the oven and allow them to cool on a wire rack for a few minutes. If desired, dust them lightly with powdered sugar for an elegant touch right before serving.

                    Prep Time, Total Time, Servings: 30 min | 50 min | Makes about 12 mini pies.

                      - Presentation Tips: Arrange the warm mini apple hand pies on a decorative platter for a charming display. For a decadent treat, serve alongside a scoop of creamy vanilla ice cream. Enjoy!

                        WANT TO SAVE THIS RECIPE?

                        Related Posts