Lemon Sorbet in Lemon Shells Refreshing Summer Treat

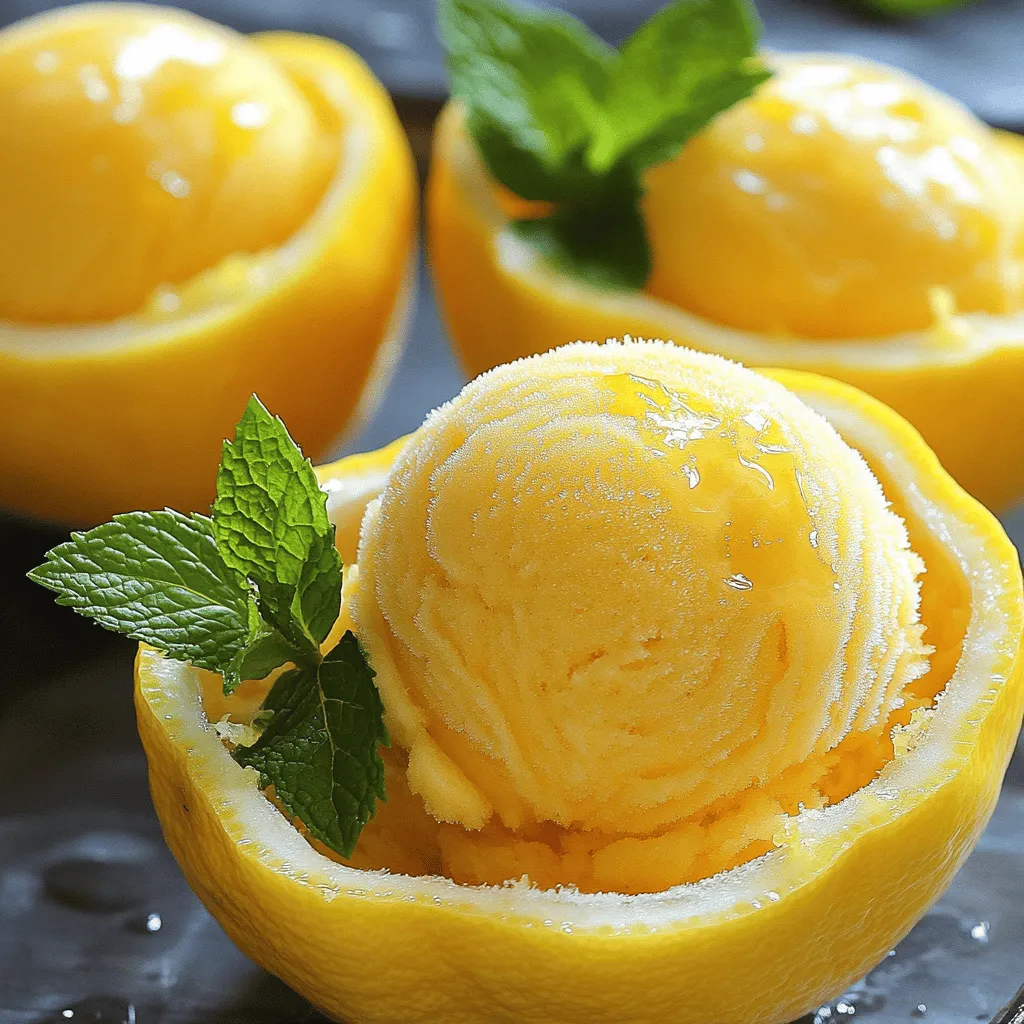
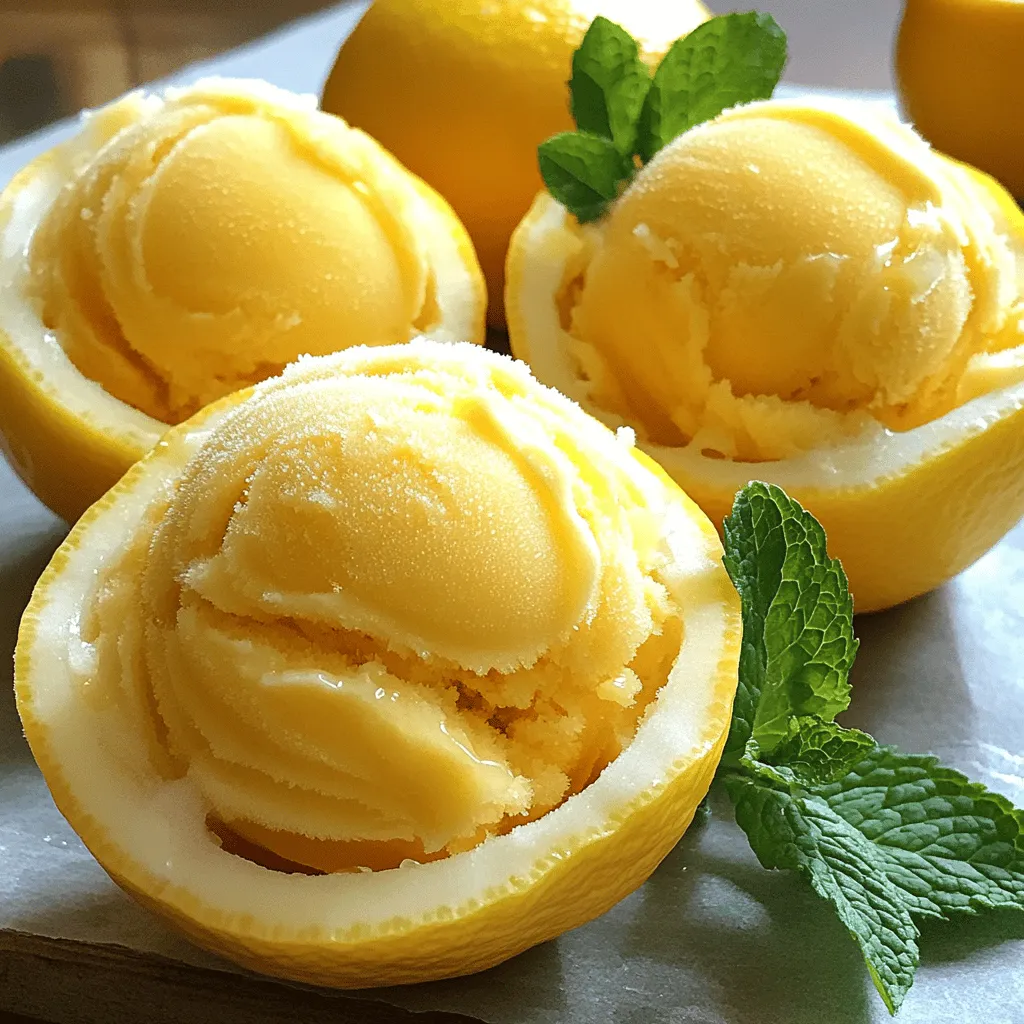
Looking for a fun and tasty summer treat? I’ve got just the thing! Lemon Sorbet in Lemon Shells is refreshing and bright, perfect for hot days. With a zesty kick and a cool texture, this dessert will impress your friends and family. Follow me as I explore the simple steps to make this delicious treat, along with tips to make it your own! Let’s dive in!
Ingredients
Main Ingredients for Lemon Sorbet
To make this refreshing treat, you need:
– 4 large lemons (to create the shells)
– 1 cup water
– 1 cup granulated sugar
– 1 cup freshly squeezed lemon juice (about 4-5 lemons)
– 1 tablespoon lemon zest
– A pinch of salt
These ingredients come together to create a tart and sweet sorbet that sings of summer.
Ingredients for Lemon Shells
The lemon shells are fun to make and serve the sorbet. You need:
– 4 large lemons
Use these lemons to form the perfect cups for your sorbet.
Optional Garnish Ingredients
For added flair, consider these garnishes:
– Fresh mint leaves
Mint adds a bright touch and enhances the look of your dessert. It’s simple but makes a big impact!
With these ingredients, you are all set to create a delicious Lemon Sorbet in Lemon Shells.
Step-by-Step Instructions
Preparing Lemon Shells
To make the lemon shells, I start by slicing the tops off the large lemons. This creates a lid for each shell. I use a small spoon to scoop out the pulp, but I leave a thin layer of lemon flesh. This keeps the shell intact. I set the hollowed lemon halves aside for later. I squeeze the juice from the pulp into a measuring cup, removing any seeds. This juice will go into the sorbet.
Making the Simple Syrup
Next, I make a simple syrup. I take a small saucepan and combine one cup of water with one cup of granulated sugar. I heat this over medium heat, stirring gently until the sugar dissolves. Once it reaches a gentle simmer, I remove the pan from the heat. I let it cool down to room temperature.
Churning the Sorbet
Now it’s time to mix everything. In a medium-sized bowl, I combine the cooled simple syrup with one cup of freshly squeezed lemon juice, lemon zest, and a pinch of salt. I stir well to blend the flavors. Then, I cover the bowl with plastic wrap and place it in the fridge for about an hour. This chilling step is key for great sorbet.
After chilling, I pour the mixture into my ice cream maker. I churn it according to the manufacturer’s instructions until it has a soft-serve texture. If I don’t have an ice cream maker, I pour the mixture into a shallow dish and place it in the freezer. I stir it every 30 minutes until it reaches the right consistency, which takes about 3-4 hours.
Once the sorbet is ready, I carefully fill each lemon shell with it, packing gently for a neat look. I place the filled shells in the freezer for about 30 minutes to firm them up. Finally, I add a mint leaf on top for a touch of color before serving this refreshing summer treat!
Tips & Tricks
How to Achieve the Best Sorbet Texture
To get the best texture in your lemon sorbet, start with cold ingredients. Use fresh lemon juice and chill your simple syrup well. This helps the sorbet freeze evenly. If you want a smoother texture, churn the mixture longer. You can also add a touch of vodka to help keep it soft. This tip works great if you want a creamy feel without making it too hard.
Essential Tools Needed for Preparation
Here are some tools that make this process easier:
– Ice cream maker (or shallow dish if you don’t have one)
– Measuring cups and spoons
– Small saucepan
– Mixing bowl
– Spoon or ice cream scoop
– Plastic wrap
Having these tools ready makes your sorbet prep quick and fun.
Serving Suggestions for Presentation
Presentation is key! Serve the sorbet in the lemon shells for a fun look. You can place the shells on a plate with fresh mint leaves for color. Add some zest on top for extra flair. If you want to be creative, try drizzling a bit of honey or a berry sauce around the plate. This makes your treat even more appealing!

Variations
Adding Flavors to Lemon Sorbet
You can easily add flavors to your lemon sorbet. Try mixing in fresh fruits like berries or mangoes. You can also add herbs such as basil or rosemary for a unique twist. Another option is to use flavored extracts like vanilla or almond. Just be sure to keep the balance between the lemon and the added flavors. This keeps the refreshing taste while giving your sorbet a fun flair.
Alternative Fruit Shells for Serving
While lemon shells are classic, you can use other fruits for serving too. Oranges, limes, or even grapefruit make great cups for sorbet. They add color and flavor, making your dish more exciting. Each fruit shell brings its own taste, so feel free to experiment. Just remember to scoop out the insides gently, keeping the shells intact for filling.
Vegan or Sugar-Free Options
If you want a vegan or sugar-free lemon sorbet, you have options. For a vegan version, replace the granulated sugar with agave syrup or maple syrup. These sweeteners work well and keep it plant-based. If you need a sugar-free option, use a sugar substitute like stevia or erythritol. The taste may change slightly, but it can still be delicious. Always taste as you go to find the flavor you love.
Storage Info
Best Practices for Storing Lemon Sorbet
To keep your lemon sorbet fresh, store it in an airtight container. I recommend using a shallow dish for better freezing. This helps the sorbet freeze evenly. Make sure to cover it tightly with plastic wrap or a lid. This protects the sorbet from freezer burn. If you used lemon shells, keep them in the fridge until you are ready to serve.
How to Re-Freeze Sorbet Without Compromise
If your sorbet melts, you can refreeze it. First, stir it gently to break up any ice crystals. Pour it back into the ice cream maker if you have one. Churn it again for a smooth texture. If not, place it back in a shallow dish and freeze. Stir it every 30 minutes until it reaches the right consistency again.
Shelf Life of Homemade Sorbet
Homemade lemon sorbet lasts about two weeks in the freezer. After that, it may develop ice crystals and lose flavor. To enjoy the best taste, consume it within one week. Always check for any off smells or changes in texture before serving. This way, you ensure a delightful experience every time you indulge in this refreshing treat.
FAQs
What is the best way to hollow out lemons?
To hollow out lemons, first cut off the tops. This creates a lid. Use a small spoon or a melon baller to scoop out the insides. Be gentle to keep the shell intact. Leave a thin layer of lemon flesh. This will hold the sorbet later. Make sure to squeeze out the juice from the insides as you scoop. You will need this juice for the sorbet.
Can I make Lemon Sorbet without an ice cream maker?
Yes, you can make Lemon Sorbet without an ice cream maker. Start by mixing your ingredients as usual. Pour this mixture into a shallow dish. Place it in the freezer. Every 30 minutes, take it out and stir it with a fork. This will break up the ice crystals. Keep doing this for about 3 to 4 hours. You will have a smooth sorbet by the end.
How do I prevent ice crystals in my sorbet?
To prevent ice crystals, use a simple syrup. This is made by dissolving sugar in water. A higher sugar content helps keep the sorbet smooth. Mix the syrup well with the lemon juice. Churn the mixture well if using an ice cream maker. If not, stir it every half hour while it freezes. This breaks up any ice crystals that form. These tips ensure you enjoy a creamy texture in your lemon sorbet.
Lemon sorbet is a simple and fun treat. We covered the main ingredients, including shells and garnishes. I shared steps for making the sorbet, from preparing lemon shells to churning. You learned tips for the best texture, tools, and serving ideas. We also explored flavor variations, storage methods, and answers to common questions. Enjoy making your sorbet and sharing it with friends. It’s a delicious way to cool off!


![To make a tasty Blueberry Peach Crostata, you’ll need a few simple ingredients. Here’s what to gather: - 1 cup fresh blueberries - 2 ripe peaches, diced (about 2 cups) - 1/4 cup granulated sugar - 1 tablespoon freshly squeezed lemon juice - 1 tablespoon cornstarch - 1 teaspoon pure vanilla extract - 1 pre-made pie crust (or homemade for an artisanal touch) - 1 egg, beaten (for gloss and color) - 1 tablespoon unsalted butter, cut into small pieces - A pinch of fine sea salt - Optional: powdered sugar for a final dusting Each ingredient plays a key role in the taste and texture of the crostata. The fresh blueberries and peaches bring sweetness and juiciness. The sugar enhances their natural flavors, while lemon juice adds a bright zing. Cornstarch helps thicken the filling, keeping it from getting too runny. Using vanilla extract adds depth to the fruit, and a pinch of sea salt balances the sweetness. For the crust, you can choose a pre-made option for ease or whip up your own for that homemade touch. The beaten egg gives the edges a lovely golden color, while unsalted butter adds richness. Don’t forget the powdered sugar for a sweet finish on top! Ready to gather these ingredients? You can find the full details in the [Full Recipe]. 1. Preheat the Oven: Start by heating your oven to 375°F (190°C). This step ensures the crostata cooks evenly. 2. Prepare the Baking Sheet: Line a baking sheet with parchment paper. This helps with easy cleanup later. 3. Prepare the Fruit Filling: In a bowl, mix fresh blueberries and diced peaches. Add granulated sugar, lemon juice, cornstarch, vanilla extract, and a pinch of sea salt. Toss gently. Let this mixture rest for about 10 minutes. This helps the flavors blend. 4. Roll Out the Pie Crust: Roll out your pie crust on a floured surface. Aim for a circle about 12 inches wide. If you use a store-bought crust, make sure it is cold for easy handling. 1. Shape the Crostata: Place the rolled crust on your baking sheet. Spoon the fruit mixture into the center, leaving a 2-inch border. 2. Fold the Edges: Carefully fold the crust edges over the filling. Create pleats to give it a rustic look. Make sure some fruit shows at the center. 3. Apply the Egg Wash: Use a pastry brush to coat the crust edges with the beaten egg. This gives it a nice golden color when baked. 4. Dot with Butter: Scatter small pieces of butter over the fruit filling. This adds extra richness during baking. 1. Bake: Place your crostata in the preheated oven. Bake for 30-35 minutes. Look for a golden-brown crust and bubbling filling. 2. Cool Before Serving: Once baked, let the crostata cool on the sheet for 10 minutes. This makes it easier to slice. Dust with powdered sugar if you like, then serve warm or at room temperature. You can find the Full Recipe for more detailed steps and tips. Enjoy your delicious Blueberry Peach Crostata! To create the best crust, start with cold ingredients. This helps the crust stay flaky. Use your fingers to mix the butter into the flour until it looks like coarse crumbs. Do not overwork the dough; handle it gently. Balancing sweetness and acidity is key. Blueberries are sweet, while peaches add a nice tang. Use lemon juice to brighten the flavors. Taste your filling before baking. If it seems too sweet, add a tiny bit of salt. This will balance the flavors better. For a beautiful display, serve slices on a rustic wooden board. Garnish with fresh mint leaves for color. You can also dust the top with powdered sugar for a nice finish. Pair your crostata with a scoop of vanilla ice cream or a dollop of whipped cream. The cold creaminess goes perfectly with the warm fruit filling. You can also try it with a drizzle of honey for an extra touch. If your crust is too soggy, it may need more time in the oven. Check the bottom of the crust to see if it is golden brown. You can also try baking it a few minutes longer. To avoid over-baking, keep an eye on the crostata as it cooks. The crust should be golden and the filling should bubble. If you notice it browning too quickly, cover it lightly with foil. This will help protect it while it finishes baking. For the full recipe, visit the link. {{image_4}} You can switch up the fruits in your crostata. For a fun twist, try using apricots or cherries. Both fruits bring a unique taste. They also pair well with blueberries and peaches. If you need a gluten-free option, use almond flour or a gluten-free pie crust. This keeps your dessert delicious and safe for gluten-sensitive friends. Want to add some extra flavor? Sprinkle in some cinnamon or nutmeg. These spices add warmth and depth to the filling. You can also try fresh herbs like basil or mint. They give a fresh twist that brightens the fruit flavors. When it comes to serving, think outside the box. A drizzle of homemade caramel sauce or a scoop of creamy vanilla ice cream works wonders. For special occasions, serve slices on a beautiful platter. Add fresh mint leaves for color and aroma. Your guests will love the visual and tasty touch! For the complete recipe, check out the Full Recipe section. To keep your blueberry peach crostata fresh, store it in the fridge. First, let it cool completely. Then, cover it with plastic wrap or place it in an airtight container. This helps keep the crust crispy and the filling juicy. You can enjoy it for up to three days. If you want to save it for longer, freezing is a great option. Wrap the crostata tightly in plastic wrap, then in aluminum foil. This method helps prevent freezer burn. You can freeze it for up to three months. When you're ready to eat it, just thaw it in the fridge overnight. To reheat the crostata, the oven is your best friend. Preheat it to 350°F (175°C). Place the crostata on a baking sheet and warm it for about 10-15 minutes. This method keeps the crust nice and flaky. If you want to refresh the flavors, brush a little melted butter on top before reheating. This adds richness and helps the fruit flavors shine. Enjoy your crostata warm for the best taste! Can I make the crostata ahead of time? Yes, you can make the crostata ahead. Prepare the filling and crust separately. Store them in the fridge for a day. When ready, assemble and bake. This keeps the crust fresh. How do I know when the crostata is done baking? Look for a golden brown crust and bubbling filling. A toothpick should slide easily through the crust. If it’s too soft, bake a few more minutes. What’s the difference between a crostata and a galette? A crostata is a rustic pie, often filled with fruit. A galette is similar but usually has a more free-form shape. Both have a flaky crust. They are delicious and easy to make. Can I use frozen fruit in the recipe? Yes, frozen fruit works well. Just thaw and drain excess liquid. This keeps the filling from being too watery. How do I keep the crust from getting soggy? To prevent a soggy crust, sprinkle cornstarch on the bottom before adding fruit. This absorbs extra juices. Bake until the crust is golden for best results. Making the crostata vegan To make a vegan crostata, replace the egg wash with a plant-based milk. Use a vegan pie crust. The filling stays the same, ensuring a tasty dessert. Tips for reducing sugar in the recipe You can cut the sugar by half. Use ripe fruits for natural sweetness. Add a touch of honey or maple syrup if needed. This keeps the flavor balanced and fresh. For the Full Recipe, check the main section. In this post, we covered how to make a delicious fruit crostata with fresh ingredients. You learned about the necessary ingredients, step-by-step instructions, and useful tips for perfecting your dessert. We also explored variations and storage options to extend its life. Now, you’re equipped to create your own stunning crostata. Experiment with flavors and enjoy the praise from family and friends! Your new dessert will impress at any gathering.](https://fastmealmate.com/wp-content/uploads/2025/06/584381ba-fe5e-4dcd-ab97-e37815fc2576-768x768.webp)


![Here is everything you need for this tasty dish: - 8 oz spaghetti or fettuccine pasta - 1 lb fresh scallops, cleaned and patted dry - 1 lb shrimp, peeled and deveined - 6 tablespoons unsalted butter - 4 cloves garlic, finely minced - 1 teaspoon red pepper flakes (optional for heat) - 1 cup cherry tomatoes, halved - 1 medium lemon, zested and juiced - 1/4 cup fresh parsley, chopped - Salt and freshly ground black pepper to taste - Grated Parmesan cheese, for serving Fresh, quality ingredients make a big difference. The pasta forms the base and gives the dish its heart. Scallops and shrimp add a rich flavor that makes each bite special. Garlic brings out the best in seafood, while the lemon brightens everything. Don't forget the fresh parsley for a pop of color and taste. For those who like a little kick, red pepper flakes can be a nice touch. Using these ingredients, you can create a beautiful meal that impresses friends and family. Check the [Full Recipe] for detailed steps to follow. Enjoy cooking! To make perfect pasta, start with a big pot of salted water. Bring it to a rolling boil. Add 8 oz of spaghetti or fettuccine and cook it until al dente. This usually means cooking it for about 1-2 minutes less than the package says. Before you drain the pasta, save 1 cup of the starchy pasta water. This water helps the sauce stick later. After reserving the water, drain the pasta and set it aside. For great seared scallops, use a hot skillet. Melt 3 tablespoons of unsalted butter over medium-high heat. Season 1 lb of cleaned scallops with salt and pepper. When the butter is sizzling, gently add the scallops. Sear them for 2-3 minutes on each side. They should be golden brown and opaque. Once done, take them out and place them on a plate. In the same skillet, lower the heat to medium and add the rest of the butter. Wait until it melts, then add 4 cloves of finely minced garlic and 1 teaspoon of red pepper flakes if you like heat. Sauté for about 30 seconds until the garlic smells great. Now, toss in 1 lb of peeled and deveined shrimp. Cook for 2-3 minutes, stirring often, until the shrimp turn pink. Next, add 1 cup of halved cherry tomatoes to the skillet. Cook for another minute until the tomatoes soften. Return the seared scallops to the pan. Squeeze the juice from 1 medium lemon over everything, and add the lemon zest. Stir gently to mix the flavors well. Now for the fun part! Add the cooked pasta to the skillet. Toss everything together so the pasta gets coated in the garlic butter sauce. If the sauce feels too thick, add some of the reserved pasta water slowly until you like the consistency. Make sure the pasta is evenly coated. Fold in 1/4 cup of chopped fresh parsley. Taste your dish and adjust the salt and pepper if needed. Serve the pasta hot. For an elegant touch, sprinkle grated Parmesan cheese on top. You can also add a sprig of parsley and a lemon wedge for a nice look. Enjoy this meal that combines so many amazing flavors! Check out the Full Recipe for detailed steps. - Recommended cooking times: For scallops, cook 2-3 minutes per side. Shrimp need about 2-3 minutes until pink. Pasta should be al dente, usually around 8-10 minutes. - Adjusting spice levels: If you like heat, add more red pepper flakes. For milder flavor, leave them out or reduce the amount. - Best pans for searing: Use a large skillet with a heavy bottom or cast iron. These help get a good sear on scallops and shrimp. - Essential tools for pasta preparation: A large pot for boiling pasta and a colander for draining are key. Tongs work great for tossing pasta with sauce. - Suggested wines to pair: A crisp white wine, like Sauvignon Blanc, complements the seafood well. You can also try a light Pinot Grigio. - Additional herbs and spices to try: Fresh basil or thyme can add a nice twist. A touch of smoked paprika gives a unique flavor boost. For the full recipe, check out the details above. {{image_4}} You can easily swap the seafood in this dish. Try using fish like cod or halibut. These options give a nice, flaky texture. You can also use lobster or crab for a more luxurious feel. If you prefer a lighter dish, switch to shrimp and scallops only. For a vegan or vegetarian twist, use mushrooms instead of seafood. Portobello or oyster mushrooms can add a meaty texture. You can also use firm tofu. This change keeps the dish flavorful while being plant-based. Cheese can change the flavor of this pasta. Adding feta cheese gives a tangy taste. Creamy goat cheese adds richness, while a sharp blue cheese brings boldness. Each cheese will create a unique twist. Incorporating seasonal vegetables can also enhance the dish. Fresh asparagus or zucchini adds crunch and color. You can toss in spinach or arugula for a touch of green. These veggies make the pasta healthier and more vibrant. If gluten is a concern, try gluten-free pasta. Options like brown rice or quinoa pasta work well. They will absorb the garlic butter sauce nicely without losing flavor. You can also switch up the noodles. Instead of spaghetti or fettuccine, use penne or linguine. Each type of noodle will give a different eating experience. Just make sure to adjust cooking times as needed. For the full recipe, check the section above! To keep your garlic butter scallop and shrimp pasta fresh, follow these steps: - Refrigeration: Place leftovers in an airtight container. Store them in the fridge for up to 3 days. This keeps the flavors intact and prevents spoilage. - Freezing: If you want to freeze, use a freezer-safe container. This dish can stay frozen for up to 2 months. However, scallops and shrimp may lose some texture when thawed. To enjoy your pasta again, use these reheating methods: - Best Method: Heat the pasta in a skillet over low heat. Add a splash of water or broth to prevent sticking. Stir gently until warmed through. - Refreshing Flavors: To boost the taste, add a little fresh garlic or a squeeze of lemon juice while reheating. This brings back the vibrant flavors of the dish. For the full recipe and more cooking tips, refer to the Full Recipe provided above. Garlic butter scallop and shrimp pasta can last up to three days in the fridge. Store it in an airtight container to keep it fresh. Always check for any off smells or changes in texture before eating. Yes, you can make garlic butter scallop and shrimp pasta ahead of time. Cook the pasta and seafood, then store them separately. Mix them together right before serving for the best taste and texture. You can serve garlic butter scallop and shrimp pasta with: - A simple green salad - Garlic bread - Roasted vegetables - A light white wine, like Sauvignon Blanc These sides balance the rich flavors of the pasta. To reheat the pasta, use a skillet over low heat. Add a splash of water or broth to keep it moist. Stir gently until heated through. This method helps maintain the dish's creamy texture. You can enhance garlic butter scallop and shrimp pasta with these spices: - Fresh basil for a sweet touch - Thyme for earthiness - Oregano for a hint of warmth - Black pepper for a little kick - A pinch of paprika for color and depth These spices can boost flavor and create a unique twist. For the full recipe, check the section above. This dish of garlic butter scallop and shrimp pasta combines fresh seafood with rich flavors. We covered the key ingredients, tips for cooking pasta, and how to perfect your dish. Remember to adjust spice levels to suit your taste. You can try different seafood or pasta types for fun twists. This recipe is easy to follow and great for impressing guests. Enjoy every bite and share it with family and friends for a delightful meal experience. Happy cooking!](https://fastmealmate.com/wp-content/uploads/2025/06/494cb207-4638-4860-b24c-000c711884e6-768x768.webp)