Korean Ground Beef Bowls Flavor-Packed and Easy Recipe

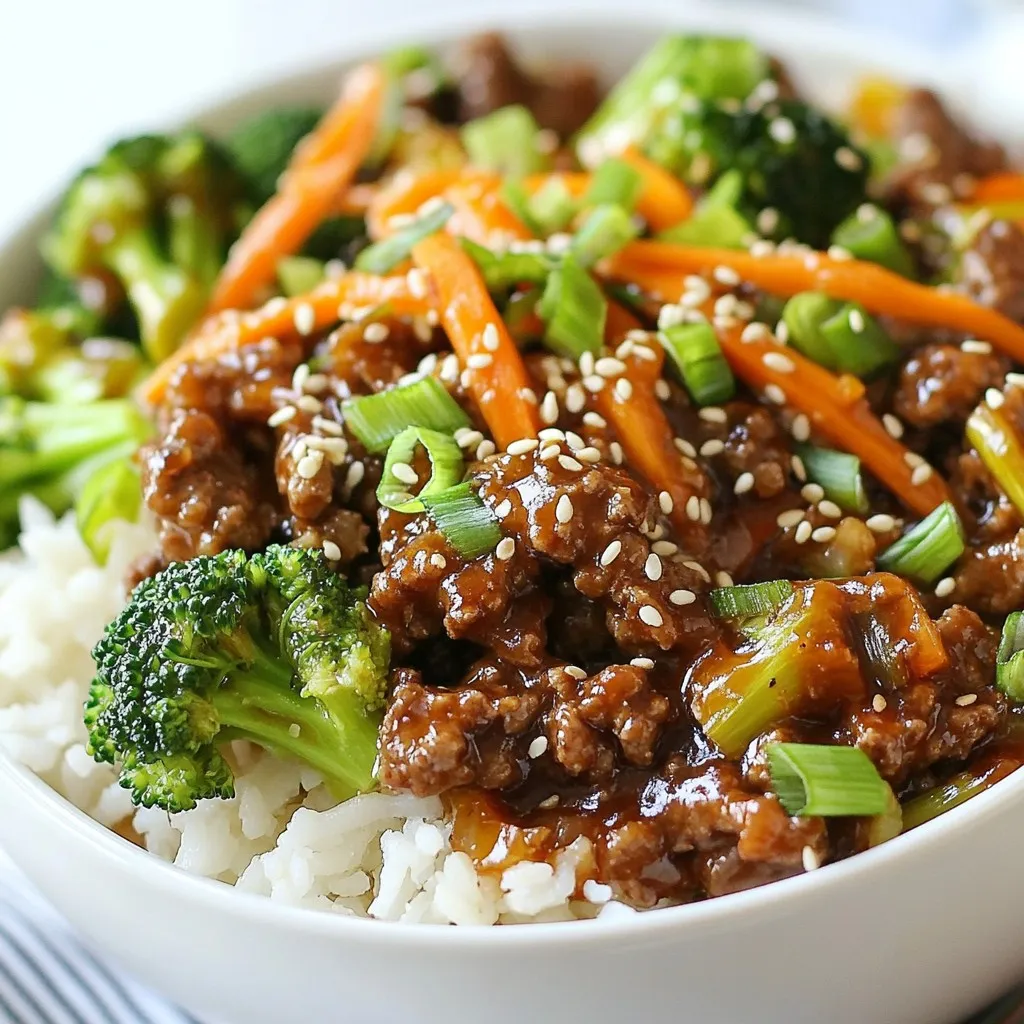
Looking for a meal that’s quick, easy, and bursting with flavor? My Korean Ground Beef Bowls are just the dish for you! With simple ingredients and step-by-step guidance, you can whip up a tasty dinner that will impress everyone at your table. From the rich taste of beef to the crunch of fresh veggies, this recipe hits all the right notes. Ready to dive in? Let’s get cooking!
Why I Love This Recipe
- Quick and Easy: This recipe comes together in just 30 minutes, making it perfect for busy weeknights.
- Flavor Packed: The combination of sesame oil, garlic, ginger, and Gochujang creates a deliciously rich flavor profile.
- Customizable: You can easily swap out the vegetables based on your preferences or what’s in your fridge.
- Healthy and Wholesome: With lean beef and fresh vegetables, this dish is both nutritious and satisfying.
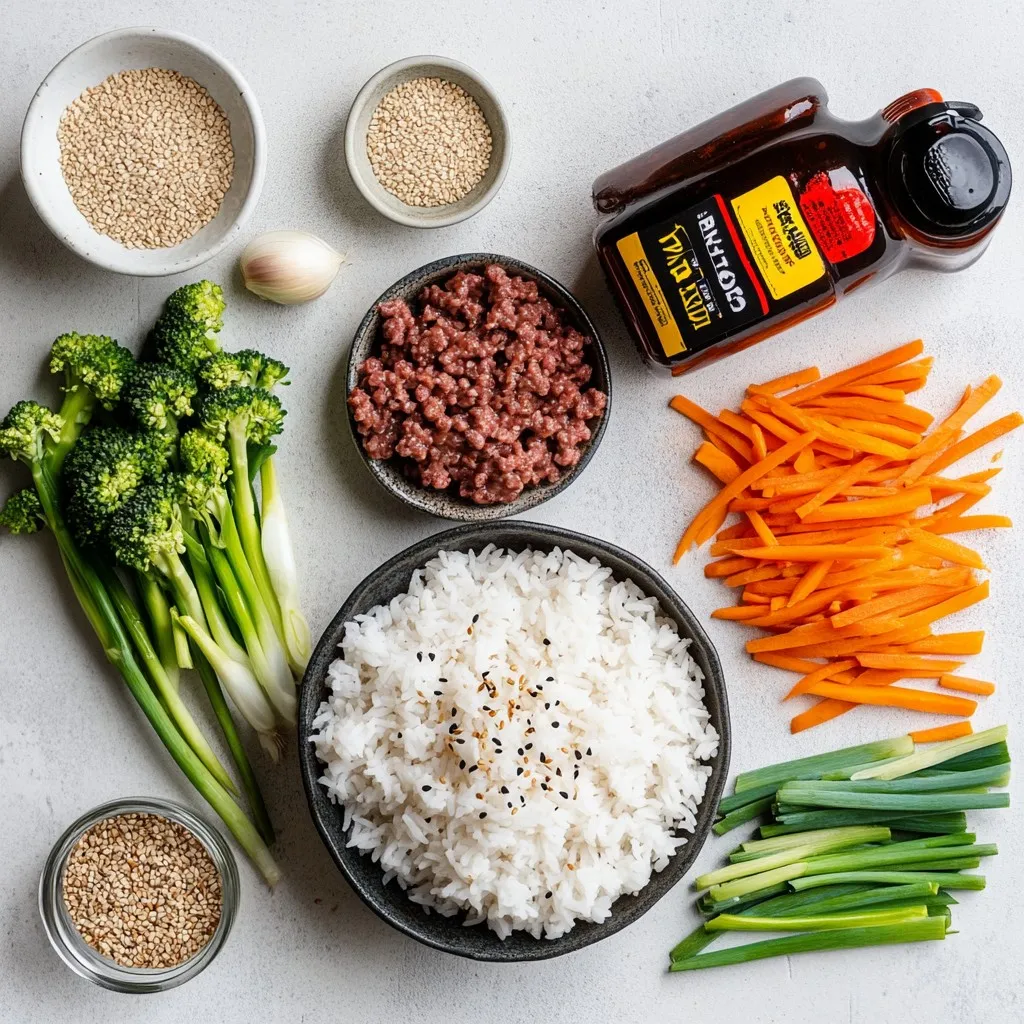
Ingredients
Main Ingredients
– 1 lb ground beef (preferably lean)
– 1 tablespoon sesame oil
– 4 cloves garlic, finely minced
– 1 tablespoon fresh ginger, finely minced
– ¼ cup low-sodium soy sauce
– 2 tablespoons brown sugar
– 1 tablespoon rice vinegar
– 1 tablespoon Gochujang (Korean chili paste)
– 2 green onions, thinly sliced (reserve some for garnish)
– 1 medium carrot, julienned
– 1 cup fresh broccoli florets
– 2 cups cooked jasmine rice
– 1 tablespoon sesame seeds (for garnish)
– Salt and pepper to taste
Gather these ingredients before you start. Lean ground beef gives the dish a nice texture. Sesame oil adds a rich, nutty flavor. Fresh garlic and ginger create a fragrant base. Low-sodium soy sauce keeps it savory without too much salt. Brown sugar brings a hint of sweetness. Rice vinegar adds brightness. Gochujang gives a spicy kick. Green onions and carrots add crunch. Broccoli adds color and nutrients. Jasmine rice serves as a fluffy base. Sesame seeds make a lovely garnish. Salt and pepper enhance all the flavors.
Each ingredient plays a role in creating balance. You can adjust the spice by adding more or less Gochujang. If you want, you can use different vegetables too!

Step-by-Step Instructions
Cooking the Base
– Heat 1 tablespoon of sesame oil in a large skillet over medium heat.
– Add 4 minced garlic cloves and 1 tablespoon of minced ginger.
– Sauté the garlic and ginger for about 1 minute until fragrant.
– Next, add 1 pound of ground beef to the skillet.
– Break the meat apart with a spatula and spread it evenly in the pan.
– Cook for 5-7 minutes until the beef is browned and no longer pink.
Creating the Flavor
– Once the beef is cooked, add ¼ cup of low-sodium soy sauce.
– Mix in 2 tablespoons of brown sugar, 1 tablespoon of rice vinegar, and 1 tablespoon of Gochujang.
– Stir everything well and sprinkle in salt and pepper to taste.
– Let the mixture simmer for 3-5 minutes to thicken the sauce.
Final Preparations
– While the beef simmers, steam 1 cup of broccoli florets for 3-4 minutes.
– Add 1 julienned medium carrot to the beef mixture and stir for 1-2 minutes.
– To assemble the bowls, place cooked jasmine rice at the bottom of each bowl.
– Top the rice with the beef mixture, steamed broccoli, and sweet carrots.
– Finally, garnish with sliced green onions and sesame seeds for a beautiful finish.
Tips & Tricks
Perfecting the Dish
How to choose the best ground beef
When picking ground beef, lean is best. Look for 80/20 beef, which has 20% fat. This mix gives flavor while keeping it juicy. Avoid meat that looks gray or has a strong smell. Freshness is key for great taste.
Tips for balancing flavors with Gochujang
Gochujang adds heat and depth to your beef. Start with one tablespoon. Taste your mix before adding more. If it’s too spicy, add a bit of brown sugar or rice vinegar to balance the heat. This will make your dish flavorful without being too hot.
Serving Suggestions
Best side dishes to complement Korean Beef Bowls
Serve your bowls with pickled vegetables or kimchi for crunch and tang. A simple cucumber salad also works well. For a hearty touch, pair with steamed dumplings. These sides enhance your meal and add variety.
Recommended drinks to pair
Korean beers or a light lager complement the flavors nicely. If you prefer wine, a chilled Riesling works well too. For a non-alcoholic option, try iced green tea. It refreshes the palate without overpowering the dish.
Pro Tips
- Use High-Quality Beef: Opt for grass-fed or organic ground beef for a richer flavor and better nutritional profile.
- Customize the Spice Level: Adjust the amount of Gochujang based on your heat preference; start with less if you’re sensitive to spice.
- Prep Ahead: Chop veggies and prepare the sauce in advance to make assembly quicker during busy weeknights.
- Experiment with Veggies: Feel free to add other vegetables like bell peppers or snap peas for extra color and crunch.

Variations
Ingredient Substitutions
You can easily switch up the protein in this dish. Try ground turkey or chicken. Both will keep the dish lean and tasty. If you want to go meatless, use firm tofu or tempeh. Crumble them like ground beef and cook them the same way. They absorb all the great flavors from the sauce.
Flavor Variations
Adjusting spice levels is simple. If you like more heat, add more Gochujang. For less heat, use less or skip it. You can also add a splash of sriracha for extra zing. Feel free to mix in different veggies too. Bell peppers, snap peas, or zucchini work well. Just remember to chop them small, so they cook fast and mix well.
Storage Info
Storing Leftovers
To store your Korean Ground Beef Bowls, let them cool first. Place them in an airtight container. This keeps the flavors fresh. You can store them in the fridge. They will last for about 3 to 4 days. If you want to keep them longer, freeze them. They can stay in the freezer for up to 2 months. Just remember to label the container with the date. This way, you will know when to use them.
Reheating Instructions
When you are ready to eat your leftovers, reheating is key. The microwave is quick and easy. Place your bowl in the microwave. Heat it for 1 to 2 minutes. Stir halfway through for even heating. If you prefer, you can use a skillet. Heat it over medium heat. Add a splash of water to keep it moist. Stir for about 5 minutes until warm. Enjoy your meal just like the first time!
FAQs
Common Questions
Can I freeze Korean Ground Beef Bowls?
Yes, you can freeze Korean Ground Beef Bowls. Just cool them first. Place the beef mix and rice in airtight containers. They can last up to three months. When ready to eat, thaw in the fridge overnight and reheat on the stove or microwave.
What can I use instead of Gochujang?
If you don’t have Gochujang, try using sriracha or chili paste. Mix a bit of sugar for sweetness. This keeps the flavor close, but it may not be as rich.
How do I make it less spicy?
To tone down the heat, reduce the Gochujang amount. You can also add more sugar or rice vinegar. Adding more vegetables like carrots or broccoli helps, too. These will balance the spice and keep the dish tasty.
Korean Ground Beef Bowls are a tasty, easy dish to make. We covered the main ingredients, step-by-step cooking, and tips for success. You learned how to adjust flavors and even switch up proteins if needed. Remember, these bowls are not just quick to prepare but also fun to customize. Use fresh, good-quality ingredients for the best results. Enjoy your cooking, and make these bowls your ow

Korean Beef Bliss Bowls
Ingredients
- 1 lb ground beef (preferably lean)
- 1 tablespoon sesame oil
- 4 cloves garlic, finely minced
- 1 tablespoon fresh ginger, finely minced
- 0.25 cup low-sodium soy sauce
- 2 tablespoons brown sugar
- 1 tablespoon rice vinegar
- 1 tablespoon Gochujang (Korean chili paste)
- 2 green onions thinly sliced (reserve some for garnish)
- 1 medium carrot, julienned
- 1 cup fresh broccoli florets
- 2 cups cooked jasmine rice
- 1 tablespoon sesame seeds (for garnish)
- to taste salt and pepper
Instructions
- Begin by heating the sesame oil in a large skillet over medium heat. Once the oil is shimmering, add the minced garlic and ginger. Sauté for about 1 minute or until the mixture becomes fragrant, stirring frequently to prevent burning.
- Next, add the ground beef to the skillet. Use a spatula to break the meat apart, spreading it evenly across the pan. Cook for approximately 5-7 minutes, or until the beef is thoroughly browned and no longer pink, ensuring to stir occasionally for even cooking.
- Once the beef is cooked, incorporate the soy sauce, brown sugar, rice vinegar, Gochujang, and a pinch of salt and pepper into the skillet. Stir everything together well, and allow it to simmer for 3-5 minutes. This will help the sauce thicken and coat the beef deliciously.
- While the beef is simmering, prepare the broccoli by steaming the florets for about 3-4 minutes until they are tender yet vibrant in color. Afterward, add the julienned carrots to the skillet with the beef, stirring them in for 1-2 minutes until they are softened and well mixed.
- To assemble the bowls, start by placing a generous scoop of warm jasmine rice in the bottom of each bowl. Top the rice with a hearty portion of the Korean beef mixture, followed by the steamed broccoli and sweet carrots for a vibrant presentation.
- Finally, garnish your bliss bowls with the reserved sliced green onions and a delightful sprinkle of sesame seeds to finish the dish with a touch of elegance.


 to guide you through each step. - Preheat your oven to 375°F (190°C). - Rinse and prepare the quinoa and vegetables. To start, turn on your oven and set it to 375°F (190°C). This step ensures your oven is hot and ready when it’s time to bake. While it heats, take one cup of quinoa and rinse it under cool water. This helps remove any bitterness. Next, chop your zucchinis and bell pepper. Dice the zucchini into small cubes and chop the bell pepper into bite-sized pieces. Don’t forget to finely dice one small onion and mince three cloves of garlic. - Sauté onion and garlic in olive oil until translucent. - Add zucchini and bell pepper, cooking until softened. Next, grab a medium saucepan. Add one tablespoon of olive oil and heat it over medium. Once the oil is warm, toss in your diced onion and minced garlic. Stir them for about 3-4 minutes. You want the onion to turn translucent and smell great. After that, add the diced zucchini and chopped bell pepper. Cook these veggies for around 5 minutes, stirring often. They should soften but still have a little crunch. - Mix in quinoa, cherry tomatoes, broth, and seasonings. - Transfer to a casserole dish and bake for 20-25 minutes. Now comes the fun part! Mix in your rinsed quinoa, one cup of halved cherry tomatoes, and two cups of vegetable broth into the pan. Add one teaspoon of dried oregano, one teaspoon of dried basil, and sprinkle salt and pepper to taste. Stir everything well to combine. Bring this mix to a gentle boil. Once it bubbles, reduce the heat to low, cover the pan, and let it simmer for 15 minutes. This allows the quinoa to absorb the broth. Once done, transfer the mixture into a lightly greased 9x13 inch casserole dish. If you love cheese, sprinkle one cup of shredded mozzarella on top. Place the dish in your preheated oven and bake for 20-25 minutes. You’ll know it’s ready when it bubbles and the cheese is golden brown. To make fluffy quinoa, rinse it well before cooking. This removes the bitter coating called saponin. Use two cups of vegetable broth for one cup of quinoa. Bring it to a boil, then lower the heat and cover. Let it simmer for 15 minutes. After cooking, let it rest for five minutes before fluffing with a fork. This will keep it light and airy. For the vegetables, sauté onion and garlic first in olive oil. Cook them until they are soft and fragrant. Then add zucchini and bell pepper. Stir them for about five minutes until they soften. This builds a great flavor base for your casserole. To elevate the dish, try adding a pinch of red pepper flakes for heat. Fresh herbs like thyme or parsley can add brightness. You can also swap out the dried oregano and basil for fresh herbs. Fresh herbs bring a stronger flavor. If you want to change ingredients, use brown rice instead of quinoa. You can also add cooked beans for a protein boost. For a creamier texture, mix in some ricotta cheese or yogurt before baking. Pair the casserole with a light side salad or some crusty bread. A fresh garden salad with lemon vinaigrette works well. It adds a nice contrast to the warm casserole. For gatherings, serve the casserole directly from the dish. Garnish with fresh basil leaves to make it look inviting. You can also sprinkle some extra cheese on top just before serving for a melty touch. {{image_4}} You can easily change the vegetables in this casserole. Try using bell peppers, spinach, or even eggplant. These swaps keep the dish vibrant and fresh throughout the summer. You can also mix in seasonal veggies like corn or cherry tomatoes for a burst of flavor. If you need a quinoa substitute, consider using brown rice or farro. These grains add a nice texture and flavor. Other options include couscous or even cauliflower rice for a low-carb choice. To make this casserole vegan, simply skip the cheese or use a plant-based cheese. You'll still get a creamy texture from the cooked veggies and broth. For a gluten-free option, use certified gluten-free quinoa. This way, everyone can enjoy the dish. If you're looking to cut calories, reduce the olive oil or skip the cheese. You can also use less quinoa and bulk up with more veggies. This keeps the dish light, tasty, and full of nutrients. Each of these variations allows you to enjoy this Summer Zucchini Quinoa Casserole in your own way. For the full recipe, check out the detailed instructions above. To keep your summer zucchini quinoa casserole fresh, first let it cool. Once cool, store it in an airtight container. You can refrigerate it for up to five days. If you want to save it for later, freeze it. Use a freezer-safe container or heavy-duty freezer bags. This way, it can last for up to three months. Remember to label the container with the date. This helps you track how long it has been stored. When you want to enjoy the casserole again, reheating is easy. For the best texture, use an oven. Preheat the oven to 350°F (175°C). Place the casserole in an oven-safe dish and cover it with foil. Heat for about 20 minutes or until warm. If you're in a hurry, you can use the microwave. Place a single serving in a microwave-safe dish. Heat for 1-2 minutes, checking every 30 seconds. This will keep the flavors and texture intact. Enjoy your delicious meal! Can I prepare the Summer Zucchini Quinoa Casserole in advance? Yes, you can prepare it ahead of time. Make the casserole, then cover and refrigerate it. When you're ready to eat, just bake it straight from the fridge. You may need to add a few more minutes to the cooking time. How to customize the recipe to suit my taste preferences? Feel free to swap out the veggies. For instance, you can use spinach, carrots, or even corn. You can also change the cheese or add some cooked chicken for extra protein. What are the best herbs to use for added flavor? Fresh herbs like basil and thyme work great. You can also try parsley or cilantro. These herbs add a fresh taste and brighten up your dish. Is this recipe suitable for a low-carb diet? This recipe is not low-carb due to the quinoa. Quinoa has more carbs than other grains but is also high in protein. If you want a lower carb option, you can use cauliflower rice instead of quinoa. What are the main nutritional benefits of zucchini and quinoa? Zucchini is low in calories and high in vitamins A and C. It also has a lot of water, which keeps you hydrated. Quinoa is a complete protein, meaning it has all nine essential amino acids. It’s also high in fiber, which is good for digestion. What should I do if my casserole is too watery? If your casserole is watery, try draining some liquid before baking. You can also bake it longer to help it thicken up. How can I prevent the quinoa from sticking together? To prevent sticking, rinse the quinoa well before cooking. This removes excess starch. Also, fluff the quinoa with a fork after it cooks to keep it separate. For the full recipe, check out the details above! You learned how to make a tasty Summer Zucchini Quinoa Casserole. We covered the ingredients, simple steps, and tips for perfect results. You can adjust the recipe to fit your taste and needs. Explore flavor swaps and storage tips to keep it fresh. With this dish, enjoy a healthy meal that is easy to make. I hope you try it and enjoy every bite!](https://fastmealmate.com/wp-content/uploads/2025/07/552d1654-693f-4b1b-8ee9-d91b85ff9950-768x768.webp)
![To make One Pan Harvest Chicken and Maple Veggies, gather these key ingredients: - 4 boneless, skinless chicken thighs - 1 large sweet potato, peeled and diced into 1-inch cubes - 2 cups Brussels sprouts, halved - 2 medium carrots, sliced into rounds - 1 large red onion, cut into wedges - 1/4 cup pure maple syrup These ingredients create a colorful and flavorful dish. The chicken provides protein, while the veggies add texture and sweetness. For the delicious marinade, you will need: - 2 tablespoons extra virgin olive oil - 1 teaspoon garlic powder - 1 teaspoon smoked paprika - 1 teaspoon dried thyme - Salt and freshly ground black pepper, to taste This mix of spices brings depth to the chicken. The olive oil helps keep the meat moist and tender. Feel free to switch up the veggies based on what is fresh. Here are some ideas: - Swap sweet potatoes for butternut squash in the fall. - Try green beans instead of Brussels sprouts in the summer. - Use parsnips in place of carrots for a unique flavor. Adjusting your veggies can keep this dish exciting and fresh throughout the year. For the full recipe, check out the complete guide. First, preheat your oven to 400°F (200°C). This step is key for even cooking. While the oven heats, gather your ingredients. You will need chicken thighs, veggies, and seasonings. Make sure to wash the vegetables well. This ensures a fresh taste in your dish. In a large bowl, add two tablespoons of extra virgin olive oil. Then, mix in one teaspoon each of garlic powder, smoked paprika, and dried thyme. Don’t forget to sprinkle in some salt and pepper. This blend will give your chicken great flavor. Now, add the chicken thighs to the bowl. Use your hands or a spoon to coat each piece well with the marinade. Make sure every inch gets some love. In another bowl, toss together the sweet potatoes, Brussels sprouts, carrot rounds, and red onion wedges. Drizzle half of the maple syrup over the veggies. Stir them until they are well coated. Next, take a large baking sheet or oven-safe skillet. Place the marinated chicken in the center and surround it with the veggies. This layout helps everything cook evenly. Finally, pour the remaining maple syrup over the chicken and veggies. This adds sweetness and flavor. Now, you’re ready to bake! For the full recipe details, check out [Full Recipe]. To get juicy chicken, choose boneless, skinless thighs. They stay moist and cook evenly. Use a meat thermometer to check doneness. Aim for 165°F (75°C) in the thickest part. Let the chicken rest for a few minutes after baking. This helps keep the juices inside. Each vegetable cooks at a different rate. Sweet potatoes need longer, while Brussels sprouts cook fast. Cut the sweet potatoes smaller for even cooking. If you want softer carrots, slice them thinner. Always check the doneness of your veggies with a fork. They should be tender but not mushy. For a rustic look, serve right from the pan. This shows off the colors and textures. If you prefer a more formal style, plate the chicken and veggies separately. Drizzle some maple glaze over the dish for shine and flavor. Adding fresh parsley as a garnish gives a bright touch. For a fun twist, use colorful plates to enhance the dish's appeal. For full details, check the Full Recipe. {{image_4}} You can mix and match veggies for your dish. If you want to try something new, consider using: - Butternut squash - Cauliflower florets - Green beans - Zucchini, sliced These options add different colors and tastes to your meal. Each veggie cooks well with the chicken and maple glaze. Feel free to experiment with what you have at home! You can switch up the protein for this recipe. If you prefer beef, use tender beef cuts. For a leaner option, turkey thighs work well too. If you want a plant-based meal, try chickpeas or tofu. Both soak up the flavors nicely. Use the same cooking time to keep everything balanced. Changing the herbs and spices can give your dish a fresh twist. Here are some ideas: - Swap thyme for rosemary for a woodsy taste. - Use cumin for a warm, earthy flavor. - Add a pinch of cinnamon for a hint of sweetness. These changes not only add new tastes but also keep things exciting in the kitchen. Don't hesitate to play around with different combinations to find what you love! Store any leftovers in an airtight container. This keeps the chicken and veggies fresh. Let them cool to room temperature before sealing. You can keep them in the fridge for up to three days. If you want to enjoy the meal later, consider freezing it. To reheat, preheat your oven to 350°F (175°C). Place the leftovers in an oven-safe dish. Cover it with foil to keep moisture in. Heat for about 15-20 minutes. This method helps keep the chicken juicy and the veggies tender. You can also use a microwave if you're short on time. Just cover the dish and heat for a few minutes until warm. If you freeze the dish, make sure to use a freezer-safe container. It can last up to three months in the freezer. When you're ready to eat, thaw it in the fridge overnight. This helps maintain texture and taste. After thawing, reheat it using the oven or microwave for the best results. Enjoy your meal again with great flavor! Yes, you can use chicken breast. Chicken breasts cook faster than thighs. They may dry out if overcooked. I recommend checking the temperature early. Aim for 165°F (75°C). Adjust the cooking time to about 20-25 minutes. This keeps the meat tender and juicy. To make this dish gluten-free, ensure all ingredients are gluten-free. The spices and maple syrup should be checked for gluten. Avoid any sauces or mixes that may contain gluten. This recipe naturally uses whole foods, so it's easy to keep it gluten-free. This dish pairs well with a few sides. Consider serving it with: - Quinoa for a hearty grain option - A fresh green salad for crunch - Mashed potatoes for comfort - Crusty bread to soak up the sweet sauce These sides complement the flavors of the chicken and veggies. Enjoy experimenting with different combinations! You’ve now learned how to make One Pan Harvest Chicken and Maple Veggies. We covered ingredients, preparation steps, and helpful tips for perfecting this dish. You can also try different veggies and proteins to keep it fresh. Store leftovers properly to enjoy again. Cooking should be fun and easy, so don’t hesitate to experiment. Trust in your skills, and enjoy every tasty bite. Happy cooking!](https://fastmealmate.com/wp-content/uploads/2025/07/0df21e0d-fcb2-40bc-96f0-06bb271e9586-768x768.webp)