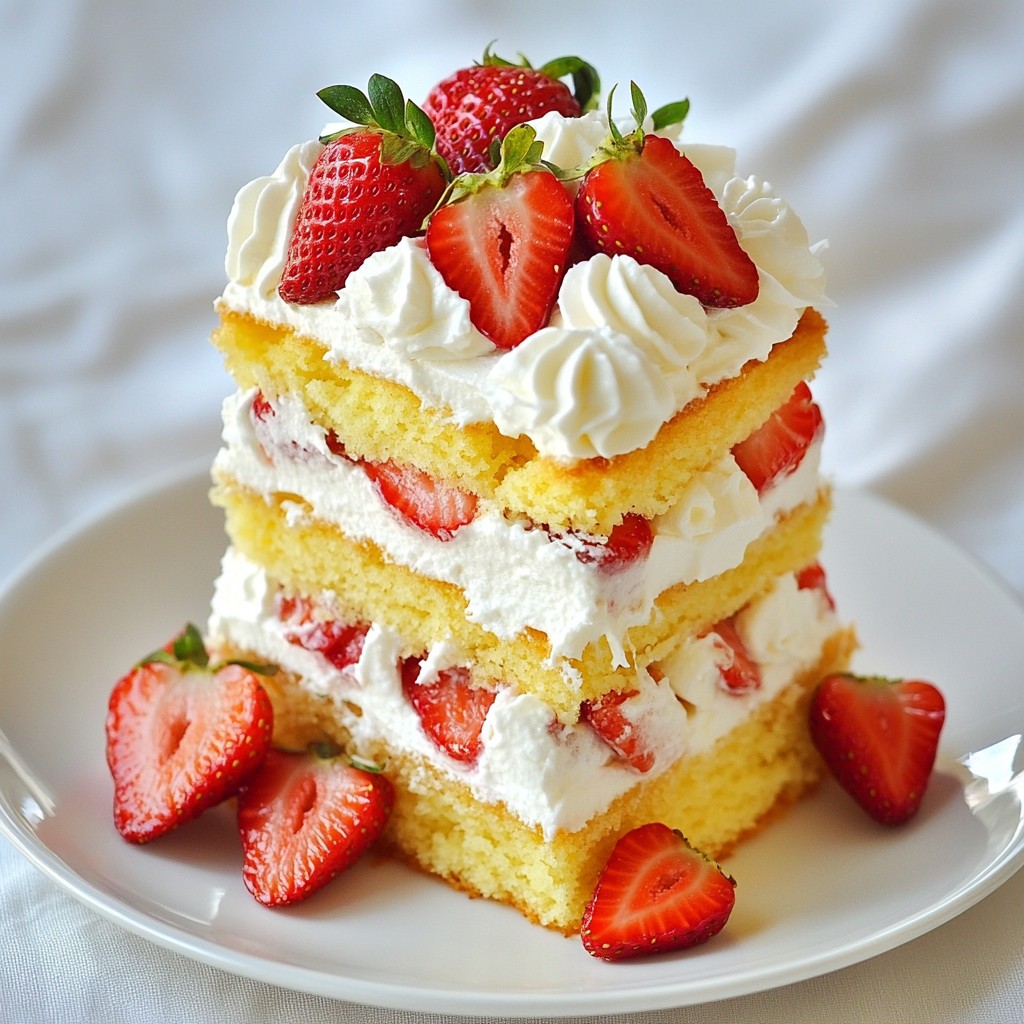
Japanese strawberry shortcake is a light and delightful dessert that everyone loves. With its soft cake layers, fresh strawberries, and creamy whipped topping, it’s a treat that shines at any gathering. I’ll guide you through each step of making this classic dessert at home. Get ready for tips on mastering the cake batter, perfecting the whipped cream, and adding your own fun twists! Let’s dive into the sweet world of Japanese strawberry shortcake!
Why I Love This Recipe
- Deliciously Light and Fluffy: This cake has a wonderfully airy texture that melts in your mouth, making it a delightful dessert for any occasion.
- Fresh Strawberry Flavor: The use of fresh strawberries brings a burst of natural sweetness and vibrant color, elevating the dessert experience.
- Easy to Customize: You can easily adapt this recipe by adding different fruits or flavors, allowing for endless variations to suit your taste.
- Impressive Presentation: This stunning cake not only tastes great but also looks beautiful, making it perfect for special occasions and gatherings.
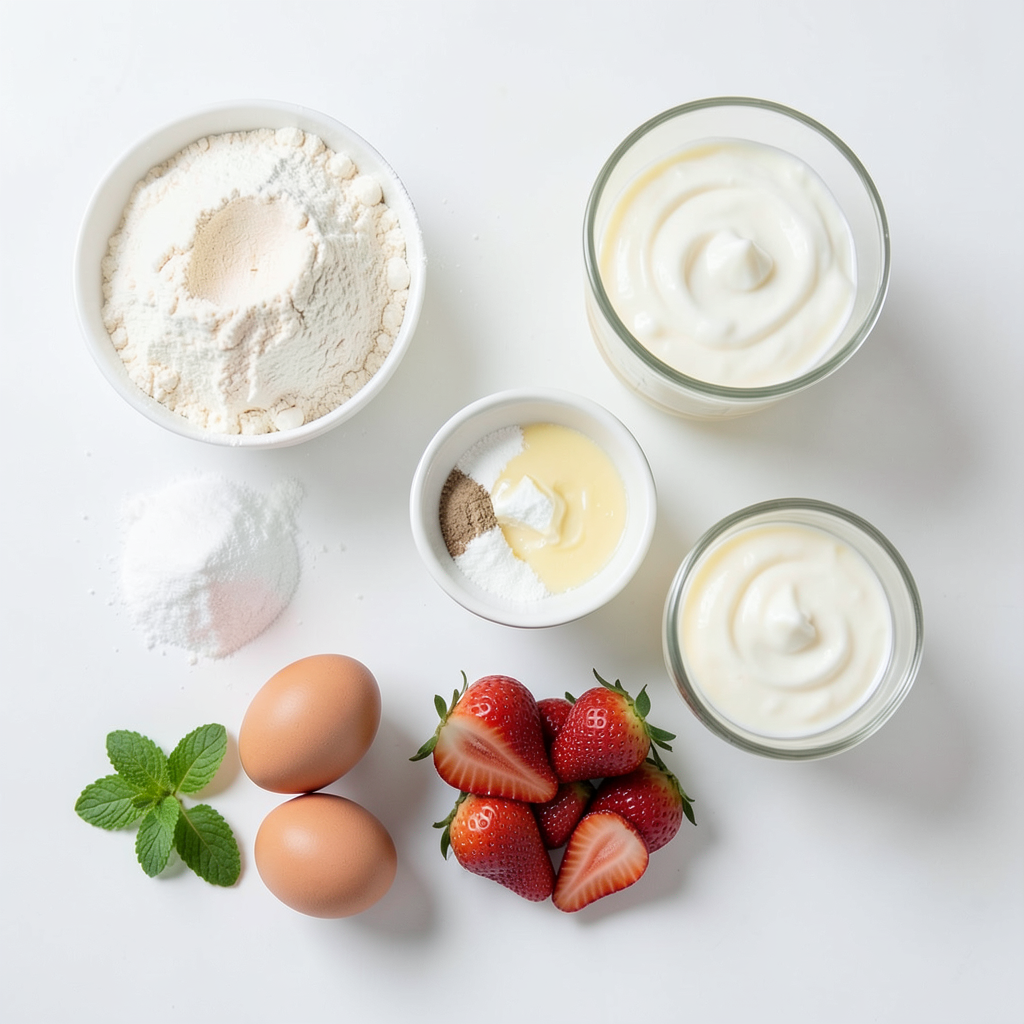
Ingredients
Main Ingredients
- 200g all-purpose flour
- 200g granulated sugar (150g for cake, 50g for whipped cream)
- 1 tsp baking powder
- 1/2 tsp baking soda
- 1/4 tsp salt
- 4 large eggs
- 60ml unsalted butter, melted and cooled
- 1 tsp pure vanilla extract
These main ingredients form the heart of the cake. All-purpose flour provides structure, while sugar adds sweetness. Baking powder and baking soda help the cake rise. Eggs create moisture and richness, and unsalted butter brings a lovely flavor. The vanilla extract adds a fragrant touch.
Optional Ingredients
- 250ml heavy whipping cream
- 300g fresh strawberries, hulled and sliced
- Fresh mint leaves for garnish
The optional ingredients enhance the cake's appeal. Heavy cream makes a rich topping, while fresh strawberries add freshness and color. Mint leaves can make the cake look pretty and taste bright.
Equipment Needed
- Mixing bowls
- Electric mixer
- Cake pans
- Parchment paper
Having the right tools makes cooking easier. Mixing bowls help you prepare your ingredients. An electric mixer saves time when beating eggs and cream. Cake pans shape the cake, and parchment paper helps with easy removal.
Step-by-Step Instructions
Preparing the Cake Batter
1. First, preheat your oven to 170°C (340°F). Grease two 8-inch round cake pans. Line the bottom with parchment paper. This helps with easy removal later.
2. In a medium bowl, whisk together 200g of all-purpose flour, 1 tsp of baking powder, 1/2 tsp of baking soda, and 1/4 tsp of salt. Set this mix aside.
3. In a large bowl, beat 4 large eggs with 150g of sugar. Use an electric mixer on medium speed. Mix for about 5 minutes until it looks thick and pale, reaching the ribbon stage.
Baking the Cakes
4. Slowly add 60ml of melted unsalted butter and 1 tsp of pure vanilla extract to the egg mix. Mix on low speed until just combined.
5. Gently fold the flour mix into the egg batter using a spatula. Be careful not to overmix; this keeps the batter light and airy.
6. Divide the batter evenly between the two pans. Bake for 25-30 minutes. The cakes should be golden brown and a toothpick should come out clean.
7. After baking, let the cakes cool in the pans for 10 minutes. Then, invert them onto a wire rack to cool completely.
Assembling the Strawberry Shortcake
8. While the cakes cool, whip 250ml of heavy cream with 50g of sugar in a medium bowl. Use an electric mixer on medium speed until soft peaks form.
9. Once cool, cut each cake in half horizontally, giving you four layers.
10. Place the first layer on a plate. Spread a generous amount of whipped cream over it. Add a layer of sliced strawberries evenly on top.
11. Repeat with the second layer: whipped cream, more strawberries, then the third layer of cake. Spread a thin layer of whipped cream over the top and sides for a crumb coat. Chill the cake for 30 minutes.
12. After chilling, use the remaining whipped cream to create swirls on top. Decorate with the last of the sliced strawberries.
13. Optionally, add fresh mint leaves for garnish. Slice and enjoy your beautiful Japanese Strawberry Shortcake!
Tips & Tricks
Ensuring Cake Moisture
Keeping your cake moist is key. Start by using room-temperature eggs. Cold eggs can make the batter dense. Next, mix the batter just enough. Overmixing can lead to a dry cake. Bake for 25 to 30 minutes. Use a toothpick to check for doneness. Remove the cake when it’s golden brown and springs back when touched.
Perfecting the Whipped Cream
Whipped cream should be fluffy but not runny. Start with cold heavy cream for best results. Beat the cream until soft peaks form. This means it holds its shape but is still smooth. You can add vanilla or lemon zest for flavor. For a twist, try using matcha or cocoa powder for different tastes.
Layering Techniques
Even layers make for a pretty cake. Use a serrated knife to slice the cakes in half. Take your time, and keep the knife steady. Spread whipped cream evenly on each layer. This helps the strawberries stick better. For the final touch, decorate with sliced strawberries on top. It gives a fresh and colorful look.
Pro Tips
- Room Temperature Eggs: Ensure your eggs are at room temperature before mixing; this helps them incorporate better and creates a fluffier batter.
- Gentle Folding: When combining the flour mixture with the egg batter, use a gentle folding technique to maintain airiness in your batter, which leads to a lighter cake.
- Cool Completely: Allow the cakes to cool completely before cutting. This prevents the layers from crumbling and ensures a clean cut.
- Whipped Cream Consistency: Whip the cream until soft peaks form for a light texture. Be careful not to overwhip, or it could turn grainy.
Variations
Different Flavors
You can make Japanese strawberry shortcake more exciting with different flavors. One popular choice is matcha-infused shortcake. Matcha powder gives the cake a lovely green color and a unique taste. It pairs well with strawberries and cream. To make this variation, simply mix in about two tablespoons of matcha powder into your dry ingredients.
Coconut or almond variations also shine. You can use coconut milk instead of some butter for a tropical twist. For an almond flavor, replace part of the vanilla extract with almond extract. This gives the cake a fragrant touch. Each variation adds a new layer of taste while keeping the cake light.
Ingredient Substitutions
Not everyone can use the same ingredients. For a gluten-free option, consider using a gluten-free all-purpose flour blend. This keeps the texture light and fluffy. Make sure your blend has xanthan gum for better structure.
If you need a dairy-free alternative, use coconut cream instead of heavy whipping cream. This gives a rich taste without dairy. You can also use a dairy-free butter substitute to keep the cake moist.
Presentation Ideas
Your Japanese strawberry shortcake can look stunning with some creative decorating. Use a piping bag to make swirls of whipped cream on top. This adds elegance to your cake. You can also layer fresh strawberries on top in a fan shape. This makes the dessert eye-catching.
When serving, consider adding a few mint leaves for color. They sit nicely next to the strawberries. Use a clean knife to slice the cake for neat pieces. A beautiful presentation makes your cake even more enjoyable to eat.
Storage Info
Storing Leftovers
To keep your Japanese strawberry shortcake fresh, store it in the fridge. Place it in an airtight container. This helps keep the cake moist and prevents it from drying out. You can also cover it with plastic wrap if you don't have a container. For longer storage, you can freeze the cake. Wrap each slice tightly in plastic wrap, then place it in a freezer bag. Label the bag with the date to track storage time.
Shelf Life
When stored properly, the cake lasts about 3-4 days in the refrigerator. After that, the texture and flavor may change. If you freeze it, the cake can last up to 2 months. However, for the best taste, enjoy it within a month.
Signs of Spoilage
Always check for signs of spoilage before eating leftover cake. If you see mold or an off smell, it's time to discard it. The cream may also separate or become watery. If the cake feels hard or dry, it's best to throw it away.
FAQs
What is Japanese Strawberry Shortcake?
Japanese Strawberry Shortcake is a light and fluffy cake. It features layers of soft sponge, fresh strawberries, and creamy whipped cream. This dessert is a staple in Japan, especially during celebrations like birthdays. It represents joy and happiness. The cake is not overly sweet, which allows the fresh strawberries to shine. The texture is soft and airy, making each bite delightful. In Japan, this treat often symbolizes good times shared with family and friends.
Can I make this recipe in advance?
Yes, you can prepare parts of this cake ahead of time. You can bake the cake layers a day before. Just store them in an airtight container at room temperature. You can also whip the cream and slice the strawberries up to a few hours ahead. Keep the whipped cream in the fridge to stay fresh. When ready, assemble the cake just before serving. This helps keep the cake light and fluffy.
What are common mistakes to avoid?
Common mistakes include overmixing the batter and not cooling the cakes properly. Overmixing can lead to a dense cake. Make sure to fold in the flour gently. Also, if the cakes are not cooled completely, the whipped cream may melt. Always let the cakes cool on a wire rack to avoid sogginess. Another mistake is not measuring the ingredients accurately, which can affect the texture.
How do I make the whipped cream stable?
To keep whipped cream stable, use cold heavy cream. Make sure your mixing bowl and beaters are also cold. Adding a bit of powdered sugar helps, too. You can also use cornstarch or gelatin for extra stability. If using gelatin, dissolve it in a small amount of warm water before adding it to the cream. This will help the whipped cream hold its shape longer, especially in warm weather.
This blog post covered the essential ingredients and step-by-step instructions for making a perfect strawberry shortcake. You learned about both main and optional ingredients and the right equipment you'll need. We explored baking tips, variations, and proper storage.
In summary, with the right methods, you can create a delicious dessert that impresses. Enjoy experimenting with flavors and techniques. Happy baking!