Irresistible King’s Hawaiian Cheesecake Danish Recipe

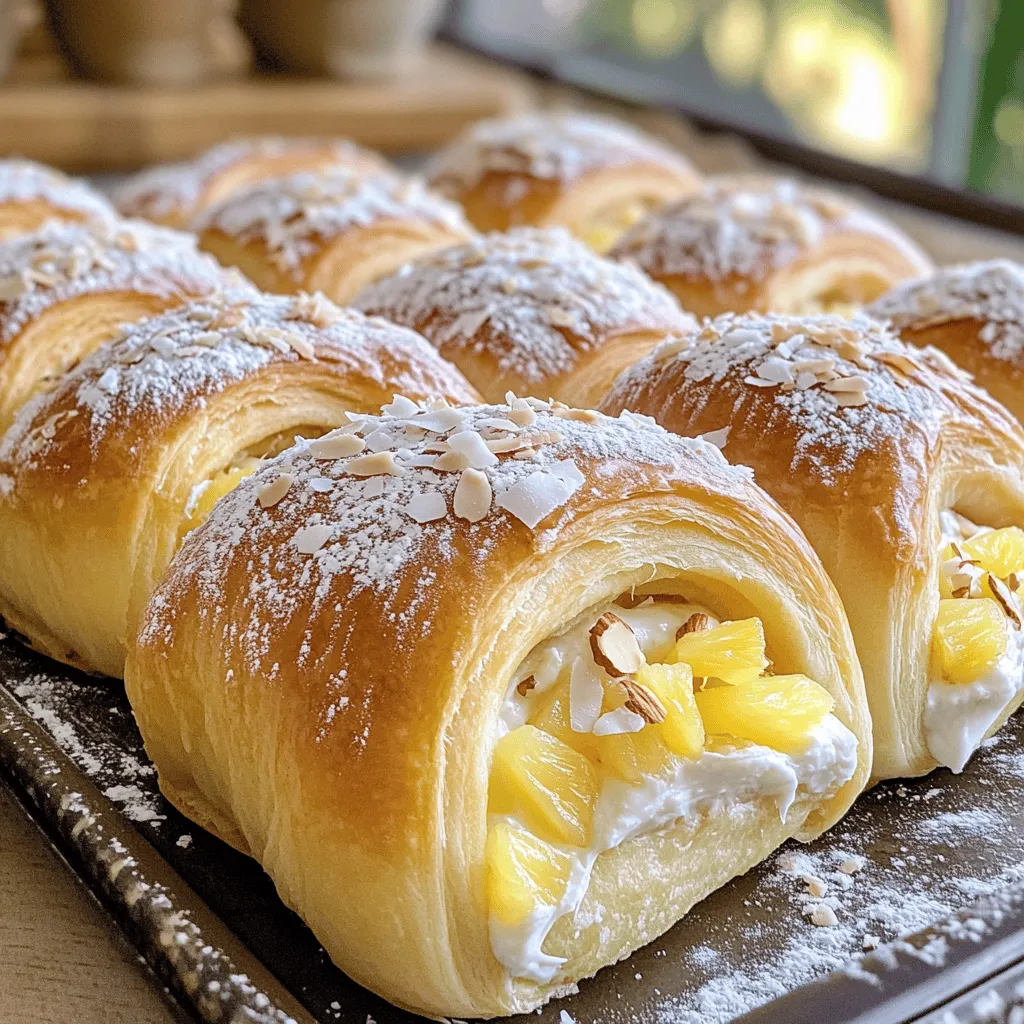
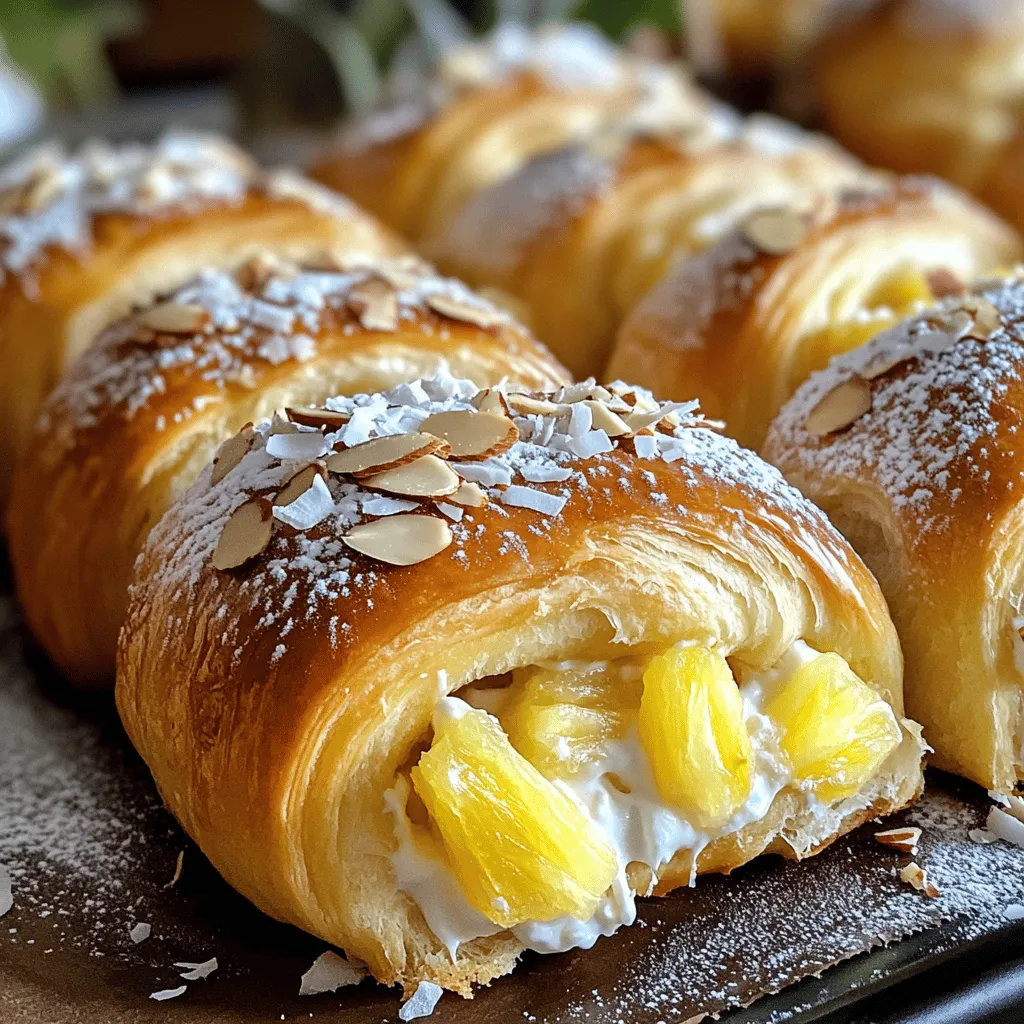
Are you ready to take your dessert game to the next level? This King’s Hawaiian Cheesecake Danish recipe combines creamy cheesecake with soft, fluffy sweet rolls. It’s simple to make and perfect for any occasion. Whether you’re a baking novice or a seasoned pro, I’ll guide you through each step. Let’s dive into the world of sweet, cheesy goodness and create something irresistible together!
Ingredients
Key Ingredients for King’s Hawaiian Cheesecake Danish
To make this tasty treat, you need these key ingredients:
– 1 package of King’s Hawaiian Sweet Rolls (12 rolls)
– 8 oz cream cheese, softened to room temperature
– 1/2 cup powdered sugar
– 1 teaspoon pure vanilla extract
– 1/4 cup sour cream
– 1 tablespoon fresh lemon juice
– 1/4 cup crushed pineapple, well-drained
– 1 egg (for egg wash)
– Optional: Sliced almonds or shredded coconut for topping
Each ingredient plays a special role. The King’s Hawaiian Sweet Rolls bring a soft, sweet base. The cream cheese adds creaminess and tang. Powdered sugar sweetens the filling. Vanilla extract gives a warm flavor, while the lemon juice brightens it up. The crushed pineapple adds a fruity twist, making each bite refreshing.
Alternatives for Common Ingredients
If you don’t have an item, here are some swaps:
– Cream cheese: Use mascarpone cheese for a richer taste.
– Sour cream: Greek yogurt works well and adds protein.
– Powdered sugar: Blend granulated sugar until fine for a quick fix.
– Fresh lemon juice: Use bottled lemon juice in a pinch.
These alternatives can still give you a yummy cheesecake Danish. Try them to see what you like best!
Optional Toppings and Enhancements
You can dress up your Danish with these toppings:
– Sliced almonds add a nice crunch.
– Shredded coconut brings a tropical feel.
– Drizzle with chocolate or caramel sauce for extra sweetness.
Feel free to get creative! These toppings can make your Danish even more special. Enjoy experimenting with flavors and textures that excite your taste buds!
Step-by-Step Instructions
Prepping the Oven and Ingredients
First, set your oven to 350°F (175°C). This warms it up for baking. Gather all your ingredients. You will need King’s Hawaiian Sweet Rolls, cream cheese, powdered sugar, vanilla extract, sour cream, lemon juice, and crushed pineapple. Having everything ready makes the process smooth.
Making the Cream Cheese Filling
In a large bowl, beat 8 oz of softened cream cheese. Use an electric mixer for a smooth texture. Add 1/2 cup powdered sugar, 1 teaspoon vanilla extract, 1/4 cup sour cream, and 1 tablespoon fresh lemon juice. Mix these until they blend well. Finally, fold in 1/4 cup of well-drained crushed pineapple. Make sure it’s fluffy and creamy, scraping the bowl sides as you mix.
Assembling the Danish
Take the King’s Hawaiian Sweet Rolls and gently pull them apart. Flatten each roll a bit with your fingers for a better base. Spoon a generous dollop of the cream cheese filling into each roll’s center. Carefully fold the edges over the filling. Pinch the seams to seal them tight. Place the rolls seam side down on a parchment-lined baking sheet.
Next, whisk one egg in a small bowl. Brush the tops of your rolls lightly with the egg wash. This helps them turn golden while baking. If you want, sprinkle sliced almonds or shredded coconut on top for extra flavor. Bake your Danish for 18-20 minutes until golden brown and puffy. After baking, let them cool slightly. Enjoy them warm for the best taste!
Tips & Tricks
How to Achieve the Perfect Puff
To get that perfect puff, start with room-temperature rolls. This helps them rise well. When you flatten the rolls, be gentle. You want to keep some air inside. Make sure to pinch the seams tightly after filling. This keeps the filling from spilling out. Lastly, brush on a good egg wash. It gives a nice golden color.
Storing Tips for Leftovers
Store any leftover Danish in an airtight container. This keeps them fresh. You can place them in the fridge for up to three days. If you want to keep them longer, freeze them. Just wrap each Danish in plastic wrap and then foil. They will stay good for up to a month.
Reheating Instructions for Best Results
To reheat, preheat your oven to 350°F (175°C). Place the Danish on a baking sheet. Heat them for about 10-12 minutes. This keeps them warm and soft. If you’re in a hurry, you can use the microwave. Heat them for about 15-20 seconds. But be careful, as this can make them a bit chewy.

Variations
Different Flavor Combinations
You can mix things up with flavors. Try adding lemon zest for a bright twist. Or, use fresh berries like blueberries or strawberries. These fruits bring a lovely sweetness. You can also swap crushed pineapple for chopped peaches. This gives a different fruity vibe. If you like chocolate, fold in mini chocolate chips. They melt and create rich pockets of flavor.
Gluten-Free Alternatives
If you need a gluten-free option, use gluten-free sweet rolls. Look for brands that mimic the soft texture of King’s Hawaiian rolls. You can also make your own dough using gluten-free flour. Just make sure to add the right binders like xanthan gum. This will help hold the Danish together. The filling can stay the same since cream cheese is naturally gluten-free.
Seasonal Ingredient Swaps
Use seasonal fruits to keep things fresh. In the fall, try using pumpkin puree. Mix it into the cream cheese filling with some spices. In winter, add cranberries for a tart kick. As spring comes, fresh strawberries work well. In summer, peaches or cherries would be perfect. These swaps keep your Danish exciting all year round. Each season brings new flavors to explore!
Storage Info
Best Practices for Preservation
To keep your King’s Hawaiian Cheesecake Danish fresh, store them in an airtight container. This helps lock in moisture and flavor. You can also wrap each Danish in plastic wrap for extra protection. Make sure to store them in a cool, dry place. Avoid direct sunlight, as it can change the texture.
Storing in the Freezer
If you want to save some for later, freezing is a great option. First, let the Danish cool completely. Then, wrap them tightly in plastic wrap or aluminum foil. Place them in a freezer-safe bag or container. This prevents freezer burn and keeps them tasting fresh. When you’re ready to enjoy, just thaw them in the fridge overnight.
How Long Do They Last?
When stored properly, your Danish will last about 3 days at room temperature. In the fridge, they can stay fresh for up to a week. If frozen, they can last for about 2 to 3 months. Just remember to check for any signs of spoilage before eating. Enjoy your delicious King’s Hawaiian Cheesecake Danish anytime!
FAQs
What is King’s Hawaiian Cheesecake Danish?
King’s Hawaiian Cheesecake Danish is a sweet treat made using King’s Hawaiian Sweet Rolls. It features a creamy filling made from cream cheese, sugar, and pineapple. The rolls get a golden crust while baking, making them soft and delicious. You can enjoy them as breakfast or dessert. Their sweet and tangy flavor pairs well with coffee or tea. I love how simple yet fancy they look on a plate!
Can I make these ahead of time?
Yes, you can make these ahead of time! Prepare the filling and the rolls a day before. Store the filled rolls in the fridge, covered tightly. When ready to bake, just take them out and let them sit for about 30 minutes at room temperature. Then, brush with egg wash and bake. This way, you have fresh Danish ready with less stress!
Where can I buy King’s Hawaiian Sweet Rolls?
You can find King’s Hawaiian Sweet Rolls at most grocery stores. They are usually in the bread aisle. If you can’t find them there, check the bakery section. You can also order them online from various retailers. Having these rolls on hand makes it easy to whip up this tasty cheesecake Danish whenever you want!
In this post, I covered the key ingredients and steps to make a King’s Hawaiian Cheesecake Danish. I shared tips for perfecting your puff and storing leftovers. You can even try different flavors to make this treat your own.
Remember, creativity is key in the kitchen. Don’t be afraid to experiment with toppings or flavors. Enjoy making this fun and tasty dessert!


![- 1 medium ripe dragonfruit (pitaya) - 1 ripe banana - 1 cup coconut milk - 1/2 cup Greek yogurt - 1/2 cup passion fruit pulp - 1 tablespoon honey or maple syrup - 1/2 cup ice cubes - Fresh mint leaves for garnish The dragonfruit is the star of our smoothie. Its bright pink skin and white flesh make your drink pop. This fruit is sweet and has tiny seeds that add a nice crunch. Bananas bring a creamy texture to the mix. They also add natural sweetness, which balances the tartness of the passion fruit. Coconut milk gives a rich, tropical flavor. It makes the smoothie creamy and smooth. You can switch it with almond milk if you want a nutty touch. Greek yogurt boosts the protein content. It also adds a pleasant tang, making the smoothie thicker. Passion fruit pulp offers a burst of flavor. It has a sweet and tangy taste that brightens the smoothie. You can use fresh or canned pulp, depending on what's available. Honey or maple syrup acts as a sweetener. You can adjust this based on your taste. Ice cubes keep the drink cold and refreshing. They make it perfect for hot days. Finally, fresh mint leaves add a splash of color and a hint of freshness. - Dairy-free options: Use a dairy-free yogurt instead of Greek yogurt. Almond or oat milk can replace coconut milk. - Sweetener variations: Try agave syrup or stevia if you want different sweeteners. - Flavor enhancers: Add vanilla extract or a squeeze of lime for a unique twist. These substitutions help you create a smoothie that fits your diet and taste. You can easily customize this drink to make it your own! For the full recipe, be sure to check the [Full Recipe]. First, gather your ingredients. You need dragonfruit, banana, coconut milk, Greek yogurt, and honey. Cut the dragonfruit in half and scoop out the flesh. In your high-speed blender, add the dragonfruit, banana, coconut milk, Greek yogurt, and honey. Blend on medium-high speed for about 30 seconds. The goal is a smooth and creamy texture. A high-speed blend helps mix everything well. This step is key for a tasty base. Now, let’s make that beautiful swirl. Pour half of the dragonfruit mixture into a tall glass. Make sure you leave some space at the top for the passion fruit pulp. Next, return the rest of the mixture to the blender. Add the passion fruit pulp and blend briefly. You want to mix just enough to create a marbled look. Pour the passion fruit blend over the first layer in the glass. This lets the colors swirl together, making it look stunning. It’s time to make your smoothie look great! Use clear glasses to show off the layers. Top your drink with ice cubes to keep it cool. For a touch of color, add a sprig of fresh mint leaves. This fresh mint not only looks nice but adds a nice aroma too. Enjoy your Dragonfruit Passion Swirl Smoothie! For the full recipe, check the instructions above. To make your smoothie creamy, use a high-speed blender. Start on medium speed, then switch to high. Blend until smooth, which usually takes about 30 seconds. For chilled drinks, ice is key. Use fresh ice cubes, but don’t overdo it. Too much ice can make your smoothie watery. Aim for a balance between ice and liquid. Sweetness is easy to adjust. If you want it sweeter, add more honey or maple syrup. You can also try different fruits like mango or berries. These fruits add layers of flavor and can change the taste profile. Experiment with what you like best! Preparing dragonfruit is simple. Cut it in half, then scoop out the flesh with a spoon. For passion fruit, cut it in half and scoop out the pulp. Make sure to use ripe fruits for the best flavor. If you have leftovers, store them in airtight containers in the fridge. This keeps your ingredients fresh for later use. {{image_4}} Trying different flavors keeps our smoothies exciting. Here are some fun ideas to mix things up. You can create a tropical fruit mix by adding mango or pineapple. These fruits bring sweetness and a sunny flavor. You can also add berries, like strawberries or blueberries. They boost the color and add a tart taste. If you want to add protein, mix in some protein powder. This helps make your smoothie a meal. For those watching calories, use low-calorie sweeteners. This keeps the taste without the extra calories. Change your smoothie with the seasons. In summer, try adding fresh peaches or watermelon for a refreshing twist. In fall, consider adding spices like cinnamon or pumpkin puree. These ingredients bring warm flavors to your drink. Experiment with these variations for a fun smoothie experience. For the full recipe, check out the previous section! You can store your Dragonfruit Passion Swirl Smoothie in the fridge for up to 24 hours. Just keep it in a sealed container to maintain freshness. If you want to prep for the week, pour the smoothie into ice cube trays or small containers. This way, you can easily blend a quick smoothie whenever you want. Frozen portions can last for about three months. To keep fresh dragonfruit and passion fruit at their best, store them at room temperature. Once you cut them, wrap them tightly and put them in the fridge. This helps keep them fresh for up to three days. For coconut milk and yogurt, always check the expiration date. Store them in the fridge and use them within a week after opening for the best taste. Look out for any strange smells or colors in your ingredients. If your dragonfruit turns brown or feels mushy, it’s time to toss it. For passion fruit, if the skin is too wrinkled or hard, it’s past its prime. Always check for mold on yogurt or coconut milk. When in doubt, it’s best to avoid using those ingredients. Freshness is key to enjoying your smoothie to the fullest. Dragonfruit is packed with nutrients. It has a high vitamin C content. This fruit supports your immune system. It contains fiber, which aids digestion. Dragonfruit is low in calories, making it a great snack. It also has antioxidants that help fight free radicals. These properties may lower your risk of chronic diseases. Eating dragonfruit can improve heart health by lowering bad cholesterol. Overall, dragonfruit is a tasty and healthy choice. Yes, you can use frozen fruits! Frozen fruits make the smoothie cold and thick. They are also convenient since they last longer. If you use frozen dragonfruit, thaw it slightly for easier blending. For other fruits, like bananas, you can slice and freeze them in advance. Just remember to adjust the amount of ice. If you want a creamier smoothie, reduce the ice when using frozen fruits. Making this smoothie vegan is easy! Simply swap Greek yogurt with a dairy-free yogurt. Almond or coconut yogurt works well. Replace honey with maple syrup for a vegan sweetener. You can also add a scoop of plant-based protein powder for extra nutrition. These simple swaps keep the smoothie delicious and vegan-friendly. Absolutely! This smoothie is bright and colorful, which kids love. The sweet taste of dragonfruit and banana makes it appealing. It has a creamy texture that is easy to drink. Packed with vitamins, it is a healthy choice for kids. Serve it in fun cups or with a colorful straw to make it exciting. This smoothie is a great way to sneak in some fruit for kids! This blog post laid out all you need for a tasty Dragonfruit Passion Swirl Smoothie. We covered the main ingredients, tips for blending, and fun variations. Remember, you can tweak the recipe to match your taste and needs. Smoothies are great for quick meals or snacks. Enjoy experimenting with flavors and ingredients! Drink it fresh for the best taste and health benefits. Your smoothie journey begins now!](https://fastmealmate.com/wp-content/uploads/2025/06/150b527a-71cf-4bb1-8c82-2935aeae296c-768x768.webp)


![- 3 medium apples, peeled, cored, and diced into small cubes - 1 cup walnuts, finely chopped to enhance texture - 1 teaspoon ground cinnamon for warmth - 1/2 cup grape juice (preferably 100% juice for a natural flavor) - 2 tablespoons honey (or agave syrup for a vegan alternative) - 1/4 cup raisins for sweetness and chew - 1 tablespoon fresh lemon juice for brightness To make Passover charoset with grape juice, I focus on using fresh and quality ingredients. Apples are the star here. I love using sweet and crisp varieties like Fuji or Honeycrisp. They bring great flavor and texture. Walnuts give a nice crunch and a bit of richness. Ground cinnamon adds warmth and depth. Grape juice not only sweetens but also ties all the flavors together. - For a vegan option, swap honey for agave syrup. - If nuts are a concern, replace walnuts with sunflower seeds. I enjoy adapting recipes to fit different needs. If you want a vegan charoset, agave syrup works well in place of honey. If you want a nut-free version, sunflower seeds give a similar crunch without the allergens. - Choose firm apples that are not bruised. - Look for grape juice that is 100% juice without added sugars. When selecting apples, feel them in your hand. They should feel firm and solid. For grape juice, read the label. Aim for juices that are pure and natural. This choice enhances the taste of your charoset. For the full recipe, check the details above. Enjoy your cooking! - Dicing Apples and Chopping Walnuts Start by peeling, coring, and dicing three medium apples into small cubes. Use a sharp knife for safety and precision. Next, finely chop one cup of walnuts. This adds a nice crunch to your charoset. Make sure the apples and walnuts are mixed well in a large bowl. - Mixing Cinnamon with Apples and Walnuts Now, sprinkle one teaspoon of ground cinnamon over the apple and walnut mix. Toss everything gently to coat the pieces evenly. The scent of cinnamon will make your kitchen smell warm and inviting. - Whisking Ingredients Together In a small bowl, whisk together half a cup of grape juice, two tablespoons of honey (or agave syrup), and one tablespoon of fresh lemon juice. Make sure the mixture is smooth and well-blended. This juice mix will bring sweetness and tang to the charoset. - Tossing Mixture for Even Coating Carefully pour the grape juice mixture over the apple-walnut blend. Stir gently until everything is well coated. This ensures that each bite is full of flavor. Next, add a quarter cup of raisins to the mix. Give it another gentle stir to evenly distribute the raisins. - Serving Suggestions Cover the bowl with plastic wrap or a lid and place it in the refrigerator. Let it chill for at least one hour. This helps the flavors meld beautifully. For serving, transfer the charoset to a decorative platter or individual bowls. A light sprinkle of cinnamon on top adds visual appeal. You can find the full recipe [here]. To make the best charoset, chill it for at least one hour. This time helps the flavors mix well. The longer it sits, the better it tastes. If you have time, chill it overnight for even more flavor. For flavor enhancements, try adding spices. A pinch of nutmeg adds warmth. You can also mix in a splash of orange juice for a citrus twist. This makes your charoset unique and exciting. When serving, aim for a beautiful look. Place the charoset in a nice bowl. For eye appeal, sprinkle extra cinnamon on top. You can also add whole walnuts or a few raisins for color. These simple touches make your dish stand out. One common mistake is overmixing the ingredients. Mixing too much can turn the apples mushy. Instead, mix gently to keep the cubes intact. This keeps the texture fresh and enjoyable. Another mistake is using the wrong apple varieties. For charoset, use sweet apples like Honeycrisp or Fuji. Avoid tart apples, as they can spoil the flavor balance. Choosing the right apples makes a big difference in taste. {{image_4}} When I think of Passover charoset, I picture the classic blend of apples and nuts. The traditional recipe sticks to simple flavors. It uses just apples, walnuts, and a touch of cinnamon. This mix brings a sweet and nutty taste that feels like home. Modern takes on charoset can be more creative. You can add dried fruits like apricots or figs for a twist. Some people also like to mix in spices like nutmeg or ginger. These small changes can make your charoset unique, while still honoring its roots. If you need a gluten-free charoset, you're in luck! All the main ingredients are naturally gluten-free. Just double-check your walnuts and any additional ingredients for cross-contamination. For vegan options, swap honey with agave syrup. This keeps the sweetness without using animal products. If you want a low-sugar version, use less honey or agave. You can rely more on the natural sweetness of the apples and grapes. Charoset varies across cultures. For example, in Sephardic traditions, you may find charoset made with dates and red wine. This adds a rich, deep flavor. In Ashkenazi traditions, the apple and walnut combo is more common. You can also explore different styles, like adding pomegranate seeds for a fresh taste. Each variation tells a story of its own, connecting us to our heritage. So, feel free to experiment and find what speaks to you! For the full recipe, check out my Passover Charoset Delight. To keep your charoset fresh, refrigerate it right after making it. Place it in an airtight container. This helps keep the flavors strong and the texture nice. If you have leftovers, they will stay tasty in the fridge for several days. You can also freeze charoset if you want to save it for later. Use a freezer-safe container and leave some space at the top. This allows it to expand as it freezes. Just remember to thaw it in the fridge before serving. Charoset lasts about 3 to 5 days in the fridge. If you freeze it, it can last for about 3 months. Always check for any off smells or changes in texture before eating. This way, you can enjoy it at its best. When reheating charoset, do it gently. Use the microwave or a small pot. Heat it on low to keep it fresh. Stir it often to warm it evenly. You want to avoid cooking it too much. This helps maintain the great taste and texture you love. Passover Charoset is a sweet and chunky mix. It usually includes fruits, nuts, and wine or juice. This dish represents the mortar used by the Jewish people when they built in Egypt. It is an important part of the Passover Seder. During the Seder, we eat charoset to remember the hard work of our ancestors. The flavors remind us of the sweetness of freedom and the hope for a bright future. Yes, you can make Passover Charoset ahead of time. It is best to prepare it a day before. This allows the flavors to blend well. You should let it chill in the fridge for at least one hour. For best taste, the longer it sits, the better it becomes. Just cover it tightly to keep it fresh. Charoset pairs well with many foods. It goes nicely with matzah during Passover. You can also serve it with roasted meats or brisket. Some people like to add it to salads for a sweet crunch. Charoset's flavors balance well with savory dishes. Try it with cheese for a unique snack. This blog covered how to make Passover Charoset, from choosing the right ingredients to serving ideas. You learned about essential ingredients like apples and walnuts. I shared tips for easy substitutions and how to select quality items. You got step-by-step instructions, tricks for the best results, and variations to try. Proper storage and reheating tips help keep your Charoset fresh. Embrace this dish's significance and flavors. Enjoy making your own delicious Charoset this Passover!](https://fastmealmate.com/wp-content/uploads/2025/06/25826363-49ff-4690-9ead-27057b46bedc-768x768.webp)

