Instant Pot Beef Stew Rich and Hearty Comfort Dish

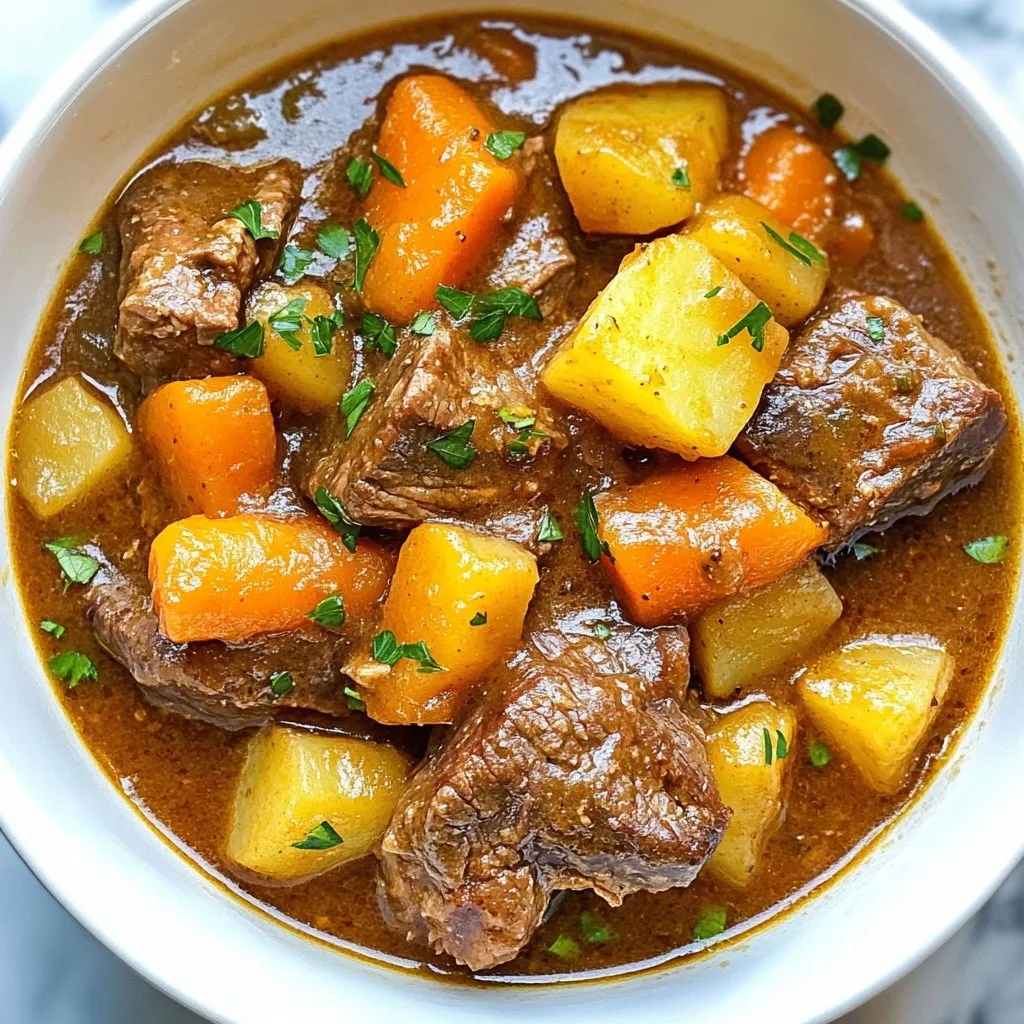
Looking for a warm, hearty dish that’s simple to make? Instant Pot Beef Stew hits the spot every time. Packed with tender beef, fresh veggies, and bold seasonings, this recipe combines comfort and ease. In this guide, I’ll walk you through the steps to create a rich stew that will impress your family. Get ready to dive into the savory goodness of this classic meal!
Why I Love This Recipe
- Comforting Warmth: This beef stew is perfect for chilly nights, providing a hearty and comforting meal that warms you from the inside out.
- Easy One-Pot Meal: Using the Instant Pot means less cleanup, as everything is cooked in one pot, making it a convenient choice for busy weeknights.
- Flavorful and Satisfying: With tender beef and a medley of vegetables, this stew is packed with rich flavors that are sure to satisfy your hunger.
- Customizable Recipe: You can easily swap in your favorite vegetables or adjust the seasonings to suit your taste, making it a versatile dish.
Ingredients
List of Ingredients
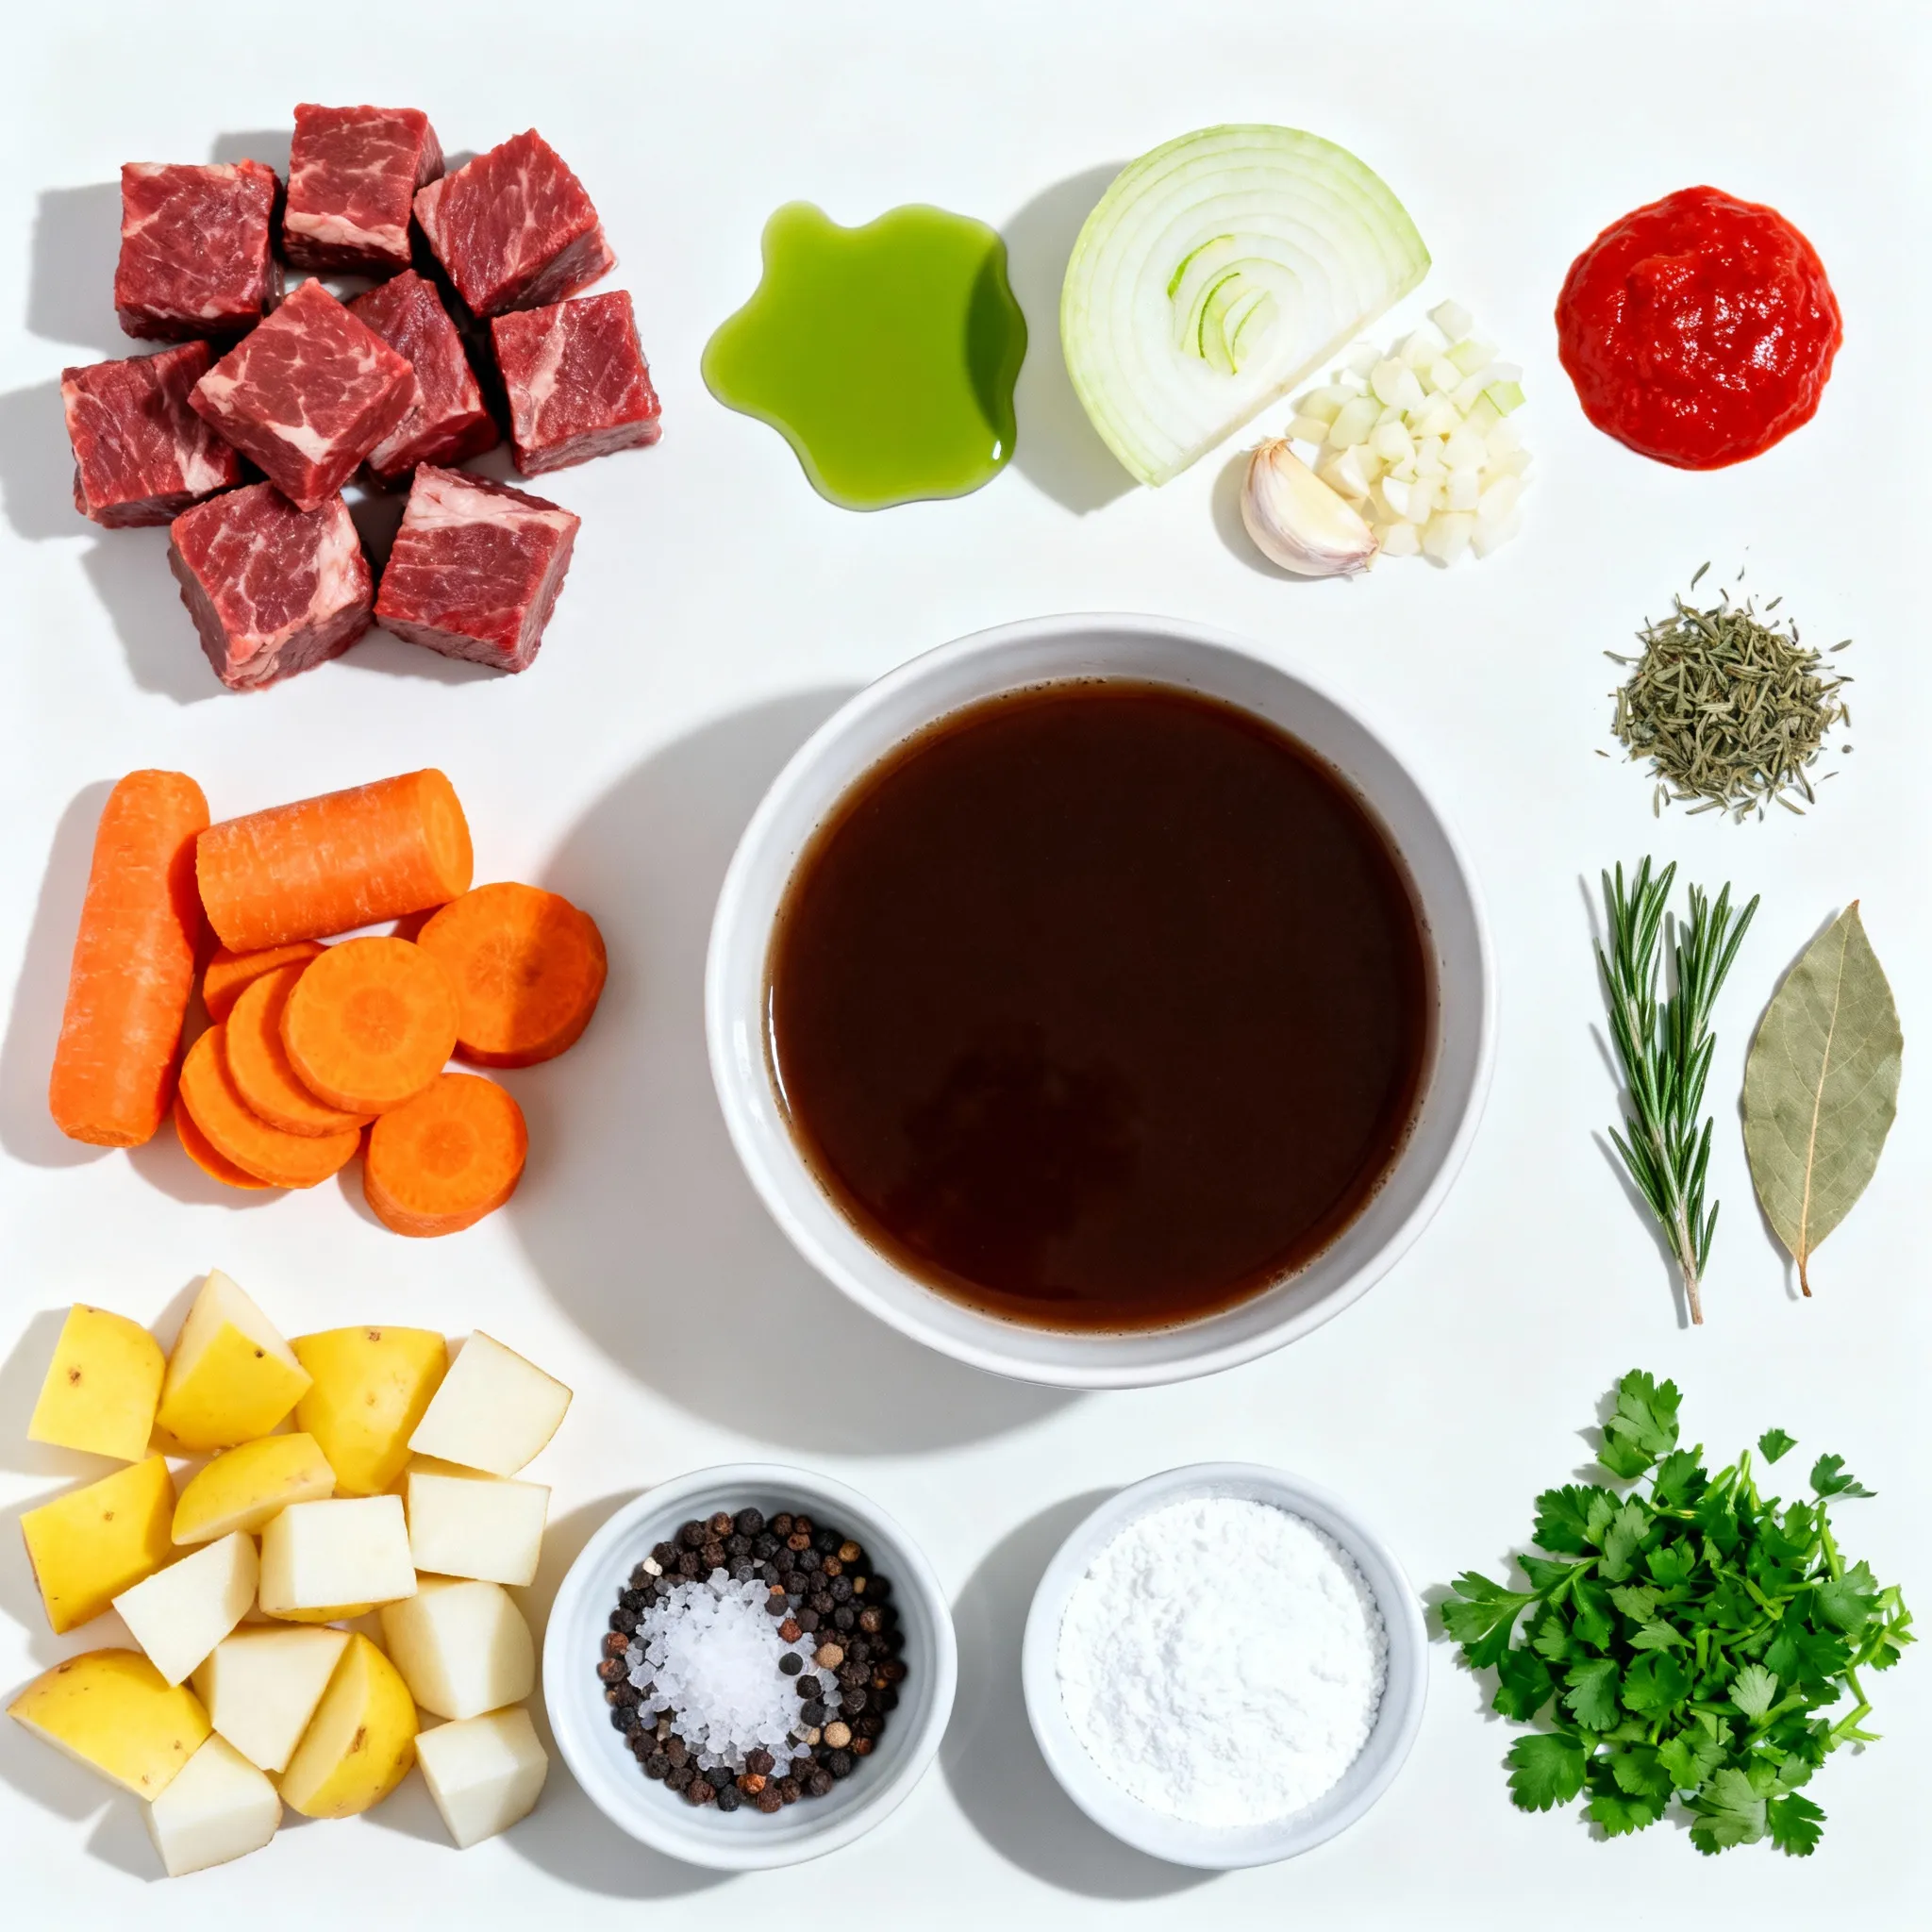
– 2 pounds beef chuck, cut into 1-inch cubes
– 3 tablespoons extra virgin olive oil
– 1 large onion, finely chopped
– 3 cloves garlic, minced
– 4 medium carrots, peeled and sliced into rounds
– 3 medium potatoes, diced into 1-inch cubes
– 2 cups beef broth (low-sodium preferred)
– 2 tablespoons tomato paste
– 2 teaspoons dried thyme
– 1 teaspoon dried rosemary
– 1 bay leaf
– Salt and freshly ground black pepper to taste
– 1 tablespoon cornstarch (optional, for thickening)
– Fresh parsley, chopped (for garnish)
When I make beef stew, I love to use the best ingredients. First, I choose beef chuck. It has rich flavor and tenderness. For veggies, I use carrots and potatoes. They add sweetness and heartiness. The onion and garlic bring a great aroma.
I prefer low-sodium beef broth. It helps control the salt. Tomato paste gives depth and richness. Thyme and rosemary add a nice herbal note. A bay leaf rounds out the flavors.
You can thicken the stew if you like. Adding cornstarch is an easy option. I always finish with fresh parsley. It brightens the dish and adds color.
Gather these simple ingredients to make your stew a hit!

Step-by-Step Instructions
Preparing the Beef
To start, we need to sauté the beef in the Instant Pot. Turn on the Instant Pot and select the Sauté mode. Add three tablespoons of extra virgin olive oil. This helps to brown the meat nicely. Season the two pounds of beef chuck with salt and pepper. Once the oil heats up, add the beef cubes in a single layer. If your pot is small, work in batches. Brown them for about 5-7 minutes, turning as needed. After that, remove the beef and set it aside on a plate.
Cooking the Aromatics
Next, we cook the aromatics. This step is key for flavor. In the same pot, add the finely chopped onion. Sauté for about 3-4 minutes until it turns translucent. Then, add three cloves of minced garlic. Sauté for another minute until the garlic smells fragrant. This mix creates a strong base for your stew.
Combining Ingredients for Stewing
Now, we will combine all the ingredients for stewing. Return the browned beef to the pot, including any juices. Then, add four medium carrots, sliced into rounds, and three medium potatoes, diced into one-inch cubes. Pour in two cups of low-sodium beef broth. Add two tablespoons of tomato paste, two teaspoons of dried thyme, one teaspoon of dried rosemary, and one bay leaf. Stir everything well to make sure the flavors blend together.
Pressure Cooking Steps
Now, it’s time to pressure cook. Close the Instant Pot lid tightly. Check that the steam release valve is set to Sealing. Select the Pressure Cook function and set the timer to 35 minutes on high pressure. This step helps break down the beef and meld those flavors.
Natural Pressure Release
After cooking, let the pressure release naturally for 10-15 minutes. This method keeps the stew tender and juicy. Once that time is up, carefully switch the valve to Venting. This releases any remaining steam. Be cautious to avoid burns from hot steam.
Final Touch and Serving Suggestions
To thicken the stew, remove the bay leaf first. If you want a thicker stew, mix one tablespoon of cornstarch with two tablespoons of cold water to make a slurry. Stir it into the stew. Select the Sauté mode again and cook while stirring. This helps the stew thicken to your liking. Taste the stew and adjust seasoning if needed. Serve it hot in bowls and garnish with fresh chopped parsley for a lovely finish.
Tips & Tricks
Enhancing Flavor
Using fresh herbs can make a big difference in taste. Fresh thyme and rosemary add bright notes to your stew. Dried herbs work, too, but they lack the same punch. When cooking, salt is key. Add it at different stages. Season beef before browning, and taste the stew before serving. Adjust with salt and pepper as needed.
Troubleshooting Common Issues
If your stew is too thin, you can fix it. Mix cornstarch with cold water to create a slurry. Stir it in while cooking on Sauté mode. This thickens the stew quickly. If it tastes flat, try a splash of vinegar or a bit more salt. This can lift the flavors nicely.
Making the Most of Your Instant Pot
The Instant Pot saves time and energy. It cooks food faster than traditional methods. Always ensure the lid is locked and the valve is set to Sealing. This keeps the steam inside. For safety, wait for the pressure to release fully before opening. Always keep your hands clear of the steam vent. Enjoy the ease of cooking with this handy tool!
Pro Tips
- Brown the Beef: Ensure you brown the beef in batches to avoid overcrowding the pot, which helps develop a rich flavor.
- Use Fresh Herbs: For a more vibrant flavor, consider using fresh thyme and rosemary instead of dried.
- Adjust Thickness: If you prefer a thicker stew, add the cornstarch slurry gradually until you reach your desired consistency.
- Let it Rest: Allow the stew to sit for about 10 minutes after cooking; this helps the flavors meld together even more.

Variations
Different Protein Options
You can switch out beef for chicken or pork. This gives you new flavors. If you choose chicken, cut it into chunks like beef. Cook it for about 10-12 minutes. For pork, use shoulder or tenderloin. It cooks well in 25-30 minutes.
Vegetable Alternatives
Seasonal vegetables can brighten your stew. Try adding parsnips, sweet potatoes, or turnips. They add different tastes. Cook these vegetables for about 5-10 minutes less than potatoes. Softer veggies, like zucchini, should go in for the last 10 minutes of cooking.
Dietary Adjustments
You can make this stew gluten-free. Use gluten-free broth and skip the cornstarch. For low-carb options, swap potatoes for cauliflower. If you want a vegan stew, use mushrooms and lentils instead of beef. Cook lentils for about 15 minutes for the best texture.
Storage Info
Storage Guidelines
To keep your beef stew fresh, follow these tips:
– Refrigerate leftovers: Store the stew in an airtight container. It lasts up to 3 days.
– Freezing tips: For longer storage, freeze the stew in portions. Use freezer-safe bags or containers. It can stay good for up to 3 months.
Reheating Instructions
Here’s how you can safely reheat your beef stew:
– Best methods: Use the microwave or stovetop. For the stovetop, heat in a pot over medium heat.
– Maintain flavor and texture: Stir often while reheating. Add a little broth if it seems too thick.
FAQs
How long does it take to cook beef stew in an Instant Pot?
Cooking beef stew in an Instant Pot takes about one hour. This includes 15 minutes for prep and 35 minutes for pressure cooking. After cooking, let the pressure release naturally for 10-15 minutes. This method gives you tender beef and rich flavors.
Can I cook frozen beef in an Instant Pot?
Yes, you can cook frozen beef in an Instant Pot. Just remember to add extra time. For frozen beef cubes, increase the pressure cooking time to about 45-50 minutes. Make sure the beef is in a single layer. This helps it cook evenly and safely.
What can I serve with beef stew?
Beef stew pairs well with many sides. Consider serving it with:
– Crusty bread for dipping
– Mashed potatoes for a creamy contrast
– Steamed green beans for a fresh crunch
– A simple green salad for brightness
These sides balance the hearty stew and add variety to your meal.
How do I make beef stew thicker?
To thicken beef stew, use a cornstarch slurry. Mix one tablespoon of cornstarch with two tablespoons of cold water. Stir this mixture into the stew after cooking. Select the Sauté mode and cook while stirring until it reaches your desired thickness. This gives your stew a nice, hearty texture.
This blog post covered how to make a delicious beef stew in an Instant Pot. We explored the key ingredients, from beef to seasonings, and went through each step, including prepping and cooking. I shared tips to enhance flavor and troubleshoot common problems. You can also adapt the stew to fit different diets. Remember, storing and reheating properly keeps the stew tasty. With these instructions and tips, you can now create a stew that warms any day. Enjoy the process and experiment to make it your ow

Hearty Instant Pot Beef Stew
Ingredients
- 2 pounds beef chuck, cut into 1-inch cubes
- 3 tablespoons extra virgin olive oil
- 1 large onion, finely chopped
- 3 cloves garlic, minced
- 4 medium carrots, peeled and sliced into rounds
- 3 medium potatoes, diced into 1-inch cubes
- 2 cups beef broth (low-sodium preferred)
- 2 tablespoons tomato paste
- 2 teaspoons dried thyme
- 1 teaspoon dried rosemary
- 1 leaf bay leaf
- to taste salt and freshly ground black pepper
- 1 tablespoon cornstarch (optional, for thickening)
- for garnish fresh parsley, chopped
Instructions
- Turn on the Instant Pot and select the Sauté mode. Add the olive oil and allow it to heat up. Season the beef cubes generously with salt and pepper. Add the seasoned beef to the pot in a single layer and sauté until browned on all sides, about 5-7 minutes. Once browned, carefully remove the beef from the pot and set it aside on a plate.
- In the same pot, add the chopped onion and sauté for about 3-4 minutes until it becomes translucent. Add the minced garlic to the onions and sauté for an additional minute until the garlic is fragrant.
- Return the browned beef to the pot along with any juices that collected on the plate. Add in the sliced carrots, diced potatoes, beef broth, tomato paste, dried thyme, dried rosemary, and the bay leaf. Stir everything well to combine all the flavors.
- Close the Instant Pot lid securely. Ensure that the steam release valve is set to Sealing. Select the Pressure Cook function and adjust the timer to 35 minutes on high pressure.
- After the cooking time is up, allow the pressure to release naturally for about 10-15 minutes. Once this time has passed, carefully switch the valve to Venting to release any remaining steam.
- Once the pressure is fully released, remove the bay leaf from the pot. If you prefer a thicker stew, create a slurry by mixing 1 tablespoon of cornstarch with 2 tablespoons of cold water. Stir this mixture into the stew. Select the Sauté mode again and cook while stirring frequently until the stew reaches your desired thickness.
- Taste the stew and adjust the seasoning with additional salt and pepper if necessary. Ladle the hearty beef stew into bowls and garnish generously with fresh chopped parsley.


. {{image_4}} You can boost the protein in your cheesy zucchini casserole easily. Try adding cooked ground turkey, chicken, or beef. For a meatless option, chickpeas or lentils work great. Just mix your chosen protein into the ricotta mixture before layering. This addition makes the dish heartier and fills you up more. This casserole is a fantastic vegetarian dish. To make it gluten-free, just swap regular breadcrumbs for gluten-free ones. You can also use crushed nuts for a crunchy topping. Using a mix of veggies, like bell peppers or spinach, instead of just zucchini can add flavor and color. This makes the dish even more fun and healthy. Herbs and spices can take this casserole to the next level. You can add fresh herbs like thyme or parsley for a garden taste. A pinch of red pepper flakes gives a nice kick if you like heat. Don’t forget to adjust the garlic powder to your taste. These small changes create a unique flavor each time you make it. For the full recipe, you can refer to the detailed instructions provided above. After enjoying your cheesy zucchini casserole, let it cool. Then, cover it tightly with plastic wrap or foil. You can also transfer it to an airtight container. This keeps it fresh and tasty. Store it in the fridge for up to three days. Keeping it sealed helps prevent any unwanted odors from other foods. When you're ready to enjoy the leftovers, preheat your oven to 350°F (175°C). Remove the casserole from the fridge and let it sit for about 10 minutes. This helps it warm evenly. Cover it with foil to keep it moist as it heats. Bake for about 20 minutes or until it’s hot throughout. You can also microwave individual portions for about 1-2 minutes, but the oven gives a better texture. If you want to save your casserole for a later date, freezing is a great option. Before freezing, let the casserole cool completely. Cut it into portions for easier thawing. Wrap each piece tightly in plastic wrap, then place it in a freezer bag. Be sure to label the bags with the date. Your casserole can last up to three months in the freezer. When you’re ready to eat, thaw it overnight in the fridge and follow the reheating steps. This way, you can enjoy a tasty meal anytime! For the full recipe, check out the details above. Yes, you can use other veggies. Carrots, bell peppers, and spinach work well. Just chop them small. This adds color and nutrients. Mix and match to suit your taste. The casserole lasts about 3 to 5 days in the fridge. Make sure to cover it well. This keeps it fresh and tasty. If it smells off, throw it out. Cottage cheese is a great substitute for ricotta. You can also blend soft tofu for a dairy-free option. Just mix it smoothly to mimic ricotta’s texture. This keeps your dish creamy and delicious. For the full recipe, check the earlier section. This blog post covered everything you need for a delicious zucchini casserole. We explored the essential ingredients, tips for selecting fresh produce, and the best cheeses. I provided clear steps to prep and bake the dish. We also discussed ways to avoid a watery casserole and how to store leftovers properly. In closing, whether you're adding protein or trying a veggie twist, this recipe is versatile. Enjoy the process, get creative, and savor each bite. Your homemade zucchini casserole will impress everyone!](https://fastmealmate.com/wp-content/uploads/2025/07/5ddfaaa2-5596-48f1-a1cf-d08d639fc95a-768x768.webp)
![- 1 lb (450g) boneless, skinless chicken thighs, cut into bite-sized pieces - 4 tablespoons unsalted butter, divided - 4 cloves garlic, minced finely - 1 large lemon, zested and juiced - 1 teaspoon dried thyme - 1 teaspoon paprika - Salt and freshly ground black pepper to taste - Fresh parsley, chopped (for garnish) These ingredients make the dish shine. The chicken thighs give a tender bite. Garlic adds a strong aroma. Lemon brings brightness and tang. Butter makes everything rich and smooth. Thyme and paprika add depth and warmth. - Red pepper flakes for heat - Fresh herbs like basil or cilantro - A splash of white wine for extra richness - Honey for a touch of sweetness Adding some of these can make your dish unique. Red pepper flakes can spice things up. Fresh herbs can add a pop of freshness. A splash of wine creates a deeper flavor. Honey can balance the tartness of lemon. - Large skillet for cooking - Cutting board for prepping the chicken - Sharp knife for cutting the chicken - Measuring spoons for accuracy - Tongs for turning the chicken These tools will help you cook efficiently. A large skillet allows even cooking. A cutting board keeps the workspace tidy. A sharp knife ensures safe and quick cutting. Measuring spoons keep your flavors balanced. Tongs help with easy flipping and serving. For the detailed cooking steps and more, check the Full Recipe. Start by gathering your ingredients. You will need: - 1 lb boneless, skinless chicken thighs, cut into bite-sized pieces - 4 tablespoons unsalted butter, divided - 4 cloves garlic, minced finely - 1 large lemon, zested and juiced - 1 teaspoon dried thyme - 1 teaspoon paprika - Salt and freshly ground black pepper to taste - Fresh parsley, chopped (for garnish) Next, melt 2 tablespoons of butter in a skillet over medium heat. As it melts, season the chicken thighs with paprika, salt, and pepper. This step adds great flavor. Once the butter is bubbling, add the chicken pieces to the skillet. Spread them out evenly for the best sear. Sear the chicken for 5-7 minutes. Turn the chicken occasionally until it turns golden brown on all sides. This browning adds depth to the dish. When done, remove the chicken and set it aside on a plate. In the same skillet, melt the remaining 2 tablespoons of butter. Add the minced garlic and sauté it for about 30 seconds. Stir constantly to prevent burning. Once fragrant, stir in the lemon juice and zest, along with the dried thyme. Let this simmer for 1-2 minutes. This step melds all the flavors together. Now, return the cooked chicken to the skillet. Toss it in the lemon garlic butter sauce until well coated. Cook everything together for another 2 minutes. This helps the chicken absorb the sauce and heat through completely. Once finished, remove the skillet from the heat. Sprinkle fresh parsley over the chicken bites for a vibrant look. Serve the chicken bites in a large dish or individual bowls. Drizzle any remaining garlic butter sauce over the top. Add lemon wedges and extra parsley for an inviting presentation. For the full recipe, check the earlier section. To get juicy chicken, use boneless, skinless thighs. They cook faster and stay moist. Cut the chicken into even pieces for uniform cooking. Sear the chicken in a hot skillet. This gives a nice brown crust. Cook it for 5-7 minutes, flipping halfway through. Always check for doneness; the chicken should reach 165°F (75°C) inside. For a richer sauce, use high-quality butter. Add fresh herbs like rosemary or basil. If you like heat, toss in red pepper flakes. A splash of white wine adds depth, too. For extra zing, use fresh lemon juice instead of bottled. Don’t forget to taste and adjust seasoning. Every bite should burst with flavor. Prep your ingredients before you start cooking. Chop garlic and zest the lemon ahead of time. Use a sharp knife for quick cutting. Consider using a pre-made garlic butter if you’re short on time. You can also marinate the chicken a few hours before cooking. This step adds flavor and cuts down on cooking time. Feel free to explore the [Full Recipe] for complete instructions! {{image_4}} You can swap chicken thighs for other proteins. Try shrimp for a quick cook. Just sauté until they turn pink. You can use pork tenderloin, cut into small pieces. It cooks fast and absorbs flavor well. Even beef cubes work if you like a heartier bite. Adjust cooking time to match the protein you choose. For a vegetarian version, use mushrooms or tofu. Both soak up flavors like a sponge. Sauté mushrooms until golden brown. For tofu, press to remove water, then cut into cubes. Cook until crispy on all sides. Toss these in the lemon garlic butter sauce just like the chicken. If you have allergies, there are easy swaps. Use olive oil instead of butter for a dairy-free option. You can replace garlic with garlic powder if you're sensitive to fresh garlic. For a low-sodium version, use less salt and a salt substitute. Adjust the recipe to fit your taste and needs. Check out the Full Recipe for more ideas and details! To keep your leftover chicken bites fresh, place them in an airtight container. Make sure to let them cool to room temperature first. Store the container in the refrigerator. They will stay good for up to three days. Label the container with the date for easy tracking. Reheating is simple! You can use a skillet or microwave. For the skillet, heat a little butter over medium heat. Add the chicken bites and stir until warmed through. This keeps the flavors intact. If using a microwave, place the chicken in a microwave-safe dish. Cover it with a damp paper towel and heat in 30-second intervals until hot. If you want to freeze the chicken bites, make sure they are cool first. Place them in a freezer-safe bag or container. Remove as much air as possible to avoid freezer burn. They can last for up to three months in the freezer. When ready to eat, thaw them in the fridge overnight. Then reheat them as mentioned above. Enjoy your Lemon Garlic Butter Chicken Bites again! For the full recipe, check out the earlier section. Yes, you can use chicken breast instead of thighs. Chicken breast is leaner and will cook faster. Just make sure to cut it into similar bite-sized pieces. You may need to adjust the cooking time to keep it juicy. Lemon Garlic Butter Chicken Bites pair well with many sides. Here are a few ideas: - Steamed rice - Pasta with olive oil - Roasted vegetables - A fresh green salad - Garlic bread These options balance the rich flavors of the chicken and add variety to your meal. This recipe is not spicy. It focuses on lemon, garlic, and herbs for flavor. If you want some heat, you can add red pepper flakes. Start with a small amount and taste as you go. To keep the chicken juicy, follow these tips: - Do not overcook the chicken. Use a meat thermometer to check for doneness. - Let the chicken rest for a few minutes after cooking. This helps keep the juices inside. - Use the butter and garlic sauce generously. It adds moisture and flavor. Following these steps will help you achieve tender and juicy chicken bites. For the complete recipe, check out the [Full Recipe]. This blog covered how to make Lemon Garlic Butter Chicken Bites. We looked at key and optional ingredients, as well as the tools you need. I provided step-by-step cooking instructions and tips for perfect chicken. We explored variations, storage methods, and answered common questions. Now, you have all the tools to whip up this dish with ease. Enjoy cooking and share your tasty results!](https://fastmealmate.com/wp-content/uploads/2025/05/97cbb791-292c-4238-a79b-781f43956dc5-768x768.webp)


![For a tasty creamy chicken stroganoff, gather these key ingredients: - 500g boneless chicken breast, sliced into thin strips - 2 cups mushrooms, sliced (button or cremini work well) - 1 medium onion, finely chopped - 3 cloves garlic, minced - 1 tablespoon olive oil - 1 tablespoon unsalted butter - 2 cups chicken broth - 1 cup sour cream - 1 tablespoon Dijon mustard - 1 teaspoon smoked paprika - Salt and freshly ground black pepper to taste - Fresh parsley, finely chopped (for garnish) - 300g egg noodles or pasta of your choice Each ingredient plays a role in making the dish creamy and flavorful. The chicken adds protein, while the mushrooms bring earthy notes. The onion and garlic create a sweet base when cooked. For a garnish, fresh parsley brightens up the dish. You can serve the stroganoff with a side of steamed vegetables or crusty bread. This adds more texture and flavor to your meal. Check [Full Recipe] for all the details on how to put this comfort food together! To start, fill a big pot with water. Add a pinch of salt and bring it to a boil. Once the water is boiling, drop in 300g of egg noodles. Cook them according to the package instructions. This usually takes around 8-10 minutes. You want them al dente, which means they should be tender but still firm. After they are cooked, carefully drain the noodles in a colander. To stop them from sticking, drizzle a bit of olive oil on them. Toss gently to coat. Now, grab a large skillet and heat it over medium heat. Add 1 tablespoon of olive oil. Once hot, add the sliced chicken breast. Season it well with salt and pepper. Cook the chicken for about 5-7 minutes. Stir it often to ensure it cooks evenly. You want that nice golden-brown color. When it is done, remove the chicken from the skillet and place it on a plate. In the same skillet, add 1 tablespoon of unsalted butter. Let it melt over medium heat. Once melted, toss in the chopped onion. Sauté it for about 3-4 minutes until it turns translucent. Next, add 3 cloves of minced garlic and 2 cups of sliced mushrooms. Cook this mixture for around 5-6 minutes. Stir it often until the mushrooms soften and release their moisture. Then, sprinkle in 1 teaspoon of smoked paprika. Mix it well. Gradually pour in 2 cups of chicken broth and bring it to a gentle simmer. Let it cook for about 5 minutes to enhance the flavor. Now it’s time to bring it all together! Return the cooked chicken to the skillet. Stir in 1 cup of sour cream and 1 tablespoon of Dijon mustard. Mix everything until it is well combined and heated through, about 2-3 minutes. Taste the sauce and adjust the seasoning with more salt and black pepper if needed. Finally, add the cooked noodles to the sauce, tossing gently until they are fully coated. If you prefer a fancier look, you can plate the noodles first and then ladle the sauce over them. Don’t forget to garnish with some fresh parsley for a burst of color and flavor. Enjoy this comforting meal! When making creamy chicken stroganoff, avoid a few common mistakes. - Overcooking chicken or noodles: Overcooked chicken can become dry. Noodles can turn mushy. Keep an eye on cooking times. - Insufficient seasoning: Under-seasoned dishes lack flavor. Always taste your sauce and adjust the salt and pepper. You can easily boost the taste of your stroganoff with a few simple changes. - Suggestions for additional spices: Try adding thyme or rosemary for extra depth. A pinch of cayenne adds a nice kick. - Using homemade vs. store-bought broth: Homemade broth gives a richer taste. Store-bought is convenient and still works well. If you or your guests have special diets, there are great options. - Gluten-free alternatives: Use gluten-free pasta or rice instead of egg noodles. This ensures everyone can enjoy the dish. - Dairy-free options: Substitute sour cream with coconut cream or a dairy-free yogurt. These keep the creaminess without the dairy. For the full recipe, check out the complete guide to making creamy chicken stroganoff. Enjoy! {{image_4}} You can switch up the protein in this creamy chicken stroganoff. Beef, pork, or tofu work well. For beef, use tender cuts like sirloin. Cook it for about 10 minutes until browned. For pork, tenderloin is great. Cook it for 7-8 minutes. If you choose tofu, press it first to remove moisture. Sauté it for 5-6 minutes until golden. To add a twist to your dish, consider using wine or mustard. A splash of white wine adds depth to the sauce. Just remember to let it simmer for a few minutes to cook off the alcohol. If you like mustard, try using whole grain or spicy mustard. It brings a unique flavor. You can also add more veggies. Peas, bell peppers, or spinach can enhance the dish. Just sauté them with the onions and mushrooms. This not only adds color but also boosts nutrition. Each variation makes your creamy chicken stroganoff special and fits your taste. For the full recipe, check the linked instructions above. To keep your creamy chicken stroganoff fresh, store it in proper containers. Use airtight containers to prevent moisture loss. It stays good in the fridge for up to three days. Make sure the dish cools down before sealing it. This helps maintain the best flavor and texture. If you want to save some for later, freezing is a great option. Let the stroganoff cool completely before transferring it to freezer-safe containers. Use heavy-duty bags or containers to prevent freezer burn. It can last in the freezer for up to three months. To thaw, place it in the fridge overnight. This slow thawing keeps flavors intact. When ready to eat, reheat it on the stove over low heat. Stir occasionally to ensure even heating. You can also add a splash of broth or water to restore creaminess. Enjoy your stored creamy chicken stroganoff like it’s fresh! You can serve creamy chicken stroganoff with many sides. Here are a few great options: - Steamed green beans - Garlic bread - A fresh green salad - Mashed potatoes These sides add color and balance to your meal. Yes, you can make creamy chicken stroganoff ahead of time. Simply cook the dish, let it cool, and store it in the fridge. It will stay fresh for about three days. When ready to eat, reheat it gently on the stove. Add a splash of chicken broth if it seems too thick. If your sauce is too thin, you can thicken it easily. Here are some methods: - Simmer the sauce longer to reduce it. - Mix a bit of cornstarch with water and stir it in. - Add more sour cream for a richer texture. These tips help you achieve the perfect creamy sauce. Yes, you can make a vegetarian version! Use mushrooms and tofu instead of chicken. Replace chicken broth with vegetable broth. This keeps the flavor while making it meat-free. You can still enjoy that creamy texture with sour cream or a plant-based alternative. Absolutely! You can use different types of noodles for creamy chicken stroganoff. Here are some options: - Egg noodles - Fettuccine - Penne - Gluten-free pasta Each type brings its own texture, making the dish fun and varied. Check the cooking time for each type to ensure they cook perfectly. For the full recipe, refer to the earlier section in this article. You learned how to make Creamy Chicken Stroganoff with fresh ingredients and simple steps. Remember the key points: cook noodles properly, achieve golden-brown chicken, and adjust flavors to your taste. Avoid common mistakes like overcooking and under-seasoning. You can also explore variations with different proteins and flavors. With proper storage, enjoy this dish later too. Now, you have all the tools to create a delicious meal that suits your needs and preferences. Enjoy cooking and sharing this tasty dish with others!](https://fastmealmate.com/wp-content/uploads/2025/06/35ebe0d3-ac06-4ed6-8d84-88d4bff41ffa-768x768.webp)
