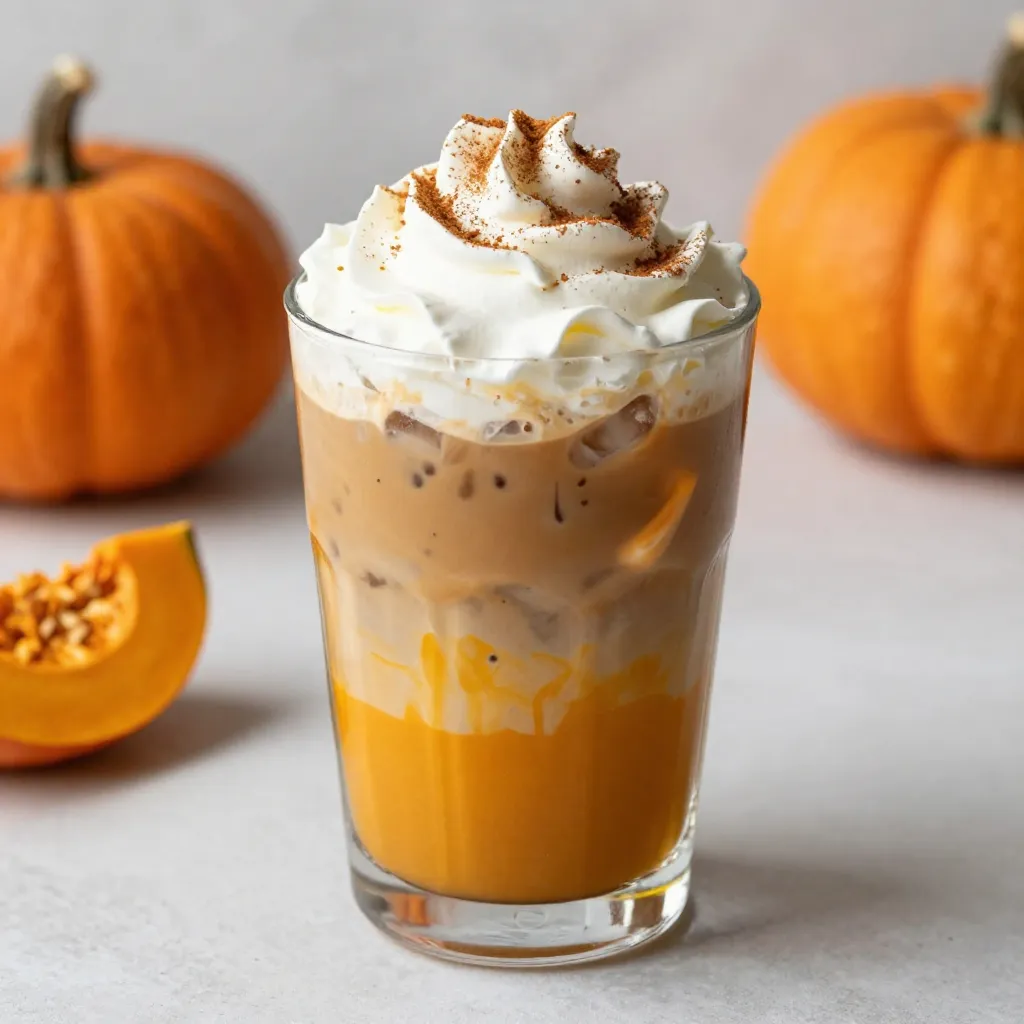
Are you ready to savor fall in a cup? My Iced Pumpkin Spice Latte recipe is simple and packed with flavor. With just a few ingredients, you can create a delicious drink that brightens any day. Whether you’re a coffee lover or just want to try something new, this recipe is for you! Let’s dive in and prepare your new favorite fall treat!
Why I Love This Recipe
- Perfectly Seasonal: This iced pumpkin spice latte captures the essence of fall, combining the rich flavors of pumpkin and spices to create a cozy yet refreshing drink.
- Customizable: You can easily adjust the sweetness and creaminess according to your taste preferences, making it a versatile treat for everyone.
- Quick & Easy: With just 10 minutes of prep time, you can whip up this delicious latte at home, saving time and money compared to coffee shop visits.
- Fun to Make: Mixing the pumpkin purée with spices and coffee is not only easy but also a fun way to get into the autumn spirit while impressing friends and family.
Ingredients
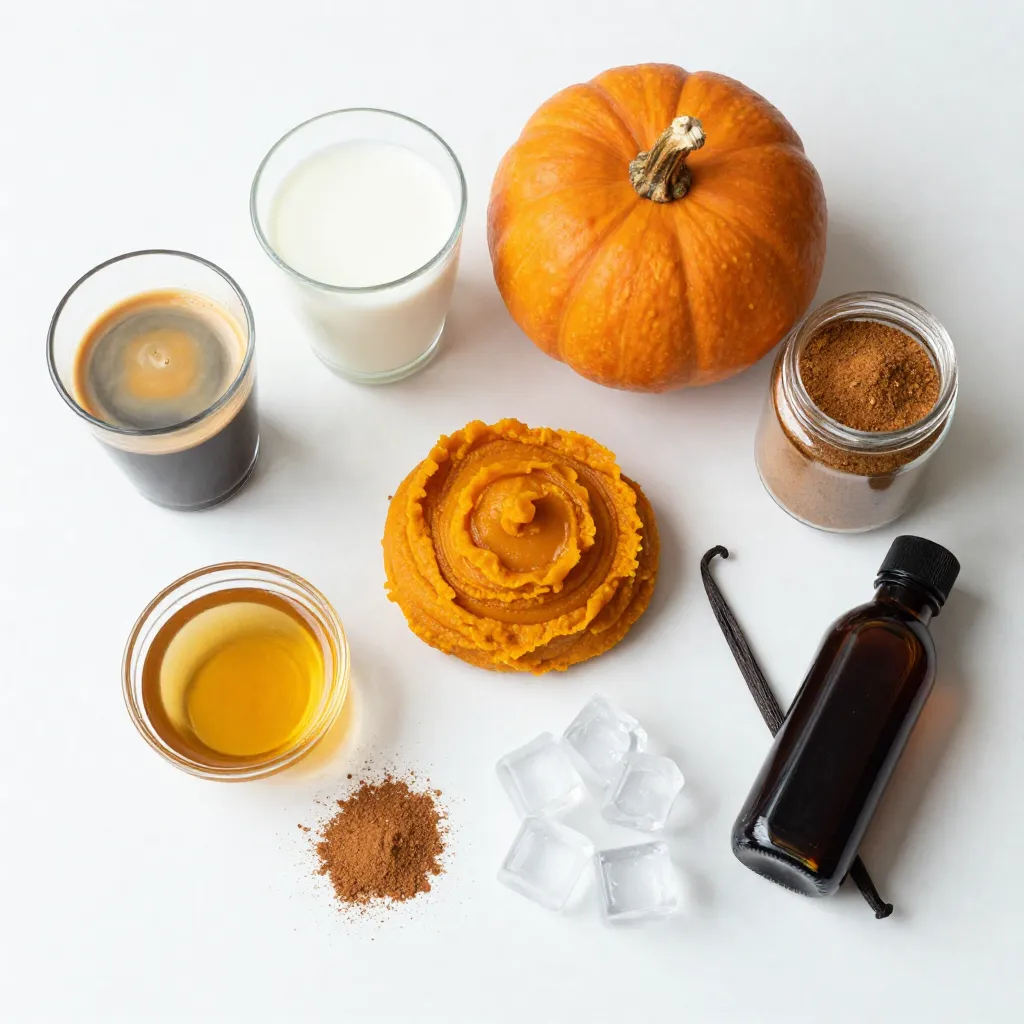
List of Ingredients
– 1 cup brewed espresso or strong coffee, chilled
– 1/2 cup milk (dairy or non-dairy)
– 1/4 cup pumpkin purée
– 2 tablespoons maple syrup
– 1 teaspoon pumpkin spice mix
– 1/2 teaspoon vanilla extract
– Ice cubes
– Optional toppings: whipped cream and ground cinnamon
To make an Iced Pumpkin Spice Latte, gather these fresh ingredients. Start with 1 cup of espresso or strong coffee that you chilled. This will be the base of your drink.
Next, use 1/2 cup of milk. You can choose dairy milk or any non-dairy option like almond or oat milk. This adds creaminess to your latte.
You’ll need 1/4 cup of pumpkin purée. This gives the drink its rich pumpkin flavor.
For sweetness, add 2 tablespoons of maple syrup. You can adjust the amount to suit your taste.
Next, include 1 teaspoon of pumpkin spice mix. This spice blend adds warmth and depth.
Add 1/2 teaspoon of vanilla extract for a hint of sweetness and aroma.
Don’t forget ice cubes to keep your drink cold and refreshing.
If you want to make your latte extra special, consider optional toppings like whipped cream and a sprinkle of ground cinnamon. These add flavor and make your drink look fancy.
With these ingredients, you can create a delicious Iced Pumpkin Spice Latte that will impress anyone!
Step-by-Step Instructions
Preparation Steps
1. First, grab a bowl or pitcher. Combine the pumpkin purée, maple syrup, pumpkin spice mix, and vanilla extract. Stir until smooth.
2. Next, pour in the chilled espresso or strong coffee. Mix well until the color is even.
3. Take two glasses and fill each with ice cubes. This keeps your latte cold and refreshing.
4. Carefully pour the pumpkin coffee mixture over the ice in each glass. Make sure to share it evenly.
5. Now, add your choice of milk. Use as much as you like to get your preferred creaminess. If you want a frothy feel, froth the milk first.
6. Stir gently to blend the milk and coffee together. This makes every sip delicious.
7. If you want, top each latte with whipped cream. For an extra touch, sprinkle a bit of ground cinnamon on top.
8. Serve your iced pumpkin spice lattes right away. Add a straw or spoon for easy mixing.
Tips for Achieving the Perfect Blend
– Use fresh ingredients like pure pumpkin purée. This enhances the taste.
– Experiment with the amount of pumpkin spice. Adjust it to fit your taste.
– Mix well to avoid any lumps. A smooth latte is a happy latte.
Presentation Ideas
– Use clear glasses to show off the beautiful layers.
– Add a cinnamon stick for a fun stirrer. It also adds flavor!
– Garnish with a sprinkle of nutmeg for extra spice. It looks great and tastes good too.
Tips & Tricks
Customization Options
– Adjusting sweetness with maple syrup: You can change the sweetness to fit your taste. Start with 2 tablespoons of maple syrup. If you like it sweeter, add more syrup a little at a time. Always taste as you go.
– Choosing non-dairy milk alternatives: If you want a dairy-free option, try almond, oat, or soy milk. Each will give your latte a unique flavor. Oat milk adds creaminess, while almond milk is lighter. Choose what you enjoy most.
– Creating a frothy texture: If you love a frothy drink, froth your milk before adding it. You can use a milk frother or shake it in a jar. Just remember to warm the milk slightly for best results.
Enhancing Flavor Profiles
– Adding extra spices: Want more warmth? Sprinkle in extra cinnamon, nutmeg, or ginger. These spices mix well with pumpkin and boost the flavor. Add a pinch at a time until it’s just right.
– Experimenting with whipped cream toppings: If you choose to add whipped cream, make it special. You can mix in a bit of pumpkin spice or even cocoa powder. This makes your latte look fancy and taste great.
Pro Tips
- Use Fresh Pumpkin Puree: For the best flavor, consider using fresh pumpkin puree instead of canned. It adds a vibrant taste and can enhance the overall quality of your latte.
- Chill Your Coffee: Make sure your coffee or espresso is thoroughly chilled before mixing. This prevents the ice from melting too quickly and keeps your latte refreshing.
- Experiment with Milk Alternatives: Don’t hesitate to try different types of milk, such as oat, almond, or coconut milk. Each will give your latte a unique flavor and creaminess.
- Customize Your Sweetness: Adjust the amount of maple syrup based on your sweetness preference. You can also substitute with other sweeteners like honey or agave syrup for a different twist.
Variations
Vegan Iced Pumpkin Spice Latte
To make a vegan version, simply swap out some ingredients. Use non-dairy milk like almond, oat, or soy milk. For sweetening, use a plant-based syrup, like agave. This keeps all the great flavors while being friendly to a vegan diet.
Sugar-Free Iced Pumpkin Spice Latte
You can replace the maple syrup with sugar-free options. Try using stevia, monk fruit sweetener, or erythritol. These will give you the sweet taste without the sugar. Make sure to adjust the amounts to suit your taste.
Iced Pumpkin Spice Latte with Cold Brew
Cold brew coffee can add a smooth flavor. Brew your coffee cold by steeping coffee grounds in cold water overnight. Then, just follow the same steps as the original recipe. Pour the cold brew over ice and mix with the pumpkin blend. This gives your latte an extra chill and rich flavor.
Storage Info
How to Store Remaining Ingredients
To keep your pumpkin purée fresh, store it in an airtight container. Place it in the fridge. It stays good for about a week. You can also freeze it for longer storage. Just pour it into ice cube trays. Once frozen, transfer the cubes to a freezer bag. This way, you have pumpkin purée ready for your next latte!
For your pumpkin spice mix, store it in a cool, dark place. A sealed jar works best. This keeps the spices flavorful and fresh for months.
Preparing Ahead of Time
If you want to save time, prepare your pumpkin mix ahead. Combine the pumpkin purée, maple syrup, pumpkin spice, and vanilla in a bowl. Then, cover and refrigerate it. When you’re ready to serve, just mix in your chilled coffee.
You can also brew your coffee in advance. Chill it in the fridge. This way, your iced pumpkin spice latte is quick to make. Just add ice and milk when you’re ready. Enjoy your delicious drink without the wait!
FAQs
What is the best coffee to use for an iced pumpkin spice latte?
The best coffee for this drink is brewed espresso or strong coffee. Espresso packs a bold flavor, which shines through the pumpkin. If you prefer a milder taste, strong brewed coffee works well, too. You can use any coffee you love, but aim for a rich blend.
Can I make this recipe without pumpkin spice mix?
Yes, you can make it without pumpkin spice mix. You can create your own blend with cinnamon, nutmeg, and ginger. Use 1/2 teaspoon of cinnamon and a pinch of nutmeg and ginger. This gives you control over flavor. Plus, it can be fun to mix your own spices!
How many calories are in an iced pumpkin spice latte?
An iced pumpkin spice latte has about 200 calories per serving. This number can change based on your milk choice and toppings. Using non-dairy milk may lower calories. Whipped cream will add more. Adjusting the maple syrup also tweaks the calorie count.
Where can I buy pre-made iced pumpkin spice lattes?
You can find pre-made iced pumpkin spice lattes at coffee shops and grocery stores. Big brands offer them in bottles or cartons. Most coffee chains sell them too. Just check the refrigerated section for a quick treat!
This blog covered how to make a delicious iced pumpkin spice latte. We discussed ingredients, preparation steps, and tips for a perfect drink. You can customize this recipe with different milks and sweetness levels to suit your taste. Remember to check storage tips if you want to prepare ahead. Whether you prefer vegan or sugar-free options, there is something for everyone. Enjoy making and sharing this tasty drin