Heavenly Peach Bars Irresistible Summer Treat

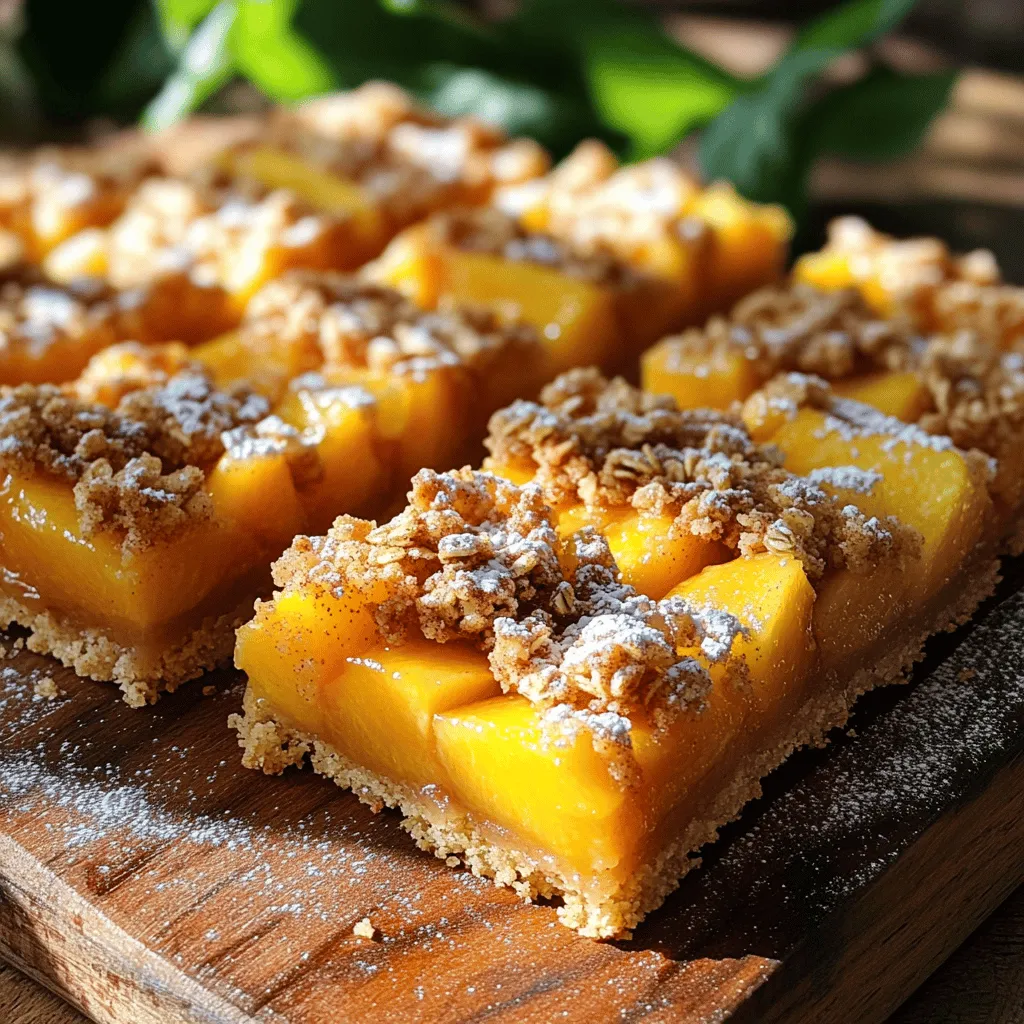
Summer is the perfect time for sweet treats, and my Heavenly Peach Bars are just that! Bursting with fresh peaches and a crumbly topping, these bars are simple to make and utterly delicious. In this post, I’ll walk you through the ingredients and steps to create this irresistible dessert that will impress your family and friends. Let’s get baking and enjoy a taste of summer!
Ingredients
To make Heavenly Peach Bars, gather these fresh and simple ingredients:
– 2 cups fresh peaches, peeled and diced
– 1 cup all-purpose flour
– 1 cup rolled oats
– 1/2 cup packed brown sugar
– 1/4 cup granulated sugar
– 1/2 cup unsalted butter, melted
– 1 teaspoon pure vanilla extract
– 1 teaspoon baking powder
– 1/4 teaspoon sea salt
– 1/2 teaspoon ground cinnamon
– Zest of 1 fresh lemon
– 1 tablespoon freshly squeezed lemon juice
Fresh peaches are key. They give the bars their sweet and juicy flavor. I love using ripe, yellow peaches for the best taste. The oats and flour create a nice base. The sugars add sweetness, while butter brings richness.
Flavorings like vanilla, cinnamon, and lemon zest brighten every bite. The lemon juice helps keep the peaches fresh and adds a zing. Using these ingredients makes my Heavenly Peach Bars truly special.
Step-by-Step Instructions
Prepping the Oven and Pan
First, preheat your oven to 350°F (175°C). This step is key for even baking. Next, grab an 8-inch square baking pan. Lightly grease it or line it with parchment paper. This helps with easy removal later.
Marinating the Peaches
Now, take your fresh peaches. Dice them into small pieces. In a medium bowl, add the diced peaches to some lemon juice. Toss gently until the peaches are well coated. Let them marinate for a few minutes. This brings out their sweet flavor.
Mixing the Dry Ingredients
In a large bowl, mix the dry ingredients. Combine all-purpose flour, rolled oats, brown sugar, granulated sugar, baking powder, sea salt, and ground cinnamon. Use a whisk to blend everything well. Add in the lemon zest for a bright kick.
Creating the Crust Mixture
Melt some unsalted butter in the microwave or on the stove. Pour the melted butter and pure vanilla extract into your dry mix. Stir until you get a crumbly texture. Set aside about 1 cup of this mix for the topping later.
Assembling the Bars
Take the remaining mixture and press it into the bottom of your baking pan. This forms a nice, firm crust. Next, layer the marinated peach pieces evenly over the crust. Make sure every slice gets some peach goodness. Crumble the reserved topping over the peaches to add texture and flavor.
Baking the Heavenly Peach Bars
Put your baking pan in the preheated oven. Bake for 30 to 35 minutes. The topping should turn a lovely golden brown, and the peach filling will bubble up. Once done, let the bars cool in the pan for at least 20 minutes. This cooling helps them hold their shape when you slice them.
Tips & Tricks
Ensuring Perfect Peach Flavor
To make the best Heavenly Peach Bars, choose ripe, sweet peaches. Varieties like Freestone peaches are ideal. They are easy to slice and have great flavor. Look for peaches with a firm feel and a sweet scent. If you can, buy them at local markets. This way, you get fresher fruit. Their flavor shines in your bars.
Texture Tips
Getting that perfect crumbly topping is key. Use cold butter when you mix. This creates a nice, flaky texture. You want to mix the butter until it’s in small pieces. Don’t overmix; it should look like coarse crumbs. This will give you a great crunch on top of the peach filling.
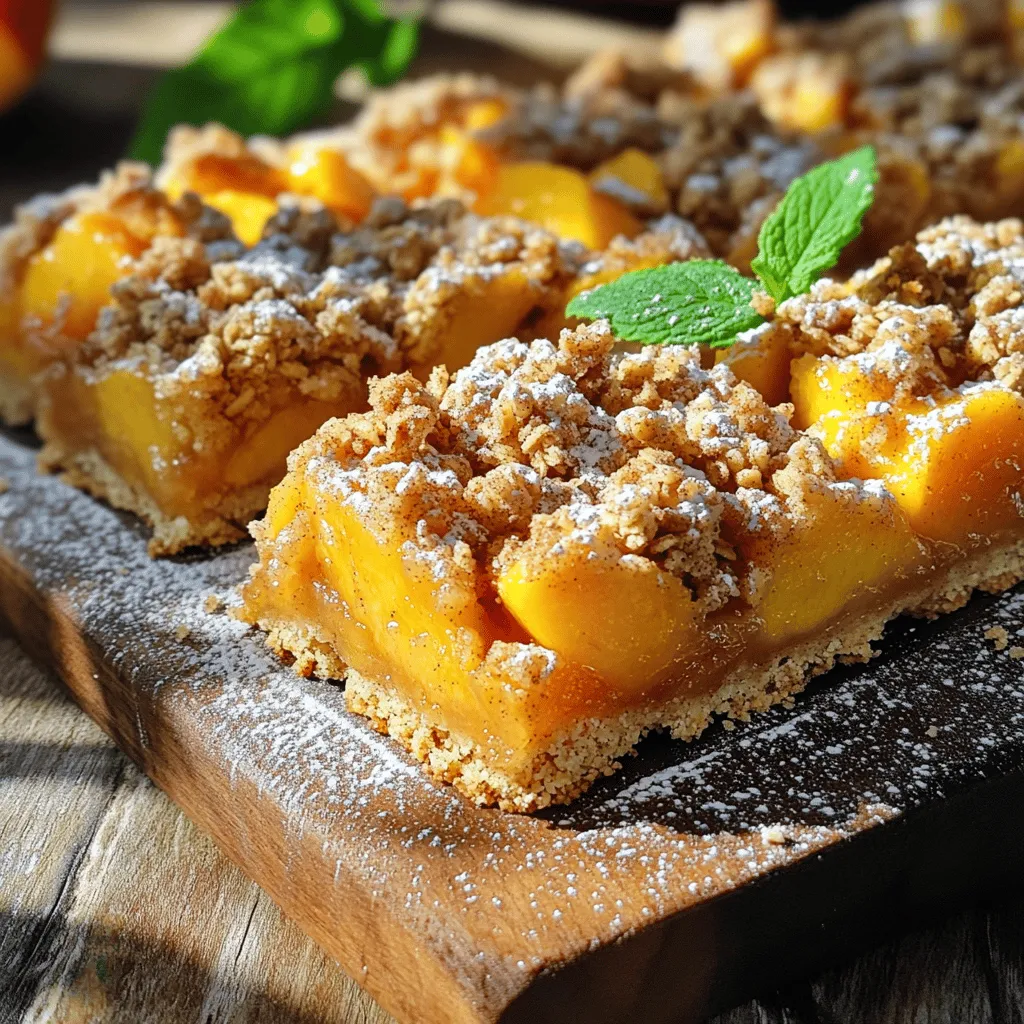
Serving Suggestions
Serve your Heavenly Peach Bars warm or at room temp. They taste great either way! For a fun touch, dust them with powdered sugar. Add fresh mint leaves on top for color and flavor. These little details make a big difference. Your friends and family will love this summer treat!

Variations
Add-ins and Customizations
You can switch up the flavor of Heavenly Peach Bars by adding other fruits or nuts. For example, try using ripe berries like blueberries or raspberries. These berries mix well with peaches and add a nice tartness. If you like nuts, chopped walnuts or pecans can give a great crunch. They add depth to the texture and flavor.
Gluten-Free Options
If you need a gluten-free crust, you can use alternative flours. Almond flour or coconut flour works well in this recipe. Both flours add unique flavors and keep the bars moist. Just remember, using different flours may change the texture. So, adjust the liquid in the recipe if needed.
Vegan Alternatives
To make these bars vegan, you can swap out some key ingredients. Use coconut oil instead of butter. For the eggs, try using flax eggs. Mix 1 tablespoon of ground flaxseed with 2.5 tablespoons of water for each egg. This will help bind the bars without using eggs. You can also choose plant-based sugars to keep it vegan-friendly.
These variations keep your Heavenly Peach Bars fun and exciting while meeting different dietary needs.
Storage Info
Storing Leftovers
To keep your Heavenly Peach Bars fresh, store them in the fridge. Place the bars in an airtight container. This helps them stay soft and tasty. They will last up to five days in the fridge. If you have a lot left, cut them into individual portions. This makes it easy to grab one for a snack.
Freezing Directions
Freezing is a great way to save your bars for later. First, let the bars cool completely. Next, wrap each bar in plastic wrap. Then, place them in a freezer-safe bag or container. Be sure to label the bag with the date. They can stay fresh for up to three months in the freezer. When you’re ready to enjoy them, just thaw them in the fridge overnight.
Reheating Tips
To reheat your Heavenly Peach Bars, preheat your oven to 350°F (175°C). Place the bars on a baking sheet. Cover them with foil to keep them moist. Heat for about 10-15 minutes. This will help the bars stay soft and warm. You can also microwave them for about 20-30 seconds. Just be careful not to overheat, or they may become tough.
FAQs
Can I use canned peaches instead of fresh?
Yes, you can use canned peaches. Drain them well to remove excess juice. This helps keep the bars from getting too soggy. Canned peaches are a great option if fresh ones are not available. Choose peaches packed in juice or water for the best flavor.
How do I know when the bars are done baking?
Look for a golden-brown topping. The edges should pull away from the pan slightly. You can also check the center; it should look set and not jiggly. A toothpick inserted into the bars should come out clean or with just a few crumbs attached.
Can I double the recipe?
Yes, you can double the recipe! Use a larger baking pan, like a 9×13-inch one. Just watch the baking time, as it may take longer. Check for doneness by looking for that golden color and checking the center.
In this article, I covered how to make delicious Heavenly Peach Bars. We went through the key ingredients, simple steps, and helpful tips to ensure your bars taste great. Remember to choose the best peaches for flavor and try out fun variations. You can even customize for vegan or gluten-free diets. Follow proper storage to enjoy them later. Now, you have all you need to bake these tasty bars. Enjoy every bite!


![- 1 cup unsalted butter, melted - 1 ½ cups brown sugar - 2 large eggs - 1 teaspoon vanilla extract - Zest and juice of 1 lemon To make these strawberry lemon blondies, we start with some key players. The butter gives a rich base, while brown sugar adds sweetness and depth. Eggs bind everything together, and vanilla extract enhances flavor. The zest and juice of one lemon bring a bright, zesty punch to the mix. - 2 cups all-purpose flour - 1 teaspoon baking powder - ½ teaspoon salt Next, we mix in our dry ingredients. All-purpose flour provides structure. Baking powder helps the blondies rise, making them light and fluffy. A little salt balances the sweetness. - 1 cup fresh strawberries, diced - Optional: Powdered sugar for dusting Finally, we fold in the star of the show: fresh strawberries! Their juicy sweetness pairs perfectly with the lemon. If you want a touch of elegance, consider dusting the blondies with powdered sugar before serving. This simple step adds a nice visual touch and a hint of extra sweetness. For the complete recipe, refer to the [Full Recipe]. First, set your oven to preheat at 350°F (175°C). This step is key to getting that perfect bake. Next, grab a 9x9 inch baking pan. Grease it well and line it with parchment paper. Leave some paper hanging over the edges. This will help you lift the blondies out later. You will need a few mixing bowls. One should be large enough for the wet ingredients. Another bowl should be used for the dry ingredients. Also, keep a whisk and spatula nearby. They make mixing easier. In your large bowl, pour in 1 cup of melted butter. Add 1 ½ cups of brown sugar to it. Stir well until it looks smooth. Next, crack in 2 large eggs. Add 1 teaspoon of vanilla extract, the zest of 1 lemon, and 1 tablespoon of fresh lemon juice. Whisk until everything is mixed well and smooth. Now, take your second bowl. In it, whisk together 2 cups of all-purpose flour, 1 teaspoon of baking powder, and ½ teaspoon of salt. Mix these dry ingredients well. Gradually add them to your wet mixture. Stir gently until you see no dry flour. Be careful not to overmix here. Next, fold in 1 cup of diced strawberries using a spatula. Do this gently to keep the fruit pieces whole. Pour the batter into your prepared pan. Use your spatula to spread it evenly. Then, place the pan in your preheated oven. Bake for 25 to 30 minutes. Keep an eye on the edges; they should turn lightly golden brown. To check for doneness, insert a toothpick in the center. It should come out with a few moist crumbs. After baking, let the blondies cool completely in the pan. A wire rack works great for this. Once they are cool, use the parchment overhang to lift them out. Transfer them to a cutting board and cut them into squares. If you like, lightly dust the tops with powdered sugar before serving. This adds a nice touch and makes them look pretty. Enjoy your strawberry lemon blondies! For the full recipe, check out the details above. To get perfect strawberry lemon blondies, avoid overmixing the batter. Overmixing can make your blondies tough. Mix just until you don’t see dry flour anymore. This keeps them soft and chewy. Also, ensure you measure your ingredients correctly. Use dry measuring cups for flour and sugar. Level them off with a knife for accuracy. This small step helps your blondies turn out just right. To enhance the lemon flavor, use fresh lemon juice and zest. Fresh ingredients make a big difference. The zest gives a bright, bold taste. For an extra kick, add a bit more lemon juice if you like it zesty. When using fresh strawberries, choose ripe ones. Look for bright red berries with no soft spots. Cut them into small, even pieces. This way, they mix evenly into the batter, spreading flavor throughout. To ensure even baking, rotate your pan halfway through. Ovens can have hot spots, so this helps. Keep an eye on the edges. They should look golden brown but not burnt. For storage, use an airtight container. A metal or glass container works best. This keeps your blondies fresh for days. If you have extra, you can freeze them. Wrap them well in plastic wrap before placing them in the freezer. This way, you’ll enjoy them later. For the full recipe, check out the full recipe section. {{image_4}} You can easily adapt the strawberry lemon blondies to fit different diets. For a vegan or dairy-free option, replace the butter with coconut oil or a vegan butter substitute. Instead of eggs, use flax eggs or applesauce. This keeps the texture while making it plant-based. For gluten-free alternatives, swap out the all-purpose flour with a gluten-free blend. Many brands offer mixes that work well in baking. Just make sure your baking powder is gluten-free, too, to keep everything safe for those with allergies. To add more fruit flavors, consider mixing in blueberries or raspberries for a twist. These berries pair nicely with lemon and add vibrant colors. You can also try adding different extracts, like almond or coconut, to change the taste. Cinnamon or nutmeg can give a warm touch to your blondies. Pairing your blondies with a scoop of vanilla ice cream makes for a delightful treat. The cold ice cream complements the warm blondies beautifully. For a fun twist, create a blondie sundae by stacking a blondie with ice cream and drizzling it with chocolate or caramel sauce. You can also serve them with whipped cream and fresh strawberries on top. This not only looks appealing but also enhances the flavors. For the full recipe, check out the Sweet & Zesty Strawberry Lemon Blondies. To store strawberry lemon blondies at room temperature, place them in a cool, dry area. Use a plate or a baking dish. Cover them lightly with foil or wax paper. This keeps them fresh for about three days. Avoid direct sunlight to prevent them from drying out. For long-term storage, you can freeze the blondies. First, let them cool completely. Then, cut them into squares. Wrap each square tightly in plastic wrap. Place the wrapped blondies in a freezer bag or airtight container. They can last up to three months in the freezer. When you want to enjoy them, you can thaw them. For the best texture, place the blondies in the fridge overnight. If you're in a hurry, let them sit at room temperature for a few hours. This way, they stay soft and tasty. To keep your blondies fresh, always use airtight containers. This prevents air from drying them out. If you don't have one, use plastic wrap tightly. Keep blondies away from strong odors, as they can absorb them. Enjoy your strawberry lemon blondies at their best! For the full recipe, check out the detailed instructions above. To cut blondies neatly, first let them cool. Use a sharp knife for clean cuts. Warm the knife in hot water, then wipe it dry. This helps slice through the soft blondies. Cut in straight lines for even squares. For a nice finish, dust the top with powdered sugar after cutting. Yes, you can make these blondies ahead of time. Bake and cool them completely. Wrap them tightly in plastic wrap. Store them in an airtight container at room temperature. They stay fresh for a few days. For longer storage, freeze them in an airtight container. Thaw at room temperature before serving. Strawberry lemon blondies last about 3 to 5 days at room temperature. Keep them in an airtight container to maintain freshness. If you store them in the fridge, they may last up to a week. For best taste, enjoy them within a few days of baking. Yes, you can use frozen strawberries in this recipe. Thaw and drain them before adding to the batter. This prevents excess moisture in the blondies. While fresh strawberries taste great, frozen ones work well too. They still provide that sweet and tart flavor we love. You now have a complete guide to making delicious strawberry lemon blondies. We covered key ingredients, step-by-step instructions, and helpful tips. Remember to avoid overmixing for the best texture and to store them properly. Feel free to customize with different fruits or flavors to make this treat your own. Enjoy your baking and share these delights with friends and family. The joy of homemade desserts is unbeatable!](https://fastmealmate.com/wp-content/uploads/2025/06/d01b8b31-fd8b-4a7a-a702-50bce4a43ad8-768x768.webp)

