Healthy Sweet Potato Hash Browns Crispy and Flavorful

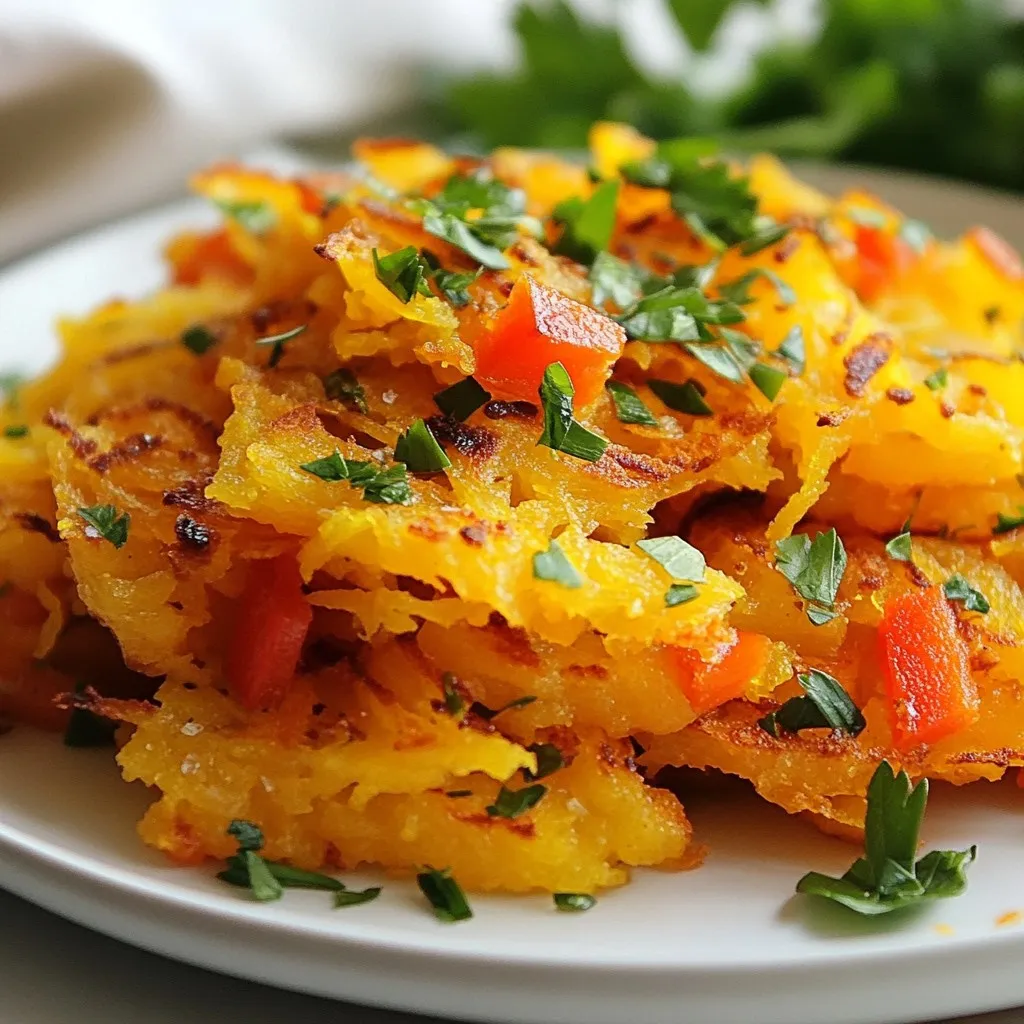
Looking for a delicious and healthy breakfast option? These crispy and flavorful sweet potato hash browns will change your morning routine! Packed with nutrients and easy to make, they offer a tasty twist on traditional hash browns. In this post, I’ll guide you through simple steps, useful tips, and fun variations to impress your family and friends. Ready to start your day on a tasty note? Let’s dive in!
Why I Love This Recipe
- Healthier Alternative: These sweet potato hash browns are a nutritious twist on traditional hash browns, packed with vitamins and minerals.
- Easy Preparation: With just a few simple ingredients and steps, you can whip up these delicious hash browns in no time.
- Versatile Dish: Perfect for breakfast, brunch, or as a side dish, these hash browns can be paired with a variety of meals.
- Crispy and Flavorful: Achieving the perfect crispiness with the seasoned sweet potatoes makes for a delightful texture and taste.
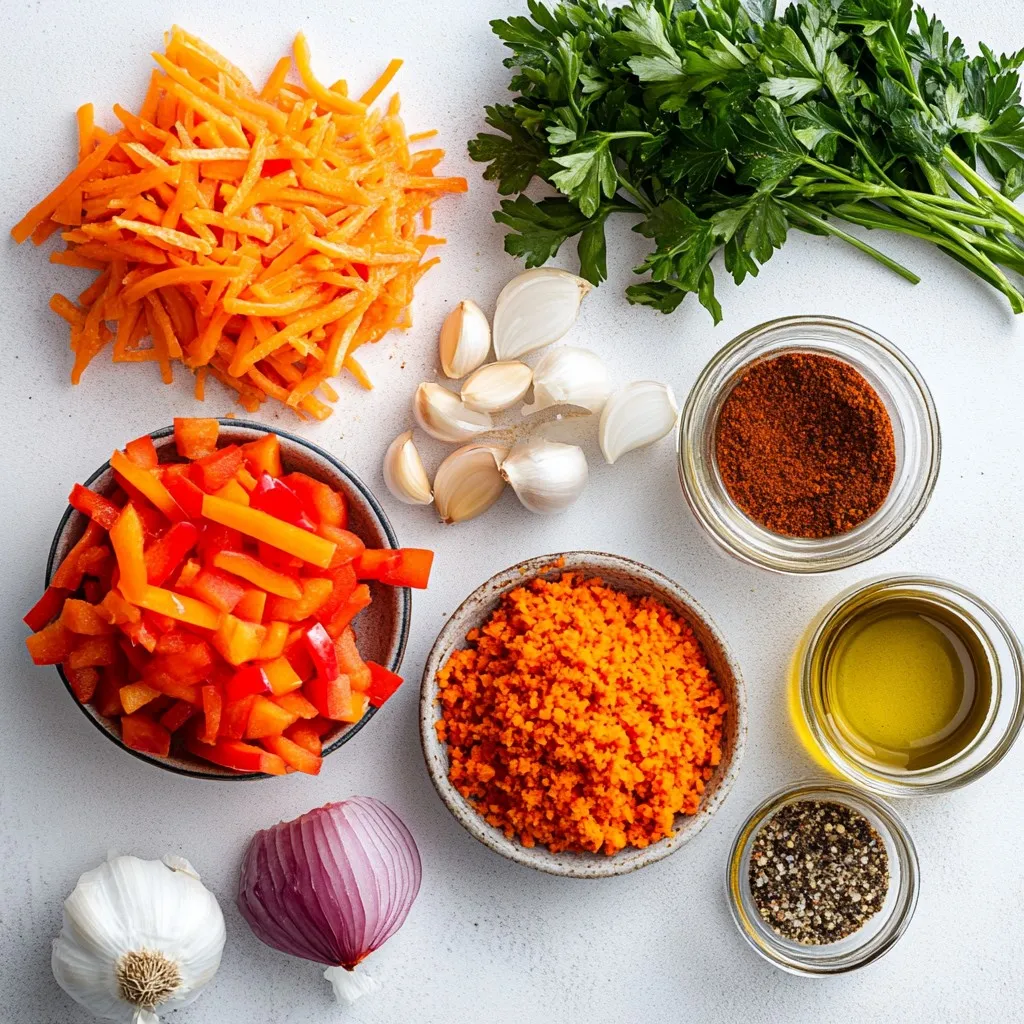
Ingredients
List of Required Ingredients
– 2 large sweet potatoes, peeled and grated
– 1 small onion, finely chopped
– 1 red bell pepper, diced
– 2 cloves garlic, minced
– 1 teaspoon smoked paprika
– 1/2 teaspoon ground cumin
– Salt and freshly cracked pepper to taste
– 2 tablespoons olive oil, divided
– Fresh parsley, chopped (for garnish)
Suggested Tools and Equipment
– Box grater or food processor
– Large non-stick skillet
– Mixing bowl
– Spatula
To make the best sweet potato hash browns, you need fresh ingredients. The sweet potatoes give a nice sweetness and a vibrant color. The onion and bell pepper add crunch and flavor. Garlic brings out the best in each bite.
I love using smoked paprika for a touch of warmth. Ground cumin adds depth, making the dish more interesting. Don’t forget the salt and pepper! They help enhance all the flavors.
For tools, a box grater or food processor makes grating easy and quick. A large non-stick skillet is key for cooking without sticking. A mixing bowl helps combine everything well. Finally, a spatula makes flipping the hash browns simple.
Gather these ingredients and tools before you start cooking. This will make your cooking process smooth and fun!

Step-by-Step Instructions
Preparation of Sweet Potatoes
Peel two large sweet potatoes with a vegetable peeler. You want to remove all the skin. Next, grate the sweet potatoes using a box grater or food processor. This makes them fine and easier to cook.
After grating, place the sweet potato in a clean kitchen towel. Twist the towel to squeeze out excess moisture. This step is very important. Less moisture helps the hash browns get crispy. If you skip this, they may turn out soggy.
Mixing Ingredients
In a large mixing bowl, combine the grated sweet potatoes with the following:
– 1 small onion, finely chopped
– 1 red bell pepper, diced
– 2 cloves garlic, minced
– 1 teaspoon smoked paprika
– 1/2 teaspoon ground cumin
– Salt and freshly cracked pepper to taste
Mix all ingredients well. Use a spatula or wooden spoon to ensure everything is evenly combined. This way, the flavors spread out well in every bite.
Cooking Process
Heat 1 tablespoon of olive oil in a large non-stick skillet over medium heat. When the oil shimmers, add half of the sweet potato mixture. Press it down gently into an even layer with a spatula. Cook for about 5-7 minutes until the bottom is golden brown.
Carefully flip the hash browns using a large spatula. If you want them crispier, add the remaining tablespoon of olive oil around the skillet edges. Cook for another 5-7 minutes until the second side is golden and crispy.
Once both sides are done, remove the hash browns. Place them on a plate lined with paper towels to absorb any extra oil. If you have more mixture left, repeat this cooking process. Enjoy your crispy sweet potato hash browns!
Tips & Tricks
Achieving Maximum Crispiness
To get your sweet potato hash browns crispy, removing moisture is key. After grating, place the sweet potato in a clean towel. Squeeze out as much moisture as you can. This step is vital. If your hash browns are wet, they will steam instead of crisp.
When cooking, use enough oil. I recommend two tablespoons for the best texture. Heat the oil until it shimmers. Then, add your mixture in a single layer. Cook for about 5-7 minutes before flipping. If they feel soft, give them more time. Crispiness comes from patience.
Flavor Enhancements
Spices make your hash browns pop! I love using smoked paprika and ground cumin. They add a warm, smoky flavor. You can also try garlic powder or chili powder for heat. Don’t forget to season with salt and pepper to taste.
For added nutrition, mix in some spinach or kale. These greens cook down well and add color. You can also toss in some shredded carrots for a sweet twist. Feel free to get creative!
Presentation Tips
How you serve your hash browns matters. Use a colorful plate to make them stand out. Sprinkle chopped parsley on top for a fresh look.
Serving alongside a poached egg or sliced avocado makes it more filling. The creamy avocado adds great flavor. You can also add a dollop of Greek yogurt for creaminess. Enjoy your beautiful, crispy hash browns!
Pro Tips
- Remove Excess Moisture: Squeezing out the moisture from the grated sweet potatoes is essential for achieving that perfect crispy texture.
- Use a Non-Stick Skillet: Cooking in a non-stick skillet helps prevent the hash browns from sticking and ensures an easy flip.
- Press Down for Crispiness: Gently pressing down the mixture in the skillet helps create a uniform surface, resulting in even cooking and crispiness.
- Garnish for Flavor: Fresh parsley not only adds a pop of color but also enhances the flavor profile, making your hash browns more appealing.

Variations
Ingredient Substitutions
You can easily change the sweet potato hash browns. For example, try using zucchini or carrots. They add different tastes and textures. Grate these veggies just like sweet potatoes. This keeps the cooking process simple.
You can also switch up the spices. Instead of smoked paprika, use chili powder for heat. Or, try Italian herbs like oregano or basil for a fresh twist. This lets you customize the flavor to your liking.
Cooking Methods
You have options when cooking sweet potato hash browns. You can bake or air fry them. Baking gives a softer texture, while air frying makes them extra crispy.
If you bake, set your oven to 425°F. Spread the mixture on a lined baking sheet. Bake for about 25-30 minutes, flipping halfway through. For air frying, preheat your air fryer to 375°F. Cook for about 15 minutes, shaking the basket halfway.
Adjust cooking times based on how crispy you want them. Keep an eye on them to avoid burning.
Serving Suggestions
Serving sweet potato hash browns can be fun. Pair them with a protein like eggs or bacon. This makes a filling meal. You can also add a side of fruit for color and freshness.
For brunch, serve hash browns on a colorful plate. Top with a poached egg or slices of avocado. This not only looks great but adds nutritious value. You can even sprinkle extra herbs for an eye-catching finish.
Storage Info
How to Store Leftovers
Store leftovers in an airtight container. This keeps them fresh and tasty. Place the container in the fridge. Use the hash browns within 3 days for the best flavor. If you need to keep them longer, freezing is a great option.
Reheating Instructions
To reheat, use a skillet for the best texture. Heat the skillet over medium heat. Add a little olive oil for crispiness. Cook until warmed through, around 5 minutes. You can also use a toaster oven. This helps keep the hash browns crispy. Avoid microwaving, as it makes them soggy.
Freezing Guidelines
To freeze sweet potato hash browns, let them cool completely first. Spread them on a baking sheet in a single layer. Freeze them for about 1-2 hours. Once frozen, transfer them to a freezer bag. Remove as much air as possible to prevent freezer burn. For thawing, place them in the fridge overnight. Reheat them in a skillet as mentioned before. This keeps them crispy and delicious!
FAQs
Can I make these hash browns ahead of time?
Yes, you can prepare these hash browns in advance. Grate the sweet potatoes and mix them with the other ingredients. Store the mixture in an airtight container in the fridge for up to two days. When ready to cook, heat your skillet and follow the recipe steps. For reheating, use a skillet to regain crispiness. You can also bake them in the oven at 375°F for about 10 minutes to warm through.
How do I make sweet potato hash browns crispy?
To get that perfect crisp, moisture removal is key. After grating, squeeze the sweet potatoes in a clean towel to remove excess liquid. This step helps achieve a golden brown texture. Use a non-stick skillet and heat the oil well before adding the mixture. Flatten the hash browns in the pan to ensure even cooking. Flip carefully, adding more oil if needed to crisp the edges.
Are sweet potato hash browns healthier than regular hash browns?
Sweet potato hash browns are often healthier than regular ones. They have more fiber and vitamins like A and C. Sweet potatoes can help with digestion and improve your immune system. Regular hash browns, made from white potatoes, are higher in starch and lower in nutrients. Choosing sweet potatoes gives you a tasty way to boost your health while enjoying a classic dish.
Can I use frozen grated sweet potatoes?
Yes, you can use frozen grated sweet potatoes. Just make sure to thaw and drain them well before cooking. Excess moisture will affect the crispiness of your hash browns. After draining, follow the recipe as usual. Frozen options can save time, but fresh sweet potatoes usually offer better flavor and texture.
What is the best way to serve sweet potato hash browns?
Sweet potato hash browns are versatile. Serve them as a breakfast side with eggs or avocado for a nutritious meal. They pair well with salsa, sour cream, or Greek yogurt. For lunch or dinner, enjoy them alongside grilled meats or veggies. Garnish with fresh herbs like parsley for a pop of color and flavor.
To wrap up, we covered how to make delicious sweet potato hash browns. We discussed the key ingredients, tools needed, and a simple cooking process. I shared tips to get them crispy and ideas for fun variations. Don’t forget the importance of proper storage, whether in the fridge or freezer. You can enjoy these hash browns for any meal. With these insights, you can create a tasty and nutritious dish that everyone will love. Enjoy experimenting in your kitche

Deliciously Crispy Sweet Potato Hash Browns
Ingredients
- 2 large sweet potatoes, peeled and grated
- 1 small onion, finely chopped
- 1 medium red bell pepper, diced
- 2 cloves garlic, minced
- 1 teaspoon smoked paprika
- 1/2 teaspoon ground cumin
- to taste Salt and freshly cracked pepper
- 2 tablespoons olive oil, divided
- to taste Fresh parsley, chopped (for garnish)
Instructions
- Start by peeling the sweet potatoes. Grate them using either a box grater or a food processor. Once grated, place the sweet potato in a clean kitchen towel or cheesecloth and twist to squeeze out as much excess moisture as possible. This step is crucial for achieving crispy hash browns.
- In a large mixing bowl, combine the grated sweet potatoes, finely chopped onion, diced red bell pepper, minced garlic, smoked paprika, ground cumin, and a generous pinch of salt and pepper. Stir the mixture well until all ingredients are thoroughly combined and evenly coated.
- Heat 1 tablespoon of olive oil in a large non-stick skillet over medium heat. Once the oil shimmers, add half of the sweet potato mixture to the skillet. Use a spatula to press it down gently into an even layer. Cook for about 5-7 minutes, or until the bottom is a beautiful golden brown.
- Carefully flip the hash browns using a large spatula. If needed, add the remaining tablespoon of olive oil around the edges of the skillet to enhance crispiness. Continue to cook for an additional 5-7 minutes, allowing the second side to also become golden and crispy.
- Once both sides are crisped to perfection, remove the hash browns from the skillet and transfer them to a plate lined with paper towels to absorb any excess oil. If there's more mixture left, repeat the cooking process with the remaining sweet potato mixture.
- For a finishing touch, garnish your crispy sweet potato hash browns with freshly chopped parsley before serving warm.


. - Cut watermelon into small cubes. - Slice peaches into delicate wedges. First, I start with the watermelon. I cut it into small cubes. This shape makes it easy to scoop. Next, I slice the peaches into delicate wedges. Their sweet juices will add a nice touch to the salad. - Combine watermelon and peach slices in a large bowl. - Fold in feta cheese and basil leaves. In a large bowl, I combine the watermelon and peach slices. Their colors make a beautiful mix. Then, I gently fold in crumbled feta cheese and torn basil leaves. This step helps blend the flavors well without breaking the fruit. - Whisk together honey, lime juice, salt, and pepper. In a small bowl, I whisk honey and lime juice. I add a pinch of salt and a few cracks of pepper. This dressing brings sweet and tangy flavors together. - Drizzle dressing over salad and gently toss. - Sprinkle chopped pistachios on top just before serving. I drizzle the honey-lime dressing over the salad. Then, I gently toss everything together. This ensures each piece of fruit gets coated. If I want extra crunch, I sprinkle chopped pistachios on top just before serving. Enjoy right away for the best taste or chill for a bit first. For the full recipe, check out the details above! To make the best Summer Peach Watermelon Salad, start with ripe fruits. Look for peaches that are soft to touch but not mushy. They should smell sweet and fragrant. For watermelon, choose a heavy one with a uniform color. A yellow spot on the bottom shows ripeness. Freshness matters a lot for flavor. The riper your fruits are, the sweeter and juicier your salad will taste. When serving this salad, choose a large, colorful bowl. A bright bowl adds to the salad's appeal. You can also use clear glass bowls for individual servings. This way, everyone can see the vibrant colors. Consider garnishing with more basil leaves on top for a fresh look. This salad pairs well with grilled meats, like chicken or shrimp. You can also serve it alongside other dishes for a complete meal. To elevate your Summer Peach Watermelon Salad, think about adding fresh herbs. Mint or cilantro can add a new twist. You could also sprinkle some chili flakes for a kick. For dressings, try mixing olive oil with balsamic vinegar. This adds a rich layer of flavor. A simple honey-lemon dressing is also a great choice. These enhancements will make your salad even more delicious. You can find the Full Recipe to explore more ideas. {{image_4}} You can change up this salad easily. Swap feta cheese for goat cheese or mozzarella. Both add a creamy touch. If you want some crunch, add nuts or seeds. Try walnuts, almonds, or sunflower seeds for a nice bite. Summer brings many fruits. You can add strawberries or blueberries for a twist. These fruits pair well with peaches and watermelon. If you want a fall twist, use apples and nuts. This keeps the salad fun and fresh all year round. This salad is gluten-free, making it safe for those with gluten issues. If you want a vegan version, skip the cheese and honey. Use agave syrup instead of honey for sweetness. This way, everyone can enjoy this tasty dish! To keep your Summer Peach Watermelon Salad fresh, store it properly. First, place any leftover salad in an airtight container. This helps prevent air from wilting the greens and fruits. It’s best to store the dressing separately. This way, the salad maintains its crispness and flavor. For containers, use glass or BPA-free plastic. Glass containers work well as they do not absorb odors. If you use plastic, ensure it is food-grade. This keeps your salad safe and fresh for longer. You can keep the salad in the refrigerator for about 2 days. After that, the fruits may start to break down. Signs of spoilage include a mushy texture or off smell. If the salad looks slimy, it’s best to toss it. Always trust your senses when it comes to food safety. Yes, you can prepare this salad ahead of time. To keep it fresh, follow these tips: - Cut fruits just before serving: Watermelon and peaches taste best when fresh. - Keep dressing separate: Mix honey and lime juice just before serving. - Store in an airtight container: This helps prevent browning and keeps the salad crisp. You can add many fruits to enhance the taste. Here are some great options: - Strawberries: Their sweet and tart flavor pairs well with peaches. - Blueberries: These tiny gems add a pop of color and sweetness. - Mango: Its juicy texture complements the watermelon nicely. You can easily tweak the sweetness to fit your taste. Here are some ideas: - Add more honey: If you like it sweeter, drizzle in more honey. - Use less honey: For a lighter taste, use less honey while mixing. - Add lime juice: This adds a tangy flavor that balances sweetness. This blog post covers how to make a refreshing summer salad with watermelon and peaches. You learned about the best fresh ingredients, how to prepare the fruits, mix the salad, and create a light dressing. I shared tips for choosing top-quality fruits and offered variations to suit your taste. Remember, freshness is key for flavor. This salad is perfect for warm days and pairs well with grilled dishes. Enjoy this delightful recipe and make it your own with unique twists! Your summer meals will shine with this colorful dish.](https://fastmealmate.com/wp-content/uploads/2025/07/6d26c9a9-fbdd-445d-815a-0962cba54d08-768x768.webp)


![To make a Zesty Italian Pasta Salad, you need fresh and colorful ingredients. Here’s the complete list of ingredients you will need: - 2 cups rotini pasta - 1 cup cherry tomatoes, halved - 1 cup cucumber, diced - 1/2 cup black olives, sliced - 1/2 cup red bell pepper, chopped - 1/4 cup red onion, finely chopped - 1/2 cup mozzarella balls, halved - 1/3 cup Italian dressing - 1 tablespoon fresh basil, chopped - 1 teaspoon dried oregano - Salt and pepper to taste Each ingredient brings its own flavor and texture. The rotini pasta is fun and holds dressings well. Cherry tomatoes add sweetness, while cucumbers give a nice crunch. Black olives bring a salty bite, and bell peppers add color and freshness. Red onions add a bit of sharpness, while mozzarella balls provide creaminess. For the dressing, you can use store-bought or make your own. I love using fresh basil and oregano for a burst of flavor. Finally, season with salt and pepper to balance everything. You can find the full recipe [here]. Enjoy your cooking adventure! - Bring salted water to a boil. - Cook rotini pasta until al dente. - Drain and cool under cold water. Cooking the pasta is the first step. Use a large pot and fill it with water. Add a good amount of salt to the water. This step adds flavor to the pasta. Once the water boils, add the rotini pasta. Follow the package directions for cooking time until it is al dente. This means the pasta should be firm but cooked. After cooking, drain the pasta and rinse it under cold water. This stops the cooking process and cools the pasta quickly. - Combine cherry tomatoes, cucumber, olives, bell pepper, and onion. - Stir gently to mix. While the pasta cools, you can prepare the vegetables. Take a large bowl and add the halved cherry tomatoes, diced cucumber, sliced black olives, chopped red bell pepper, and finely chopped red onion. Each vegetable brings its own flavor and texture to the salad. Stir gently to mix them without squishing the tomatoes. This colorful mix will make your salad bright and fun! - Add cooled pasta to the vegetable mix. - Incorporate mozzarella balls. - Drizzle with dressing and seasonings. Once the pasta is cool, add it to the bowl with the mixed vegetables. Next, add halved mozzarella balls. These little cheese bites add creaminess. Now, drizzle the Italian dressing over the pasta and vegetables. Don't forget to sprinkle the fresh basil, dried oregano, salt, and pepper. These seasonings will enhance the flavors. - Toss ingredients to combine. - Refrigerate for at least 30 minutes. Now, it is time to mix everything. Toss all the ingredients together carefully. You want every part to be coated with dressing. Cover the bowl with a lid or plastic wrap. Place it in the fridge for at least 30 minutes. Chilling the salad helps the flavors blend well. Trust me, the wait is worth it! To get the best taste from your Zesty Italian Pasta Salad, choose a good Italian dressing. Brands like Annie's or Ken's work well. Don't use too much dressing at first; you can always add more later. Always taste as you go. A little salt and pepper can boost the flavor. Remember, it's easy to add, but hard to take away. Serving your pasta salad is just as fun as making it! You can use a large bowl for a family-style meal. This makes it easy for everyone to help themselves. For a more stylish look, you can serve it in small bowls. This way, each guest gets their own. A sprinkle of fresh basil on top adds a nice touch. It makes the dish look bright and tasty! One common mistake is overcooking the pasta. Make sure to cook it just until it's al dente. This keeps your pasta from getting mushy. Another mistake is not chilling the salad. Chilling helps the flavors blend well. If you skip this step, your salad may not taste as good. Aim to chill it for at least 30 minutes before serving. For the full recipe, check out the Zesty Italian Pasta Salad section. {{image_4}} You can easily adapt this salad to fit different diets. For a gluten-free option, use gluten-free rotini pasta. It cooks just like regular pasta. Many brands make great options now. For a vegan twist, swap the mozzarella cheese with vegan cheese or even avocado. Both add creaminess and flavor to your dish. Want to make this salad more filling? Add some protein! Grilled chicken works great. Just chop it into bite-sized pieces. Shrimp is another tasty choice. Cook it until pink and toss it in. For a plant-based option, chickpeas are perfect. They add a nice texture. When you add protein, taste your salad again. You may need to adjust the seasoning. Just add a pinch of salt or a dash of dressing. Using seasonal veggies can elevate your pasta salad. In summer, add fresh zucchini or bell peppers. They bring a nice crunch and color. In fall, roasted butternut squash can add sweet notes. You can also switch up the dressing. Try a balsamic vinaigrette for a tangy twist. This keeps your salad exciting and fresh year-round. To store your zesty Italian pasta salad, use airtight containers. Glass or plastic containers work well. Make sure the lid seals tightly to keep air out. This helps maintain freshness. For best results, store the salad in the fridge within two hours of serving. You can freeze pasta salad, but it might change texture. To freeze, place it in a freezer-safe container. Label the container with the date. When ready to eat, thaw it in the fridge overnight. Reheat gently on the stove or in the microwave. Be careful not to overcook it again. In the fridge, your pasta salad lasts about three to five days. Keep an eye out for signs of spoilage. If it has an off smell, or if the vegetables look mushy, it’s best to toss it. Trust your senses; they guide you well in the kitchen. You can make Zesty Italian Pasta Salad a day before serving. Cook the pasta, mix it with the veggies, and add the dressing. Store it in the fridge. Chilling helps the flavors blend well. Just give it a good toss before serving. This makes it a great option for parties. Yes, you can customize the ingredients to fit your taste. Try adding different vegetables like bell peppers or zucchini. You can also swap out mozzarella for feta or add beans for protein. Get creative! Make it your own. Italian Pasta Salad pairs well with grilled meats, like chicken or steak. It also goes nicely with crusty bread or a fresh green salad. For a fun twist, serve it with garlic bread for a complete meal. No, it's not safe to leave pasta salad out for long. The safe time is about two hours. After that, bacteria can grow, making it unsafe to eat. Keep it chilled if you are not serving it right away. Absolutely! Homemade Italian dressing adds a personal touch. You can control the flavors and ingredients. Mix olive oil, vinegar, herbs, and spices to create your blend. This makes the salad even more special. For the full recipe, check out the section above! This Zesty Italian Pasta Salad is a bright and tasty dish. It combines fresh veggies, pasta, and cheese. Each bite is full of flavor. Here’s a quick look at what you need and how to make it. - 2 cups rotini pasta - 1 cup cherry tomatoes, halved - 1 cup cucumber, diced - 1/2 cup black olives, sliced - 1/2 cup red bell pepper, chopped - 1/4 cup red onion, finely chopped - 1/2 cup mozzarella balls, halved - 1/3 cup Italian dressing (store-bought or homemade) - 1 tablespoon fresh basil, chopped - 1 teaspoon dried oregano - Salt and pepper to taste First, cook the rotini pasta in salted boiling water. Follow the package instructions for best results. Drain and cool the pasta under cold water. This stops the cooking and keeps it firm. While the pasta cools, chop the veggies. Use a large bowl for the cherry tomatoes, cucumber, black olives, red bell pepper, and red onion. Stir them gently to mix. Next, add the cooled pasta to the veggies. Toss in the mozzarella balls, making sure they spread evenly. Now, drizzle the Italian dressing over the mix. Add the chopped basil, dried oregano, and a sprinkle of salt and pepper. Toss everything together until well coated. Finally, cover the bowl and chill in the fridge for at least 30 minutes. This step helps all the flavors blend nicely. Serve the pasta salad in a large bowl. You can also use individual bowls for a fun touch. Garnish with extra basil leaves for color. Enjoy this tasty dish at picnics or family meals! This blog post detailed how to make a zesty Italian pasta salad. We reviewed all the ingredients, cooking steps, and tips for the best flavor. You learned how to store leftovers and variations to suit your diet. Remember to chill the salad and avoid overcooking the pasta. With these tips, you can impress friends and family with this easy dish. Enjoy creating your own version of this refreshing salad!](https://fastmealmate.com/wp-content/uploads/2025/06/c8b502a6-31c8-41d1-a3bc-a403a8dd39f3-768x768.webp)