Grilled Shrimp Skewers Fresh and Flavorful Recipe

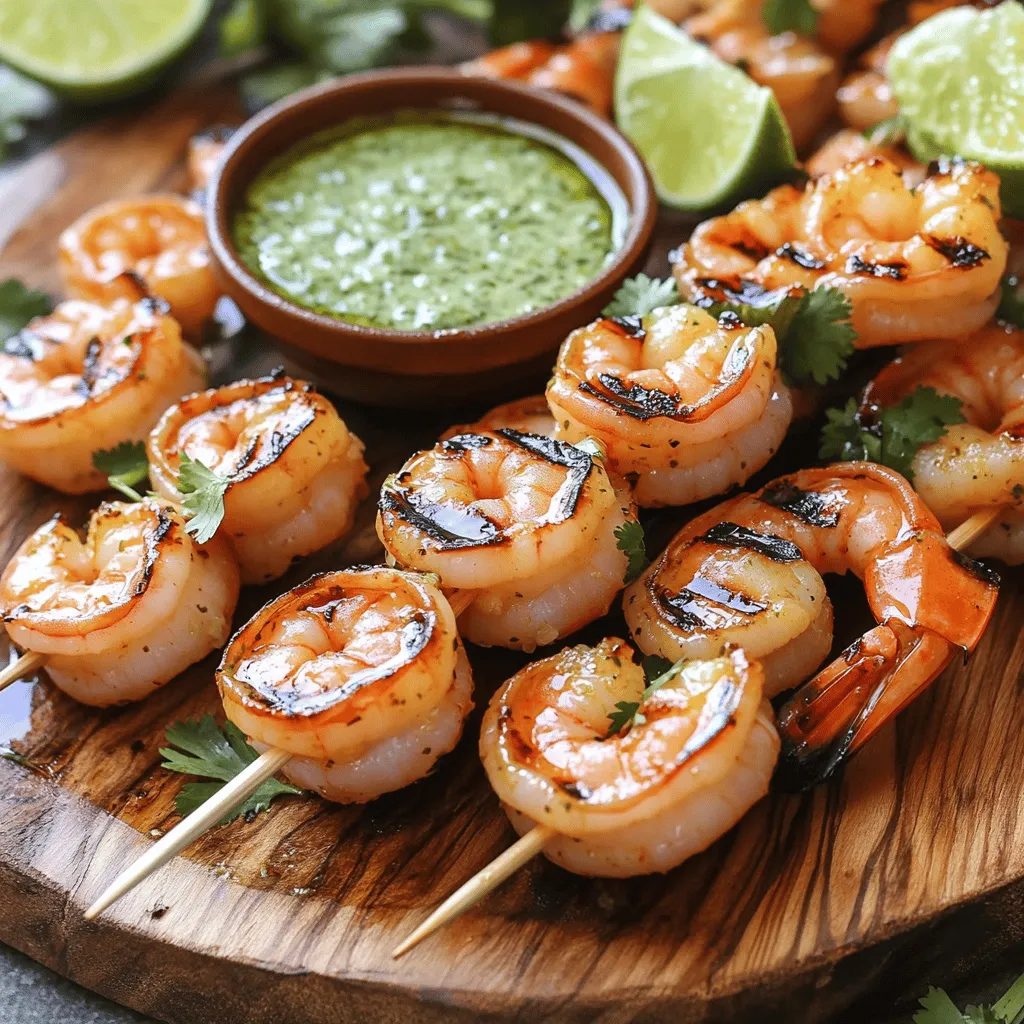
If you crave a meal that’s quick, tasty, and easy to make, you’re in the right place! My Grilled Shrimp Skewers recipe pairs simple ingredients with bold flavors to create a dish you’ll love. Whether you’re grilling for family or a fun get-together, these skewers will impress. Ready to learn how to make this fresh and flavorful dish? Let’s dive in and get cooking!
Ingredients for Grilled Shrimp Skewers
Main Ingredients
– 1 pound large shrimp, peeled and deveined
– 2 tablespoons extra virgin olive oil
– 2 cloves garlic, finely minced
– 1 teaspoon smoked paprika
– 1 teaspoon ground cumin
– Sea salt and freshly cracked black pepper
– Juice of 1 lime
– 1/4 cup fresh cilantro, chopped
– 1 jalapeño, deseeded and minced (optional)
These ingredients create a burst of flavor. Each one plays a key role. The shrimp should be large and fresh. They soak up the marinade well. Olive oil adds richness and helps with cooking. Garlic gives a nice aroma and flavor. Smoked paprika adds depth, while cumin warms up the dish. Lime juice brightens everything up. Fresh cilantro adds a lovely herbal note. The jalapeño can spice things up if you want.
Equipment Needed
– Grilling utensils (tongs, basting brush)
– Soaked wooden skewers or metal skewers
– Mixing bowl for marinade
For grilling, you need some basic tools. Tongs help flip the shrimp easily. A basting brush is useful for adding marinade while cooking. Use wooden skewers that have soaked in water. This keeps them from burning on the grill. Metal skewers are a great option too. A mixing bowl helps combine everything smoothly. The right tools make cooking fun and simple!
Step-by-Step Instructions
Marinating the Shrimp
– Whisk together marinade ingredients until mixed.
– Add shrimp and coat thoroughly.
– Cover and refrigerate for at least 30 minutes.
I love marinating shrimp! It makes them tasty and juicy. Start by whisking together the olive oil, minced garlic, smoked paprika, ground cumin, lime juice, sea salt, and black pepper. This mix creates a great flavor. Next, add the shrimp. Make sure every shrimp gets coated. Cover the bowl and put it in the fridge for at least 30 minutes. This helps the shrimp soak up all the flavors. You can also let them sit longer for even more taste!
Preparing the Grill
– Preheat grill to medium-high.
– Soak wooden skewers prior to grilling.
While the shrimp marinate, prepare the grill. Preheat it to medium-high heat. This step is key for perfect grilling. If you use wooden skewers, soak them in water for about 30 minutes. This prevents them from burning on the grill.
Grilling the Shrimp
– Thread shrimp onto skewers.
– Place skewers on the grill and cook for 2-3 minutes on each side.
– Check for doneness (pink and firm).
After marinating, it’s time to grill! Carefully thread the shrimp onto the soaked skewers. Aim for 4-5 shrimp per skewer. Leave a little space between each shrimp. This helps them cook evenly. Place the skewers on the hot grill. Cook for about 2-3 minutes on each side. Keep an eye on them! The shrimp are done when they turn pink and feel firm to the touch. Overcooking can make them tough, so check often. Enjoy your flavorful creation!
Tips & Tricks
Perfecting the Grill Marks
– Use a hot grill for better sear. A hot surface gives shrimp nice lines.
– Leave space between shrimp on skewers. This helps cook them evenly.
Marinade Tips
– Longer marination gives deeper flavor. Aim for at least 30 minutes.
– Adjust seasonings based on personal preference. Add more lime for zing or salt for taste.
Cooking Without a Grill
– You can broil shrimp in the oven. Set the broiler to high and watch closely.
– Pan-searing is also great. Use a hot skillet and add oil for flavor.
Using these tips, you can make the best grilled shrimp skewers.

Variations
Different Marinade Options
You can change the flavor of your grilled shrimp skewers by using different marinades. One fun option is a lemon garlic marinade. This gives the shrimp a light, fresh taste. Just mix lemon juice, minced garlic, olive oil, and a bit of salt. Let the shrimp soak in this mix for about 30 minutes before grilling.
Another tasty idea is a teriyaki glaze. This Asian twist adds a sweet and savory flavor. Use store-bought teriyaki sauce or make your own with soy sauce, honey, and ginger. Marinate the shrimp for about 30 minutes for the best taste.
Accompaniments
Grilled shrimp skewers pair well with many sides. You can serve them with grilled vegetables for a colorful plate. Bell peppers, zucchini, and corn work great. A fresh salad also complements the shrimp. Use greens, cherry tomatoes, and a light vinaigrette for a refreshing side.
For sauces, try sriracha aioli for a kick. Mix mayonnaise, sriracha, and lime juice to make it creamy and spicy. Garlic butter is another choice. Just melt butter and mix in minced garlic for a rich dip.
Skewer Alternatives
If you want to change things up, try different proteins or veggies on the skewers. You can replace shrimp with chicken. Simply cut chicken into pieces and marinate like shrimp.
Vegetables like mushrooms, bell peppers, and onions also work well. Skewer them alongside shrimp or on their own. For seafood lovers, scallops or fish like salmon can be great options, too. Just adjust the cooking time for these proteins to ensure they cook through.
Storage Info
Storing Leftover Shrimp
To keep grilled shrimp fresh, store it in the fridge. Place leftovers in an airtight container. This helps prevent any strong odors from spreading. I recommend using glass or BPA-free plastic containers for best results.
Freezing Guidance
If you have extra skewers, freezing is a great option. First, let the shrimp cool completely. Then, place them in a freezer bag. Remove as much air as possible. This prevents freezer burn and keeps your shrimp tasty. When ready to eat, thaw the shrimp overnight in the fridge. Reheat them on a grill or in a skillet over medium heat for about 5 minutes.
Duration for Freshness
Grilled shrimp lasts about 3 days in the fridge. Make sure to check for signs of spoilage. If the shrimp smells off or has a slimy texture, it’s best to discard it. Always prioritize safety when storing food. Enjoy your grilled shrimp skewers with confidence!
FAQs
How do you know when shrimp are done cooking?
You can tell shrimp are done when they change color. Look for a bright pink hue. The flesh should also feel firm to the touch. Cook shrimp for about 2-3 minutes per side. Overcooking will make them tough and chewy, so watch closely.
Can I marinate shrimp too long?
Yes, marinating shrimp for too long can make them mushy. Aim for 30 minutes to 2 hours. This timeframe allows flavors to soak in without harming the texture. If you exceed 2 hours, the shrimp may lose their firm bite.
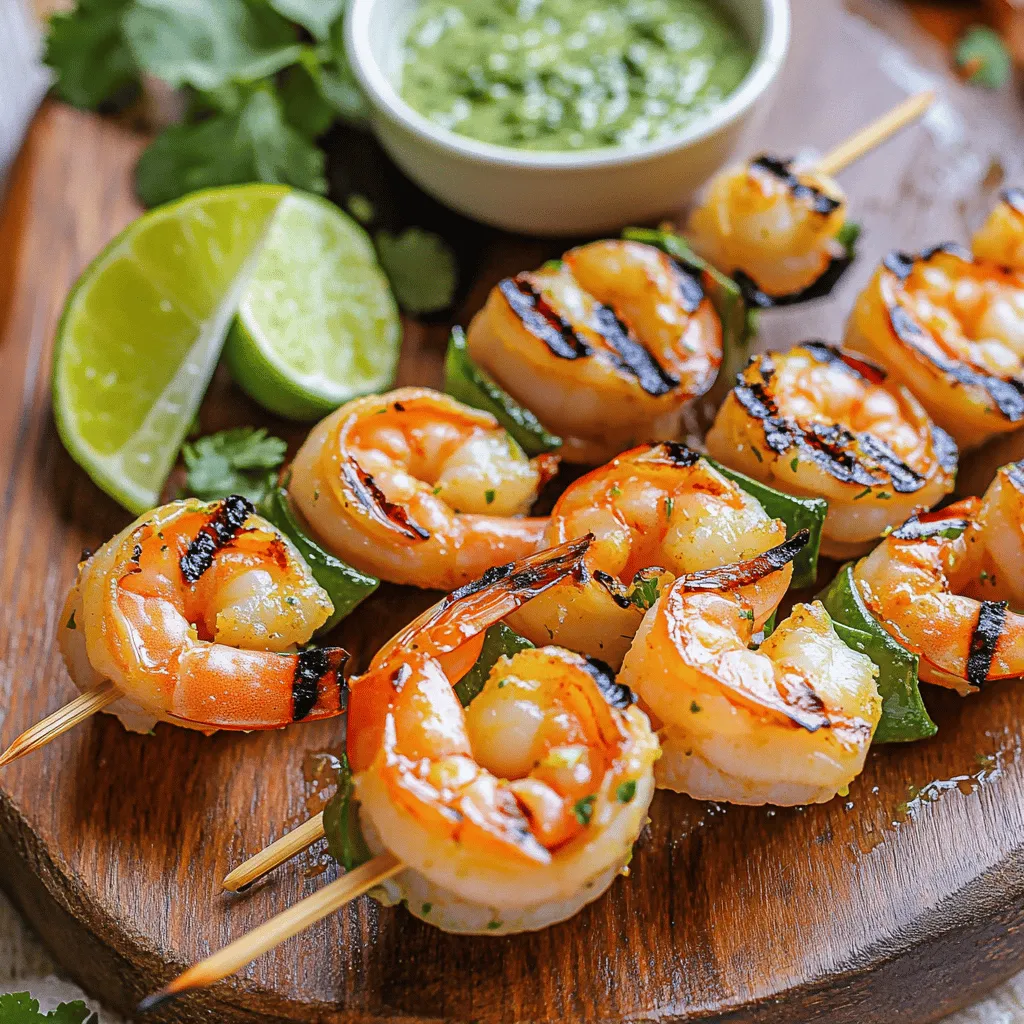
What’s the best way to serve grilled shrimp skewers?
I like to serve grilled shrimp skewers on a rustic wooden platter. Drizzle with the zesty cilantro-lime sauce for added flavor. You can also add lime wedges and fresh cilantro for a pop of color. Pair with charred veggies or a crisp salad for balance.
Can I use frozen shrimp for this recipe?
Yes, you can use frozen shrimp. Thaw them overnight in the fridge or run them under cold water. Dry the shrimp well before marinating. This helps the marinade stick better. Using frozen shrimp is a great option if fresh ones aren’t available.
Grilled shrimp skewers are easy and tasty. We covered essential ingredients and equipment. Marinating and grilling techniques make the shrimp flavorful and fun. You learned tips to perfect your grilling too.
With some creativity, you can try different flavors and pairings. Remember to store any leftovers properly. Enjoy making these skewers and impressing friends and family! Now, grab your grill and start cooking.


![To make garlic butter shrimp, gather these simple ingredients: - 1 lb large shrimp, deveined and peeled - 6 tablespoons unsalted butter - 5 cloves garlic, finely minced - 1 teaspoon red pepper flakes - 1 lemon, zested and juiced - 2 tablespoons fresh parsley, finely chopped - Salt and freshly ground black pepper, to taste - Optional: 1 tablespoon extra virgin olive oil These ingredients create a dish full of flavor. The shrimp give a sweet and briny taste. The garlic brings a warm, earthy aroma. Butter adds richness and a smooth texture. Lemon juice brightens the dish and balances the flavors. Fresh parsley gives a pop of color and freshness. Feel free to adjust the red pepper flakes. If you like heat, add more! If you prefer a milder flavor, use less. The optional olive oil helps prevent butter from burning. It adds depth to the dish. Once you gather these ingredients, you're ready to dive into the world of garlic butter shrimp. For a full recipe, check out the section above. To start, heat a large skillet over medium heat. Add 3 tablespoons of unsalted butter and, if you like, 1 tablespoon of extra virgin olive oil. This oil helps keep the butter from burning and adds flavor. Once the butter melts, add 5 cloves of minced garlic along with 1 teaspoon of red pepper flakes. Sauté for about 1-2 minutes. Stir often until the garlic smells great and turns light golden brown. Watch closely, so the garlic doesn’t burn. Now, it’s time for the shrimp. Carefully add 1 pound of peeled and deveined shrimp to the skillet. Spread them out in a single layer. Season with salt and freshly ground black pepper. Let the shrimp cook for about 2-3 minutes without stirring. You will see them change color to pink and opaque. When they look good, gently flip the shrimp over. Add the zest and juice from 1 lemon along with the remaining 3 tablespoons of butter. Cook for another 2-3 minutes until the shrimp are fully cooked and coated in the buttery sauce. When the shrimp are done, take the skillet off the heat. Stir in 2 tablespoons of finely chopped parsley. Taste the dish and adjust seasoning by adding more salt or pepper if needed. Serve the garlic butter shrimp hot to enjoy the best flavor. For more details, check the Full Recipe. To make your garlic butter shrimp shine, focus on two key areas: garlic and seasoning. - Avoid burning garlic: Garlic burns fast. Keep your heat at medium. Stir it often. You want it golden, not dark. Burnt garlic tastes bad. - Adjust seasoning to preference: Taste is personal. Start with salt and pepper. Add more to match your liking. You can also play with red pepper flakes for heat. Now, let’s talk about how to serve your dish. Presentation matters, and there are tasty ways to enjoy it. - Pairing with rice or bread: Serve your shrimp over fluffy rice. Jasmine or basmati works great. If you prefer, slice some warm bread. It soaks up the sauce well. - Garnishing ideas: Fresh parsley adds color. A few lemon wedges brighten your plate. A sprinkle of extra red pepper flakes adds a kick. Need more help? Here are some useful tools. - Suggested video tutorial or high-quality images: Look for a video that shows the steps in action. It helps to see the cooking process. - Nutritional information: Check out the calories and nutrients in this dish. It’s good to know what you're eating. For the full recipe, click [Full Recipe]. Enjoy cooking! {{image_4}} You can play with the flavors in garlic butter shrimp. For a kick, try Spicy Garlic Butter Shrimp. Just add more red pepper flakes. Adjust the heat to your taste. This gives the dish a nice kick that many love. Another great option is Lemon Herb Garlic Shrimp. Add fresh herbs like thyme or basil for a fresh twist. You can also squeeze extra lemon juice for more brightness. This variation makes the dish feel light and refreshing. You can swap some ingredients for different flavors. Instead of butter, try using olive oil. This gives a different taste and is a healthier choice. You can also use ghee for a rich flavor. Adding vegetables can change the dish too. Toss in asparagus or cherry tomatoes. These add color and nutrients. They cook quickly and soak up the garlic butter sauce. If you need gluten-free options, this recipe is easy. Just make sure your red pepper flakes and any other spices are gluten-free. For a dairy-free option, use olive oil instead of butter. You can also try vegan butter. This keeps the flavor while making it suitable for those avoiding dairy. By making these small adjustments, you can enjoy garlic butter shrimp in many ways. For the full recipe, check out the details above. To store leftovers, place the garlic butter shrimp in an airtight container. Ensure the shrimp cool down first. This keeps them fresh and tasty. You should eat the leftovers within 2 days. The flavors stay best within this time. For reheating, I suggest using a skillet. Heat it on low and add a little butter. This method keeps the shrimp moist. Stir gently to avoid overcooked shrimp. If you use the microwave, heat in short bursts. Check every 30 seconds until warm. You can freeze cooked shrimp for later use. Place them in a freezer-safe bag and remove as much air as possible. They can last up to 3 months in the freezer. To defrost, place the shrimp in the fridge overnight. For a faster method, submerge the bag in cold water. This way, you can enjoy your garlic butter shrimp whenever you want. For the full recipe, check out the [Full Recipe]. Cook shrimp for about 2-3 minutes on each side. They turn pink and opaque. This short time keeps them tender and juicy. Overcooking makes them tough. Always check their texture before serving. Yes, you can use frozen shrimp. Thaw them first in cold water. It takes about 15-20 minutes. Pat them dry before cooking. This helps them sear nicely in the pan. Cooking frozen shrimp directly may not give the best results. You can pair garlic butter shrimp with many sides. Rice is a great choice, like jasmine or basmati. You can also serve it with crusty bread. A fresh salad or steamed veggies work well too. They balance the rich flavors of the shrimp. This recipe is very flexible. You can adjust the spice level by adding more or less red pepper flakes. Want a different flavor? Try adding fresh herbs like basil or cilantro. You can even add veggies like asparagus or bell peppers. The choice is yours! For the full recipe, check the earlier section. This blog post covered a simple garlic butter shrimp recipe with step-by-step instructions. You learned about key ingredients, cooking tips, and variations for flavor. Storing and reheating shrimp was also discussed. This dish is not only easy to make, but it’s also delicious too. Experiment with the ingredients or try new sides to make it your own. Enjoy your cooking, and have fun exploring different flavors and options!](https://fastmealmate.com/wp-content/uploads/2025/05/4326bcb2-842f-4d6f-96a8-35ed43fbf561-768x768.webp)


![When making Baked Zucchini Parmesan, you need fresh, simple ingredients. Here’s what you should gather: - 4 medium zucchinis, sliced into ½-inch thick rounds - 1 cup shredded mozzarella cheese - ½ cup freshly grated Parmesan cheese - 1 cup panko breadcrumbs - 2 garlic cloves, finely minced - 1 teaspoon dried oregano - 1 teaspoon dried basil - 1 teaspoon sea salt - ½ teaspoon freshly cracked black pepper - 2 tablespoons extra virgin olive oil - Fresh basil leaves for garnish (optional) These ingredients create a great mix of flavors and textures. The zucchini becomes soft, while the cheese melts beautifully. The panko breadcrumbs add the perfect crunch. Each bite gives you a taste of cheesy goodness! For the full recipe, check out the detailed instructions. Enjoy creating this dish! - Preheat the oven to 400°F (200°C). - Line a baking sheet with parchment paper. - In a bowl, combine: - 1 cup panko breadcrumbs - 2 minced garlic cloves - 1 teaspoon dried oregano - 1 teaspoon dried basil - 1 teaspoon sea salt - ½ teaspoon black pepper - Toss the ingredients well. - Drizzle 2 tablespoons olive oil over the mixture. - Mix again until all the breadcrumbs are coated. - Lay sliced zucchini on the baking sheet in a single layer. - Sprinkle the breadcrumb mixture evenly over the zucchini. - Add 1 cup shredded mozzarella cheese on top. - Finish with ½ cup grated Parmesan cheese for extra flavor. - Place the baking sheet in the oven. - Bake for 25-30 minutes until golden and bubbly. - Let cool for a few minutes. - Garnish with fresh basil leaves if desired. For the full recipe, check out the detailed steps included above. Enjoy your crispy, cheesy zucchini! To make your baked zucchini truly crunchy, adjust the breadcrumb coating. Use panko breadcrumbs for a lighter, crispier texture compared to regular breadcrumbs. If you want even more crunch, mix in some crushed cornflakes or a sprinkle of grated Parmesan into the panko. This combination gives a great bite. Baking technique plays a key role too. Make sure you lay the zucchini slices in a single layer. If they overlap, they will steam instead of bake, and you’ll lose that crunch. Turning the baking sheet halfway through baking can also help ensure even cooking. For more flavor, add spices like smoked paprika or chili powder. These spices bring a warm touch that pairs well with zucchini. Fresh herbs can brighten the dish. Use fresh basil or parsley for a burst of color and taste. If fresh herbs are hard to find, dried herbs like oregano or thyme work well too. You can serve baked zucchini parmesan in many ways. For a delightful appetizer, cut it into small squares and serve with a dipping sauce. As a side dish, pair it with grilled chicken or fish for a healthy meal. You can also serve it over pasta for a heartier option. Feel free to explore these ideas and make the dish your own. Enjoy the process! For the full recipe, check out the [Full Recipe]. {{image_4}} You can make baked zucchini parmesan even more exciting by adding other veggies. Try including bell peppers, tomatoes, or mushrooms. These vegetables add color and taste. You can also mix in some spinach for a healthy twist. Adding protein can turn this dish into a hearty meal. Consider cooked chicken, turkey, or even crumbled sausage. For a vegetarian option, use chickpeas or lentils. They add both flavor and protein. If you need a gluten-free dish, swap panko for gluten-free breadcrumbs. This keeps the crunch while catering to dietary needs. Always check the labels to ensure they are truly gluten-free. For a vegan version, replace cheese with plant-based alternatives. Nutritional yeast gives a cheesy flavor without dairy. You can also use cashew cheese for a creamy texture. Use olive oil to replace any butter in the recipe. Using seasonal herbs can elevate your baked zucchini parmesan. Fresh basil, parsley, or thyme can add unique flavors. You can mix and match herbs based on the season for fresh taste. During holidays, adapt this dish to fit the occasion. Add a layer of roasted garlic or sun-dried tomatoes for a festive flair. These simple changes can make it special for gatherings. For the full recipe, check out the [Full Recipe]. To keep your Baked Zucchini Parmesan fresh, store leftovers in an airtight container. This helps lock in flavor and moisture. You can keep it in the fridge for up to three days. If you want to enjoy it later, make sure it cools completely before sealing. Freezing is a great way to save this tasty dish. Here’s how to do it: 1. Cool Completely: Ensure the dish is fully cooled. 2. Wrap it Up: Use plastic wrap to cover it tightly. Then, place it in a freezer-safe container or bag. 3. Label and Date: Write the date on the bag or container. This helps you remember when you made it. You can freeze it for up to three months. When you’re ready to eat, you can reheat it in the oven or microwave. - Oven Method: Preheat the oven to 350°F (175°C). Place the zucchini on a baking sheet and cover it with foil. Bake for about 15-20 minutes until hot. This keeps it crispy. - Microwave Method: Heat it in a microwave-safe dish. Cover it with a damp paper towel. Heat in short bursts of 30 seconds until warm. Note, this method may make it a bit soggy. Choose the method that works best for you! Enjoy your delicious dish anytime! You can tell when the zucchini is done by checking its color and texture. The cheese should be golden and bubbly. The zucchini should be soft but not mushy. This usually takes about 25-30 minutes in the oven. Keep an eye on it to avoid overcooking. Yes, you can use different cheeses! Cheddar, gouda, or even a spicy pepper jack can work well. Mix and match to find your favorite flavor. Just make sure the cheese melts nicely to create a gooey texture. Baked zucchini parmesan is a healthy choice. Each serving has about 180 calories, with 10 grams of fat and 8 grams of protein. It also provides vitamins A and C, plus calcium from the cheese. This dish is a great way to enjoy veggies! You can prepare the zucchini ahead of time! Slice and layer them with breadcrumbs and cheese. Cover the dish and store it in the fridge for up to 24 hours. Just bake it right before serving for a fresh taste. Yes, the recipe is vegetarian as it uses no meat. It features cheese, zucchini, and herbs, all of which are plant-based. Enjoy this dish as a great meat-free option for any meal. To spice things up, add crushed red pepper flakes to the breadcrumb mix. You can also use spicy cheese or add jalapeños for extra kick. Adjust the heat to your taste for a fun twist! For the full recipe, check out the Cheesy Baked Zucchini Delights. Enjoy your cooking adventure! This blog post shares a simple and tasty baked zucchini parmesan recipe. We covered essential ingredients, step-by-step instructions, and helpful tips to enhance flavor and crunch. You learned how to store leftovers and even make variations for different diets. Now you can confidently whip up this dish as a side or appetizer. Enjoy experimenting with flavors and sharing your creations. Baked zucchini parmesan is a great way to eat healthy and delicious food. Happy cooking!](https://fastmealmate.com/wp-content/uploads/2025/06/6985a322-15fd-4ae0-839d-4317f4e09967-768x768.webp)