Gingerbread Kiss Cookies Delightful Festive Treat

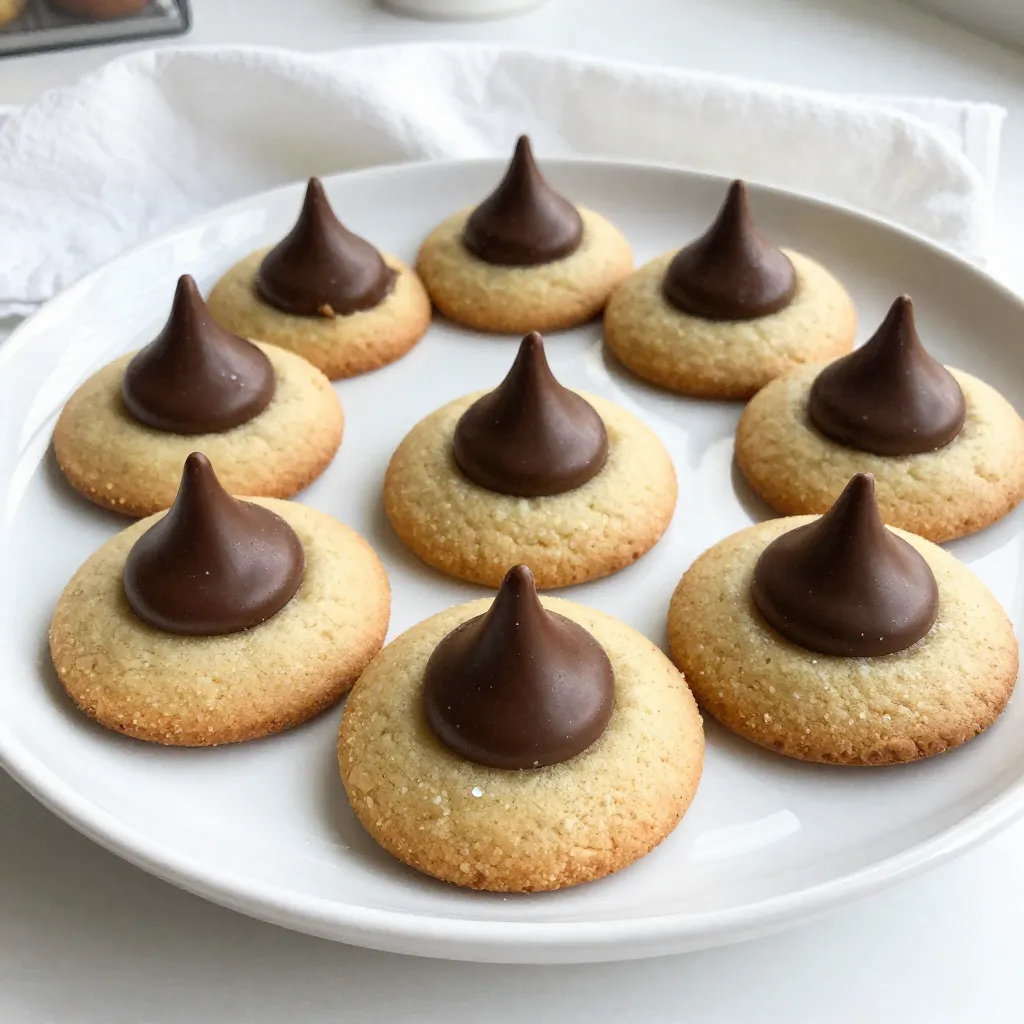
Get ready to spread some holiday cheer with Gingerbread Kiss Cookies! These delightful cookies combine classic gingerbread flavors with sweet chocolate kisses, making them the perfect festive treat. I’ll guide you step-by-step through the easy process of baking these cookies. Whether you want to impress guests or simply enjoy a tasty snack, follow along for tips, variations, and storage advice. Let’s bake something special this season!
Why I Love This Recipe
- Festive Flavor: The combination of ginger, cinnamon, and cloves creates a warm, spicy flavor that perfectly embodies the holiday spirit.
- Chocolate Surprise: Each cookie features a delectable chocolate kiss in the center, adding a delightful sweetness that complements the spiced dough.
- Easy to Make: With straightforward ingredients and simple steps, these cookies are perfect for bakers of all skill levels.
- Perfect for Sharing: These cookies make a beautiful gift for family and friends, spreading joy during the festive season.
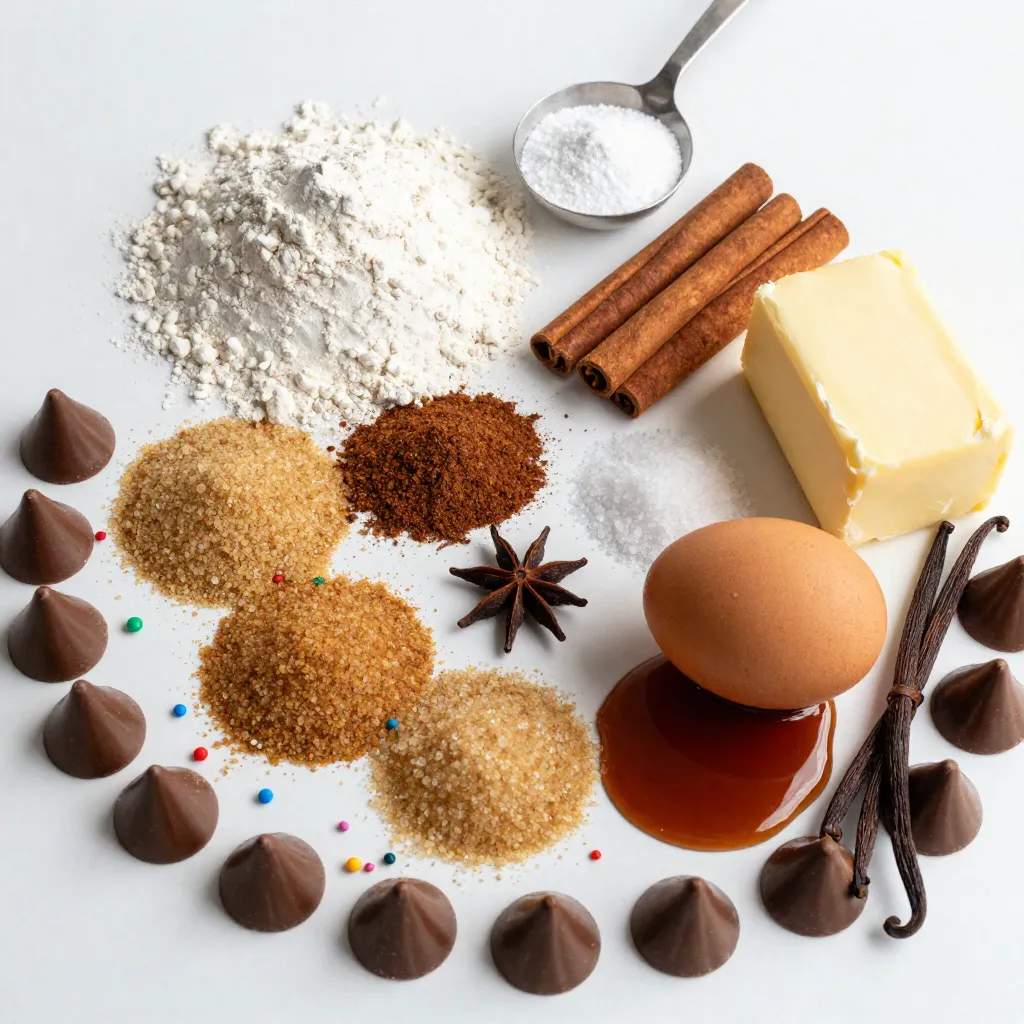
Ingredients
To make Gingerbread Kiss Cookies, gather the following ingredients:
– 2 1/4 cups all-purpose flour
– 1 teaspoon baking soda
– 2 teaspoons ground ginger
– 1 teaspoon ground cinnamon
– 1/2 teaspoon ground cloves
– 1/4 teaspoon salt
– 3/4 cup unsalted butter, softened to room temperature
– 1/2 cup packed brown sugar
– 1/2 cup granulated sugar, plus extra for rolling
– 1 large egg
– 1/4 cup molasses
– 1 teaspoon vanilla extract
– 24 chocolate kisses, unwrapped
– Optional: Sprinkles or coarse sugar for garnish
Each ingredient plays a key role. The flour gives structure, while the baking soda helps cookies rise. The spices bring warmth. Butter adds richness, and sugars create sweetness and a lovely texture. Molasses adds depth, and vanilla enhances the flavor. Finally, chocolate kisses provide a delicious surprise. Feel free to add sprinkles for a festive touch!

Step-by-Step Instructions
Preheat the Oven
Set your oven to 350°F (175°C). This is the best temperature for baking gingerbread cookies. Prepare a baking sheet by lining it with parchment paper. This helps the cookies not to stick.
Mixing Dry Ingredients
In a medium bowl, whisk together the flour, baking soda, ground ginger, ground cinnamon, ground cloves, and salt. Make sure you mix well so there are no lumps. Set this mixture aside for later.
Creaming Butter and Sugars
In a large bowl, use an electric mixer to cream the softened butter, brown sugar, and granulated sugar. Mix until the mixture is light and fluffy. This should take about 3 to 5 minutes. This step is key for a nice texture.
Incorporating Wet Ingredients
Now, add the egg, molasses, and vanilla extract to the creamed mixture. Beat until everything is smoothly combined. Make sure not to overmix at this stage.
Shaping and Baking the Cookies
Roll the dough into 1-inch balls. Then, roll each ball in granulated sugar until coated. Place the balls on the prepared baking sheet, spacing them about 2 inches apart. This helps the cookies spread evenly while baking.
Adding the Chocolate Kisses
After baking for about 8-10 minutes, take the cookies out of the oven. While they are still hot, gently press a chocolate kiss into the center of each cookie. This adds a sweet surprise!
Cooling and Serving Suggestions
Allow the cookies to cool on the baking sheet for a few minutes. Then, carefully move them to a wire rack to cool completely. For a fun touch, arrange the cookies on a decorative plate and sprinkle with colorful holiday-themed sprinkles or coarse sugar.
Tips & Tricks
Perfecting the Cookie Texture
To get tender cookies, start with room-temperature butter. Soft butter mixes better, making the dough smooth. Cream the butter and sugars for about 3-5 minutes. This step gives cookies a light and fluffy feel. Mix the dry and wet ingredients until just combined. Overmixing makes cookies tough.
Optional Toppings
Sprinkles can add a fun touch! Use colorful holiday-themed sprinkles or coarse sugar on top. After shaping the dough balls, roll them in sugar. This gives a sweet crunch and a pretty shine. You can even drizzle melted chocolate over cooled cookies for extra flair.
Baking Tips
Watch your baking time closely. Cookies should bake for 8-10 minutes. The edges must be firm while the centers stay soft. If cookies spread too much, check your oven temperature. An oven thermometer helps ensure the right heat. If your cookies are too hard, try reducing the baking time next time.
Pro Tips
- Chill the Dough: For even better flavor and texture, chill the cookie dough for at least 30 minutes before shaping and baking. This allows the spices to meld beautifully.
- Use Fresh Spices: Ensure your ground spices are fresh for the best flavor. Stale spices can diminish the aromatic qualities of your cookies.
- Press Kisses Gently: When pressing the chocolate kisses into the warm cookies, do so gently to prevent the cookies from flattening too much.
- Storage Tips: Store the cookies in an airtight container at room temperature for up to a week to keep them soft and chewy.
Variations
Gluten-Free Gingerbread Kiss Cookies
To make gluten-free gingerbread kiss cookies, swap the all-purpose flour. Use a 1:1 gluten-free baking mix. Look for blends with xanthan gum. This adds the right texture. You can also try almond flour or coconut flour. Just remember to adjust the liquid in the recipe. These flours absorb more moisture.
Other Flavor Additions
Want to spice things up? Consider adding nutmeg or allspice for extra warmth. A little cayenne can give a surprising kick. You can also mix in some finely chopped candied ginger. This adds texture and a sweet zing. For a twist, try adding orange zest. It brings a fresh, bright flavor that pairs well with ginger.
Decorative Variations
Decorating your cookies can be fun! Try drizzling melted chocolate over the top. Use white or dark chocolate for a nice contrast. You can also add festive sprinkles or colored sugar. For a holiday look, use red and green. Another idea is to dust the cookies with powdered sugar. This gives a snowy effect and looks lovely on a plate.
Storage Info
How to Store
To keep your Gingerbread Kiss Cookies fresh, place them in an airtight container. Layer parchment paper between the cookies to prevent sticking. Store them at room temperature for best results. Keep them away from heat or moisture. This helps maintain their soft texture and flavor.
Freezing Instructions
You can freeze both the cookie dough and the baked cookies. For dough, shape it into balls and freeze them on a baking sheet. Once frozen, transfer the balls to a zip-top bag. For baked cookies, let them cool completely first. Then, place them in a freezer-safe container. They can last up to three months in the freezer.
Shelf Life
When stored properly, these cookies last about a week at room temperature. If you freeze them, they remain good for about three months. Always check for any signs of spoilage before enjoying. This way, you can savor every bite of your delightful treat!
FAQs
Can I substitute different types of sugar?
Yes, you can use different sugars. Brown sugar adds moisture and flavor. It makes your cookies soft and chewy. Granulated sugar gives a nice crunch when rolled. You can also try coconut sugar for a deeper taste. Remember, each sugar changes the texture a bit.
What can I use instead of molasses?
If you don’t have molasses, try honey or maple syrup. Both add sweetness and some flavor. You can also mix brown sugar with a bit of water to mimic molasses. This keeps your cookies moist and tasty.
How do I know when my cookies are done baking?
Watch for the edges of the cookies. They should look firm and set. The centers may still appear soft. This is okay! They will firm up as they cool. A golden brown color is another good sign.
Can I make this recipe vegan?
Yes, you can make vegan gingerbread kiss cookies! Use coconut oil instead of butter. For the egg, try a flax egg or applesauce. You can also find vegan chocolate kisses for a tasty treat. These swaps keep the flavor and fun intact!
This blog post shared a detailed guide to making delicious Gingerbread Kiss Cookies. You learned about essential ingredients, step-by-step baking instructions, and helpful tips to achieve the perfect cookie. We also explored variations, storage tips, and answered common questions. Baking can be fun and rewarding. With these tools, you can make great cookies to share. Enjoy the process and impress friends and family with your baking skill

Gingerbread Kiss Cookies
Ingredients
- 2.25 cups all-purpose flour
- 1 teaspoon baking soda
- 2 teaspoons ground ginger
- 1 teaspoon ground cinnamon
- 0.5 teaspoon ground cloves
- 0.25 teaspoon salt
- 0.75 cup unsalted butter, softened to room temperature
- 0.5 cup packed brown sugar
- 0.5 cup granulated sugar, plus extra for rolling
- 1 large egg
- 0.25 cup molasses
- 1 teaspoon vanilla extract
- 24 chocolate kisses, unwrapped
- Optional: Sprinkles or coarse sugar for garnish
Instructions
- Preheat the oven: Set your oven to 350°F (175°C) and prepare a baking sheet by lining it with parchment paper to prevent sticking.
- Mix dry ingredients: In a medium-sized mixing bowl, whisk together the all-purpose flour, baking soda, ground ginger, ground cinnamon, ground cloves, and salt. Once well combined, set this mixture aside.
- Cream the sugars and butter: In a large mixing bowl, use an electric mixer to cream the softened butter, brown sugar, and granulated sugar until the mixture is light and fluffy—this will take about 3-5 minutes.
- Incorporate wet ingredients: Add the egg, molasses, and vanilla extract to the creamed mixture. Beat until all ingredients are smoothly combined.
- Combine wet and dry mixtures: Gradually add the reserved dry ingredient mixture to the wet ingredients. Stir until just combined; be careful not to overmix to keep the cookies tender.
- Shape the cookies: Roll the dough into 1-inch balls. Then, roll each ball in granulated sugar until coated and place them on the prepared baking sheet, spacing them about 2 inches apart to allow for spreading.
- Bake the cookies: Place the baking sheet in the preheated oven and bake for about 8-10 minutes, or until the edges are firm and the centers remain slightly soft.
- Add the chocolate kisses: Remove the baking sheet from the oven. While the cookies are still hot, gently press a chocolate kiss into the center of each cookie.
- Final baking: Return the cookies to the oven for another 1-2 minutes to let the chocolate kisses soften without melting into a puddle.
- Cool and serve: Take the baking sheet out of the oven and allow the cookies to cool on the sheet for a few minutes. Then, carefully transfer them to a wire rack to cool completely.


![To make a classic Italian zucchini pasta casserole, you will need the following ingredients: - 3 medium zucchinis, sliced into thin, even rounds - 2 cups cooked pasta (choose your favorite like penne or fusilli) - 1 cup marinara sauce (preferably homemade or high-quality store-bought) - 1 cup creamy ricotta cheese - 1 cup shredded mozzarella cheese, plus extra for topping - 1/2 cup grated Parmesan cheese - 1 large egg, lightly beaten - 2 cloves garlic, minced - 1 teaspoon dried oregano - 1 teaspoon dried basil - Sea salt and freshly cracked black pepper, to taste - Olive oil, for drizzling and greasing - Fresh basil leaves, for garnish Each ingredient plays a key role in building flavor and texture. The zucchini adds a fresh crunch, while the pasta provides a hearty base. The cheeses bring creaminess and richness. Marinara sauce ties everything together with its robust flavor. When I make this dish, I focus on using fresh ingredients. It makes a big difference. Quality marinara or homemade sauce enhances the taste. I also love to mix different cheeses for added depth. You can switch up the cheeses based on your preference. Using good olive oil is essential for greasing the dish and drizzling on top. It adds a lovely finish. As for herbs, oregano and basil deliver classic Italian flavor. Feel free to personalize this recipe. Adjust the seasonings to suit your taste. This dish is forgiving, making it easy to put your spin on it. For the full recipe, check out the complete instructions. 1. Preheating the Oven and Sautéing Zucchini - First, set your oven to 375°F (190°C). This temperature works well for baking. - Next, grab a skillet and drizzle some olive oil into it. Heat it over medium heat. - Add the sliced zucchinis and minced garlic to the skillet. Sauté them for about 5-7 minutes. - Keep stirring until the zucchinis become soft and slightly golden. - Season with sea salt, black pepper, oregano, and basil. This adds a punch of flavor. - Once done, remove the skillet from the heat and let it cool for a few moments. 2. Mixing Ingredients for the Casserole - While the zucchini cools, take a large mixing bowl and combine the cooked pasta, marinara sauce, ricotta cheese, and the lightly beaten egg. - Add half of the mozzarella and half of the Parmesan cheese to the bowl. - Stir everything together until well mixed. This will create a creamy base. - Now, gently fold the sautéed zucchini into the pasta mixture. Make sure it blends without mashing the veggies. 1. Assembling the Casserole - Grease a 9x13 inch baking dish with olive oil. This keeps the casserole from sticking. - Pour the pasta and zucchini mixture into the greased dish. Spread it out evenly with a spatula. - To finish, sprinkle the remaining mozzarella and Parmesan on top. This creates a cheesy crust. 2. Baking and Best Practices - Cover the dish tightly with aluminum foil and place it in the preheated oven. - Bake for 20 minutes. This helps all the flavors mix well. - After 20 minutes, carefully take off the foil. Bake for another 10-15 minutes. Watch for the cheese to melt and turn golden brown. - Once it’s done, remove the casserole from the oven. Let it cool for a few minutes before serving. - For a lovely touch, garnish with fresh basil leaves. This adds color and flavor to your dish. For the complete recipe, refer to [Full Recipe]. - Seasoning Suggestions: I love using fresh herbs. Basil and oregano add a lovely taste. Don’t forget to season with sea salt and black pepper. These simple touches make a big difference. Consider adding a pinch of red pepper flakes for a bit of heat. - Achieving the Perfect Cheese Crust: To get that golden crust, use a mix of mozzarella and Parmesan on top. When you bake the casserole, keep it covered for the first part of cooking. This helps the cheese melt nicely. Uncover it towards the end to allow browning. - Sautéing Tips: When sautéing zucchini, cut it into thin, even rounds. This ensures even cooking. Don’t overcrowd the pan; this can lead to steaming instead of browning. Give them enough space to caramelize. - Alternative Pasta Cooking Methods: You can use different pasta shapes, like penne or fusilli. You don’t need to cook it all the way. Make it al dente, as it will cook more in the oven. This keeps the pasta from getting mushy in the casserole. Make sure to check out the Full Recipe for all the steps and details! {{image_4}} Different Cheese Options Cheese makes this dish rich and creamy. You can swap ricotta for cottage cheese if you like. For a sharper taste, use aged provolone or gouda. If you want a bit of tang, try feta cheese. Each cheese brings its unique flavor to the casserole. Meat Additions and Alternatives For meat lovers, ground beef or turkey can add protein. Cook the meat first and mix it with the pasta. If you prefer a lighter option, add cooked chicken or sausage. You can also use plant-based meats for a tasty, hearty dish. Gluten-Free Options To make this casserole gluten-free, choose gluten-free pasta. Many brands offer great options that hold up well in baking. Just check the package for cooking times to ensure perfect texture. Vegan Adaptations For a vegan version, swap all cheeses for cashew cream or tofu ricotta. You can also use a flax egg instead of the beaten egg for binding. Use your favorite marinara sauce that is dairy-free, and you’ll have a delicious vegan casserole. Experimenting with these swaps and modifications can make the Classic Italian Zucchini Pasta Casserole fit any diet or taste. For the full recipe, check out the details above. After enjoying your Classic Italian Zucchini Pasta Casserole, let’s talk storage. First, cool the casserole completely. This helps prevent condensation, which can make it soggy. Once cool, place leftovers in an airtight container. Store them in the fridge for up to three days. If you want to save it for longer, freezing works too. Cut the casserole into portions. Wrap each slice tightly in plastic wrap, then place them in a freezer-safe bag. This way, you can enjoy it for up to three months. When ready to enjoy your casserole again, reheating is key. The best method is using an oven. Preheat it to 350°F (175°C). Place the casserole in a baking dish and cover it with foil. Heat for 20-25 minutes. This helps keep the texture nice and creamy. If you’re in a hurry, a microwave works too. Use a microwave-safe plate and cover it with a damp paper towel. Heat in short bursts, stirring in between, until hot. This method may not keep the texture as good as the oven. For the best flavor and texture, always let it cool slightly before serving. Enjoy! Can I use other vegetables? Yes, you can use other veggies. Try bell peppers, spinach, or mushrooms. Just chop them small so they cook well. Mixing different vegetables adds flavor and color to your dish. How to make it ahead of time? You can make this casserole a day ahead. Just prepare it like normal, but do not bake it. Cover it and store it in the fridge. When ready, bake it as instructed, adding a few extra minutes if needed. What types of pasta work best? I love using penne or fusilli for this dish. Both types hold sauce well and stay firm while baking. You can also use gluten-free pasta if you prefer. How long can it be stored in the fridge? You can keep leftovers in the fridge for about three days. Make sure to cover it well. To reheat, just warm it in the oven or microwave until hot. Recommended Side Dishes Serve this casserole with a fresh salad or garlic bread. A simple mixed greens salad adds a crisp touch. Garlic bread brings a nice crunch and flavor. Pairing Wine with Casserole A light red wine like Chianti pairs well with this dish. It balances the flavors of the zucchini and cheese. If you prefer white, try a crisp Pinot Grigio. How to Garnish and Serve Garnish with fresh basil leaves for a pop of color. You can also sprinkle extra Parmesan on top before serving. This adds flavor and looks great on the table. For the full recipe, check the details above. Enjoy your cooking! In this blog post, we explored a delicious zucchini pasta casserole. We covered ingredients like zucchini, pasta, marinara, and various cheeses. You learned step-by-step instructions for preparation and baking. We included helpful tips for flavor and texture enhancement. You also discovered variations to suit different diets and preferences. In closing, this casserole is versatile and easy to make. Enjoy the cooking process and share it with loved ones.](https://fastmealmate.com/wp-content/uploads/2025/07/1e9eddde-dee0-4a9c-92bd-9b0350c13af8-768x768.webp)


![- 4 cups of juicy watermelon (cut into cubes) - 2 cups of crisp cucumber (diced) - 1 cup of creamy feta cheese (crumbled) - 1/4 cup of fresh mint leaves (finely chopped) - 2 tablespoons of high-quality olive oil - 1 tablespoon of balsamic reduction (optional) - Sea salt to taste - Freshly cracked black pepper to taste - Juice from one fresh lemon The ingredients for this salad create a refreshing blend. The watermelon brings sweetness, while the cucumber adds crunch. Feta cheese gives a creamy touch, making the dish rich and satisfying. Fresh mint adds a burst of flavor that brightens every bite. Using high-quality olive oil enhances the taste, while balsamic reduction adds a sweet twist. You can adjust salt and pepper to fit your taste. The lemon juice lifts the flavors, making everything pop. This salad is perfect for hot days. It’s simple to make and looks great on any table. Plus, it’s a great way to enjoy fresh, seasonal produce. For the full recipe, check out the detailed steps later in this article. To cube watermelon, start with a big, ripe piece. Cut off both ends to make it stable. Stand it up, then slice down the sides to remove the skin. Now, cut the flesh into thick slabs. After that, slice the slabs into cubes. Aim for bite-sized pieces so they are easy to eat. For the cucumber, wash it well. Cut off the ends, then slice it in half lengthwise. Use a spoon to scrape out the seeds if you want a less watery salad. Next, chop it into small, even pieces. This helps the cucumber mix well with other ingredients. When it comes to crumbling feta cheese, first take it out of its packaging. Use your hands or a fork to break it into small pieces. Try to keep the crumbles big enough to stay distinct in the salad. This way, you get that lovely creamy bite. In a large bowl, start by adding the cubed watermelon and diced cucumber. Gently mix them together, ensuring they are evenly combined. Next, sprinkle the crumbled feta cheese over the top. This will add a creamy texture and a salty kick. Add the finely chopped mint leaves next. This herb brightens the salad with its fresh flavor. Now, drizzle the olive oil and squeeze the fresh lemon juice over the salad. This will give it a bright, zesty taste. Using a large spoon, carefully toss the salad. Do this gently to keep the feta from mashing. You want to mix the flavors without losing the feta's shape. Now it's time to season the salad. Add sea salt and freshly cracked black pepper to taste. Start with a little, then adjust as needed. The salt will help enhance all the flavors. Let the salad rest for about 10 minutes before serving. This step is key. It allows the flavors to meld together. The watermelon will release some juice, creating a light dressing. For the complete recipe, check the [Full Recipe]. To create the best flavor in your salad, balance sweetness and acidity. Watermelon is sweet, so you need acidity to cut through that. Fresh lemon juice adds bright notes. You can also try balsamic reduction for a sweet twist. Adjust seasonings to your taste. Add sea salt and black pepper slowly. Taste as you go. This way, the salad fits your personal preference. Presentation matters when serving this salad. For a colorful display, choose a large bowl. Layer the watermelon, cucumber, and feta beautifully. You can also arrange the watermelon cubes in a fun pattern. Lastly, garnish with extra mint leaves. This adds a pop of green and a fresh smell. Having the right tools makes preparation easy. A sharp chef's knife is key for cutting watermelon and cucumber. Use a sturdy mixing bowl to combine all ingredients gently. These tools ensure you maintain the salad's texture and create a lovely dish. For the best results, make sure your tools are clean and ready to go. For a complete guide, check the Full Recipe. {{image_4}} You can swap feta cheese for a vegan option like tofu or almond cheese. These substitutes provide a similar creamy texture. If you want to add more flavor, try using a vegan feta made from cashews. For fruits or vegetables, consider adding berries, mango, or radishes. These additions add color and a unique taste to your salad. Watermelon pairs well with many fruits, so feel free to get creative! Different dressings can enhance your salad. A simple lemon vinaigrette works great. Mix olive oil, lemon juice, salt, and pepper for a fresh taste. You can also make your own balsamic reduction at home. Just simmer balsamic vinegar on low heat until it thickens. This sweet and tangy sauce pairs well with the salad, adding depth to the flavors. Changing the salad with the seasons can keep it fresh. In summer, add fresh basil or strawberries for a sweet twist. In fall, try diced apples or pears for a crunchy bite. For winter, include pomegranate seeds or citrus fruits. These ingredients add a pop of color and flavor to your dish. Always look for seasonal produce to keep your salad exciting and vibrant! To keep your leftover salad fresh, place it in an airtight container. This helps prevent moisture loss and keeps flavors strong. You can use glass or plastic containers. Glass is great for easy cleaning and doesn’t absorb odors. If you want to keep it extra fresh, add a layer of plastic wrap on top before sealing. You can freeze Watermelon Cucumber Feta Salad, but it’s not ideal. Freezing can change the texture of watermelon and cucumber. If you choose to freeze, prepare it without the feta and dressing. Store the fruit and cucumber in a freezer-safe bag. When you're ready to eat, thaw it in the fridge overnight. Add feta and dressing just before serving. In the fridge, this salad lasts about 2 to 3 days. After that, it may start to lose its crispness. Look for signs of spoilage, like a mushy texture or off smell. If the feta starts to look slimy, it’s time to toss it. Always trust your senses when deciding if food is still good to eat. To make this salad heartier, add protein or grains. You can include: - Grilled chicken breast, sliced thin - Cooked quinoa for a nutty flavor - Chickpeas for a plant-based option - Shrimp for a light seafood touch These ingredients mix well with the fresh flavors and keep your salad satisfying. Yes, you can prep ingredients ahead. To keep the salad fresh: - Chop watermelon and cucumber a few hours before serving. - Store the feta separately to avoid sogginess. - Mix everything together just before serving. This way, you enjoy that crisp texture and vibrant taste. Watermelon is hydrating and low in calories. It has vitamins A and C, which support your skin and immune system. Cucumber is also hydrating and offers fiber, which is good for digestion. This salad fits into a healthy diet by providing essential nutrients with low calories. Yes, this salad is gluten-free. All the ingredients, including watermelon, cucumber, and feta, do not contain gluten. For extra options: - Serve it with gluten-free crackers. - Pair it with gluten-free bread for a light meal. Feel free to enjoy this salad without worries about gluten! The Watermelon Cucumber Feta Salad is a refreshingly light dish. You learned about its main ingredients, step-by-step preparation, and unique variations. Remember to balance flavors and let it rest before serving. With tips for storage and healthy options, you can enjoy this salad any time. This recipe is simple, delicious, and perfect for warm days. Now, you have the tools to create a great salad that impresses everyone. Enjoy making it your own!](https://fastmealmate.com/wp-content/uploads/2025/07/b20d6dc1-e7c2-400f-acd5-da5290acfeaa-768x768.webp)