Garlic Butter Steak Bites & Potatoes Simple Delight

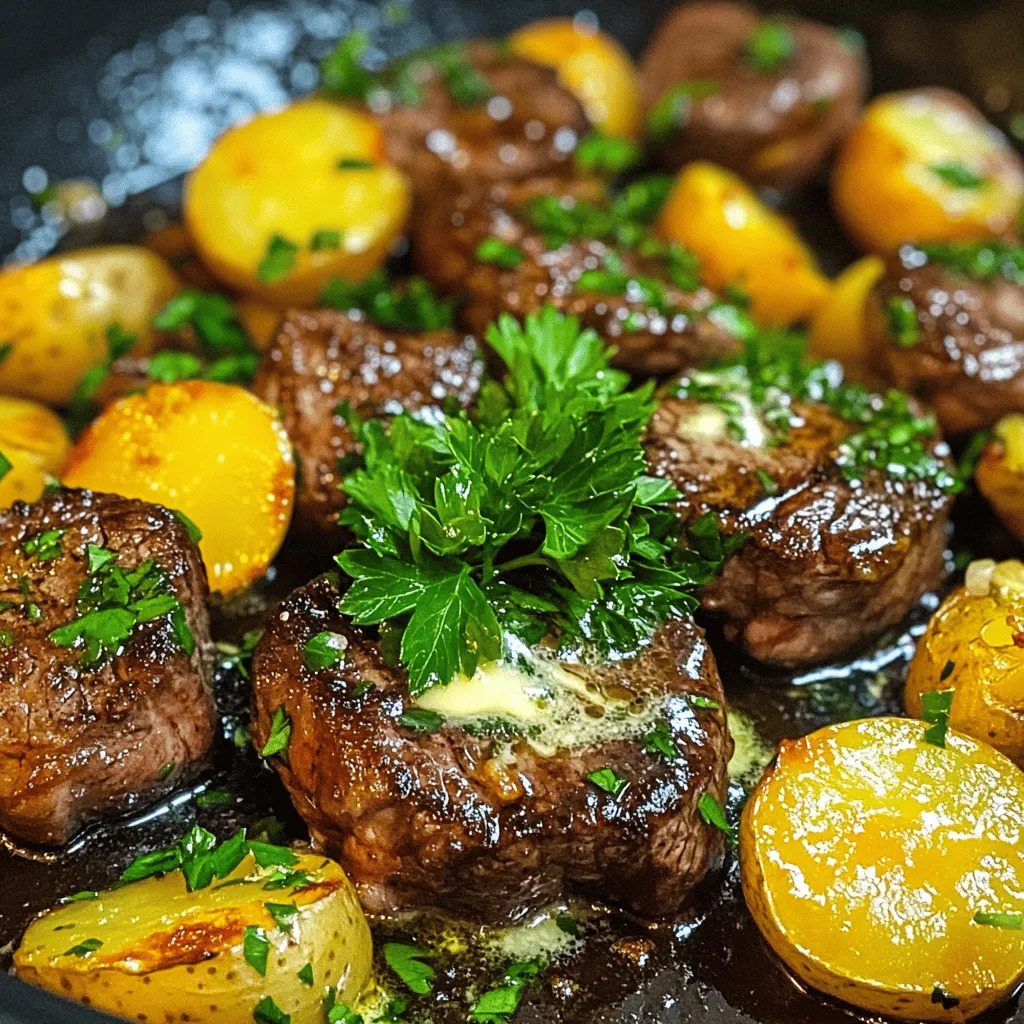
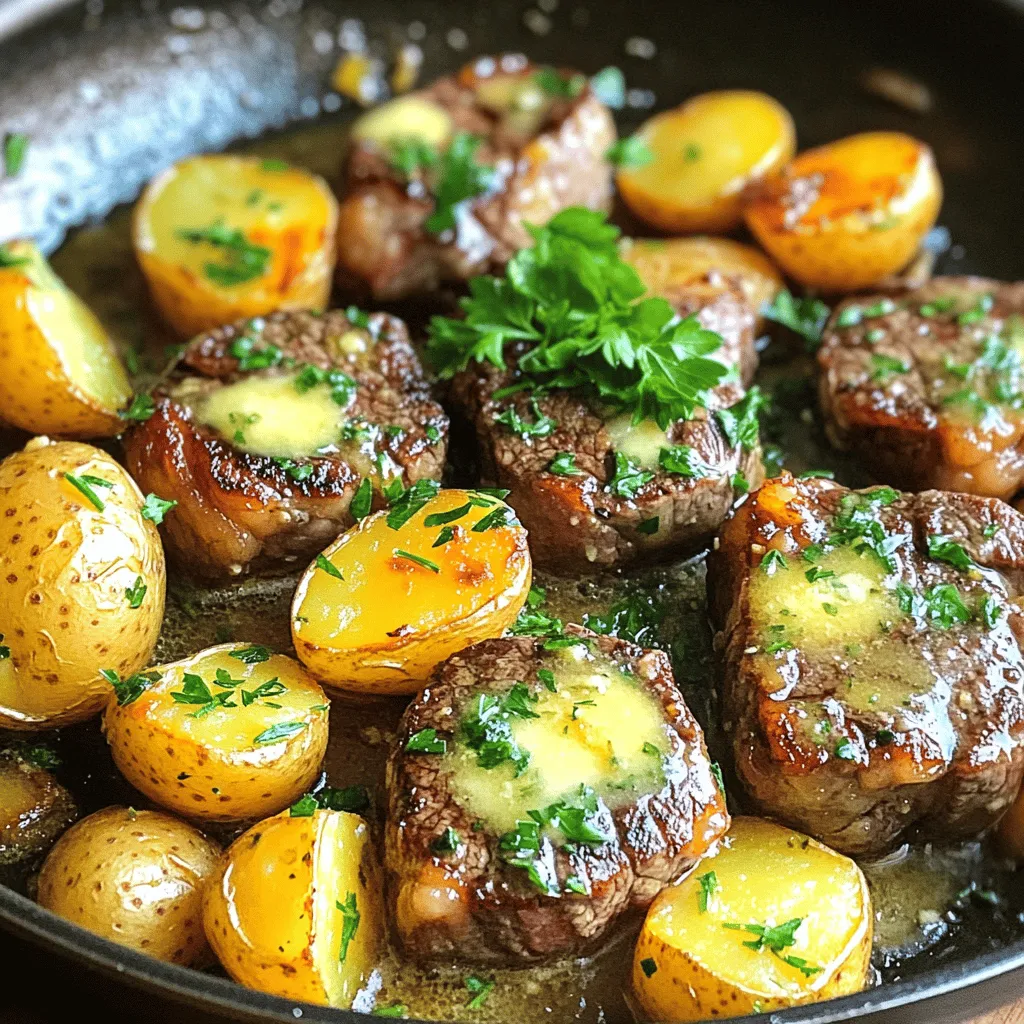
Welcome to a tasty adventure with Garlic Butter Steak Bites & Potatoes! This simple delight combines tender steak and crispy potatoes, all smothered in rich garlic butter. You’ll savor every bite while impressing your family and friends. Whether you’re a seasoned pro in the kitchen or a beginner, this dish is easy and quick to make. Let’s dive into the ingredients and start cooking something delicious together!
Ingredients
Main Ingredients
– 1 lb sirloin steak, cut into bite-sized cubes
– 1 lb baby potatoes, halved
– 4 tablespoons unsalted butter
– 4 cloves garlic, minced
Seasonings and Oils
– 1 teaspoon dried thyme
– 1 teaspoon dried rosemary
– 1 tablespoon olive oil
– Salt and pepper, to taste
Garnish
– Fresh parsley, chopped
Gathering the right ingredients is key to making this dish shine. Start with quality sirloin steak. This cut is tender and packs great flavor. Next, baby potatoes add a fun pop of color and a nice texture. Use unsalted butter for rich flavor. Garlic brings a warm taste that pairs perfectly with the steak and potatoes.
Seasonings elevate the dish. Dried thyme and rosemary add depth. Olive oil helps with cooking and adds a hint of richness. Don’t forget salt and pepper to enhance all the flavors. Finally, fresh parsley gives a bright touch when you serve the dish.
With these ingredients, you are ready to create a meal that is both simple and delightful.
Step-by-Step Instructions
Preparing the Potatoes
Start with your baby potatoes. Place them in a large pot of salted water. Bring the water to a boil over high heat. Cook the potatoes for about 10 minutes. They should be tender and easy to pierce with a fork. Once done, drain the potatoes in a colander and set them aside.
Searing the Steak Bites
Next, take your sirloin steak. Cut it into bite-sized cubes and season with salt and pepper. Heat olive oil in a large skillet over medium-high heat. Add the steak cubes to the skillet, but be careful not to overcrowd the pan. Sear the steak for about 3-4 minutes. Turn the pieces occasionally. You want a nice brown crust on all sides. Once done, remove the steak from the skillet and set it aside.
Cooking the Potatoes
Now, let’s cook the potatoes. In the same skillet, add the cooked baby potatoes. Sauté them over medium heat for about 5 minutes. Stir them occasionally. The goal is to make them crispy and golden brown. This will enhance their flavor and texture.
Preparing the Garlic Butter Sauce
It’s time for the garlic butter sauce. Lower the heat to medium-low. Push the crispy potatoes to one side of the skillet. Add unsalted butter to the empty side. Let the butter melt completely. Once melted, add minced garlic, dried thyme, and dried rosemary. Stir for about 1 minute. The garlic should become fragrant and soft.
Combining Ingredients
Now, bring everything together. Return the seared steak bites to the skillet. Mix them with the potatoes and garlic butter sauce. Cook for another 2-3 minutes. This allows all the flavors to meld. Adjust the seasoning with more salt and pepper to taste if needed.
Serving Suggestions
Finally, it’s time to serve. Remove the skillet from the heat. Garnish with freshly chopped parsley for a pop of color. Serve immediately and enjoy the rich, buttery goodness of this dish!
Tips & Tricks
Choosing the Right Cut of Steak
For steak bites, I recommend using sirloin. This cut is tender and flavorful. Look for steak with good marbling. Marbling means small fat streaks in the meat. This fat adds flavor and keeps the steak juicy. Avoid cuts that are too lean, as they can become dry when cooked.
Cooking Techniques
To keep your steak bites tender, do not overcook them. Cook for only 3-4 minutes. Use a hot skillet to sear the meat quickly. This gives a nice crust while keeping the inside juicy. For the potatoes, the key is to sauté them until they are crispy. Stir them occasionally for even browning.
Flavor Enhancements
Feel free to add more herbs and spices. Fresh thyme or oregano can give a nice touch. You can also mix in vegetables like bell peppers or green beans. This adds color and variety to your dish. Adding a splash of lemon juice before serving brightens the flavors.

Variations
Protein Substitutes
You can swap steak for chicken or shrimp. Chicken thighs work well because they stay juicy. Shrimp cooks fast and adds a nice flavor. Both options still taste great with garlic butter. For a vegetarian twist, use mushrooms. Portobello or cremini mushrooms add a hearty bite. Cook them until golden to enhance their flavor.
Different Potato Options
You can choose sweet potatoes or regular potatoes. Sweet potatoes give a sweet taste and vibrant color. Regular potatoes, like baby or Yukon Gold, are classic choices. You can also try russets or red potatoes. Russets become fluffy, while red potatoes stay firm. Each type has its own unique texture and taste.
Sauce Variations
To make the sauce richer, add cream. Cream makes it smooth and adds depth. You can also spice things up with chili flakes. A spicy garlic butter sauce adds a kick. Just mix in the flakes with the garlic for a bold flavor. These variations keep the dish exciting and tailored to your taste.
Storage Info
Refrigeration Guidelines
To store leftovers, let them cool first. Place the steak bites and potatoes in a container. Use an airtight container to keep them fresh. Your leftovers can last for up to three days in the fridge.
Reheating Instructions
When reheating steak bites, use low heat. This keeps them tender and juicy. You can heat them in a skillet or microwave. For the potatoes, add a little oil when reheating. This helps them stay crispy. Try to avoid reheating them too long to keep their texture.
Freezing Tips
If you want to freeze portions, divide them into small containers. This makes it easy to thaw only what you need. When ready to eat, thaw them in the fridge overnight. Reheat them gently to enjoy the flavor again.
FAQs
How do I make Garlic Butter Steak Bites tender?
To make the steak bites tender, start with a good cut. Sirloin steak is great for this. Marinate the steak in olive oil, salt, and pepper for at least 30 minutes. This helps to break down the meat fibers. When you cook, sear the steak on high heat. Avoid overcrowding the pan. This keeps the heat high and forms a nice crust. Cook for just 3-4 minutes on each side. This keeps the inside juicy and tender.
Can I prepare Garlic Butter Steak Bites in advance?
Yes, you can prepare the steak bites in advance. Cook the steak and potatoes separately. Let them cool completely before storing. Use an airtight container in the fridge. This keeps them fresh for up to two days. When ready to eat, reheat them on a skillet. This ensures they stay tasty and warm.
What sides pair well with Garlic Butter Steak Bites?
Garlic Butter Steak Bites go well with many sides. Here are some great options:
– Steamed vegetables: Broccoli or green beans add color and nutrients.
– Salad: A fresh garden salad offers crunch and brightness.
– Rice: Fluffy rice soaks up the garlic butter sauce nicely.
– Crusty bread: Use it to mop up any leftover sauce.
How long do leftovers last?
Leftovers of Garlic Butter Steak Bites last about two days in the fridge. Store them in an airtight container. Make sure they cool down before sealing. To eat, check the smell and look for any changes. If they look good, reheat them on low heat. This keeps the steak tender and the potatoes crispy.
In this blog post, we covered how to make Garlic Butter Steak Bites with crispy baby potatoes. We discussed the main ingredients, steps for perfect cooking, and shared tips and tricks to enhance flavor. Don’t forget about variations like protein swaps and sauce options. Finally, I shared storage tips to keep your leftovers fresh. This dish is easy to make and perfect for any meal. Enjoy cooking and tweak it to your taste!


 to guide you through each step. - Preheat your oven to 375°F (190°C). - Rinse and prepare the quinoa and vegetables. To start, turn on your oven and set it to 375°F (190°C). This step ensures your oven is hot and ready when it’s time to bake. While it heats, take one cup of quinoa and rinse it under cool water. This helps remove any bitterness. Next, chop your zucchinis and bell pepper. Dice the zucchini into small cubes and chop the bell pepper into bite-sized pieces. Don’t forget to finely dice one small onion and mince three cloves of garlic. - Sauté onion and garlic in olive oil until translucent. - Add zucchini and bell pepper, cooking until softened. Next, grab a medium saucepan. Add one tablespoon of olive oil and heat it over medium. Once the oil is warm, toss in your diced onion and minced garlic. Stir them for about 3-4 minutes. You want the onion to turn translucent and smell great. After that, add the diced zucchini and chopped bell pepper. Cook these veggies for around 5 minutes, stirring often. They should soften but still have a little crunch. - Mix in quinoa, cherry tomatoes, broth, and seasonings. - Transfer to a casserole dish and bake for 20-25 minutes. Now comes the fun part! Mix in your rinsed quinoa, one cup of halved cherry tomatoes, and two cups of vegetable broth into the pan. Add one teaspoon of dried oregano, one teaspoon of dried basil, and sprinkle salt and pepper to taste. Stir everything well to combine. Bring this mix to a gentle boil. Once it bubbles, reduce the heat to low, cover the pan, and let it simmer for 15 minutes. This allows the quinoa to absorb the broth. Once done, transfer the mixture into a lightly greased 9x13 inch casserole dish. If you love cheese, sprinkle one cup of shredded mozzarella on top. Place the dish in your preheated oven and bake for 20-25 minutes. You’ll know it’s ready when it bubbles and the cheese is golden brown. To make fluffy quinoa, rinse it well before cooking. This removes the bitter coating called saponin. Use two cups of vegetable broth for one cup of quinoa. Bring it to a boil, then lower the heat and cover. Let it simmer for 15 minutes. After cooking, let it rest for five minutes before fluffing with a fork. This will keep it light and airy. For the vegetables, sauté onion and garlic first in olive oil. Cook them until they are soft and fragrant. Then add zucchini and bell pepper. Stir them for about five minutes until they soften. This builds a great flavor base for your casserole. To elevate the dish, try adding a pinch of red pepper flakes for heat. Fresh herbs like thyme or parsley can add brightness. You can also swap out the dried oregano and basil for fresh herbs. Fresh herbs bring a stronger flavor. If you want to change ingredients, use brown rice instead of quinoa. You can also add cooked beans for a protein boost. For a creamier texture, mix in some ricotta cheese or yogurt before baking. Pair the casserole with a light side salad or some crusty bread. A fresh garden salad with lemon vinaigrette works well. It adds a nice contrast to the warm casserole. For gatherings, serve the casserole directly from the dish. Garnish with fresh basil leaves to make it look inviting. You can also sprinkle some extra cheese on top just before serving for a melty touch. {{image_4}} You can easily change the vegetables in this casserole. Try using bell peppers, spinach, or even eggplant. These swaps keep the dish vibrant and fresh throughout the summer. You can also mix in seasonal veggies like corn or cherry tomatoes for a burst of flavor. If you need a quinoa substitute, consider using brown rice or farro. These grains add a nice texture and flavor. Other options include couscous or even cauliflower rice for a low-carb choice. To make this casserole vegan, simply skip the cheese or use a plant-based cheese. You'll still get a creamy texture from the cooked veggies and broth. For a gluten-free option, use certified gluten-free quinoa. This way, everyone can enjoy the dish. If you're looking to cut calories, reduce the olive oil or skip the cheese. You can also use less quinoa and bulk up with more veggies. This keeps the dish light, tasty, and full of nutrients. Each of these variations allows you to enjoy this Summer Zucchini Quinoa Casserole in your own way. For the full recipe, check out the detailed instructions above. To keep your summer zucchini quinoa casserole fresh, first let it cool. Once cool, store it in an airtight container. You can refrigerate it for up to five days. If you want to save it for later, freeze it. Use a freezer-safe container or heavy-duty freezer bags. This way, it can last for up to three months. Remember to label the container with the date. This helps you track how long it has been stored. When you want to enjoy the casserole again, reheating is easy. For the best texture, use an oven. Preheat the oven to 350°F (175°C). Place the casserole in an oven-safe dish and cover it with foil. Heat for about 20 minutes or until warm. If you're in a hurry, you can use the microwave. Place a single serving in a microwave-safe dish. Heat for 1-2 minutes, checking every 30 seconds. This will keep the flavors and texture intact. Enjoy your delicious meal! Can I prepare the Summer Zucchini Quinoa Casserole in advance? Yes, you can prepare it ahead of time. Make the casserole, then cover and refrigerate it. When you're ready to eat, just bake it straight from the fridge. You may need to add a few more minutes to the cooking time. How to customize the recipe to suit my taste preferences? Feel free to swap out the veggies. For instance, you can use spinach, carrots, or even corn. You can also change the cheese or add some cooked chicken for extra protein. What are the best herbs to use for added flavor? Fresh herbs like basil and thyme work great. You can also try parsley or cilantro. These herbs add a fresh taste and brighten up your dish. Is this recipe suitable for a low-carb diet? This recipe is not low-carb due to the quinoa. Quinoa has more carbs than other grains but is also high in protein. If you want a lower carb option, you can use cauliflower rice instead of quinoa. What are the main nutritional benefits of zucchini and quinoa? Zucchini is low in calories and high in vitamins A and C. It also has a lot of water, which keeps you hydrated. Quinoa is a complete protein, meaning it has all nine essential amino acids. It’s also high in fiber, which is good for digestion. What should I do if my casserole is too watery? If your casserole is watery, try draining some liquid before baking. You can also bake it longer to help it thicken up. How can I prevent the quinoa from sticking together? To prevent sticking, rinse the quinoa well before cooking. This removes excess starch. Also, fluff the quinoa with a fork after it cooks to keep it separate. For the full recipe, check out the details above! You learned how to make a tasty Summer Zucchini Quinoa Casserole. We covered the ingredients, simple steps, and tips for perfect results. You can adjust the recipe to fit your taste and needs. Explore flavor swaps and storage tips to keep it fresh. With this dish, enjoy a healthy meal that is easy to make. I hope you try it and enjoy every bite!](https://fastmealmate.com/wp-content/uploads/2025/07/552d1654-693f-4b1b-8ee9-d91b85ff9950-768x768.webp)


![To make a tasty Instant Pot beef stew, you need a few key ingredients. Here’s what you’ll need: - 2 lbs beef chuck, cut into 1-inch cubes - 4 medium carrots, sliced into rounds - 3 medium potatoes, diced into bite-sized pieces - 1 onion, finely chopped - 3 cloves garlic, minced - 4 cups beef broth - 2 tablespoons tomato paste - 1 teaspoon dried thyme - 1 teaspoon dried rosemary - 1 bay leaf - Salt and freshly ground black pepper to taste - 2 tablespoons extra virgin olive oil - 1 tablespoon Worcestershire sauce - 1 cup frozen peas Each ingredient plays a vital role in building the flavor. The beef chuck gives the stew its rich taste and tender texture. Carrots and potatoes add sweetness and heartiness. Onions and garlic bring depth, while broth keeps everything moist and flavorful. Tomato paste adds a nice tang, and the herbs like thyme and rosemary provide warmth. The bay leaf adds a subtle earthiness. The olive oil helps to sauté the beef and veggies, while Worcestershire sauce gives a savory kick. Finally, frozen peas add a pop of color and sweetness at the end. For the full recipe, check out the complete instructions. Happy cooking! Start by getting your Instant Pot ready. Set it to the 'Sauté' function. Add 2 tablespoons of extra virgin olive oil. Once the oil is hot, add 2 lbs of beef chuck, cut into 1-inch cubes. Season the beef with salt and freshly ground black pepper. Brown the beef for about 5-7 minutes. You want it to have a nice color on all sides. When done, take the beef out and place it on a plate. Next, we’ll sauté the onions and garlic. In the same pot, add 1 finely chopped onion and 3 minced garlic cloves. Stir them for 2-3 minutes until the onion turns soft and clear. This step adds a great flavor base for your stew. Now it’s time to deglaze the pot. Add 2 tablespoons of tomato paste and 1 tablespoon of Worcestershire sauce. Use a wooden spoon to scrape the bottom of the pot. This helps to lift all those tasty bits stuck at the bottom. After deglazing, return the browned beef to the pot. Then, add 4 medium sliced carrots and 3 medium diced potatoes. Don’t forget to include 1 teaspoon each of dried thyme and dried rosemary, plus 1 bay leaf. Finally, pour in 4 cups of beef broth. Give everything a good stir to mix all the flavors together. Secure the lid on your Instant Pot, making sure the vent is sealed. Set it to 'Manual' or 'Pressure Cook' and choose high pressure for 35 minutes. Once it finishes, let the pressure release naturally for 10 minutes. After that, carefully turn the vent to let out any extra pressure before opening the lid. Finally, gently stir in 1 cup of frozen peas. Let the stew sit for 5 minutes to warm the peas. Taste your stew and adjust the seasoning with more salt or pepper if needed. For the full recipe, check [Full Recipe]. Enjoy your hearty and flavorful meal! To make tender beef and a flavorful broth, start with quality beef chuck. It has good marbling, which helps keep the meat juicy. Cut the beef into 1-inch cubes. This size cooks evenly and absorbs flavor well. Searing the beef is key. Use the sauté function on your Instant Pot. Browning adds depth to the stew. After browning, don’t skip deglazing. Scrape the pot to lift all those tasty bits. They add richness to your broth. Avoid common mistakes, like overcrowding the pot. It can lead to uneven cooking. If your beef isn’t browning well, cook in smaller batches. Also, don’t rush the natural pressure release. This step helps keep the meat tender. For an appealing dish, serve your beef stew in deep bowls. Top with freshly chopped parsley. This adds color and freshness. Pair it with warm, crusty bread. It’s perfect for dipping into the savory broth. Consider side dishes that complement the stew. Creamy mashed potatoes or buttery corn enhance the meal. A simple green salad adds a nice crunch. These sides balance the richness of the stew. For the full recipe, check out the details above. Enjoy your hearty meal! {{image_4}} You can change the beef in this stew to other proteins. Lamb works well, giving a rich taste. Chicken is another option; it cooks faster and is lighter. You can also use turkey for a healthy twist. Switching vegetables can change the flavor too. Try adding parsnips or sweet potatoes for a sweet touch. Green beans or corn add a nice crunch. Fresh herbs like parsley or thyme can brighten up the dish. Want a richer taste? Add a splash of red wine or beer. It adds depth and a warm flavor. Just remember to let the alcohol cook off a bit. For a spicy kick, chop some peppers or sprinkle in chili flakes. You can adjust the heat to your liking. Adding a touch of smoked paprika can also bring a warm, smoky flavor. These variations keep the stew fresh and exciting. Check the full recipe for more tips! To keep your beef stew fresh, start by cooling it. After it cools, place it in an airtight container. You can store it in the fridge for up to three days. For longer storage, freeze the stew in a freezer-safe container. Leave some space at the top for the stew to expand as it freezes. When you are ready to eat, you can reheat it on the stove or in the microwave. If reheating on the stove, do it on low heat. Stir often to keep it from sticking. In the fridge, beef stew lasts about three days. In the freezer, it can stay good for about three months. Always look for signs of spoilage. If the stew smells off or has a strange color, it’s best to throw it away. Checking for these signs helps you enjoy your meal safely. You can skip browning the meat, but it affects the flavor. Browning adds rich taste and deep color. It seals in juices, keeping the beef tender. Without this step, your stew may taste flat, lacking depth. I recommend you take the time to brown the meat. It makes a big difference in the final dish. To thicken your beef stew, you have a few options. You can mash some of the potatoes in the stew for a natural thickener. Another way is to mix a tablespoon of cornstarch with water, then stir it in. If you want a rich texture, simmer the stew longer with the lid off. This helps to reduce the liquid, giving you a thicker consistency. Yes, you can make a hearty vegetarian stew. Use mushrooms instead of beef for a meaty texture. You can also add lentils or chickpeas for protein. Swap beef broth for vegetable broth to keep it flavorful. Add plenty of root vegetables like carrots, potatoes, and parsnips for body and taste. This way, you still get a warm, filling dish without the meat. For stew, beef chuck is the best choice. It has a good amount of fat, making it tender when cooked. You can also use brisket or round for a leaner option. These cuts break down during cooking, adding flavor to your stew. Always opt for well-marbled meat, as this will keep your stew juicy and delicious. For the full recipe, check out the Hearty Instant Pot Beef Stew section. In this post, we covered how to make a tasty Instant Pot beef stew. We discussed essential ingredients, preparation steps, and cooking tips. You learned how to perfect your stew and explore fun variations. Plus, we shared storage tips to keep your leftovers fresh. With these steps, you can make a hearty meal easily. Enjoy pushing the limits of flavors and try new ingredients!](https://fastmealmate.com/wp-content/uploads/2025/06/1aa76e63-909b-4af2-b8b1-6d18f846e702-768x768.webp)
. - Bring salted water to a boil. - Add rotini pasta and cook until al dente. - This usually takes about 7 to 9 minutes. - Drain the pasta and rinse it under cold water to cool. - Chop the cherry tomatoes in half. - Dice the cucumber and red bell pepper. - Finely chop the red onion. - If you use fresh corn, cook it lightly for 2-3 minutes. - Cool the corn under cold water. - In a bowl, combine olive oil and lemon juice. - Add Dijon mustard and minced garlic. - Whisk the mixture until it is smooth. - Season it with salt and pepper to taste. - In a large bowl, mix the cooled pasta with the chopped vegetables. - Add crumbled feta cheese, basil, and parsley. - Drizzle the lemon vinaigrette over the pasta mixture. - Toss gently to coat all the ingredients evenly. - Cover the salad with plastic wrap. - Chill in the refrigerator for at least 30 minutes. - This helps the flavors blend together nicely. This refreshing summer pasta salad with lemon vinaigrette is perfect for hot days. For the complete recipe, check the [Full Recipe]. - Use fresh, seasonal vegetables for better flavor. Fresh veggies taste brighter and more delicious. They also add color and crunch. Look for ripe tomatoes, crisp cucumbers, and sweet bell peppers. - Adjust dressing ingredients according to personal preference. This salad is flexible. If you like tangy, add more lemon juice. If you prefer creamy, a bit of yogurt can work wonders. - Serve in a chilled bowl and garnish with basil leaves and lemon wedges. This adds a lovely touch and makes your dish pop. - Consider colorful serving dishes to enhance visual appeal. Bright colors make the salad inviting. Use a vibrant bowl to catch the eye and draw people in. {{image_4}} You can make your summer pasta salad even more filling. Adding proteins boosts nutrition and flavor. Grilled chicken, shrimp, or chickpeas work well. Grilled chicken adds a smoky taste. Shrimp gives a fresh ocean flavor. Chickpeas offer a hearty, plant-based option. Each choice makes your salad special and satisfying. While lemon vinaigrette is zesty, you can switch it up. Try balsamic vinaigrette for a sweet-tangy twist. A yogurt-based dressing adds creaminess and a slight tang. Both options change the salad's vibe while keeping it fresh. Feel free to experiment to find your favorite taste. Using seasonal vegetables makes your salad vibrant. Swap in zucchini for a crunchy bite. Asparagus adds a touch of elegance. Bell peppers bring sweetness and color. You can mix and match based on what’s fresh and available. This keeps your salad exciting and full of flavor. For the full recipe, check out the detailed instructions above. After enjoying your summer pasta salad, store any leftovers in an airtight container. This keeps the salad fresh. You can keep it in the refrigerator for up to 3 days. Freezing this pasta salad is not a good idea. The texture of the pasta and vegetables changes when frozen. They become mushy when thawed, which affects the taste. I recommend eating the salad cold straight from the fridge. This keeps the flavors bright and fresh. Don’t reheat it, as it tastes best when chilled. For more details, check out the Full Recipe. Use a gluten-free pasta option available in stores. Many brands offer good choices. Just check the label to ensure it's truly gluten-free. This way, everyone can enjoy the dish without worry. Yes, it’s best to make the salad a few hours before serving for best flavor. This time lets the ingredients blend together. You can chill it in the fridge, which enhances the taste. Just remember to toss it gently before serving. Try goat cheese, mozzarella, or skip cheese entirely for a dairy-free option. Each cheese gives a different flavor. Goat cheese adds creaminess, while mozzarella is mild and stretchy. Picking one that fits your taste makes the salad even better! This summer pasta salad is fresh, simple, and easy to make. You learned how to prepare a tasty dish with rotini pasta, colorful vegetables, and a zesty lemon vinaigrette. We discussed tips to enhance flavor and presentation. Remember, you can add proteins or swap ingredients for variety. This salad makes a great side or light meal. Enjoy making your own version and impress your guests this warm season!](https://fastmealmate.com/wp-content/uploads/2025/07/167fa52b-6c37-4fee-aa24-5fa64edc3341-768x768.webp)