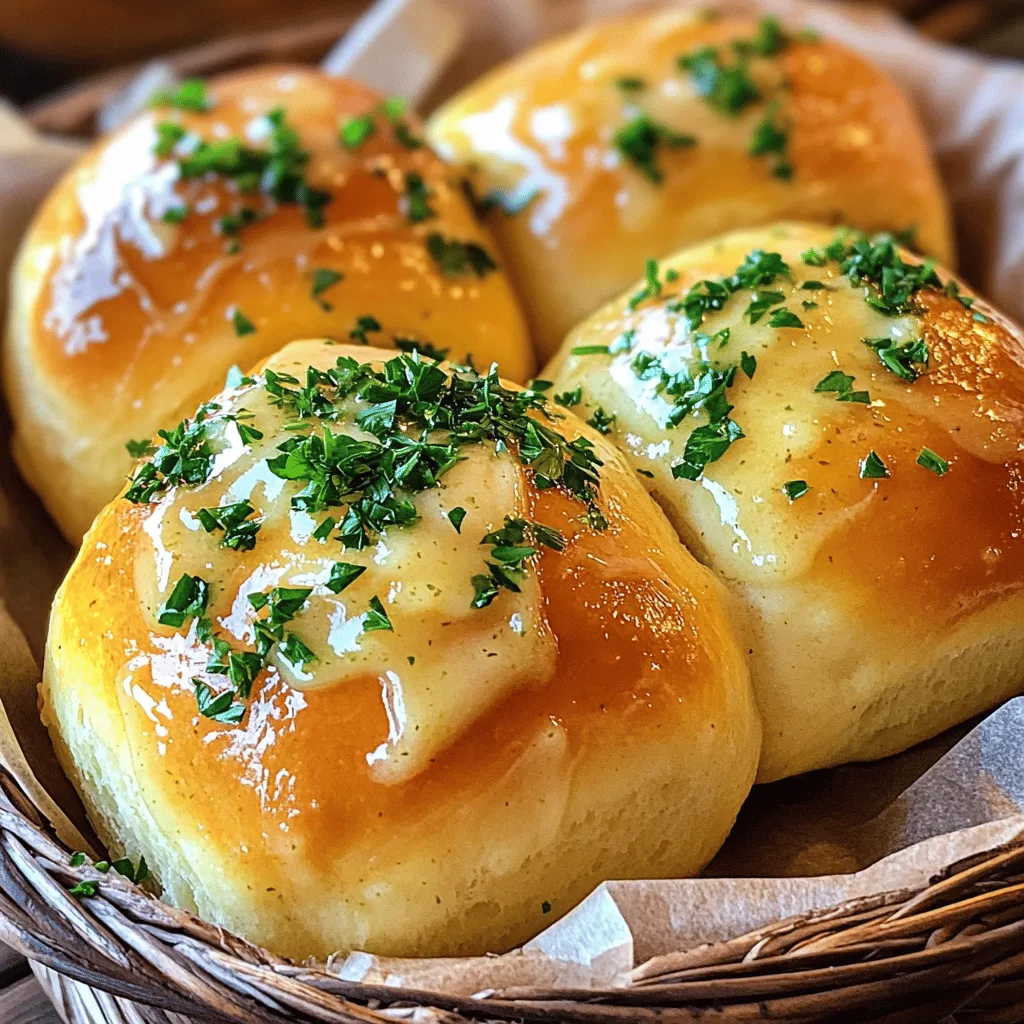
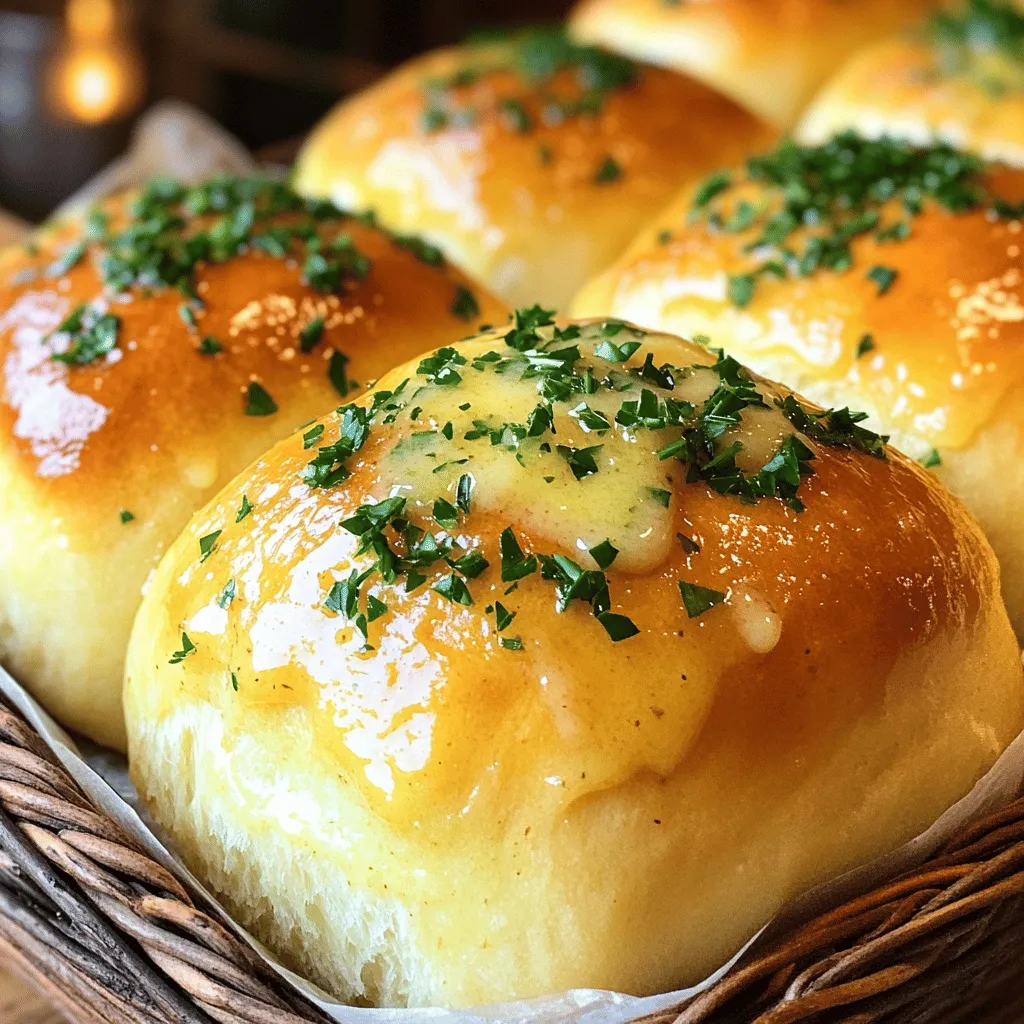
Get ready to delight your taste buds with my easy recipe for Garlic Butter Bread Rolls! These fluffy, golden rolls are packed with rich flavor, making them the perfect side for any meal. In this post, I will share the simple ingredients, step-by-step instructions, and pro tips to make your rolls a hit. Whether you enjoy them fresh from the oven or stored for later, you won’t want to miss this treat!
Ingredients
Main Ingredients for Garlic Butter Bread Rolls
To make garlic butter bread rolls, you need a few key items. Gather these:
– 3 cups all-purpose flour
– 1 packet (2¼ teaspoons) instant yeast
– 1 teaspoon sugar
– 1 teaspoon salt
– 1 cup warm water (about 110°F)
– ¼ cup unsalted butter, melted
– 4 cloves garlic, minced
– 2 tablespoons fresh parsley, chopped
– 1 tablespoon additional melted butter for brushing
– Optional: pinch of chili flakes for added spice
These ingredients create a soft, fluffy roll with a rich garlic flavor.
Essential Tools and Equipment
You will need some basic tools to make these rolls. Here’s what to have on hand:
– Large mixing bowl
– Measuring cups and spoons
– Wooden spoon or spatula
– Clean kitchen towel
– Baking dish (greased)
– Small saucepan (for melting butter)
– Oven
Having these tools ready will make your cooking process smooth and fun.
Optional Add-Ins for Extra Flavor
If you want to spice things up, consider adding a few extras. Here are some fun options:
– Grated cheese (like Parmesan or cheddar) for richness
– Fresh herbs (like thyme or rosemary) for a fragrant touch
– Cooked bacon bits for a savory kick
– Sun-dried tomatoes for a sweet burst
These add-ins can elevate your garlic butter bread rolls, making them even more special.
Step-by-Step Instructions
Activating the Yeast and Preparing the Dough
Start by activating the yeast. In a large bowl, mix warm water, sugar, and yeast. Let it sit for 5 to 10 minutes. You want it to get frothy. This shows the yeast is alive. Next, pour in the melted butter and salt. Gradually add the flour, stirring until a shaggy dough forms.
Kneading the Dough for Perfect Texture
Transfer the dough to a lightly floured surface. Knead it for about 8 to 10 minutes. You want the dough to be smooth and elastic. It should stretch easily without tearing. This step is key to getting soft rolls that rise well.
Rising the Dough: Importance and Tips
Rising is crucial. Shape your kneaded dough into a ball. Place it in a greased bowl and cover it with a towel. Put it in a warm spot for about 1 hour. The dough should double in size.
– How to check if the dough has risen properly: Gently poke the dough with your finger. If it springs back slowly, it has risen enough. If it springs back quickly, give it more time. This step makes your rolls light and fluffy.
Tips & Tricks
Secrets to Fluffy Garlic Butter Rolls
To make your garlic butter rolls fluffy, use fresh yeast. Fresh yeast gives the dough a nice rise and light texture. Use warm water around 110°F to activate the yeast properly. This temperature helps yeast grow without killing it. Knead the dough well for about 8-10 minutes. The dough should feel smooth and elastic. Let it rise in a warm spot. This helps the dough double in size, which gives you those fluffy rolls.
Common Mistakes to Avoid
Many home cooks make mistakes that can ruin their bread rolls. One common mistake is using cold water for the yeast. Cold water slows down yeast activity. Always check your yeast for freshness. Old yeast can fail to rise. Avoid over-kneading; this can lead to tough rolls. Also, don’t skip the second rise. It’s crucial for achieving that airy texture. Lastly, keep an eye on your oven temperature. Too hot or too cold can affect baking time and texture.
Pro Tips for Flavor Enhancements
Want to boost your garlic butter rolls’ flavor? Here are some simple tips. First, use fresh garlic for a robust taste. Fresh herbs like parsley or chives also add great flavor. For a spicy kick, sprinkle in some chili flakes. Mix these into the garlic butter for a tasty surprise. To achieve a perfectly crisp top, brush the rolls with melted butter before and after baking. This gives them a lovely golden color and rich flavor.Enjoy your baking!
Variations
Herb-Infused Garlic Butter
You can easily boost the flavor of your garlic butter with herbs. Fresh herbs like rosemary, thyme, or basil work well. Simply chop them finely and mix them into the melted butter with the garlic. This adds a fresh, aromatic touch to your rolls. Experiment with different herbs for varied tastes.
Adding Cheese for Extra Richness
If you love cheese, try adding it to your rolls. Grate some parmesan or mozzarella and mix it into the dough. You can also sprinkle cheese on top before baking. The cheese melts and adds a rich, creamy texture. It’s a delightful twist that cheese lovers will enjoy.
Spicy Garlic Butter Option
For those who enjoy a kick, make your garlic butter spicy. Add red pepper flakes or cayenne pepper to the melted butter. This gives your rolls a warm, spicy flavor. You can adjust the spice level to match your taste. Don’t be afraid to try other spices too. Smoked paprika or cumin can also add unique flavors.
Feel free to mix and match these ideas. Your garlic butter bread rolls will always be new and exciting!
Storage Info
Best Practices for Storing Leftover Rolls
After you enjoy these garlic butter bread rolls, store them properly. First, let the rolls cool completely. This step helps prevent sogginess. Then, place them in an airtight container or a zip-top bag. Keep them at room temperature for up to two days. If you need them to last longer, consider refrigerating them. Just note that refrigeration can dry them out.
Reheating Instructions for Freshness
To reheat leftover rolls and bring back their soft texture, preheat your oven to 350°F (175°C). Wrap the rolls in aluminum foil to keep moisture in. Heat them for about 10-15 minutes. You can also microwave them for about 15-20 seconds. However, using the oven gives better results, keeping the crust crispy and the inside soft.
Freezing Unbaked vs. Baked Rolls
You can freeze both unbaked and baked rolls. For unbaked rolls, shape them and place them on a baking tray. Freeze until firm, then transfer to a zip-top bag. They can stay frozen for up to three months. When ready to bake, let them thaw in the fridge overnight, then rise and bake as usual.
For baked rolls, allow them to cool completely. Wrap tightly in plastic wrap and place in a freezer bag. They can also last for about three months. To enjoy, just reheat them from frozen in the oven.
FAQs
How long do garlic butter bread rolls stay fresh?
Garlic butter bread rolls stay fresh for about 2-3 days at room temperature. Keep them in a sealed bag or container. You can also freeze them for up to 3 months. Just thaw and warm them in the oven when ready to eat.
Can I use whole wheat flour instead of all-purpose flour?
Yes, you can use whole wheat flour. It gives the rolls a nutty flavor and adds fiber. However, the texture may be denser. You might need to adjust the water amount since whole wheat flour absorbs more liquid. Start with the same amount and add a bit more if needed.
What can I serve with garlic butter bread rolls?
Garlic butter bread rolls pair well with many meals. Here are some ideas:
– Soups: They make a great side for tomato or minestrone soup.
– Salads: Serve with a fresh garden salad for a light meal.
– Pasta: They complement rich pasta dishes like Alfredo or marinara.
– Grilled meats: Use them to soak up juices from grilled chicken or steak.
Garlic butter bread rolls are a delight that anyone can make. We covered the key ingredients, tools, and tasty add-ins. I shared step-by-step instructions from activating the yeast to kneading the dough. Tips helped you avoid mistakes, achieve fluffiness, and add flavors. I also explored fun variations and storage methods.
These rolls can enhance any meal. With practice, you’ll bake perfect rolls every time. Enjoy sharing them with friends or family!


