Fudgy Greek Yogurt Brownies Rich and Indulgent Treat

Are you ready for a treat that’s both rich and satisfying? These Fudgy Greek Yogurt Brownies are a game changer! I’ll show you how to whip up a dessert that tastes decadent while being a bit healthier. With simple ingredients and easy steps, you’ll create brownies that everyone will love. Let’s dive into this delicious recipe and discover how Greek yogurt can transform your baking!
Ingredients
Main Ingredients for Fudgy Greek Yogurt Brownies
To make these fudgy Greek yogurt brownies, gather these key ingredients:
– 1 cup unsweetened cocoa powder
– 1 cup Greek yogurt (plain)
– 1/2 cup granulated sugar
– 1/2 cup packed brown sugar
– 1/4 cup coconut oil, melted
– 2 large eggs
– 1 teaspoon pure vanilla extract
– 1/2 teaspoon sea salt
– 1/2 cup all-purpose flour
– 1/2 cup dark chocolate chips (optional)
Each ingredient plays a big role in making these brownies rich and moist. The cocoa powder gives that deep chocolate taste. Greek yogurt not only adds creaminess but also cuts down on fat. Coconut oil contributes to a lovely texture and flavor. Eggs bind everything together while sugars sweeten the mix.
Optional Add-ins for Extra Flavor
You can make these brownies even more special with optional add-ins:
– 1/2 cup dark chocolate chips
– Nuts like walnuts or pecans
– A pinch of cinnamon for warmth
– Sea salt flakes on top for contrast
These add-ins can enhance the brownies. Dark chocolate chips boost the chocolatey flavor. Nuts add crunch. Cinnamon gives a warm note, and salt flakes provide a nice contrast.
Nutritional Benefits of Greek Yogurt
Using Greek yogurt has many health benefits:
– High in protein, which helps with muscle growth
– Lower in fat than butter
– Contains probiotics for gut health
Greek yogurt makes these brownies a bit healthier. You still enjoy a sweet treat while getting extra protein and good bacteria. It’s a win-win for your taste buds and your body!
Step-by-Step Instructions
Prepping Your Baking Pan
Start by preheating your oven to 350°F (175°C). Grab an 8×8 inch baking pan. Grease it with cooking spray or line it with parchment paper. This makes it easy to remove the brownies later.
Mixing Wet Ingredients
In a large bowl, combine 1 cup of Greek yogurt with 1/4 cup of melted coconut oil. Add 1/2 cup of granulated sugar and 1/2 cup of packed brown sugar. Crack in 2 large eggs and pour in 1 teaspoon of pure vanilla extract. Whisk everything together until smooth and creamy.
Incorporating Dry Ingredients
Next, sift in 1 cup of unsweetened cocoa powder and 1/2 teaspoon of sea salt. Stir gently to combine the dry ingredients with the wet mixture. Make sure there are no lumps in your batter.
Baking the Brownies
Now it’s time for the flour. Gently fold in 1/2 cup of all-purpose flour. Be careful not to overmix; this keeps the brownies fudgy. If you like, fold in 1/2 cup of dark chocolate chips for extra chocolatey goodness. Pour the batter into the prepared pan and smooth it out with a spatula.
Bake for 20-25 minutes. To check if they are done, insert a toothpick into the center. It should come out with a few moist crumbs, but no wet batter.
Cooling and Cutting Instructions
After baking, let the brownies cool in the pan for 10 minutes. Use the edges of the parchment paper to lift them out. Allow them to cool completely on a wire rack. Once cool, cut them into squares. Enjoy your fudgy Greek yogurt brownies!
Tips & Tricks
How to Achieve the Perfect Fudgy Texture
To make your brownies fudgy, focus on two key things: mixing and baking time. Mix your wet and dry ingredients just until they come together. Overmixing can lead to a cake-like texture. Bake them for 20-25 minutes. Check with a toothpick; it should have a few moist crumbs, not wet batter. This helps keep the brownies soft and rich.
Tips for Measuring Ingredients Accurately
Accurate measuring is vital for great brownies. Use dry measuring cups for cocoa powder and flour. Always level off the top with a knife for precision. For sticky ingredients like coconut oil, use a liquid measuring cup and pour it in. This ensures you add the right amounts and helps your brownies turn out perfect every time.
Best Practices for Storing Leftover Brownies
Store your brownies in an airtight container. This keeps them fresh and fudgy. If you want to keep them longer, wrap them in plastic wrap and then foil. You can refrigerate them for up to a week. For longer storage, freeze them for up to three months. Just thaw in the fridge overnight before enjoying.

Variations
Gluten-Free Fudgy Greek Yogurt Brownies
You can make these brownies gluten-free easily. Just swap the all-purpose flour with a gluten-free blend. Look for a blend that includes xanthan gum for the best texture. This way, you still get that fudgy goodness without the gluten. Keep in mind that baking times may change slightly. Check them a few minutes early.
Vegan Adaptations for the Recipe
To make these brownies vegan, you can replace the eggs. Use two tablespoons of flaxseed meal mixed with six tablespoons of water. Let it sit for a few minutes until it thickens. Also, choose a dairy-free yogurt and a plant-based oil, like avocado oil. The result is still rich and tasty, perfect for vegan diets.
Flavor Variations: Adding Nuts, Spices, or Extracts
Enhance your brownies by adding nuts, spices, or extracts. Chopped walnuts or pecans add a nice crunch. You can also mix in a teaspoon of cinnamon or a pinch of sea salt to boost flavor. For a twist, try adding a splash of almond extract or mint extract for something special. Each addition gives your brownies a unique taste.
Serving Suggestions
Creative Ways to Serve Brownies
Fudgy Greek yogurt brownies are great on their own, but you can make them even more fun. Try cutting the brownies into smaller squares for bite-sized treats. You can stack them for a beautiful dessert tower. This adds height and makes your table look fancy. For a casual option, serve the brownies on a wooden board. This rustic look is eye-catching and inviting.
Pairing with Ice Cream or Yogurt
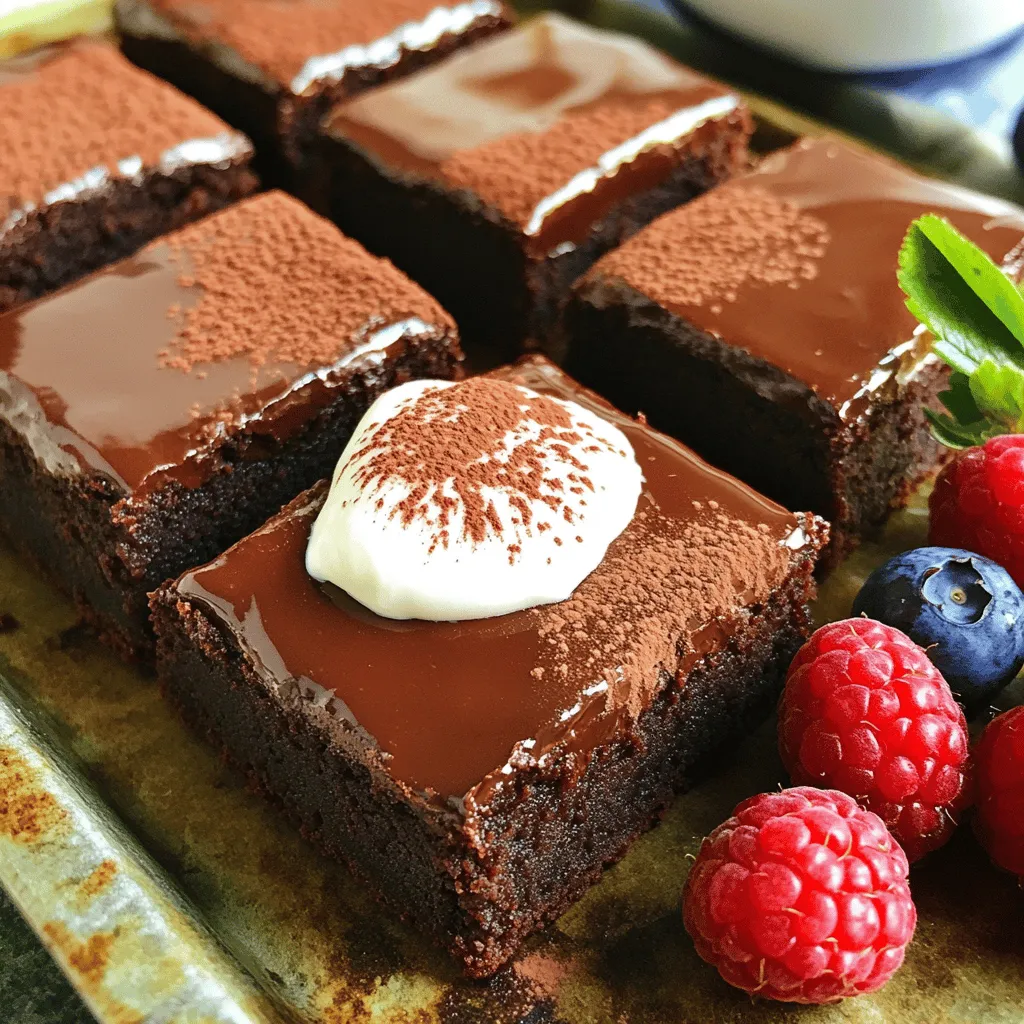
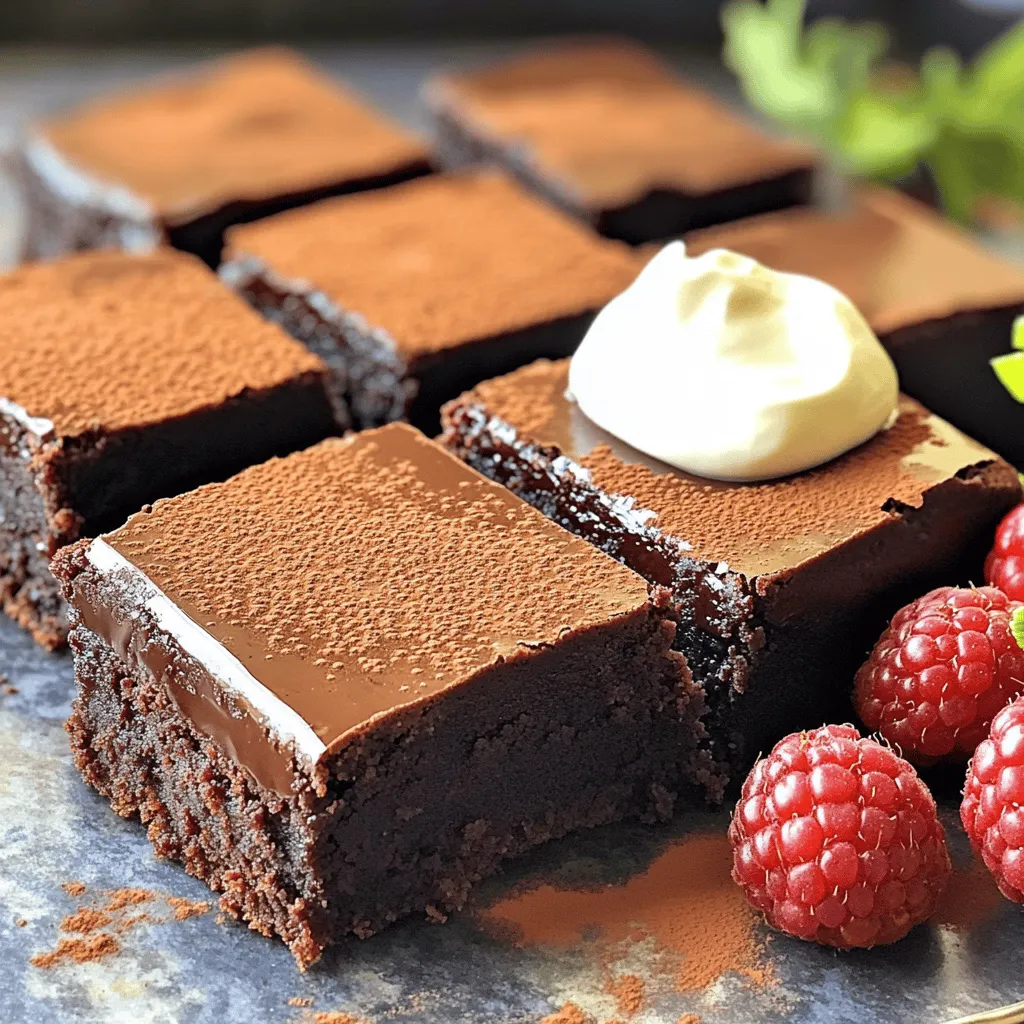
These brownies pair well with ice cream or yogurt. A scoop of vanilla ice cream on top adds creaminess. The cold ice cream melts slightly on the warm brownie, creating a delicious mix. You can also use Greek yogurt for a lighter touch. A dollop of yogurt adds a tangy flavor that balances the sweetness.
Garnishing Ideas for Presentation
Garnishing can elevate your brownies. Try a dusting of cocoa powder on top for a simple look. You can also add fresh berries for color and freshness. Strawberries or raspberries work best. Another idea is to drizzle melted chocolate over the brownies. This adds a rich touch that chocolate lovers will enjoy. Finally, consider adding mint leaves for a pop of green. This looks great and adds a fresh taste.
FAQs
Can I use non-fat Greek yogurt in this recipe?
Yes, you can use non-fat Greek yogurt in this recipe. It will still produce fudgy brownies. The yogurt adds moisture and richness without extra fat. Your brownies may be slightly less rich, but they will still taste great.
How can I make brownies less sweet?
To make brownies less sweet, you can reduce the sugar. Try cutting the granulated and brown sugar to 1/4 cup each. You can also use unsweetened cocoa powder to balance the sweetness. Adding a pinch of sea salt can help enhance the flavors too.
What should I do if my brownies come out dry?
If your brownies are dry, it may be due to overbaking. Always check them a few minutes early. If you bake them too long, they lose moisture. You can also try adding an extra egg or a bit more yogurt next time for added moisture.
How long do these brownies stay fresh?
These brownies stay fresh for about 3 to 4 days when stored at room temperature. Keep them in an airtight container to maintain softness. You can also refrigerate them for up to a week or freeze for longer storage.
These fudgy Greek yogurt brownies are easy to make and fun to eat. You learned about the key ingredients, step-by-step baking instructions, and tips for the best texture. You discovered variations like gluten-free and vegan options, plus creative serving ideas.
In the end, enjoy experimenting with flavors and sharing these brownies with others. They are a delicious treat that you can feel good about. Enjoy your baking journey!


![To make Mango Mint Lassi, you need a few key ingredients. Here’s what you’ll need: - 1 ripe mango, peeled and diced into small pieces - 1 cup plain yogurt (Greek yogurt recommended for added creaminess) - 1/2 cup milk (optional: use almond or coconut milk for a dairy-free alternative) - 1/4 cup fresh mint leaves, roughly chopped - 2 tablespoons honey or maple syrup (adjust to your taste) - 1/2 teaspoon ground cardamom (optional for a touch of warmth) - Ice cubes (optional, for a refreshing chilled drink) - A pinch of salt to enhance the flavors These ingredients create a sweet and creamy drink that is perfect for hot days. You can change this recipe to suit your taste. Here are some optional ingredients you might like: - Coconut cream for extra richness - A squeeze of lime juice for a tangy kick - Other fruits like banana or pineapple for different flavors - Chia seeds for added health benefits - Vanilla extract for a sweeter aroma Feel free to mix and match these ingredients to make the drink your own. If you have dietary needs, no problem! Here are some substitutes you can use: - Use almond or coconut milk instead of regular milk for a dairy-free option. - Replace yogurt with dairy-free yogurt for a vegan choice. - Honey can be swapped with agave nectar or stevia for a sugar-free drink. - If you are allergic to nuts, stick with regular yogurt and milk. These substitutes keep the drink tasty while meeting your dietary needs. Enjoy experimenting with different flavors and textures! To make a mango mint lassi, start with fresh ingredients. First, you need one ripe mango. Peel and dice the mango into small pieces. This helps it blend better. Next, grab one cup of plain yogurt. Greek yogurt gives a nice creamy texture. If you want, you can also use half a cup of milk. This makes the lassi smoother. If you're dairy-free, choose almond or coconut milk. Now, add a quarter cup of fresh mint leaves. Chop them roughly to release their flavor. For sweetness, use two tablespoons of honey or maple syrup. You can adjust this later based on your taste. Finally, add a pinch of salt. This enhances all the flavors. Now it is time to blend! In your blender, combine the mango, yogurt, milk, and sweetener. Secure the lid tightly to avoid spills. Start blending on high speed. Keep blending until you see a smooth and creamy mixture. If you like your lassi cold, add some ice cubes. Blend again until everything is mixed well. Check the texture. If it is too thick, add a bit more milk. Blend again to combine. You want it creamy but pourable, perfect for sipping. After blending, taste your lassi. If you want it sweeter, add more honey or maple syrup. Blend briefly to mix in the extra sweetener. If your lassi is too thick, add a splash of milk. Blend again until you reach the right consistency. Pour the lassi into tall glasses. This recipe makes enough for 2-3 servings. For a nice touch, garnish each glass with a mint sprig and a slice of mango. This makes your drink look extra special. Enjoy your refreshing mango mint lassi! For the full recipe, check the earlier section. Choosing the right mango is key to a tasty mango mint lassi. Look for mangoes that are soft but not mushy. They should have a sweet aroma. The skin color may vary based on the type, so focus on feel and smell. The best mango for this drink is the Ataulfo or Haden variety. These types have a creamy texture and rich flavor, perfect for blending. You can make mango mint lassi ahead of time. Prepare the lassi and store it in the fridge. It stays fresh for about 24 hours. Just give it a quick stir before serving. If you want it cold, add ice cubes right before you drink it. This keeps the lassi from getting watery. Spices can boost the flavor of your lassi. Ground cardamom adds a nice touch of warmth. You can also try a dash of cinnamon for a different twist. For a fun kick, consider adding a pinch of cayenne pepper. This spice brings a hint of heat that balances the sweetness of the mango. Experiment with these spices to find your favorite mix! For the full recipe, check out the [Full Recipe]. {{image_4}} To make a vegan Mango Mint Lassi, simply swap regular yogurt for a plant-based one. Use almond, coconut, or cashew yogurt for a creamy base. You can also choose almond or coconut milk instead of cow's milk. This keeps the lassi light and refreshing while still full of flavor. If you want a sugar-free version, skip the honey or maple syrup. You can use ripe mango for natural sweetness. You might also add a few drops of vanilla extract to enhance the flavor. This way, you still enjoy a tasty drink without extra sugar. Feel free to play with flavors! You can add berries or peaches for a fruity twist. Basil or cilantro can replace mint for a unique taste. Each variation brings a new twist, making the lassi fun to explore. Use the full recipe to get started on these adventures! After making your Mango Mint Lassi, store any leftovers in the fridge. Use a clean, airtight container. This helps keep the drink fresh for about 2 to 3 days. When you’re ready to enjoy it again, give it a good shake or stir. The ingredients may separate, but that’s normal. You can freeze Mango Mint Lassi for later use. Pour it into ice cube trays or freezer-safe bags. If you use bags, remove as much air as possible before sealing. The lassi can last up to 2 months in the freezer. To use, thaw it in the fridge overnight or blend it straight from frozen for a slushy treat. If your lassi is too thick after storage, add a splash of milk or water. Blend it again to reach your desired texture. For a refreshing twist, serve it over ice cubes or blend in some fresh mint leaves. This will revive the flavors and make it taste fresh again. Enjoy your creamy drink! Mango Mint Lassi comes from India. Lassi is a yogurt drink, popular in Indian homes. It often includes fruit or spices. The mango adds sweetness, while mint gives a fresh twist. People enjoy it in hot weather for its cooling effect. This drink represents the rich flavors of Indian cuisine. Yes, you can make Mango Mint Lassi ahead of time. Blend it and store it in the fridge. It stays fresh for up to two days. Just remember to stir it before serving. If it separates, don’t worry; this is normal. Adding ice cubes when serving makes it extra refreshing. Mango Mint Lassi is quite healthy! It has yogurt, which is good for your gut. Yogurt contains probiotics that help digestion. Mango is full of vitamins, especially vitamin C and vitamin A. Mint adds a burst of flavor and aids digestion too. This drink is a tasty way to enjoy nutrients while keeping cool. Mango Mint Lassi is a tasty and easy drink to make. We covered key ingredients and how to customize them. The steps to blend this drink help create a smooth texture. Tips on selecting mangoes and serving it with flair add to the fun. Variations suit all diets, and storage tips keep it fresh. Try this drink yourself to taste the joy. It’s a simple delight you can share with everyone. Enjoy making it your own!](https://fastmealmate.com/wp-content/uploads/2025/06/4c375769-c270-449a-b275-479d6ed1cf7d-768x768.webp)

![To make Easy Roasted Tomato Soup, gather these key ingredients: - 2 pounds of ripe, juicy tomatoes, halved - 1 medium onion, cut into quarters - 4 cloves of garlic, left unpeeled - 2 tablespoons of extra virgin olive oil - Sea salt and freshly cracked black pepper, to taste - 1 teaspoon of dried basil - 1 teaspoon of sugar (optional, to counterbalance acidity) - 4 cups of rich vegetable broth - 1/2 cup of heavy cream (optional, for a luscious finish) - Fresh basil leaves, for a lovely garnish These ingredients create a base that bursts with flavor. The tomatoes give the soup its rich taste. The onion adds sweetness, while garlic brings depth. You can add optional ingredients to boost the flavor: - A splash of balsamic vinegar for acidity - A pinch of red pepper flakes for heat - A teaspoon of smoked paprika for a smoky taste These extras can transform the soup into something special. Feel free to experiment and find your favorite combination. To prepare this soup, you’ll need a few handy tools: - A large baking sheet for roasting - A pot for cooking the soup - An immersion blender or a standard countertop blender - A cutting board and sharp knife for prep Having the right tools makes cooking easier. With these, you’ll create a smooth, tasty soup that warms the soul. For the complete recipe, check out the [Full Recipe]. To start, gather all your ingredients. You need: - 2 pounds of ripe, juicy tomatoes, halved - 1 medium onion, cut into quarters - 4 cloves of garlic, left unpeeled - 2 tablespoons of extra virgin olive oil - Sea salt and freshly cracked black pepper, to taste - 1 teaspoon of dried basil - 1 teaspoon of sugar (optional) - 4 cups of rich vegetable broth - 1/2 cup of heavy cream (optional) - Fresh basil leaves for garnish First, wash the tomatoes well. Cut them in half and place them on a baking sheet. Next, quarter the onion and add it to the sheet. Toss in the unpeeled garlic cloves. Now, drizzle the olive oil over the veggies. Sprinkle sea salt, black pepper, and dried basil on top. If you want to balance the soup's acidity, add sugar now. Preheat your oven to 400°F (200°C). Once the oven is ready, slide in your baking sheet. Roast the vegetables for 25-30 minutes. The tomatoes should soften and caramelize. After roasting, take the sheet out and let the veggies cool. Once cool enough to handle, peel off the garlic skins. In a large pot, combine the roasted tomatoes, onion, and garlic. Add the vegetable broth and place the pot over medium heat. Bring the mixture to a gentle simmer. Use an immersion blender to puree the soup until smooth. If you don’t have one, carefully transfer the soup to a blender. Make sure to leave space for steam to escape. If you want a rich finish, stir in the heavy cream now. Taste the soup and adjust the seasoning. Heat until hot throughout. Finally, serve the soup in bowls. Garnish with fresh basil leaves for color and flavor. Enjoy your delicious, comforting bowl of roasted tomato soup! To get a smooth soup, use an immersion blender. It makes blending easy. If you prefer, you can blend in batches with a regular blender. Just leave space for steam. For a thicker texture, add less broth. If you like it thinner, add more broth. You can also stir in heavy cream for extra richness. It adds a nice velvety feel. One mistake is not roasting the tomatoes long enough. They need time to caramelize and develop flavor. Don’t skip the sugar if your tomatoes are very acidic. It balances the taste. Also, remember to peel the garlic after roasting. Skins can affect the smoothness of your soup. Finally, taste your soup before serving. Adjust salt and pepper to match your flavor. Serve your soup hot, garnished with fresh basil leaves. They add color and flavor. Pair it with a grilled cheese sandwich for a classic combo. You can also serve it with crusty bread for dipping. For a twist, add a drizzle of balsamic glaze on top. This adds a sweet tang that enhances the soup. For the full recipe, check the details above. {{image_4}} You can easily make this soup vegan. Just skip the heavy cream. Use more vegetable broth instead. This keeps the soup rich and tasty. The roasted tomatoes give it a great flavor. You won’t miss the cream at all. Add a splash of coconut milk for creaminess if you like. It adds a nice twist! Want to spice things up? Add a pinch of red pepper flakes for heat. A dash of smoked paprika gives a warm flavor. Fresh herbs like thyme or oregano enhance the soup, too. You can also stir in a tablespoon of balsamic vinegar. It adds depth and a little sweetness. Don't forget to taste as you go! This soup is naturally gluten-free. You don’t need any flour or wheat. Just use certified gluten-free vegetable broth. This way, everyone can enjoy it. If you want to thicken the soup, use blended potatoes or a cornstarch slurry. It keeps the soup smooth without gluten. Enjoy this comforting bowl without worries! To store leftover soup, let it cool first. Pour it into an airtight container. Make sure to seal it well. Place it in the fridge. It will stay fresh for about three days. If you want to keep it longer, freezing is better. Freezing is a great way to prepare meals ahead. Use freezer-safe containers or bags. Fill them with soup, leaving some space at the top. This allows for expansion. Label the containers with the date. It can last up to three months in the freezer. When you’re ready to use it, just thaw it in the fridge overnight. To reheat your soup, use a pot on the stove. Heat it gently over medium-low. Stir often to avoid burning. If the soup is too thick, add a splash of broth or water. You can also use a microwave. Heat it in short bursts, stirring in between. Always taste before serving to check the flavor. Adjust seasoning if needed for that perfect bowl of comfort. The best tomatoes for this soup are ripe, juicy varieties. I love using Roma or vine-ripened tomatoes. They have great flavor and are less watery. You can also mix in some heirloom tomatoes for extra depth. Their sweetness adds a lovely touch to the soup. Yes, you can make this soup ahead of time. It keeps well in the fridge for up to four days. Just make sure to cool it completely before storage. You can also freeze it for up to three months. For the best taste, reheat the soup gently on the stove. To make roasted tomato soup without cream, simply skip the heavy cream. Instead, you can add a splash of vegetable broth for richness. For added creaminess, blend in some cooked white beans or cashews. They blend smoothly and give a nice texture without dairy. You’ll still enjoy a flavorful bowl of comfort. For the full recipe, check out the detailed instructions above. In this post, we explored how to make easy roasted tomato soup. We discussed key ingredients, optional flavors, and tools you need. Following the step-by-step instructions ensures success every time. I shared tips for the perfect consistency and common mistakes to avoid. You can even try vegan and gluten-free options. Lastly, I covered storage and reheating for later enjoyment. Enjoy making this warm soup and share it with others.](https://fastmealmate.com/wp-content/uploads/2025/07/8c50acbe-b26b-4fce-9348-24a1062b636d-768x768.webp)