Feta Spinach Rolled Chicken Delightful Dinner Recipe

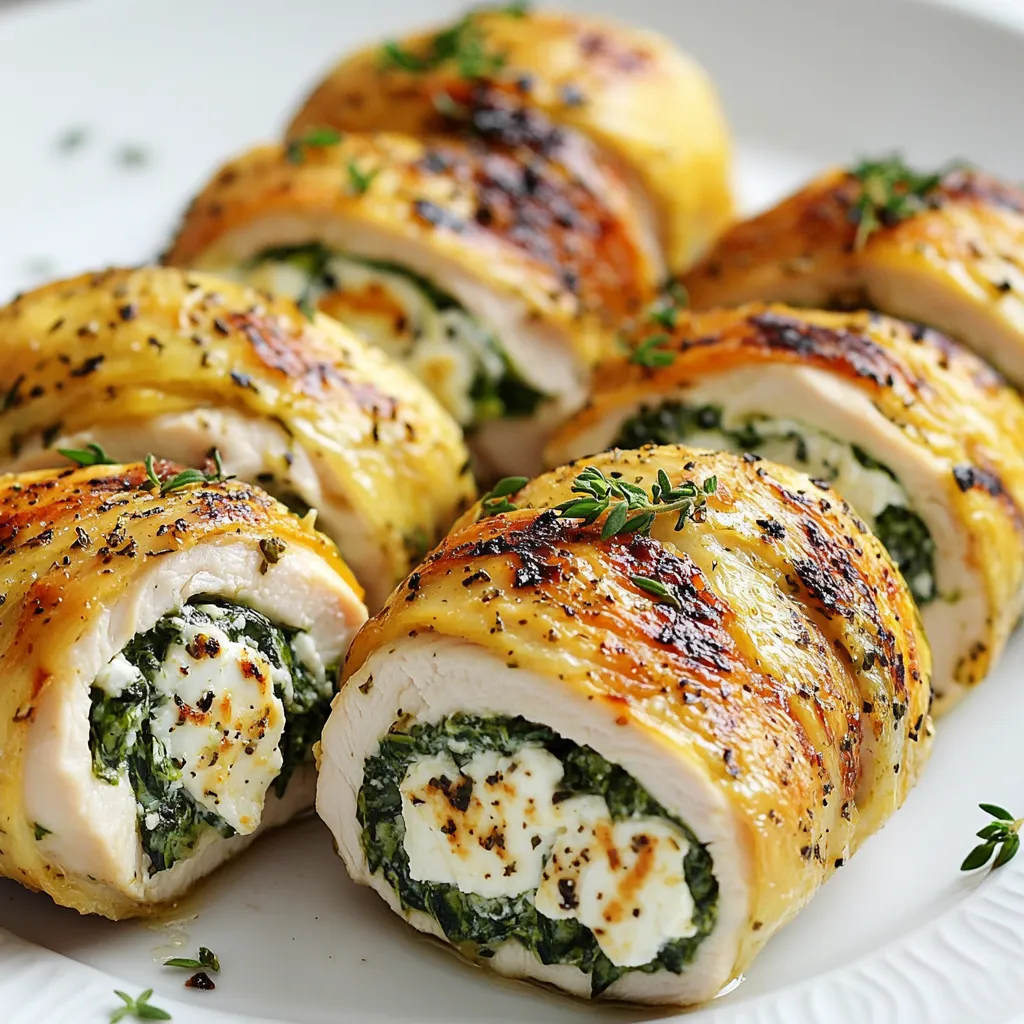
Are you ready to impress your family with a delicious dish? Feta Spinach Rolled Chicken is the perfect blend of flavors and easy to make. With simple ingredients like chicken breasts, spinach, and feta, this recipe is sure to be a hit at dinner. I’m excited to share every step, tip, and trick to help you create this delightful meal. Let’s dive into the recipe and get cooking!
Why I Love This Recipe
- Delicious Flavor Combination: The creamy feta and spinach filling perfectly complement the tender chicken, creating a mouthwatering dish that’s full of flavor.
- Easy to Make: This recipe is straightforward and requires minimal ingredients, making it perfect for both weeknight dinners and special occasions.
- Impressive Presentation: Slicing the rolled chicken reveals a beautiful filling, making it an eye-catching dish that will impress your guests.
- Healthy Option: Packed with nutrients from spinach and protein from chicken, this dish is a wholesome choice for a balanced meal.
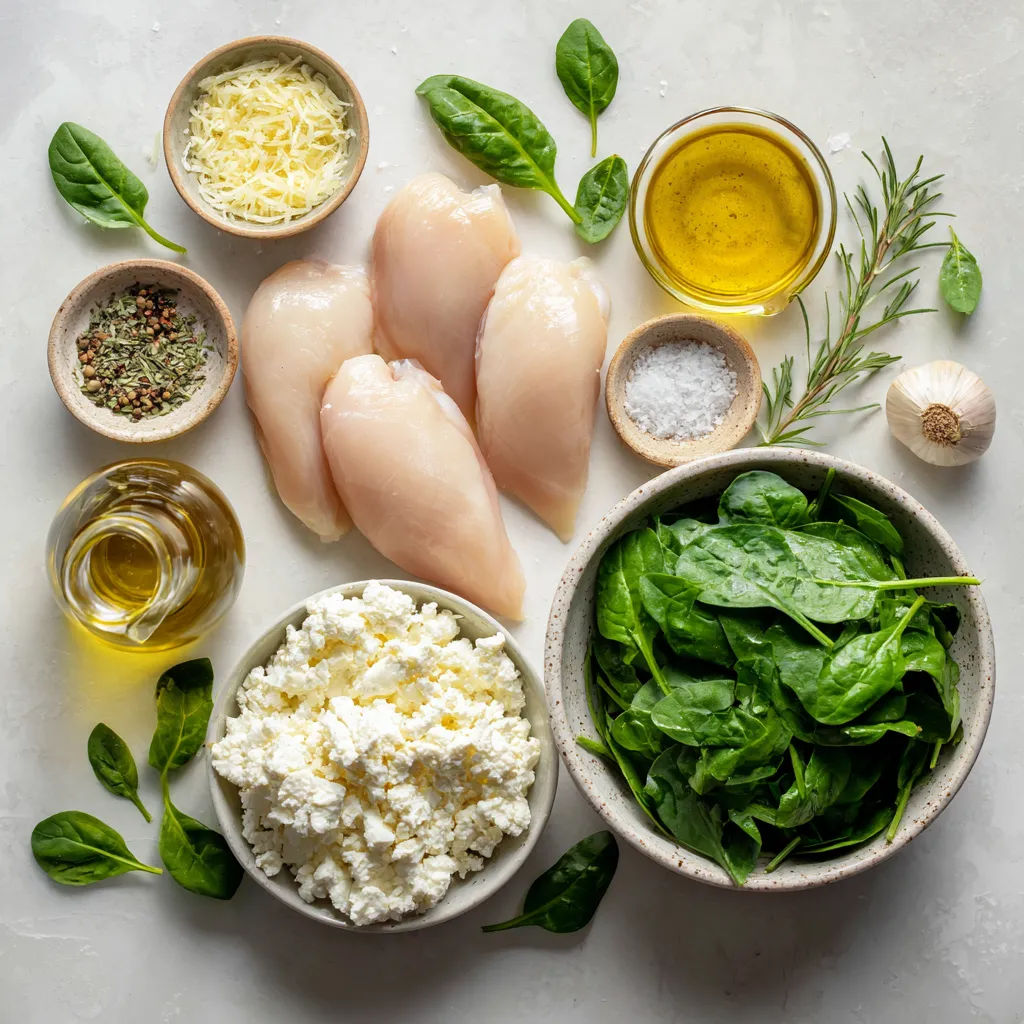
Ingredients
– 4 boneless, skinless chicken breasts
– 1 cup fresh spinach, finely chopped
– 1/2 cup feta cheese, crumbled
– 1/4 cup cream cheese, softened to room temperature
– 2 cloves garlic, minced
– 1 teaspoon lemon zest
– 1 teaspoon dried oregano
– Salt and freshly ground black pepper
– 2 tablespoons extra virgin olive oil
– Toothpicks or kitchen twine
Gather these ingredients before starting. Each one plays a key role in the flavor and texture of the dish. The chicken breasts provide a nice canvas for the creamy filling. Fresh spinach adds a pop of green and a hint of earthiness. Feta cheese gives a tangy taste, while cream cheese adds smoothness. Garlic brings a savory note, and lemon zest brightens everything up. Dried oregano adds depth to the filling. The olive oil helps to achieve a lovely golden crust when cooking. Lastly, toothpicks or kitchen twine keep your rolls secure.
Make sure to use fresh ingredients for the best taste. This dish is not only tasty but also looks great on the plate. A colorful, delicious meal awaits you!

Step-by-Step Instructions
Prepping the Oven and Filling
– Preheat oven to 375°F (190°C).
– In a bowl, mix fresh spinach, crumbled feta, softened cream cheese, minced garlic, lemon zest, dried oregano, and salt and pepper. Stir until creamy.
Preparing the Chicken
– Place chicken breasts between plastic wrap.
– Pound each breast to 1/2 inch thick using a meat mallet.
– Spread the creamy filling evenly onto each chicken breast.
Rolling and Securing the Chicken
– Carefully roll each chicken breast tightly from one side.
– Use toothpicks or kitchen twine to secure the rolls.
– Heat olive oil in a skillet over medium-high heat.
– Sear the chicken rolls until golden brown, about 3-4 minutes on each side.
Baking the Chicken
– Move the skillet with chicken to the preheated oven.
– Bake for 20-25 minutes until fully cooked.
– The chicken should reach an internal temperature of 165°F (74°C).
– Let the chicken rest for 5 minutes before slicing.
– Remove toothpicks or twine, then slice into medallions.
Tips & Tricks
Ensuring Perfect Rolls
To avoid filling spillage, spread the filling evenly. Leave a small border around the edges. This helps keep the filling inside while rolling. Use a gentle hand when rolling the chicken. Start from one side and roll tightly to secure the filling.
Cooking Tips
Cook the chicken until it reaches an internal temperature of 165°F (74°C). This ensures it is safe to eat. For a golden-brown crust, sear the chicken in hot olive oil. Sear each side for about 3-4 minutes. This adds flavor and color to your dish.
Serving Suggestions
For a great presentation, slice the chicken into medallions. Arrange them on a bed of fresh greens or roasted veggies. Drizzle with balsamic glaze for extra flavor. Fresh herbs also add a nice touch and color. Pair with rice or a light salad for a complete meal.
Pro Tips
- Use Fresh Ingredients: Fresh spinach and high-quality feta cheese will enhance the flavor of the dish significantly. Always opt for ingredients that are in season for the best taste.
- Pound Evenly: Make sure to pound the chicken breasts evenly to ensure they cook at the same rate. This helps prevent some parts from being overcooked while others are undercooked.
- Let it Rest: Allow the chicken to rest for at least 5 minutes after baking. This step is crucial for retaining the juices and ensuring a moist and flavorful chicken roll.
- Experiment with Spices: Feel free to adjust the flavor profile by adding different herbs and spices to the filling, such as sun-dried tomatoes or pine nuts, for an extra layer of complexity.

Variations
Cheese Alternatives
You can switch feta cheese for other options. Try goat cheese for a tangy twist. Cream cheese can add a rich texture. You may also use mozzarella for a milder flavor. Each cheese brings unique notes to the dish.
Adding Vegetables
Feel free to add more veggies to your filling. Chopped sun-dried tomatoes add sweetness. Bell peppers give a nice crunch. You can even include mushrooms for an earthy taste. For toppings, consider fresh herbs like parsley or basil. They add color and flavor.
Flavor Enhancements
Spices can elevate your chicken. Add red pepper flakes for heat. Try smoked paprika for a deep, warm flavor. Marinades are also great. A mix of lemon juice, olive oil, and herbs can infuse the chicken with zest. Let it marinate for at least 30 minutes for the best results.
Storage Info
Storing Leftovers
To keep your Feta Spinach Rolled Chicken fresh, store it in an airtight container. Place it in the fridge within two hours of cooking. This keeps bacteria at bay and keeps the chicken safe to eat. Your rolled chicken will last about 3 to 4 days in the refrigerator.
Reheating Instructions
When it’s time to enjoy leftovers, avoid drying them out. The best way is to reheat in the oven. Preheat to 350°F (175°C). Place the chicken in a baking dish and cover it with foil. Heat for about 15 to 20 minutes. This keeps the chicken moist and flavorful. You can also use a microwave, but use a low power setting. Add a splash of broth or water for moisture. This helps the chicken stay juicy and tasty.
FAQs
Can I make Feta Spinach Rolled Chicken ahead of time?
Yes, you can prepare Feta Spinach Rolled Chicken ahead of time. You can make the filling and roll the chicken. Cover it and store it in the fridge for up to 24 hours. When ready, just bake it as directed. This saves time on busy days.
What should I serve with Feta Spinach Rolled Chicken?
Feta Spinach Rolled Chicken pairs well with many sides. Try serving it with:
– Roasted vegetables
– A fresh green salad
– Quinoa or rice
– Garlic bread
These options add color and flavor to your meal.
Can I freeze Feta Spinach Rolled Chicken?
Yes, you can freeze the rolled chicken. Wrap it tightly in plastic wrap and foil. It can last up to three months in the freezer. Thaw it in the fridge overnight before baking. This makes it easy to enjoy later.
What are some common mistakes to avoid?
Some common mistakes include:
– Not pounding the chicken evenly
– Overfilling the rolls
– Skipping the resting time after cooking
Avoid these mistakes for best results. They can affect the texture and taste of your dish.
How do I know when the chicken is cooked properly?
Use a meat thermometer to check the chicken. The internal temperature should reach 165°F (74°C). If you don’t have a thermometer, cut into the chicken. The meat should be white and juices should run clear. This ensures it is safe to eat.
In this post, I shared a tasty recipe for Feta Spinach Rolled Chicken. You learned about the ingredients, how to prepare and cook the chicken, and tips for making it perfect. I also covered storage and reheating methods to keep leftovers fresh.
Final thoughts: This dish is not only delicious but also easy to customize. Try different cheeses or veggies for your personal touch. Enjoy this flavorful meal with confidenc

Feta Spinach Rolled Chicken
Ingredients
- 4 pieces boneless, skinless chicken breasts
- 1 cup fresh spinach, finely chopped
- 1/2 cup feta cheese, crumbled
- 1/4 cup cream cheese, softened to room temperature
- 2 cloves garlic, minced
- 1 teaspoon lemon zest
- 1 teaspoon dried oregano
- to taste Salt and freshly ground black pepper
- 2 tablespoons extra virgin olive oil
- as needed Toothpicks or kitchen twine for securing the rolls
Instructions
- Preheat your oven to 375°F (190°C), ensuring even heat throughout cooking.
- In a mixing bowl, combine the finely chopped spinach, crumbled feta, softened cream cheese, minced garlic, lemon zest, dried oregano, and a generous pinch of salt and pepper. Stir until all ingredients are well integrated, creating a smooth, creamy filling.
- Place the chicken breasts between two sheets of plastic wrap or parchment paper. With a meat mallet or rolling pin, gently pound each breast until they are approximately 1/2 inch thick.
- Arrange each chicken breast flat on your workspace. Spoon a generous heap of the spinach-feta filling onto the center of each breast, spreading it out evenly while leaving a small margin around the edges.
- Starting from one side, carefully roll each chicken breast tightly away from you, ensuring the filling is secured inside. Use toothpicks to pierce through the ends, or tie them with kitchen twine.
- In a large, oven-safe skillet, heat the extra virgin olive oil over medium-high heat until shimmering. Gently add the chicken rolls and sear each side until a golden-brown crust forms, about 3-4 minutes per side.
- After searing, transfer the skillet to the preheated oven. Bake the chicken rolls for 20-25 minutes, or until they are fully cooked and reach an internal temperature of 165°F (74°C).
- Once cooked, remove the skillet from the oven and allow the chicken to rest for 5 minutes. Carefully remove the toothpicks or twine.
- With a sharp knife, slice each rolled chicken breast into medallions, showcasing the vibrant, layered filling inside.


 for more details and tips! Cooling your sauce is key before storing it. If you skip this step, you risk spoilage. Let your sauce cool to room temperature for about 30 minutes. This helps keep bacteria away. For storage, use airtight containers. Glass jars or plastic containers work well. Fill them, leaving some space at the top. This room allows for expansion during freezing. You can keep your tomato sauce in the fridge for about one week. After that, it may lose flavor and freshness. Always check for signs of spoilage. If you see mold or notice off smells, toss it out. Safety first! Freezing is a great option for long-term storage. You can pour your cooled sauce into freezer bags or containers. Make sure to label them with the date. This keeps your freezer organized. Aim to use your sauce within six months for the best taste. After this time, it may lose flavor. When ready to use, thaw it overnight in the fridge or heat it directly from the freezer on low heat. For homestyle canned tomato sauce, I recommend using Roma tomatoes. They have fewer seeds and thicker flesh, which gives you a rich sauce. Heirloom tomatoes are also great. They offer unique flavors, but they can be juicier. Choose what you like best! Yes, you can use canned tomatoes. They are convenient and save time. Canned tomatoes are often picked at peak ripeness, giving you good flavor. However, they may contain added salt or preservatives. This can change the taste of your sauce. Always check the label before using! If your sauce is too thin, there are easy ways to fix it. First, let it simmer longer. This allows excess water to evaporate. You can also add tomato paste. It thickens the sauce and adds more flavor. Another option is to use a blender for a smoother texture. Try these methods to get the right thickness! In this blog post, I shared how to make homestyle canned tomato sauce. We covered key ingredients like ripe tomatoes, onion, and olive oil. I provided step-by-step instructions for preparing, sautéing, and simmering. You learned tips for perfecting the sauce and several tasty variations. Finally, I gave guidelines for storage and answered common questions. Making your sauce allows for creativity and customization. Enjoy the process and the flavors you create!](https://fastmealmate.com/wp-content/uploads/2025/07/d3d80814-eb56-4e2c-a9cc-6b13653587fc-768x768.webp)
 to guide you through each step. - Preheat your oven to 375°F (190°C). - Rinse and prepare the quinoa and vegetables. To start, turn on your oven and set it to 375°F (190°C). This step ensures your oven is hot and ready when it’s time to bake. While it heats, take one cup of quinoa and rinse it under cool water. This helps remove any bitterness. Next, chop your zucchinis and bell pepper. Dice the zucchini into small cubes and chop the bell pepper into bite-sized pieces. Don’t forget to finely dice one small onion and mince three cloves of garlic. - Sauté onion and garlic in olive oil until translucent. - Add zucchini and bell pepper, cooking until softened. Next, grab a medium saucepan. Add one tablespoon of olive oil and heat it over medium. Once the oil is warm, toss in your diced onion and minced garlic. Stir them for about 3-4 minutes. You want the onion to turn translucent and smell great. After that, add the diced zucchini and chopped bell pepper. Cook these veggies for around 5 minutes, stirring often. They should soften but still have a little crunch. - Mix in quinoa, cherry tomatoes, broth, and seasonings. - Transfer to a casserole dish and bake for 20-25 minutes. Now comes the fun part! Mix in your rinsed quinoa, one cup of halved cherry tomatoes, and two cups of vegetable broth into the pan. Add one teaspoon of dried oregano, one teaspoon of dried basil, and sprinkle salt and pepper to taste. Stir everything well to combine. Bring this mix to a gentle boil. Once it bubbles, reduce the heat to low, cover the pan, and let it simmer for 15 minutes. This allows the quinoa to absorb the broth. Once done, transfer the mixture into a lightly greased 9x13 inch casserole dish. If you love cheese, sprinkle one cup of shredded mozzarella on top. Place the dish in your preheated oven and bake for 20-25 minutes. You’ll know it’s ready when it bubbles and the cheese is golden brown. To make fluffy quinoa, rinse it well before cooking. This removes the bitter coating called saponin. Use two cups of vegetable broth for one cup of quinoa. Bring it to a boil, then lower the heat and cover. Let it simmer for 15 minutes. After cooking, let it rest for five minutes before fluffing with a fork. This will keep it light and airy. For the vegetables, sauté onion and garlic first in olive oil. Cook them until they are soft and fragrant. Then add zucchini and bell pepper. Stir them for about five minutes until they soften. This builds a great flavor base for your casserole. To elevate the dish, try adding a pinch of red pepper flakes for heat. Fresh herbs like thyme or parsley can add brightness. You can also swap out the dried oregano and basil for fresh herbs. Fresh herbs bring a stronger flavor. If you want to change ingredients, use brown rice instead of quinoa. You can also add cooked beans for a protein boost. For a creamier texture, mix in some ricotta cheese or yogurt before baking. Pair the casserole with a light side salad or some crusty bread. A fresh garden salad with lemon vinaigrette works well. It adds a nice contrast to the warm casserole. For gatherings, serve the casserole directly from the dish. Garnish with fresh basil leaves to make it look inviting. You can also sprinkle some extra cheese on top just before serving for a melty touch. {{image_4}} You can easily change the vegetables in this casserole. Try using bell peppers, spinach, or even eggplant. These swaps keep the dish vibrant and fresh throughout the summer. You can also mix in seasonal veggies like corn or cherry tomatoes for a burst of flavor. If you need a quinoa substitute, consider using brown rice or farro. These grains add a nice texture and flavor. Other options include couscous or even cauliflower rice for a low-carb choice. To make this casserole vegan, simply skip the cheese or use a plant-based cheese. You'll still get a creamy texture from the cooked veggies and broth. For a gluten-free option, use certified gluten-free quinoa. This way, everyone can enjoy the dish. If you're looking to cut calories, reduce the olive oil or skip the cheese. You can also use less quinoa and bulk up with more veggies. This keeps the dish light, tasty, and full of nutrients. Each of these variations allows you to enjoy this Summer Zucchini Quinoa Casserole in your own way. For the full recipe, check out the detailed instructions above. To keep your summer zucchini quinoa casserole fresh, first let it cool. Once cool, store it in an airtight container. You can refrigerate it for up to five days. If you want to save it for later, freeze it. Use a freezer-safe container or heavy-duty freezer bags. This way, it can last for up to three months. Remember to label the container with the date. This helps you track how long it has been stored. When you want to enjoy the casserole again, reheating is easy. For the best texture, use an oven. Preheat the oven to 350°F (175°C). Place the casserole in an oven-safe dish and cover it with foil. Heat for about 20 minutes or until warm. If you're in a hurry, you can use the microwave. Place a single serving in a microwave-safe dish. Heat for 1-2 minutes, checking every 30 seconds. This will keep the flavors and texture intact. Enjoy your delicious meal! Can I prepare the Summer Zucchini Quinoa Casserole in advance? Yes, you can prepare it ahead of time. Make the casserole, then cover and refrigerate it. When you're ready to eat, just bake it straight from the fridge. You may need to add a few more minutes to the cooking time. How to customize the recipe to suit my taste preferences? Feel free to swap out the veggies. For instance, you can use spinach, carrots, or even corn. You can also change the cheese or add some cooked chicken for extra protein. What are the best herbs to use for added flavor? Fresh herbs like basil and thyme work great. You can also try parsley or cilantro. These herbs add a fresh taste and brighten up your dish. Is this recipe suitable for a low-carb diet? This recipe is not low-carb due to the quinoa. Quinoa has more carbs than other grains but is also high in protein. If you want a lower carb option, you can use cauliflower rice instead of quinoa. What are the main nutritional benefits of zucchini and quinoa? Zucchini is low in calories and high in vitamins A and C. It also has a lot of water, which keeps you hydrated. Quinoa is a complete protein, meaning it has all nine essential amino acids. It’s also high in fiber, which is good for digestion. What should I do if my casserole is too watery? If your casserole is watery, try draining some liquid before baking. You can also bake it longer to help it thicken up. How can I prevent the quinoa from sticking together? To prevent sticking, rinse the quinoa well before cooking. This removes excess starch. Also, fluff the quinoa with a fork after it cooks to keep it separate. For the full recipe, check out the details above! You learned how to make a tasty Summer Zucchini Quinoa Casserole. We covered the ingredients, simple steps, and tips for perfect results. You can adjust the recipe to fit your taste and needs. Explore flavor swaps and storage tips to keep it fresh. With this dish, enjoy a healthy meal that is easy to make. I hope you try it and enjoy every bite!](https://fastmealmate.com/wp-content/uploads/2025/07/552d1654-693f-4b1b-8ee9-d91b85ff9950-768x768.webp)


![To make a classic Italian zucchini pasta casserole, you will need the following ingredients: - 3 medium zucchinis, sliced into thin, even rounds - 2 cups cooked pasta (choose your favorite like penne or fusilli) - 1 cup marinara sauce (preferably homemade or high-quality store-bought) - 1 cup creamy ricotta cheese - 1 cup shredded mozzarella cheese, plus extra for topping - 1/2 cup grated Parmesan cheese - 1 large egg, lightly beaten - 2 cloves garlic, minced - 1 teaspoon dried oregano - 1 teaspoon dried basil - Sea salt and freshly cracked black pepper, to taste - Olive oil, for drizzling and greasing - Fresh basil leaves, for garnish Each ingredient plays a key role in building flavor and texture. The zucchini adds a fresh crunch, while the pasta provides a hearty base. The cheeses bring creaminess and richness. Marinara sauce ties everything together with its robust flavor. When I make this dish, I focus on using fresh ingredients. It makes a big difference. Quality marinara or homemade sauce enhances the taste. I also love to mix different cheeses for added depth. You can switch up the cheeses based on your preference. Using good olive oil is essential for greasing the dish and drizzling on top. It adds a lovely finish. As for herbs, oregano and basil deliver classic Italian flavor. Feel free to personalize this recipe. Adjust the seasonings to suit your taste. This dish is forgiving, making it easy to put your spin on it. For the full recipe, check out the complete instructions. 1. Preheating the Oven and Sautéing Zucchini - First, set your oven to 375°F (190°C). This temperature works well for baking. - Next, grab a skillet and drizzle some olive oil into it. Heat it over medium heat. - Add the sliced zucchinis and minced garlic to the skillet. Sauté them for about 5-7 minutes. - Keep stirring until the zucchinis become soft and slightly golden. - Season with sea salt, black pepper, oregano, and basil. This adds a punch of flavor. - Once done, remove the skillet from the heat and let it cool for a few moments. 2. Mixing Ingredients for the Casserole - While the zucchini cools, take a large mixing bowl and combine the cooked pasta, marinara sauce, ricotta cheese, and the lightly beaten egg. - Add half of the mozzarella and half of the Parmesan cheese to the bowl. - Stir everything together until well mixed. This will create a creamy base. - Now, gently fold the sautéed zucchini into the pasta mixture. Make sure it blends without mashing the veggies. 1. Assembling the Casserole - Grease a 9x13 inch baking dish with olive oil. This keeps the casserole from sticking. - Pour the pasta and zucchini mixture into the greased dish. Spread it out evenly with a spatula. - To finish, sprinkle the remaining mozzarella and Parmesan on top. This creates a cheesy crust. 2. Baking and Best Practices - Cover the dish tightly with aluminum foil and place it in the preheated oven. - Bake for 20 minutes. This helps all the flavors mix well. - After 20 minutes, carefully take off the foil. Bake for another 10-15 minutes. Watch for the cheese to melt and turn golden brown. - Once it’s done, remove the casserole from the oven. Let it cool for a few minutes before serving. - For a lovely touch, garnish with fresh basil leaves. This adds color and flavor to your dish. For the complete recipe, refer to [Full Recipe]. - Seasoning Suggestions: I love using fresh herbs. Basil and oregano add a lovely taste. Don’t forget to season with sea salt and black pepper. These simple touches make a big difference. Consider adding a pinch of red pepper flakes for a bit of heat. - Achieving the Perfect Cheese Crust: To get that golden crust, use a mix of mozzarella and Parmesan on top. When you bake the casserole, keep it covered for the first part of cooking. This helps the cheese melt nicely. Uncover it towards the end to allow browning. - Sautéing Tips: When sautéing zucchini, cut it into thin, even rounds. This ensures even cooking. Don’t overcrowd the pan; this can lead to steaming instead of browning. Give them enough space to caramelize. - Alternative Pasta Cooking Methods: You can use different pasta shapes, like penne or fusilli. You don’t need to cook it all the way. Make it al dente, as it will cook more in the oven. This keeps the pasta from getting mushy in the casserole. Make sure to check out the Full Recipe for all the steps and details! {{image_4}} Different Cheese Options Cheese makes this dish rich and creamy. You can swap ricotta for cottage cheese if you like. For a sharper taste, use aged provolone or gouda. If you want a bit of tang, try feta cheese. Each cheese brings its unique flavor to the casserole. Meat Additions and Alternatives For meat lovers, ground beef or turkey can add protein. Cook the meat first and mix it with the pasta. If you prefer a lighter option, add cooked chicken or sausage. You can also use plant-based meats for a tasty, hearty dish. Gluten-Free Options To make this casserole gluten-free, choose gluten-free pasta. Many brands offer great options that hold up well in baking. Just check the package for cooking times to ensure perfect texture. Vegan Adaptations For a vegan version, swap all cheeses for cashew cream or tofu ricotta. You can also use a flax egg instead of the beaten egg for binding. Use your favorite marinara sauce that is dairy-free, and you’ll have a delicious vegan casserole. Experimenting with these swaps and modifications can make the Classic Italian Zucchini Pasta Casserole fit any diet or taste. For the full recipe, check out the details above. After enjoying your Classic Italian Zucchini Pasta Casserole, let’s talk storage. First, cool the casserole completely. This helps prevent condensation, which can make it soggy. Once cool, place leftovers in an airtight container. Store them in the fridge for up to three days. If you want to save it for longer, freezing works too. Cut the casserole into portions. Wrap each slice tightly in plastic wrap, then place them in a freezer-safe bag. This way, you can enjoy it for up to three months. When ready to enjoy your casserole again, reheating is key. The best method is using an oven. Preheat it to 350°F (175°C). Place the casserole in a baking dish and cover it with foil. Heat for 20-25 minutes. This helps keep the texture nice and creamy. If you’re in a hurry, a microwave works too. Use a microwave-safe plate and cover it with a damp paper towel. Heat in short bursts, stirring in between, until hot. This method may not keep the texture as good as the oven. For the best flavor and texture, always let it cool slightly before serving. Enjoy! Can I use other vegetables? Yes, you can use other veggies. Try bell peppers, spinach, or mushrooms. Just chop them small so they cook well. Mixing different vegetables adds flavor and color to your dish. How to make it ahead of time? You can make this casserole a day ahead. Just prepare it like normal, but do not bake it. Cover it and store it in the fridge. When ready, bake it as instructed, adding a few extra minutes if needed. What types of pasta work best? I love using penne or fusilli for this dish. Both types hold sauce well and stay firm while baking. You can also use gluten-free pasta if you prefer. How long can it be stored in the fridge? You can keep leftovers in the fridge for about three days. Make sure to cover it well. To reheat, just warm it in the oven or microwave until hot. Recommended Side Dishes Serve this casserole with a fresh salad or garlic bread. A simple mixed greens salad adds a crisp touch. Garlic bread brings a nice crunch and flavor. Pairing Wine with Casserole A light red wine like Chianti pairs well with this dish. It balances the flavors of the zucchini and cheese. If you prefer white, try a crisp Pinot Grigio. How to Garnish and Serve Garnish with fresh basil leaves for a pop of color. You can also sprinkle extra Parmesan on top before serving. This adds flavor and looks great on the table. For the full recipe, check the details above. Enjoy your cooking! In this blog post, we explored a delicious zucchini pasta casserole. We covered ingredients like zucchini, pasta, marinara, and various cheeses. You learned step-by-step instructions for preparation and baking. We included helpful tips for flavor and texture enhancement. You also discovered variations to suit different diets and preferences. In closing, this casserole is versatile and easy to make. Enjoy the cooking process and share it with loved ones.](https://fastmealmate.com/wp-content/uploads/2025/07/1e9eddde-dee0-4a9c-92bd-9b0350c13af8-768x768.webp)