Festive Christmas Salad Vibrant and Flavorful Meal

Looking to impress your guests this holiday season? My Festive Christmas Salad is just the dish you need! Packed with vibrant ingredients, this salad is both colorful and flavorful. It’s perfect for any holiday table and easy to make. In this post, I’ll guide you through every step, from prepping to seasoning. Let’s create a joyful and tasty salad that everyone will love!
Why I Love This Recipe
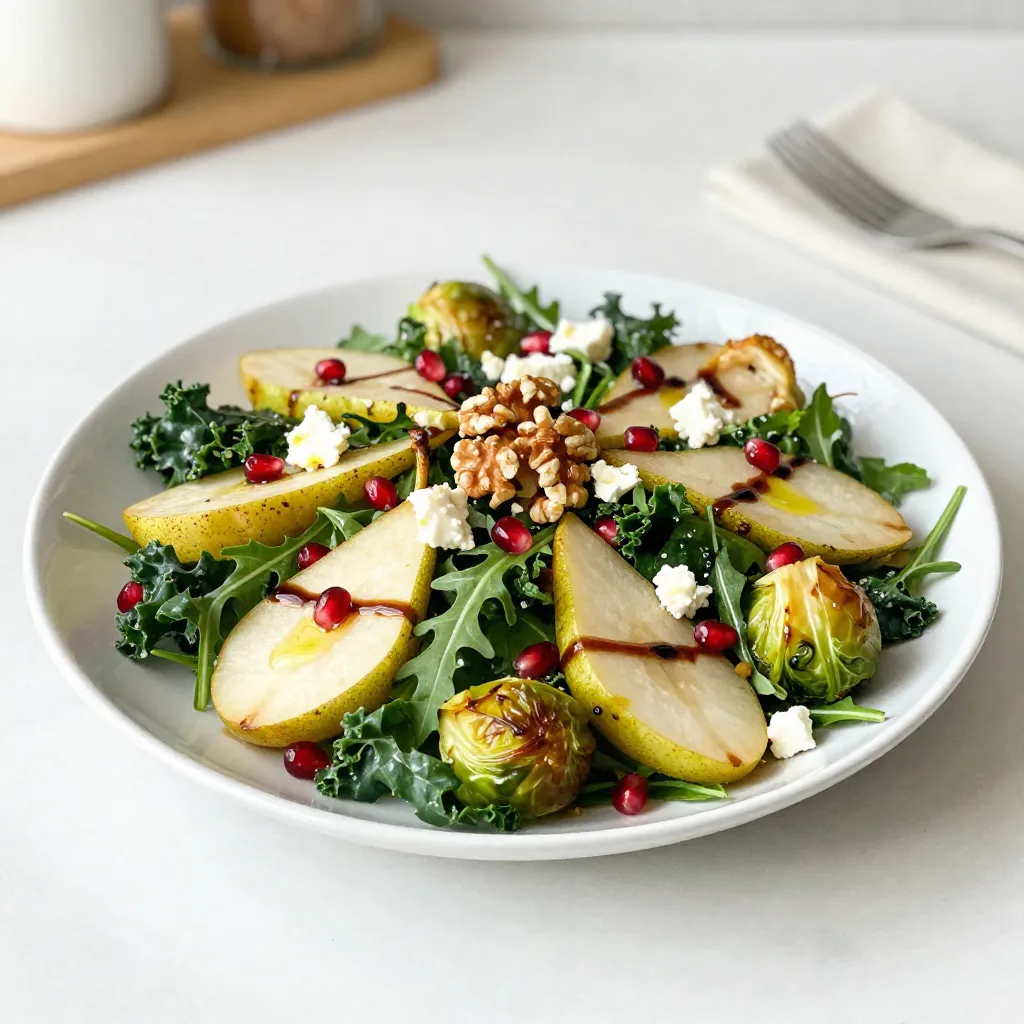
- Fresh and Festive: This salad combines vibrant colors and flavors that embody the spirit of the holiday season, making it a delightful addition to any festive table.
- Nutritious Ingredients: With mixed greens, Brussels sprouts, and fresh fruits, this salad is packed with nutrients, ensuring that you enjoy a healthy dish amidst holiday indulgence.
- Textural Contrast: The combination of crunchy walnuts, juicy pears, and creamy feta creates a wonderful contrast that enhances every bite, making it irresistibly satisfying.
- Easy to Prepare: This recipe is quick to assemble, allowing you to spend less time in the kitchen and more time enjoying the company of family and friends during the holidays.
Ingredients
List of Ingredients
– 4 cups mixed greens (arugula, baby spinach, and kale)
– 1 cup pomegranate seeds
– 1 cup roasted Brussels sprouts, halved
– 1 cup diced pear
– ½ cup crumbled feta cheese
– ¼ cup candied walnuts
– 2 tablespoons olive oil
– 1 tablespoon balsamic vinegar
– Salt and black pepper to taste
Description of Key Ingredients
– Mixed Greens: This blend adds a fresh, crisp texture. Arugula offers a peppery bite, spinach is mild, and kale adds a hearty feel.
– Pomegranate Seeds: These jewel-like seeds provide a tart sweetness and a colorful pop. They brighten the salad with flavor and look.
– Brussels Sprouts: Roasting brings out their natural sweetness. They add a warm, earthy taste to the salad.
– Diced Pear: Juicy and sweet, pears give a soft contrast to the crispy greens and nuts.
– Feta Cheese: This creamy cheese adds a tangy flavor. It pairs well with the sweetness of the fruits.
– Candied Walnuts: These nuts add crunch and sweetness. They enhance the overall taste and texture of the salad.
– Olive Oil: A good quality oil adds richness and helps the dressing blend well.
– Balsamic Vinegar: The aged vinegar adds depth and a slight tang to the dressing.
Equipment Needed
– Baking sheet for roasting sprouts
– Mixing bowl for tossing ingredients
– Salad spinner or towel for drying greens
– Large salad bowl for serving
– Small bowl for mixing dressing
– Salad tongs for tossing the salad
– Knife and cutting board for chopping fruits and veggies

Step-by-Step Instructions
Prepping the Brussels Sprouts
To start, we need to roast our Brussels sprouts. First, preheat your oven to 400°F (200°C). In a bowl, toss the halved Brussels sprouts with olive oil, salt, and black pepper until they are all coated. Spread them on a baking sheet in a single layer. Roast them for 20 to 25 minutes. Look for them to be tender and slightly crispy on the edges. Once done, take them out and let them cool a bit. This step gives the sprouts a rich, caramelized flavor.
Preparing the Mixed Greens
While the Brussels sprouts roast, let’s prepare our mixed greens. Take 4 cups of your greens and rinse them under cold water. This step removes any dirt. After rinsing, use a salad spinner or a clean towel to dry them. Once dry, place the greens into a large salad bowl. This blend of arugula, baby spinach, and kale will be fresh and vibrant for our salad.
Assembling the Salad
Now, it’s time to assemble our festive salad. Start by adding the diced pears and pomegranate seeds to the bowl with the mixed greens. These ingredients add a sweet and tangy burst of flavor. Next, add the slightly cooled roasted Brussels sprouts. Their warm, earthy taste will mix perfectly with the fresh fruits.
Next, sprinkle the crumbled feta cheese on top for a creamy touch. The crunchy, sweet candied walnuts will add a nice texture.
For the dressing, whisk together olive oil and balsamic vinegar in a small bowl. Drizzle this mixture over the salad. Make sure to coat all the ingredients evenly.
Finally, season your salad with salt and freshly ground black pepper. Use salad tongs to gently toss everything together. This step keeps the greens and fruits whole while mixing the flavors.
Your festive Christmas salad is now ready to serve!
Tips & Tricks
How to Roast Brussels Sprouts Perfectly
To roast Brussels sprouts, start by preheating your oven to 400°F (200°C). This high heat gives them a nice crunch. Cut the sprouts in half and toss them with olive oil, salt, and pepper. Make sure every half is well-coated. Spread them out on a baking sheet in a single layer. This helps them cook evenly. Roast for about 20 to 25 minutes. Look for a golden-brown color and crispy edges. Let them cool slightly before adding to your salad.
Best Storage Practices for the Salad
If you have leftovers, store the salad in an airtight container. Keep the dressing separate. This keeps the greens fresh and crisp. You can store the salad in the fridge for up to three days. Make sure to eat it soon for the best taste. If you need to store roasted Brussels sprouts, put them in a container too. They will last for about four days.
Serving Suggestions
Serve the festive salad on a large platter for a stunning display. For a fun twist, add extra pomegranate seeds and candied walnuts on top. You can also garnish with fresh herbs like rosemary or thyme. This adds a lovely aroma and extra color. Pair the salad with holiday dishes like roasted turkey or ham for a complete meal. Enjoy this vibrant dish as a centerpiece on your holiday table!
Pro Tips
- Fresh Greens Matter: Always use the freshest mixed greens possible for the best flavor and texture in your salad. Look for vibrant colors and crisp leaves.
- Roast for Flavor: Ensure your Brussels sprouts are evenly coated with oil and seasoning before roasting for maximum caramelization and flavor.
- Layering Ingredients: When adding ingredients to your salad, layer them instead of mixing them all at once. This allows each flavor to shine through and enhances the visual appeal.
- Make Ahead: You can prepare the Brussels sprouts and dressing in advance. Just toss the salad together right before serving to keep the greens fresh and crisp.
Variations
Adding Seasonal Fruits
You can enhance this salad with seasonal fruits. Try adding slices of juicy orange or tangy grapefruit. These fruits add bright flavors and a fresh twist. You might also enjoy adding dried cranberries for extra sweetness. Their chewy texture contrasts well with the crunchy nuts and greens.
Nut-Free Alternatives
If you have nut allergies, you can easily swap the candied walnuts. Try using pumpkin seeds or sunflower seeds instead. They still add a nice crunch to your salad. You can also use crispy chickpeas for a protein boost while keeping it nut-free.
Vegan Modifications
To make this salad vegan, simply remove the feta cheese. You can replace it with avocado for creaminess. A sprinkle of nutritional yeast can add a cheesy flavor. For the dressing, ensure your balsamic vinegar is vegan-friendly. This way, the salad remains festive and delicious without any animal products.
Storage Info
How to Store Leftovers
To keep your festive Christmas salad fresh, place leftovers in an airtight container. Make sure to separate the dressing if you mixed it in. This way, the greens stay crisp.
Recommended Refrigeration Time
I recommend eating leftovers within 2 days. After that, the greens may wilt. The flavors will fade too. Ensure you check for any signs of spoilage, like odd smells or discoloration.
Freezing the Salad Components
It’s best not to freeze the entire salad. Freezing can change the texture of the greens and fruits. However, you can freeze the roasted Brussels sprouts and candied walnuts. Just place them in freezer bags. They will stay good for up to 3 months. When ready to use, thaw them overnight in the fridge.
FAQs
Can I make the salad ahead of time?
Yes, you can make parts of the salad ahead. Prepare the Brussels sprouts and store them in the fridge. Mix the greens, pears, and pomegranate seeds in a bowl. Keep them in a separate container. Combine everything just before serving. This keeps the greens crisp and fresh.
What are the best dressings for a Christmas salad?
A simple olive oil and balsamic vinegar mix works great. You can also try a honey mustard dressing for sweetness. Lemon vinaigrette adds a nice zing too. Aim for dressings that balance the salad’s sweet and savory flavors.
How can I make this salad more filling?
To bulk up the salad, add protein-rich ingredients. Grilled chicken or chickpeas are excellent choices. You can also add quinoa or farro for extra texture. These additions will make your salad a complete meal.
In this blog post, we explored the ingredients and steps for making a tasty Brussels sprouts salad. You learned about key ingredients and how to prep them. We shared tips for perfect roasting and storage. We also talked about fun variations to mix it up.
This salad is versatile, fresh, and easy to make. Try it out and enjo

Festive Christmas Salad
Ingredients
- 4 cups mixed greens (arugula, baby spinach, and kale)
- 1 cup pomegranate seeds
- 1 cup roasted Brussels sprouts, halved
- 1 cup diced pear
- 0.5 cup crumbled feta cheese
- 0.25 cup candied walnuts
- 2 tablespoons olive oil
- 1 tablespoon balsamic vinegar
- to taste salt
- to taste black pepper
Instructions
- Preheat your oven to 400°F (200°C). Toss the halved Brussels sprouts with olive oil, salt, and black pepper. Spread on a baking sheet and roast for 20-25 minutes until tender and caramelized. Set aside to cool.
- Rinse the mixed greens under cold water and dry them. Place the dried greens in a large salad bowl.
- Add the diced pears and pomegranate seeds to the bowl of mixed greens.
- Once cooled, add the roasted Brussels sprouts to the salad bowl.
- Scatter the crumbled feta cheese and candied walnuts on top of the salad.
- Whisk together olive oil and balsamic vinegar in a small bowl. Drizzle over the salad.
- Season with salt and black pepper to taste. Toss gently to combine all ingredients.


![To make these tasty strawberry cream cheese rolls, gather these simple ingredients: - 1 cup fresh strawberries, diced - 1 tablespoon granulated sugar (optional; for sweetness) - 8 oz cream cheese, softened to room temperature - 1/4 cup powdered sugar - 1 teaspoon pure vanilla extract - 1 package (about 8 oz) crescent roll dough - 1 egg, beaten (for egg wash) - 1 tablespoon sesame seeds (for topping, optional) You can change some ingredients if needed. Here are some easy swaps: - Strawberries: Use any berry like blueberries or raspberries. - Cream Cheese: Neufchâtel cheese is a great lower-fat choice. - Sugar: Try honey or maple syrup for a natural sweetener. - Crescent Roll Dough: Use puff pastry if you want a flakier roll. - Egg Wash: Brush with milk or a non-dairy milk for a vegan option. Having the right tools makes the process easier. Here’s what you need: - Baking sheet - Parchment paper - Mixing bowls - Electric mixer or whisk - Rolling pin (optional) - Knife for cutting strawberries - Measuring cups and spoons Gathering these items will help you whip up these rolls with ease. Enjoy the process! First, we need to get the oven ready. Set your oven to 375°F (190°C). This step is key. Preheating helps the rolls bake evenly. While the oven heats, you can prep the other ingredients. Next, let’s work on the strawberries. Dice 1 cup of fresh strawberries. Place them in a bowl. If you want extra sweetness, add 1 tablespoon of granulated sugar. Gently stir them together. Let the strawberries sit for about 10 minutes. This process, called macerating, helps them soften and release their juices. Now, it’s time to make the filling. In a separate bowl, take 8 oz of softened cream cheese. Add 1/4 cup of powdered sugar and 1 teaspoon of pure vanilla extract. Beat these together until the mixture is smooth and creamy. Make sure there are no lumps. This filling is rich and tasty, perfect for our rolls. Let’s assemble our rolls. Unroll 1 package of crescent roll dough on a clean surface. Separate the dough into individual triangles. For each triangle, spread a generous spoonful of the cream cheese mixture on the wide end. Add a few pieces of the macerated strawberries on top. Roll the dough from the wider side to the tip, tucking in the filling as you go. Press the tip down gently to seal the roll. Now, we prepare for baking. Place the rolls on a parchment-lined baking sheet. To make them shiny and golden, brush the tops with a beaten egg. If you like, sprinkle sesame seeds on top for extra crunch. Now, put the baking sheet in your preheated oven. Bake the rolls for about 12-15 minutes. Look for a golden brown color. Once baked, take the rolls out of the oven. Let them cool for a few minutes on the baking sheet. The filling will be hot, so be careful! For a lovely presentation, serve the rolls on a nice platter. You can dust them with powdered sugar and add whole strawberries on the side for a fresh touch. Enjoy your sweet treat! For the full recipe, check out the details above. To make the best strawberry cream cheese rolls, focus on the texture. Always use softened cream cheese. This helps it blend well with the sugar and vanilla. If your cream cheese is too cold, it will be lumpy. For the strawberries, let them sit with sugar for about 10 minutes. This softens them and brings out their natural juice. When rolling the dough, avoid over-stretching. This keeps the rolls fluffy and light. Watch out for a few common mistakes. First, don’t skip the egg wash. This gives the rolls a lovely golden color. Second, be careful not to overfill. Too much filling can cause the rolls to burst open while baking. Lastly, always preheat your oven. This step is crucial for even baking. If you skip it, the rolls may not rise properly. Presentation matters, especially with these rolls. Serve them on a nice platter, dusted with powdered sugar. This makes them look extra special. You can also add whole strawberries around the rolls. This adds color and freshness to your dish. For a finishing touch, consider drizzling a little melted chocolate on top. These simple steps make your rolls shine on any table. For the complete recipe, check the Full Recipe section. Enjoy making your own delicious strawberry cream cheese rolls! {{image_4}} You can switch up the fruit in these rolls. Instead of strawberries, use raspberries, blueberries, or peaches. Each fruit brings a unique taste. Raspberries add a tart flavor, while blueberries offer a sweet touch. To use other fruits, chop them into small pieces. Mix them with sugar, just like you did with the strawberries. Let them sit to release their juices. This step helps enhance the flavor. If you're gluten-free, don't worry! You can still enjoy these rolls. Look for gluten-free crescent roll dough in stores. Many brands make tasty options. Just follow the same steps as the regular recipe. The end result will still be fluffy and delicious. Always check the ingredients to ensure they meet your needs. Feel free to add more flavors to the cream cheese filling. You can mix in lemon zest for a fresh twist. Alternatively, consider adding a dash of cinnamon for warmth. For a chocolatey treat, fold in some mini chocolate chips. These add-ins will create a fun twist on the classic rolls. You can also use flavored cream cheese, like strawberry or vanilla. This can save time while adding even more flavor. Check out the Full Recipe for these ideas and details! Store leftover strawberry cream cheese rolls in an airtight container. Keep them in the fridge for up to three days. If you want to keep them fresh for longer, consider wrapping each roll in plastic wrap before placing them in the container. This helps maintain their moisture and flavor. To reheat the rolls, preheat your oven to 350°F (175°C). Place the rolls on a baking sheet and cover them with foil. Heat for about 10-15 minutes, or until warm throughout. You can also use a microwave. Heat each roll for 15-20 seconds until warm. Just be careful not to overheat them, as this can make them tough. You can freeze these rolls for later enjoyment. Allow them to cool completely after baking. Then, wrap each roll tightly in plastic wrap, followed by aluminum foil. This helps prevent freezer burn. Store them in the freezer for up to two months. When you are ready to enjoy them, thaw them in the fridge overnight and reheat as described above. For the full recipe, check out the complete instructions above! You can prepare the rolls a day before. Follow the steps until the baking part. Once you assemble them, cover the rolls tightly with plastic wrap. Store them in the fridge overnight. When you're ready to bake, take them out and let them sit for about 20 minutes. Then, brush with egg wash and bake as usual. Yes, you can use frozen strawberries. Thaw them first and drain any excess juice. Dicing them will help them mix well with the cream cheese. The taste will still be great, but fresh strawberries do add a nice touch. These rolls pair well with a few items. Consider serving them with whipped cream or a scoop of vanilla ice cream. A light drizzle of chocolate sauce can elevate the flavor. Fresh mint leaves also add a nice touch and color. Check the color and texture of the rolls. They should be golden brown and puffed up. You can gently tap the top; it should sound hollow. If you're unsure, an instant-read thermometer can help. The internal temperature should reach 190°F (88°C) for a perfect bake. For the full recipe, refer to the [Full Recipe]. This blog post covered everything you need to make Strawberry Cream Cheese Rolls. We explored the ingredients, gave useful substitutions, and listed the best tools. Then, I provided simple steps for prepping, baking, and serving. I shared tips for great texture and ways to avoid common mistakes. In conclusion, enjoy these tasty rolls with your favorite flavors. They are fun to make and eat! Keep experimenting with variations and storage tips to make the most of your delicious treats. Happy baking!](https://fastmealmate.com/wp-content/uploads/2025/06/0240e1a4-5971-472f-af7e-a45e0386d654-768x768.webp)


