Easy Caramel Apple Bark Irresistible Fall Treat

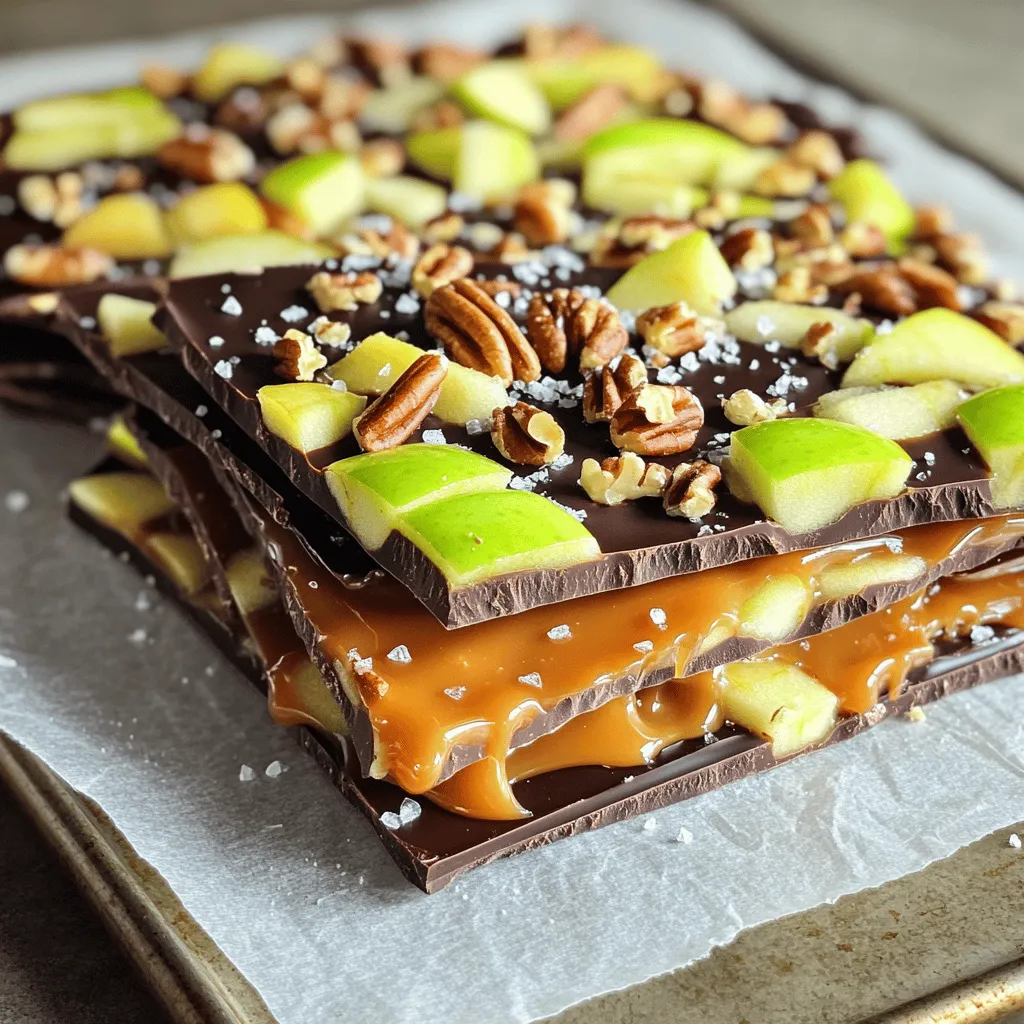
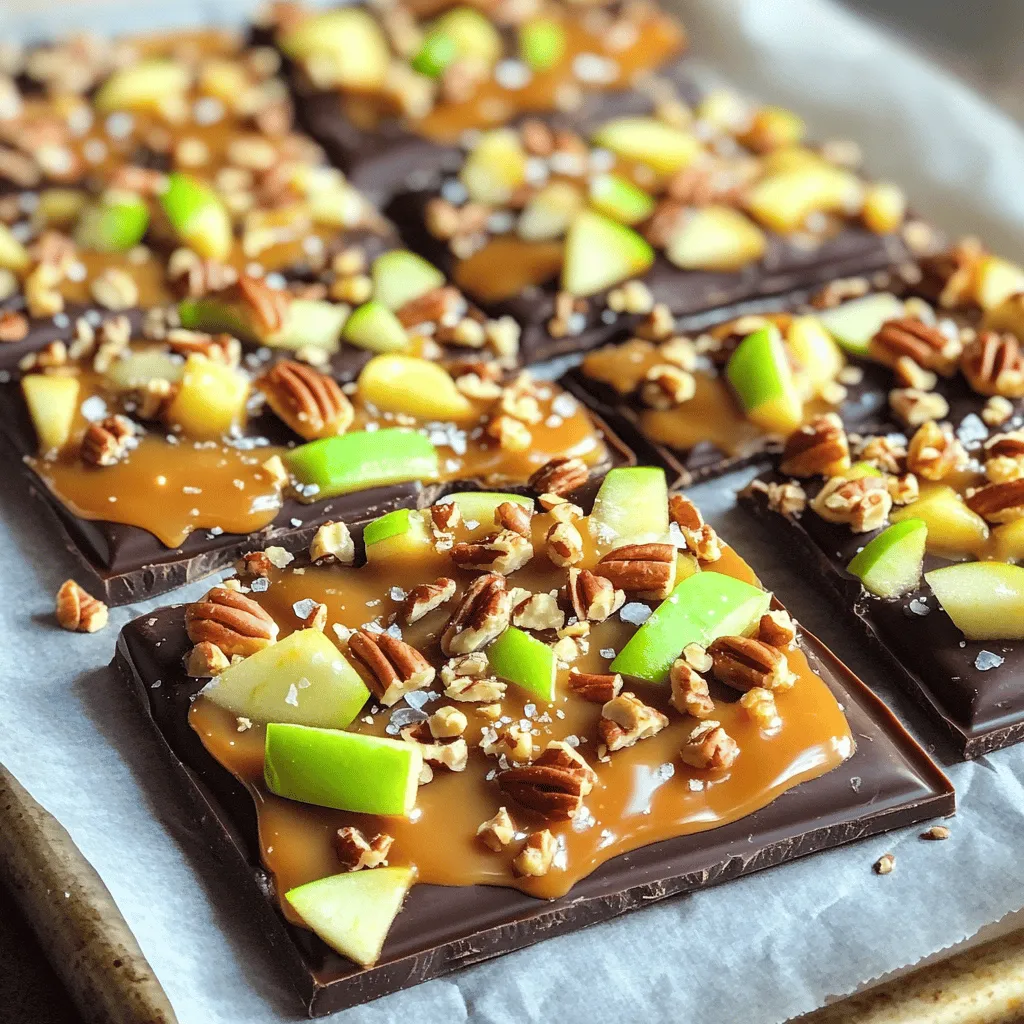
Are you ready to create a sweet fall treat? Easy Caramel Apple Bark combines rich chocolate and creamy caramel over crunchy apples. It’s simple to make and perfect for sharing. Whether you want a fun snack for the kids or a tasty dessert for a dinner party, this bark delivers. Let’s jump in and discover how to make this delicious treat that everyone will love!
Ingredients
List of Ingredients
– 2 cups dark chocolate chips
– 1 cup milk chocolate chips
– 1 cup caramel bits
– 2 medium apples, diced (Granny Smith or Honeycrisp work best)
– 1/4 cup chopped nuts (pecans or walnuts for crunch)
– A pinch of sea salt
Let’s break down these ingredients. Dark chocolate chips give a rich flavor. Milk chocolate chips add sweetness. Caramel bits melt easily for that gooey goodness. Apples bring a nice crunch and tartness. Nuts add texture and flavor. Sea salt enhances the sweet taste.
Recommended Alternatives
– For dairy-free, use vegan chocolate chips and caramels.
– If you have nut allergies, skip the nuts or use seeds like pumpkin seeds.
– You can use any apples you like, but tart ones work best.
Measuring Tips
– Use a dry measuring cup for chocolate and nuts.
– For caramel, a liquid measuring cup can help.
– Make sure to dice apples into small pieces for even spreading.
These ingredients create a tasty and fun treat. Each one plays a role in flavor and texture. You can personalize this bark based on your preferences or dietary needs.
Step-by-Step Instructions
Preparation Steps
– Preparing the baking sheet for easy cleanup: Start by lining a baking sheet with parchment paper. This helps the bark come off easily. Make sure to cover the whole sheet. This way, you avoid a sticky mess later. Set this prepared baking sheet aside.
– Melting chocolate and caramel properly: For the dark chocolate, use a microwave-safe bowl. Add the dark chocolate chips and heat in 30-second intervals. Stir after each time until smooth. Then, pour it onto your baking sheet and spread it evenly. For the caramel, use another bowl. Heat the caramel bits for 1-2 minutes, stirring until it is melted. Watch it closely so it doesn’t burn.
– Layering techniques for aesthetic appeal: After melting, drizzle the caramel over the dark chocolate. Then, melt the milk chocolate in the same way. Use a spoon to add dollops of milk chocolate on top of the caramel. You can swirl it for a fun design. Next, sprinkle the diced apples and chopped nuts over the layers. This adds crunch and color.
Setting the Bark
– Chilling times and temperatures: Once you finish layering, place the baking sheet in the fridge. Chill it for about 1-2 hours. This cooling time is key for the bark to set well.
– Checking for proper firmness: After chilling, check if the bark is firm. It should feel hard to the touch. If it is not set, leave it in the fridge for a bit longer. Once firm, it’s ready to break into pieces.
Tips & Tricks
Common Mistakes to Avoid
– Overheating chocolate or caramel: This is a common mistake. When melting chocolate or caramel, heat in short bursts. Stir often to help it melt evenly. If you overheat, it can burn. Burnt chocolate or caramel will not taste good. This ruins the bark.
– Uneven layer distribution: Make sure to spread each layer evenly. If one layer is too thick, it may not set well. You want every bite to have a bit of each flavor. Use a spatula to help with this.
Enhancing Flavor and Texture
– Additional toppings suggestions: You can add more to your bark. Consider using dried fruits like cranberries or cherries. They give a nice chew and sweetness. You might also try mini marshmallows for a fun twist.
– Alternative nut options and compatibility: If you want different nuts, try almonds or cashews. Both will add a nice crunch. Just chop them well so they mix in with the bark. Make sure to pick nuts that you enjoy. This makes the bark even better!

Variations
Seasonal Options
You can easily change the flavors of your caramel apple bark. In fall, add warm spices like cinnamon and nutmeg. These spices give a cozy taste perfect for the season. Just sprinkle them on the caramel layer before adding the apples. For summer, switch to fresh fruits like strawberries or peaches. Their bright flavors will make the bark feel light and refreshing.
Dietary Adjustments
If you want a vegan version, swap the chocolate and caramel. Use dairy-free chocolate chips and coconut cream caramel. These options taste great and fit a vegan diet. For those with nut allergies, skip the nuts or use seeds like pumpkin or sunflower. This keeps the bark safe for everyone while still adding crunch.
Storage Info
Best Practices for Storage
To keep your caramel apple bark fresh, store it in an airtight container. Use a container that fits the bark snugly to avoid breakage. Place parchment paper between layers if you have more than one piece. Keep it in a cool, dry place away from sunlight. The bark will stay fresh for about two weeks. After this time, it may start to lose its flavor and texture.
Freezing Instructions
If you want to store caramel apple bark for a longer time, freezing is a great option. First, let the bark cool completely. Then, wrap it tightly in plastic wrap. Place the wrapped bark in a freezer-safe container or bag. This prevents freezer burn and keeps it tasty. You can freeze the bark for up to three months.
To enjoy your frozen bark, simply remove it from the freezer. Let it thaw in the refrigerator for a few hours. If you prefer it warm, you can heat it in the microwave for a few seconds. Just be careful not to melt it. Enjoy your delicious treat any time you want!
FAQs
What types of apples are best for this recipe?
For this recipe, I suggest using Granny Smith or Honeycrisp apples. They provide a nice balance of sweet and tart flavors. Their crisp texture holds up well in the bark, making each bite satisfying.
How can I make my caramel apple bark more colorful?
To add color, you can use different types of apples. Try red apples like Fuji or Gala for a pop of brightness. You can also sprinkle colorful sprinkles or add dried fruits like cranberries for variety.
Can I use white chocolate instead of milk chocolate?
Yes, you can use white chocolate instead of milk chocolate. This will give your bark a sweeter taste and lighter color. Just melt it the same way as milk chocolate for a smooth finish.
How do I know when the bark is fully set?
The bark is fully set when it feels firm to the touch. After chilling for 1-2 hours, check for a solid texture. If it’s still soft, let it chill longer until it hardens completely.
Is there a way to make this dessert healthier?
To make this dessert healthier, you can use dark chocolate with a higher cocoa content. You might also consider reducing the amount of caramel or using a sugar-free version. Adding nuts boosts protein and fiber too!
This blog post covered everything you need to know about making caramel apple bark. We discussed essential ingredients, preparation steps, and tips for success. I shared common mistakes to avoid and ideas for tasty variations. You also learned the best ways to store your bark and answered common questions.
In the end, enjoy being creative with this fun dessert. With simple swaps and options, you can make it fit your tastes and needs. So, get baking and share your delicious results!


![- 1 cup pumpkin puree - 1 cup water - 1 cup brown sugar - 1 tablespoon pure vanilla extract - 1 teaspoon ground cinnamon - 1 teaspoon ground nutmeg - 1/2 teaspoon ground ginger - 1/4 teaspoon ground cloves Substitutes for pumpkin puree If you cannot find pumpkin puree, you can use butternut squash puree. This option works well and gives a similar flavor. You can roast and blend the squash until smooth for best results. The importance of using pure vanilla extract Using pure vanilla extract is key for the best flavor. I avoid imitation vanilla as it lacks the depth you need for this syrup. The pure extract enhances the sweetness and adds warmth to the spice mix. How to adjust serving sizes You can easily scale the recipe up or down. If you want more syrup, just double the ingredients. For a smaller batch, cut everything in half. Alternative ways to use pumpkin spice syrup This syrup is not just for coffee. Drizzle it on pancakes and waffles or mix it into yogurt. You can even stir it into oatmeal or smoothies for a fall twist. - Blending pumpkin puree and water Start by adding 1 cup of pumpkin puree and 1 cup of water to a medium saucepan. Use a whisk to blend these together. Make sure there are no lumps. A smooth mixture is essential for a nice syrup. - Heating the mixture Place the saucepan on medium heat. Keep a close eye on it as you heat. You want the mixture to reach a gentle simmer, not a boil. This helps develop the flavors without burning. - Adding brown sugar Once your mixture is simmering, gradually add 1 cup of brown sugar. Stir continuously until all the sugar dissolves. This will make the mixture glossy and sweet. - Stirring in spices After the sugar dissolves, add in 1 tablespoon of pure vanilla extract, 1 teaspoon of ground cinnamon, 1 teaspoon of ground nutmeg, 1/2 teaspoon of ground ginger, and 1/4 teaspoon of ground cloves. Stir well to mix the spices evenly into the syrup. - Simmering for flavor development Let the mixture simmer gently for 10-15 minutes. Stir it occasionally. You will notice the syrup starting to thicken. This thickening shows that the flavors are blending together nicely. - The thickening process Keep an eye on the syrup as it cooks. It should thicken slightly, which is a good sign that it is ready. The longer it simmers, the richer the flavor will be. - Straining the syrup Once cooked, remove the saucepan from heat. Let the syrup cool down to room temperature. After cooling, strain it through a fine-mesh sieve into a clean container. This step removes any solids, giving you a smooth syrup. - Storing the syrup properly Pour your finished syrup into an airtight bottle or jar. Store it in the refrigerator. It will stay fresh for up to two weeks. Now, you can use it in your favorite drinks and desserts! For the full recipe, check out the complete details. - Overheating the mixture: Heating too high can burn the sugar. Keep it to medium heat and watch closely. - Not stirring enough while cooking: Stirring helps mix flavors and prevents sticking. Always keep the spoon moving. - Ensuring the right thickness: To check thickness, dip a spoon and see if syrup coats it. It should feel sticky but not too thick. - Enhancing flavors with additional spices: You can add a pinch of allspice or cardamom for extra depth. Experiment to find your favorite mix. - Creative serving ideas: Drizzle syrup over pancakes, waffles, or even ice cream. It adds a nice touch to your treats. - Pairing suggestions with recipes: Use your syrup in lattes or hot chocolate. It’s also great in oatmeal or yogurt for a fall twist. For the full recipe, check out the details! {{image_4}} You can boost the taste of pumpkin spice syrup in fun ways. Try adding a vanilla bean for a rich flavor. Slice the bean open and scrape out the seeds. Mix these seeds into the syrup for a creamy touch. Another option is caramel. Drizzle in some caramel sauce for a sweet twist. This adds depth and a unique flavor to your syrup. You can even create a spiced pumpkin version. Mix in extra spices like allspice or cardamom for a new taste. These small changes can make a big difference. As the seasons change, so can your syrup. For the holidays, add flavors like peppermint or gingerbread. This gives your syrup a festive flair. You can also use different types of pumpkin. Try butternut squash or sweet potato for a unique twist. Each type brings its own flavor and sweetness, making your syrup special. Experiment with these variations to find your favorite. Pumpkin spice syrup is not just for drinks. You can use it in many recipes. Add it to pancakes or waffles for a sweet breakfast. It also works great in desserts like cakes and pies. Drizzle it on ice cream for a fall-inspired treat. You can even stir it into your coffee or tea for a warm drink. The options are endless! Check out the [Full Recipe] for more ideas. Pumpkin spice syrup lasts about two weeks in the refrigerator. Store it in an airtight container. For best taste, use it fresh. You can freeze the syrup to extend its life. It keeps well in ice cube trays. Just thaw before use. Use glass jars or plastic bottles for storage. Ensure they are airtight to keep the syrup fresh. Label your containers with the date you made the syrup. This helps you keep track of its freshness. Look for changes in color or smell. If it smells off or looks cloudy, it’s time to toss it. If you see mold, do not use it. Always taste a small amount before using. If it tastes strange, throw it away. Pumpkin spice syrup includes simple, tasty ingredients. Here are the main ones: - 1 cup pumpkin puree - 1 cup water - 1 cup brown sugar - 1 tablespoon pure vanilla extract - 1 teaspoon ground cinnamon - 1 teaspoon ground nutmeg - 1/2 teaspoon ground ginger - 1/4 teaspoon ground cloves You can change or add some ingredients too. For example, you can use maple syrup instead of brown sugar. This gives a unique flavor twist. You can use this syrup in many ways. Here are some fun ideas: - Drizzle it over pancakes or waffles. - Stir it into coffee or lattes. - Add it to smoothies for a fall flavor. - Mix it with oatmeal or yogurt. - Use it in baking for cookies or cakes. These ideas help you enjoy that yummy pumpkin spice taste in all your meals. Yes, you can make pumpkin spice syrup vegan easily. Just swap out a few things: - Use agave syrup or maple syrup instead of brown sugar. - Ensure your vanilla extract is alcohol-free. These changes keep the flavor while making it plant-based. You can find pumpkin spice syrup in many stores. Look in these places: - Local grocery stores often have it. - Check specialty coffee shops or cafes. - Online shops like Amazon or specialty food sites. When buying, read the label. Some brands add extra flavors or sugars. Homemade pumpkin spice syrup lasts about two weeks in the fridge. To store it well: - Keep it in an airtight jar or bottle. - Always use a clean spoon to scoop out syrup. If you have more, you can freeze it. Just pour it into ice cube trays. This way, you can use it later in drinks or desserts. Pumpkin spice syrup is simple to make and adds great flavor to many dishes. We covered key ingredients, steps for cooking, and tips for serving. You can easily switch ingredients and try different flavors. Remember to store your syrup well to keep it fresh. With this guide, you can create or enjoy homemade pumpkin spice syrup all season long. Explore all the ways to use it today!](https://fastmealmate.com/wp-content/uploads/2025/07/e167359e-7abc-4f0d-8f6c-a8401fb81292-768x768.webp)
