Dump and Go Crockpot Chicken Easy One-Pot Meal

If you’re tired of complex meals and want something simple, I have just the dish for you! This Dump and Go Crockpot Chicken is an easy one-pot meal, perfect for any night. With just a few ingredients and minimal effort, you’ll have a tasty dinner ready when you are. Ready to learn how to make this quick and satisfying meal? Let’s dive into the details!
Why I Love This Recipe
- Effortless Preparation: This recipe requires minimal effort, allowing you to set it and forget it while the crockpot does all the work.
- Flavorful Ingredients: The combination of spices and fresh vegetables creates a deliciously vibrant dish that’s bursting with flavor.
- Healthy and Nutritious: Packed with protein, fiber, and essential nutrients, this dish is a wholesome choice for any meal.
- Versatile Serving Options: This dish can be served in various ways, whether with rice, tortillas, or on its own, making it perfect for any occasion.
Ingredients
Main Ingredients
– 4 boneless, skinless chicken breasts
– 1 cup diced tomatoes (canned or fresh)
– 1 cup black beans, rinsed and drained
– 1 cup corn (frozen or canned)
– 1 bell pepper, chopped
– 1 small onion, finely diced
– 2 garlic cloves, minced
When making Dump and Go Crockpot Chicken, start with fresh chicken breasts. I love using boneless and skinless ones for easy shredding. Diced tomatoes add a juicy base. Whether you choose canned or fresh, both work well. Black beans are a great source of protein. Rinse and drain them to keep the dish light. Corn adds sweetness and texture. You can use frozen or canned corn; both are tasty.
Bell peppers bring color and crunch. Pick any color you like. A small onion and minced garlic boost flavor. Together, they create a rich taste that makes the dish special.
Spices and Seasoning
– 2 teaspoons ground cumin
– 1 teaspoon chili powder
– 1 teaspoon paprika
– Salt and freshly ground black pepper to taste
Spices are the heart of our recipe. Ground cumin gives warmth and depth. Chili powder adds a nice kick, while paprika brings vibrant color. Salt and freshly ground black pepper enhance all the flavors. Don’t be shy with seasoning; it makes a big difference.
Liquid Ingredients
– 1 cup low-sodium chicken broth
– Fresh cilantro, chopped (for garnish)
Liquid is key for a good crockpot dish. Low-sodium chicken broth keeps it savory without being too salty. Pour it over all the ingredients for even cooking. Fresh cilantro adds a burst of flavor at the end. It’s optional but highly recommended for that fresh touch.
This combination of ingredients makes for a simple, yet delicious meal that you can prepare with ease.

Step-by-Step Instructions
Preparation of Chicken
– Place chicken breasts in the crockpot.
– Ensure chicken is evenly spread in the bottom.
Start with the chicken. I like to use four boneless, skinless chicken breasts. This keeps the dish light and healthy. Make sure the chicken is flat in the pot. This helps it cook evenly.
Adding Vegetables and Spices
– Layer diced tomatoes, black beans, corn, bell pepper, onion, and garlic.
– Sprinkle ground cumin, chili powder, paprika, salt, and pepper.
Next, add the vegetables. I use one cup of diced tomatoes, one cup of black beans, and one cup of corn. You can use frozen or canned corn. Then, chop one bell pepper and a small onion. Don’t forget two minced garlic cloves. This mix makes the dish colorful and tasty.
Now, for the spices! I sprinkle two teaspoons of ground cumin, one teaspoon of chili powder, and one teaspoon of paprika over the mix. Add salt and pepper to taste. The spices boost the flavor.
Cooking Process
– Pour chicken broth over ingredients.
– Set crockpot to cook on low or high heat.
– Shred chicken 30 minutes before serving.
After that, pour one cup of low-sodium chicken broth over everything. This helps keep the chicken moist. You can set the crockpot on low for six to seven hours or high for three to four hours.
About thirty minutes before serving, shred the chicken with two forks. Stir the chicken into the broth and vegetables. This makes every bite delicious!
Tips & Tricks
Cooking Tips
To ensure your chicken is tender, always use boneless, skinless breasts. Place them in the crockpot and spread them evenly. This helps them cook well. It is crucial to fully submerge the chicken in broth. This keeps it juicy and flavorful. The broth should cover the chicken completely. This way, every bite will be moist and tasty.
Serving Tips
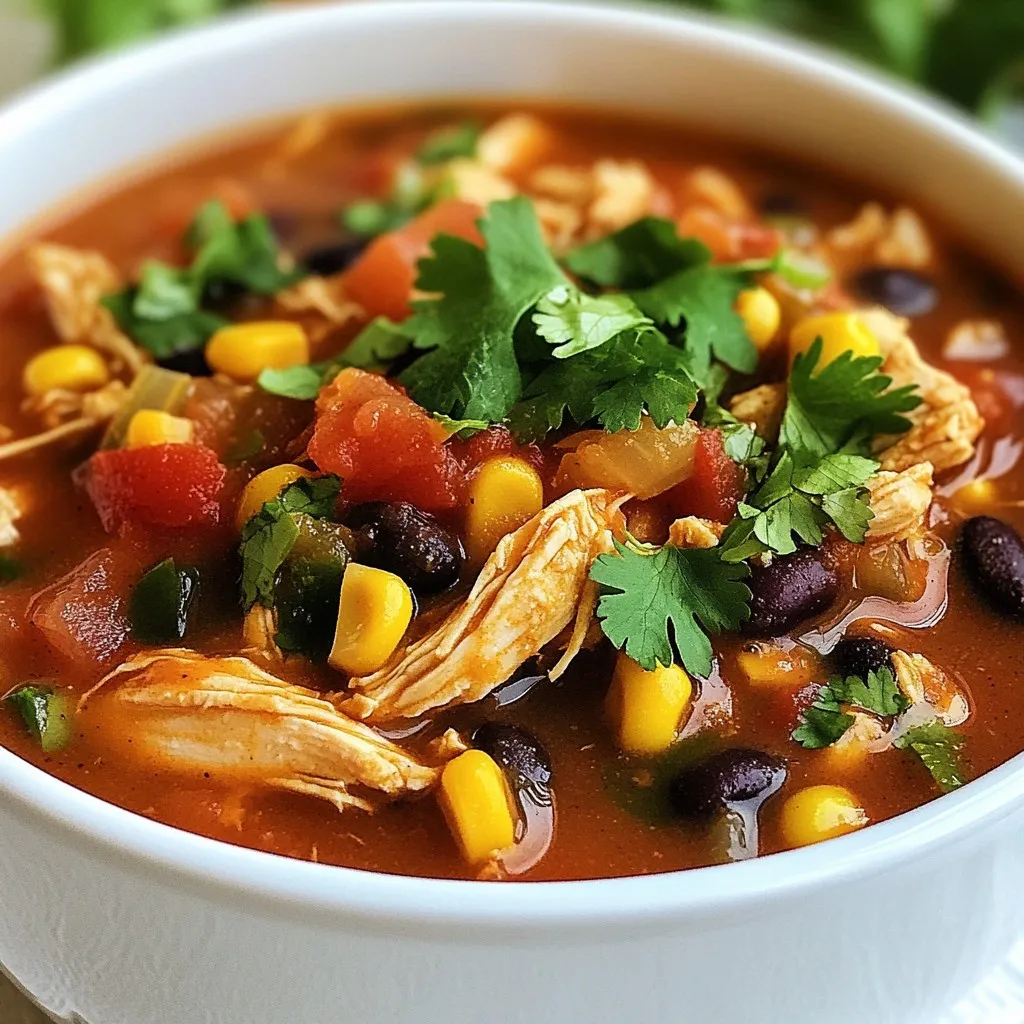
I love to serve this dish with crispy tortillas or warm rice. They soak up the delicious sauce well. When presenting, use shallow bowls. This allows the colorful mixture to shine through. A sprinkle of fresh cilantro on top adds a pop of color. It makes the dish look even more inviting.
Spice Adjustments
You can easily adjust the spice levels to your taste. If you like it spicy, add more chili powder or some jalapeños. To make the dish more flavorful, try adding lime juice or fresh herbs. These small changes can really enhance the taste. Don’t be afraid to experiment and find your perfect blend!
Pro Tips
- Marinate for Extra Flavor: For enhanced taste, marinate the chicken breasts in spices and a bit of broth for a few hours or overnight before cooking.
- Mix and Match Vegetables: Feel free to add or substitute other vegetables like zucchini, carrots, or spinach for additional nutrition and flavor.
- Save the Broth: After shredding the chicken, save any leftover broth to use as a base for soups or sauces, maximizing your meal prep.
- Customize the Spiciness: Adjust the heat level by adding diced jalapeños or a pinch of cayenne pepper, tailoring the dish to your spice preference.

Variations
Ingredient Swaps
You can change the protein in this dish. Try turkey or tofu for a twist. Each protein adds its own flavor. You may also swap out veggies based on the season. In fall, use squash or sweet potatoes. In summer, add zucchini or fresh corn.
Cooking Methods
Crockpots cook slowly and keep food moist. You can also use an Instant Pot for faster meals. In an Instant Pot, cook on high for about 15 minutes. On the stovetop, simmer on low for about 30 minutes. Adjust the time for your chosen method to ensure the chicken stays juicy.
Flavor Enhancements
Want to spice things up? Add jalapeños or hot sauce for heat. You can also sprinkle sour cream, cheese, or diced avocado on top. These toppings add creaminess and flavor, making your meal even better!
Storage Info
Refrigeration Tips
To store leftovers, place the chicken in an airtight container. This keeps it fresh for up to 3-4 days. Make sure to let the dish cool before sealing the lid. This helps avoid moisture build-up. I recommend glass containers for better longevity. They do not stain and are easy to clean.
Freezing Instructions
For freezing, use freezer-safe bags or containers. Remove as much air as possible to prevent freezer burn. You can freeze the chicken for up to three months. When ready to eat, thaw it in the fridge overnight. Reheat it on the stove or in the microwave until it’s hot throughout.
Shelf Life
In the fridge, the cooked Dump and Go Crockpot Chicken lasts about 3-4 days. In the freezer, it can last up to three months. Always check for signs of spoilage before eating. If it smells off or has changed color, it is best to discard it.
FAQs
Can I use frozen chicken breasts?
Yes, you can use frozen chicken breasts in this recipe. The crockpot cooks the chicken slowly, which helps thaw and cook it safely. Just make sure to adjust the cooking time. If you use frozen chicken, add about an hour to the cooking time. This way, the chicken will be tender and juicy. Always check the internal temperature. It should reach 165°F (75°C) for safe eating.
How can I adjust cooking time for different crockpot models?
Every crockpot works a bit differently. Most models have low and high settings. If you have a newer crockpot, it may cook faster. If your crockpot runs hot, check the chicken a little early. For the low setting, aim for 6-7 hours. For high, cook for 3-4 hours. Always check the chicken’s doneness before serving.
What can I serve with Dump and Go Crockpot Chicken?
This dish pairs well with many sides. Here are some tasty options:
– Warm tortillas for a fun wrap.
– Steamed rice for a filling base.
– A fresh salad for a light touch.
– Chips for a crunchy sidekick.
These sides will round out your meal and make it even more enjoyable.
This blog covered the key ingredients, cooking steps, and tips for making Dump and Go Crockpot Chicken. You learned how to layer fresh vegetables, spices, and chicken to get a flavorful dish. Remember, you can swap ingredients and customize spice levels to fit your taste. With proper storage, enjoy leftovers for days! Try different methods for cooking and serve alongside tasty sides. This recipe is both easy and delicious, making it perfect for any meal. Enjoy your cooking journe

Effortless Heavenly Crockpot Chicken
Ingredients
- 4 pieces boneless, skinless chicken breasts
- 1 cup diced tomatoes (canned or fresh)
- 1 cup black beans, rinsed and drained
- 1 cup corn (frozen or canned)
- 1 piece bell pepper, chopped
- 1 small onion, finely diced
- 2 cloves garlic, minced
- 2 teaspoons ground cumin
- 1 teaspoon chili powder
- 1 teaspoon paprika
- to taste salt and freshly ground black pepper
- 1 cup low-sodium chicken broth
- optional Fresh cilantro, chopped, for garnish
Instructions
- Carefully place the chicken breasts in the bottom of the crockpot, ensuring they are spread out evenly.
- Evenly distribute the diced tomatoes, black beans, corn, bell pepper, onion, and garlic over the chicken, creating a colorful layer.
- Sprinkle the ground cumin, chili powder, paprika, salt, and freshly ground black pepper on top of the entire mixture.
- Gently pour the chicken broth over the contents of the crockpot, making sure that the chicken breasts are fully submerged in the liquid.
- Cover the crockpot with its lid and set to cook on low heat for 6-7 hours or on high heat for 3-4 hours, until the chicken is tender and fully cooked.
- Approximately 30 minutes before serving, use two forks to shred the chicken directly in the crockpot.
- Once cooked, serve the chicken mixture warm, garnished with a sprinkle of freshly chopped cilantro on top.


![To make a classic Italian zucchini pasta casserole, you will need the following ingredients: - 3 medium zucchinis, sliced into thin, even rounds - 2 cups cooked pasta (choose your favorite like penne or fusilli) - 1 cup marinara sauce (preferably homemade or high-quality store-bought) - 1 cup creamy ricotta cheese - 1 cup shredded mozzarella cheese, plus extra for topping - 1/2 cup grated Parmesan cheese - 1 large egg, lightly beaten - 2 cloves garlic, minced - 1 teaspoon dried oregano - 1 teaspoon dried basil - Sea salt and freshly cracked black pepper, to taste - Olive oil, for drizzling and greasing - Fresh basil leaves, for garnish Each ingredient plays a key role in building flavor and texture. The zucchini adds a fresh crunch, while the pasta provides a hearty base. The cheeses bring creaminess and richness. Marinara sauce ties everything together with its robust flavor. When I make this dish, I focus on using fresh ingredients. It makes a big difference. Quality marinara or homemade sauce enhances the taste. I also love to mix different cheeses for added depth. You can switch up the cheeses based on your preference. Using good olive oil is essential for greasing the dish and drizzling on top. It adds a lovely finish. As for herbs, oregano and basil deliver classic Italian flavor. Feel free to personalize this recipe. Adjust the seasonings to suit your taste. This dish is forgiving, making it easy to put your spin on it. For the full recipe, check out the complete instructions. 1. Preheating the Oven and Sautéing Zucchini - First, set your oven to 375°F (190°C). This temperature works well for baking. - Next, grab a skillet and drizzle some olive oil into it. Heat it over medium heat. - Add the sliced zucchinis and minced garlic to the skillet. Sauté them for about 5-7 minutes. - Keep stirring until the zucchinis become soft and slightly golden. - Season with sea salt, black pepper, oregano, and basil. This adds a punch of flavor. - Once done, remove the skillet from the heat and let it cool for a few moments. 2. Mixing Ingredients for the Casserole - While the zucchini cools, take a large mixing bowl and combine the cooked pasta, marinara sauce, ricotta cheese, and the lightly beaten egg. - Add half of the mozzarella and half of the Parmesan cheese to the bowl. - Stir everything together until well mixed. This will create a creamy base. - Now, gently fold the sautéed zucchini into the pasta mixture. Make sure it blends without mashing the veggies. 1. Assembling the Casserole - Grease a 9x13 inch baking dish with olive oil. This keeps the casserole from sticking. - Pour the pasta and zucchini mixture into the greased dish. Spread it out evenly with a spatula. - To finish, sprinkle the remaining mozzarella and Parmesan on top. This creates a cheesy crust. 2. Baking and Best Practices - Cover the dish tightly with aluminum foil and place it in the preheated oven. - Bake for 20 minutes. This helps all the flavors mix well. - After 20 minutes, carefully take off the foil. Bake for another 10-15 minutes. Watch for the cheese to melt and turn golden brown. - Once it’s done, remove the casserole from the oven. Let it cool for a few minutes before serving. - For a lovely touch, garnish with fresh basil leaves. This adds color and flavor to your dish. For the complete recipe, refer to [Full Recipe]. - Seasoning Suggestions: I love using fresh herbs. Basil and oregano add a lovely taste. Don’t forget to season with sea salt and black pepper. These simple touches make a big difference. Consider adding a pinch of red pepper flakes for a bit of heat. - Achieving the Perfect Cheese Crust: To get that golden crust, use a mix of mozzarella and Parmesan on top. When you bake the casserole, keep it covered for the first part of cooking. This helps the cheese melt nicely. Uncover it towards the end to allow browning. - Sautéing Tips: When sautéing zucchini, cut it into thin, even rounds. This ensures even cooking. Don’t overcrowd the pan; this can lead to steaming instead of browning. Give them enough space to caramelize. - Alternative Pasta Cooking Methods: You can use different pasta shapes, like penne or fusilli. You don’t need to cook it all the way. Make it al dente, as it will cook more in the oven. This keeps the pasta from getting mushy in the casserole. Make sure to check out the Full Recipe for all the steps and details! {{image_4}} Different Cheese Options Cheese makes this dish rich and creamy. You can swap ricotta for cottage cheese if you like. For a sharper taste, use aged provolone or gouda. If you want a bit of tang, try feta cheese. Each cheese brings its unique flavor to the casserole. Meat Additions and Alternatives For meat lovers, ground beef or turkey can add protein. Cook the meat first and mix it with the pasta. If you prefer a lighter option, add cooked chicken or sausage. You can also use plant-based meats for a tasty, hearty dish. Gluten-Free Options To make this casserole gluten-free, choose gluten-free pasta. Many brands offer great options that hold up well in baking. Just check the package for cooking times to ensure perfect texture. Vegan Adaptations For a vegan version, swap all cheeses for cashew cream or tofu ricotta. You can also use a flax egg instead of the beaten egg for binding. Use your favorite marinara sauce that is dairy-free, and you’ll have a delicious vegan casserole. Experimenting with these swaps and modifications can make the Classic Italian Zucchini Pasta Casserole fit any diet or taste. For the full recipe, check out the details above. After enjoying your Classic Italian Zucchini Pasta Casserole, let’s talk storage. First, cool the casserole completely. This helps prevent condensation, which can make it soggy. Once cool, place leftovers in an airtight container. Store them in the fridge for up to three days. If you want to save it for longer, freezing works too. Cut the casserole into portions. Wrap each slice tightly in plastic wrap, then place them in a freezer-safe bag. This way, you can enjoy it for up to three months. When ready to enjoy your casserole again, reheating is key. The best method is using an oven. Preheat it to 350°F (175°C). Place the casserole in a baking dish and cover it with foil. Heat for 20-25 minutes. This helps keep the texture nice and creamy. If you’re in a hurry, a microwave works too. Use a microwave-safe plate and cover it with a damp paper towel. Heat in short bursts, stirring in between, until hot. This method may not keep the texture as good as the oven. For the best flavor and texture, always let it cool slightly before serving. Enjoy! Can I use other vegetables? Yes, you can use other veggies. Try bell peppers, spinach, or mushrooms. Just chop them small so they cook well. Mixing different vegetables adds flavor and color to your dish. How to make it ahead of time? You can make this casserole a day ahead. Just prepare it like normal, but do not bake it. Cover it and store it in the fridge. When ready, bake it as instructed, adding a few extra minutes if needed. What types of pasta work best? I love using penne or fusilli for this dish. Both types hold sauce well and stay firm while baking. You can also use gluten-free pasta if you prefer. How long can it be stored in the fridge? You can keep leftovers in the fridge for about three days. Make sure to cover it well. To reheat, just warm it in the oven or microwave until hot. Recommended Side Dishes Serve this casserole with a fresh salad or garlic bread. A simple mixed greens salad adds a crisp touch. Garlic bread brings a nice crunch and flavor. Pairing Wine with Casserole A light red wine like Chianti pairs well with this dish. It balances the flavors of the zucchini and cheese. If you prefer white, try a crisp Pinot Grigio. How to Garnish and Serve Garnish with fresh basil leaves for a pop of color. You can also sprinkle extra Parmesan on top before serving. This adds flavor and looks great on the table. For the full recipe, check the details above. Enjoy your cooking! In this blog post, we explored a delicious zucchini pasta casserole. We covered ingredients like zucchini, pasta, marinara, and various cheeses. You learned step-by-step instructions for preparation and baking. We included helpful tips for flavor and texture enhancement. You also discovered variations to suit different diets and preferences. In closing, this casserole is versatile and easy to make. Enjoy the cooking process and share it with loved ones.](https://fastmealmate.com/wp-content/uploads/2025/07/1e9eddde-dee0-4a9c-92bd-9b0350c13af8-768x768.webp)
![- 8 oz spaghetti or fettuccine - 3 large egg yolks - 1 whole egg - 1/2 cup finely grated Parmesan cheese - 1 tablespoon gochujang - 2 cloves garlic, minced - 1 tablespoon olive oil - 4 oz pancetta or diced turkey bacon (optional) - Salt and freshly cracked black pepper - Chopped green onions (for garnish) - Sesame seeds (for garnish) Gather these ingredients before you start cooking. This will make your process smooth and fun. The star of this dish is gochujang. It adds a deep heat and unique flavor. The creamy sauce comes from the eggs and cheese. The garlic and olive oil offer a nice aroma. If you want a meat option, use pancetta or turkey bacon. - Large pot - Medium mixing bowl - Large skillet - Tongs You need a large pot to boil the pasta. A medium mixing bowl helps mix the egg and cheese. The large skillet cooks the garlic and meat. Tongs are key to tossing your pasta with the sauce. Having the right tools makes cooking easier and more enjoyable. - Calories per serving: about 500 - Protein: 20g - Fat: 25g - Carbohydrates: 50g This dish is rich and filling. The calories come from the pasta, eggs, and cheese. It packs a good protein punch from the eggs and cheese. Enjoy it as a main meal or share it with a friend. For more details, check the Full Recipe for serving sizes and more tips. - Bring a large pot of salted water to a boil. - Cook spaghetti or fettuccine until al dente, about 8-10 minutes. First, salt the water. This helps the pasta taste great. When it boils, add the pasta. Stir it often. Before draining, save one cup of pasta water. This water helps make the sauce creamy later. - Whisk together egg yolks, whole egg, Parmesan, gochujang, and seasonings. - Heat olive oil and sauté garlic. In a medium bowl, mix the egg yolks, whole egg, and finely grated Parmesan cheese. Add gochujang and a pinch of salt and pepper. Whisk until it looks smooth. Heat olive oil in a skillet over medium heat. Add minced garlic. Sauté it for about 30 seconds. Watch for it to smell great and turn golden. - Cook pancetta or turkey bacon if using. - Toss drained pasta with garlic oil. - Mix in egg and gochujang mixture off the heat. If you want meat, add pancetta or turkey bacon now. Cook it until it is crispy, about 3-4 minutes. Then, toss the drained pasta into the skillet. Mix it well with the garlic oil. Off the heat, pour the egg and gochujang mixture over the hot pasta. Use tongs to toss it. The heat will cook the eggs gently, making a creamy sauce. Slowly add the reserved pasta water until the sauce is creamy and smooth. Taste and add more salt or pepper if you need to. Plate your Gochujang Carbonara right away. Enjoy the spicy twist! For the full recipe, check out the detailed steps and tips. To achieve a creamy sauce, start with room temperature eggs. Cold eggs can make the sauce clumpy. Whisk the yolks and the whole egg together well. This creates a smooth base. When you combine the egg mixture with the pasta, do it off the heat. The pasta should be hot enough to cook the eggs gently. Toss quickly with tongs. This helps make a rich sauce. If your sauce feels too thick, use reserved pasta water. Add it a little at a time. This water adds starch and helps to loosen the sauce. Keep tossing until you reach your desired creaminess. To boost the flavor, try adding spices. A pinch of red pepper flakes can add heat. Fresh herbs like parsley or basil can bring brightness. These small changes can really lift your dish. You can also experiment with different cheese. Pecorino Romano adds a sharp flavor. A mix of Parmesan and Pecorino can give you a nice depth. Use what you like best for a personal touch. One big mistake is overcooking the pasta. Al dente is best, as it will cook a bit more in the sauce. Always check the package time and taste a strand. Another mistake is scrambling the eggs. Keep the heat low when mixing the egg and pasta. If the skillet is too hot, the eggs will cook too fast. You want a creamy sauce, not scrambled eggs. {{image_4}} You can make a great vegetarian version of gochujang carbonara. Start by replacing the pancetta. Use mushrooms instead. They add a nice umami flavor. You can use shiitake or cremini mushrooms for this. Just sauté them in olive oil until they are golden and tender. Next, add seasonal vegetables. Think spinach, zucchini, or asparagus. They brighten up the dish and add color. Just toss them in the skillet with the garlic. This adds flavor and nutrition. Want more heat? You can increase the gochujang. Adding a little more will make it extra spicy. Just be careful! Start small and taste as you go. If you want to add other spices, try crushed red pepper flakes. They bring another layer of heat and flavor. Do you need a gluten-free option? You can easily swap out regular pasta for gluten-free pasta. There are many good brands available now. They work well in this recipe. You can also explore other noodle types. Try rice noodles or soba noodles. Each option gives a unique twist to the dish. They can bring different textures and flavors, making it fun to try new things. To keep your Gochujang Carbonara fresh, store it in an airtight container. Place the container in the fridge. Make sure to cool the pasta to room temperature before sealing. This helps prevent moisture buildup. Leftovers last about 3 days in the fridge. The best way to reheat carbonara is on the stove. Add a splash of water or broth to a skillet. Heat it over low to medium heat. Stir gently until warm. This keeps the sauce creamy and smooth. Avoid using the microwave, as it can dry out the pasta. You can freeze carbonara, but it may change texture. To freeze, place cooled portions in freezer-safe bags. Remove as much air as possible before sealing. For best taste, eat it within 1 month. When ready to eat, thaw it in the fridge overnight. Reheat gently on the stove with added liquid. This helps restore some of the creaminess. For the full recipe, check out the details above. Gochujang is a Korean chili paste. It has a deep red color. This paste is made from fermented soybeans, glutinous rice, and chili powder. Its flavor is sweet, spicy, and umami-rich. Gochujang adds a unique kick to many dishes. You can find it in Asian markets and some grocery stores. Yes, you can prep this dish ahead of time. Cook the pasta and store it in the fridge. Keep the sauce separate, so it stays creamy. When you are ready to eat, heat the pasta and mix in the sauce. This way, you enjoy fresh, tasty carbonara. If you lack pancetta, try turkey bacon or diced ham. For a vegetarian option, use mushrooms. Sauté them until golden and add them to the dish. You can also use smoked tofu for a plant-based protein. To make it milder, use less gochujang. You can start with half a tablespoon and taste it. If you want more heat, add a little more gochujang or some red pepper flakes. Adjust slowly until it meets your preference. For the complete steps and extra tips for making Gochujang Carbonara, click here: [Full Recipe]. This blog post covered how to make Gochujang Carbonara, from ingredients to storage tips. You learned about choosing the right pasta, creating a creamy sauce, and avoiding common cooking mistakes. No matter your taste, you can try variations like vegetarian options. Always store leftovers correctly to enjoy them later. Remember, cooking is fun, so feel free to experiment with flavors! Enjoy your delicious meal and impress others with your skills!](https://fastmealmate.com/wp-content/uploads/2025/06/8ba01260-66cf-4de4-8766-bae4801448e1-768x768.webp)
