Are you looking for tasty meals that fit a diabetes-friendly diet? You’re in the right place! In this post, I’ll share simple and satisfying power bowl recipes that pack a punch in flavor and nutrition. You will discover how easy it is to whip up these bowls with fresh ingredients while enjoying their health perks. Let’s dive into the world of power bowls that are both delicious and good for you!
Why I Love This Recipe
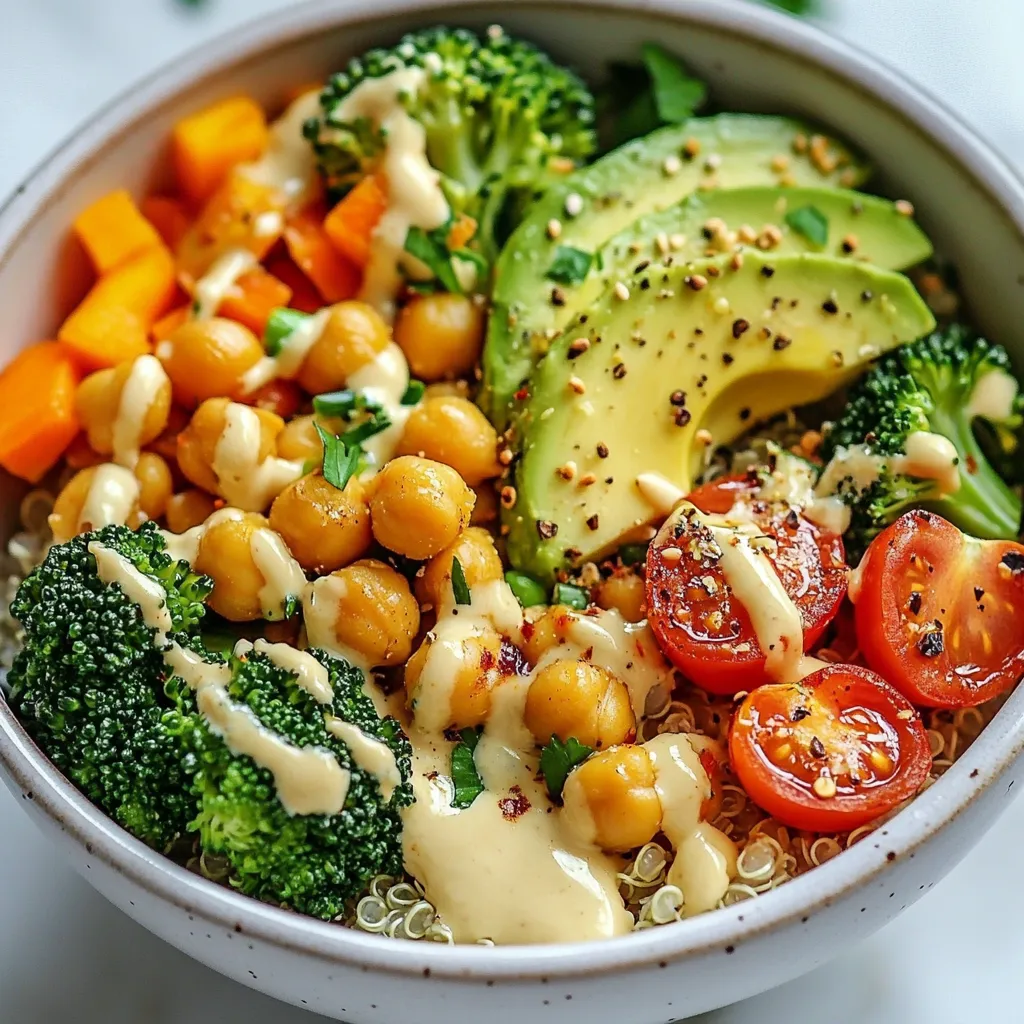
- Nutrient-Dense Ingredients: This power bowl is packed with wholesome ingredients like quinoa, chickpeas, and fresh vegetables, providing a balanced meal rich in protein, fiber, and essential nutrients.
- Quick and Easy Preparation: With a total prep time of just 30 minutes, this recipe is perfect for busy weeknights or meal prepping for the week ahead.
- Customizable to Your Taste: You can easily swap out ingredients based on what you have on hand or your personal preferences, making it a versatile and adaptable dish.
- Deliciously Satisfying: The combination of creamy avocado, crunchy pumpkin seeds, and flavorful tahini dressing creates a satisfying meal that will leave you feeling full and energized.
Ingredients
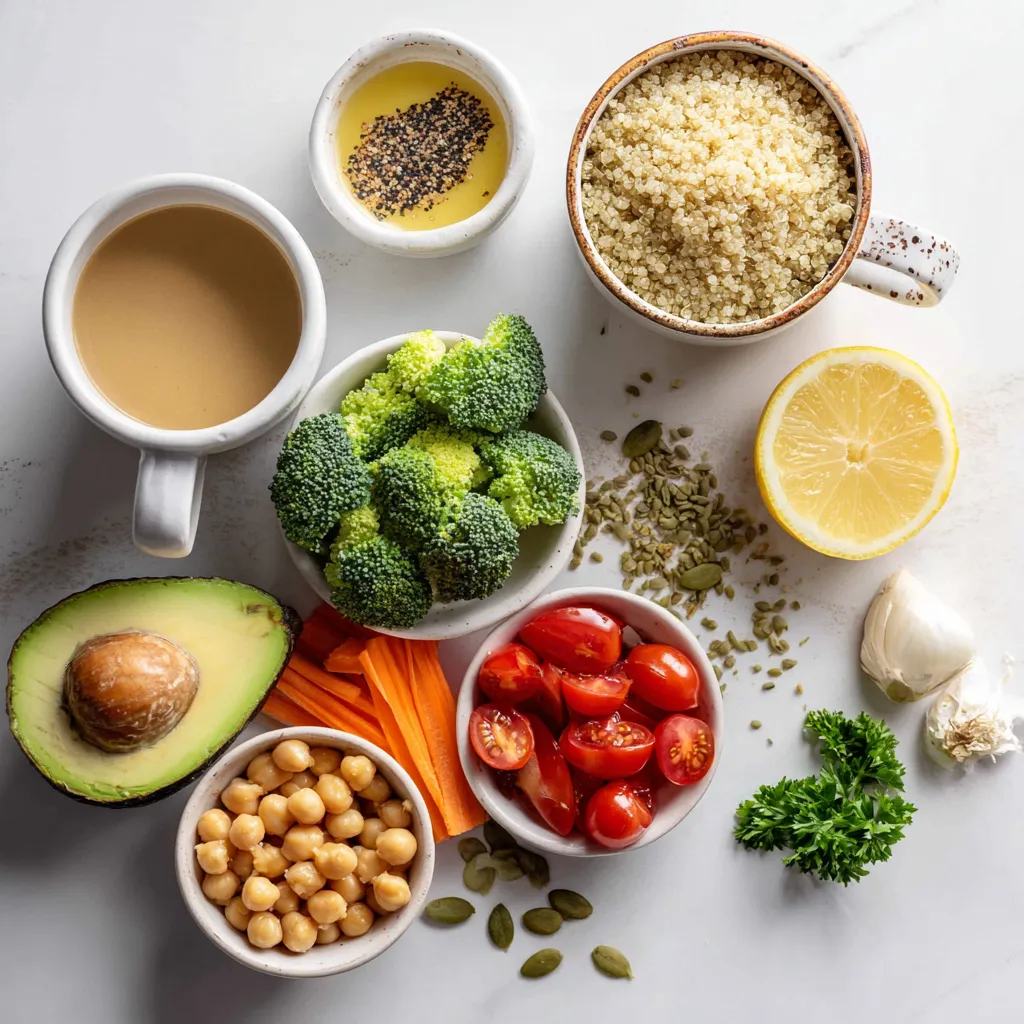
List of Ingredients
– 1 cup quinoa, thoroughly rinsed
– 2 cups low-sodium vegetable broth
– 1 cup chickpeas, cooked or canned, drained and rinsed
– 1 cup broccoli florets, steamed until tender
– 1 medium avocado, diced into bite-sized pieces
– 1 medium carrot, shredded or grated
– ½ cup cherry tomatoes, halved
– ¼ cup pumpkin seeds
– 2 tablespoons tahini
– 2 tablespoons fresh lemon juice
– 1 garlic clove, finely minced
– Salt and freshly cracked pepper to taste
– Fresh parsley, chopped
Nutritional Benefits of Each Ingredient
Quinoa is a whole grain. It has protein and fiber. This helps you feel full. Chickpeas are rich in protein and good carbs. They help keep blood sugar stable. Broccoli is low in calories and high in vitamins. It has antioxidants that help fight disease.
Avocado is full of healthy fats. It can lower bad cholesterol. Carrots are great for your eyes. They are high in vitamins and low in calories. Cherry tomatoes are sweet and juicy. They provide vitamins and hydration. Pumpkin seeds add healthy fats and crunch. They are also full of magnesium.
Tahini is made from ground sesame seeds. It adds creaminess and healthy fats. Garlic adds flavor and may help your heart. Lemon juice brightens the dish and adds vitamin C. Parsley is more than a garnish. It has vitamins and adds color.
Optional Add-Ins
You can add cooked chicken or tofu for extra protein. Spinach or kale can boost nutrition and color. Other veggies like bell peppers or zucchini can add flavor. Try adding your favorite nuts for crunch. You can switch the tahini for yogurt for a tangy twist.
Step-by-Step Instructions
Cooking Quinoa
To start, gather your ingredients. You will need one cup of quinoa and two cups of low-sodium vegetable broth. First, rinse the quinoa under cold water. This helps remove any bitterness. Next, in a medium saucepan, bring the vegetable broth to a boil over medium-high heat. Once boiling, add the rinsed quinoa. Stir it gently to mix. Reduce the heat to low and cover the pan with a lid. Let it simmer for about 15 minutes. The quinoa will become fluffy as it cooks. After the time is up, remove the pan from the heat. Keep it covered for five more minutes. This lets the grains settle. Finally, fluff the quinoa with a fork to separate the grains.
Preparing the Tahini Dressing
While the quinoa cooks, you can make the tahini dressing. In a small mixing bowl, combine two tablespoons of tahini, the juice from one lemon, and one finely minced garlic clove. Add a pinch of salt and some freshly cracked pepper for taste. Whisk the mixture until it becomes smooth. If the dressing is too thick, add a teaspoon of water. Keep adding water until you find the right consistency. This dressing adds creaminess and flavor to your power bowl.
Assembling the Power Bowl
Now it’s time to build your power bowl. In a large serving bowl or individual bowls, start with a layer of fluffy quinoa. This is your base. Next, add cooked chickpeas, steamed broccoli florets, diced avocado, shredded carrots, and halved cherry tomatoes. Be sure to distribute these evenly. Each ingredient brings color and nutrition to the dish. Once everything is layered, drizzle the tahini dressing over the top. This gives a creamy touch. Finally, sprinkle pumpkin seeds for crunch and garnish with chopped parsley. Enjoy the fresh flavors in every bite!
Tips & Tricks
Best Practices for Cooking Quinoa
To cook quinoa perfectly, start with rinsing it well. Rinsing removes the bitter coating called saponin. Use two cups of low-sodium vegetable broth for every cup of quinoa. This adds flavor without extra salt. Once the broth boils, add the quinoa and stir. Lower the heat and cover it. Let it simmer for about 15 minutes. After that, let it sit for 5 minutes off the heat. Fluff it with a fork to separate the grains. This method gives you light and fluffy quinoa every time.
Enhancing Flavor with Seasonings
To boost flavor, you can add spices and herbs. Consider adding garlic, onion powder, or smoked paprika while cooking. Fresh herbs like parsley or cilantro can enhance taste too. For a zest, try adding fresh lemon juice or a splash of vinegar. When you make the tahini dressing, adjust the garlic and lemon juice to your taste. This simple dressing adds creaminess and brightness. You can also experiment with different oils or vinegars for more flavor.
Storage Tips for Leftovers
If you have leftovers, store them in an airtight container. Keep the quinoa and toppings separate to avoid sogginess. You can store quinoa for about 3-5 days in the fridge. For longer storage, freeze it in portions. When ready to eat, reheat the quinoa in a pan or microwave. Add a splash of water to keep it moist. Enjoy your power bowls again with fresh toppings for a quick meal.
Pro Tips
- Perfectly Fluffy Quinoa: To achieve the ideal fluffy texture, make sure to rinse the quinoa thoroughly before cooking. This removes the natural coating called saponin that can make it taste bitter.
- Customize Your Toppings: Feel free to swap out or add other vegetables and proteins such as roasted sweet potatoes, kale, or grilled chicken for added variety and nutrition.
- Storage Tips: Store any leftover bowls in airtight containers in the refrigerator. They will keep well for up to 3 days. Just add the tahini dressing fresh when serving.
- Boost Flavor: For an extra flavor kick, consider adding spices like cumin or smoked paprika to the chickpeas while cooking, or sprinkle them on top before serving.
Variations
Protein Swaps
You can switch proteins in this power bowl. Try chicken or tofu for great taste. Chicken adds lean protein. Tofu gives a plant-based option. Both taste great with our tahini dressing. Other options include beans or lentils. They boost fiber and protein too. Mix and match to find your favorite!
Seasonal Vegetable Options
Seasonal veggies make this bowl fresh and exciting. In spring, add asparagus or peas. In summer, use corn or bell peppers. In fall, try roasted squash or Brussels sprouts. Winter calls for hearty greens like kale or Swiss chard. Using seasonal produce keeps your meals vibrant and packed with nutrients.
Alternative Dressings
Feel free to change the dressing. A yogurt-based dressing adds creaminess and tang. You can also whip up a simple vinaigrette with olive oil and vinegar. For a spicy kick, try Sriracha mixed with Greek yogurt. Each dressing gives a new flavor twist to your bowl. Experiment to find your perfect match!
Storage Info
Refrigeration Guidelines
You can store your diabetes-friendly power bowls in the fridge. Place each bowl in an airtight container. They will stay fresh for up to four days. Make sure to let the bowls cool to room temperature before sealing. This helps prevent moisture buildup inside the container.
Freezing Instructions
If you want to save some for later, freezing is a great option. Separate the ingredients before freezing. Quinoa, chickpeas, and veggies freeze well. Just avoid freezing the avocado, as it can become brown and mushy. Use freezer-safe bags or containers to keep them fresh. You can freeze the bowls for up to three months.
How to Reheat Leftovers
Reheating is easy! For best results, use the stovetop. Place the quinoa and veggies in a pan with a splash of water. Heat over medium until warm. Stir often to avoid sticking. You can also use the microwave. Just cover the bowl with a microwave-safe lid or plate. Heat in 30-second intervals, stirring in between, until hot. Add fresh toppings like avocado and parsley after reheating for extra flavor.
FAQs
What is a diabetes-friendly diet?
A diabetes-friendly diet helps control blood sugar levels. It focuses on whole foods, low in sugar and refined carbs. You should include lean proteins, healthy fats, and plenty of fiber. Foods like vegetables, whole grains, and legumes are great choices. These foods keep you full and stabilize blood sugar. This diet also limits processed foods and sugary snacks. In short, it is all about balance and making smart choices.
How can I make this recipe low-calorie?
To make this recipe low-calorie, you can adjust a few ingredients. Start by cutting the avocado amount in half. Avocado is healthy, but it adds calories. You can also swap quinoa for cauliflower rice. Cauliflower adds volume with fewer calories. Use less tahini in the dressing or make it with yogurt instead. Finally, add more veggies for bulk without many calories. These changes keep the meal tasty and filling.
Are power bowls suitable for meal prep?
Yes, power bowls are perfect for meal prep. They store well in containers and reheat nicely. You can prepare the quinoa and veggies ahead of time. Just assemble the bowls when you’re ready to eat. Keep the dressing separate until serving. This prevents sogginess and keeps flavors fresh. Power bowls offer convenience and variety, making them a great choice for busy days.
This blog post covers how to make a healthy power bowl. We discussed key ingredients and their health benefits. You learned how to cook quinoa and prepare tahini dressing. We shared tips for enhancing flavors and storing leftovers. You also saw variations for protein, veggies, and dressings. Remember, these bowls are nutritious and easy to prepare. They are great for any meal and fit well into meal prep. Start experimenting with your own power bowls for a tasty, healthy dis


