Are you ready to bake something delicious? These Apple Crumb Muffins are easy to make and packed with flavor. The warm spices and juicy apples create a cozy treat perfect for any occasion. Plus, I’ll share tips and tricks to ensure your muffins come out amazing every time. Let’s get started with this simple recipe that will impress your family and friends!
Ingredients
List of Ingredients
– 2 cups all-purpose flour
– 1 teaspoon baking powder
– 1/2 teaspoon baking soda
– 1/2 teaspoon salt
– 1 teaspoon ground cinnamon
– 3/4 cup granulated sugar
– 1/2 cup packed brown sugar
– 1/2 cup unsalted butter, melted
– 2 large eggs, at room temperature
– 1 teaspoon pure vanilla extract
– 1 cup plain yogurt (or sour cream)
– 2 cups apples, peeled and diced (approximately 2 medium apples)
– 1/2 cup old-fashioned rolled oats
Measurement Guidelines
When you measure your ingredients, use proper tools. For dry ingredients, a dry measuring cup is best. Press flour down slightly to avoid gaps. For liquids, use a liquid measuring cup and check at eye level. This ensures you get the right amounts for recipes. Accurate measurements lead to better results.
Ingredient Substitutions
You can switch some ingredients if needed. Use whole wheat flour for a healthier option. If you want a dairy-free muffin, try almond or coconut yogurt instead. Apples are key, but you can use pears or peaches too. For a nutty touch, add chopped walnuts or pecans. Always feel free to adjust!
Step-by-Step Instructions
Preparation Steps
Preheating the Oven
Start by preheating your oven to 350°F (175°C). This step is key for even baking.
Preparing the Muffin Tin
Line a standard muffin tin with paper liners. You can also spray each cup with non-stick cooking spray. This helps the muffins release easily after baking.
Mixing Ingredients
Dry Mixture Preparation
In a large bowl, whisk together 2 cups of all-purpose flour, 1 teaspoon of baking powder, 1/2 teaspoon of baking soda, 1/2 teaspoon of salt, and 1 teaspoon of ground cinnamon. Mix well and set it aside.
Sugar and Butter Mixture
In another bowl, combine 3/4 cup of granulated sugar, 1/2 cup of packed brown sugar, and 1/2 cup of melted butter. Stir until this mixture is smooth and creamy.
Combining Mixtures
Wet and Dry Ingredient Integration
Gently pour the sugar-butter mixture into the bowl with the dry ingredients. Use a spatula to mix just until combined. Be careful not to overmix, as this keeps the muffins light and fluffy.
Folding in Apples
Next, fold in 2 cups of peeled and diced apples. Use a spatula to distribute them evenly without overmixing the batter.
Finishing Touches
Preparing the Crumb Topping
In a small bowl, mix 1/2 cup of old-fashioned rolled oats with 1/4 cup of flour, 1/4 cup of brown sugar, and 1/4 cup of melted butter. Blend until it becomes crumbly. This topping adds a nice crunch.
Filling Muffin Liners
Spoon the muffin batter into the lined muffin cups. Fill each about two-thirds full. This allows room for the muffins to rise while baking.
Baking Instructions
Place the muffin tin in your preheated oven. Bake for 20 to 25 minutes. To check if they are done, insert a toothpick into the center of a muffin. It should come out clean.
These steps will guide you to make delicious apple crumb muffins.
Tips & Tricks
Baking Tips for Apple Crumb Muffins
Preventing Overmixing
To keep your muffins light, mix gently. After adding the wet ingredients to the dry, stir just until combined. If you see some flour lumps, that’s okay. Overmixing can make your muffins dense, not fluffy.
Ensuring Proper Baking Time
Baking time is key. Set your timer for 20 minutes. Check doneness by inserting a toothpick in the center. If it comes out clean, they’re ready. If not, check every minute. Be careful not to open the oven too often, as it can affect the rise.
Enhancing Flavor
Adding a pinch of nutmeg can boost flavor. You might also try mixing in some chopped walnuts or pecans. They add a nice crunch and depth. If you love spice, a dash of ginger pairs well with apple too.
Presentation Tips
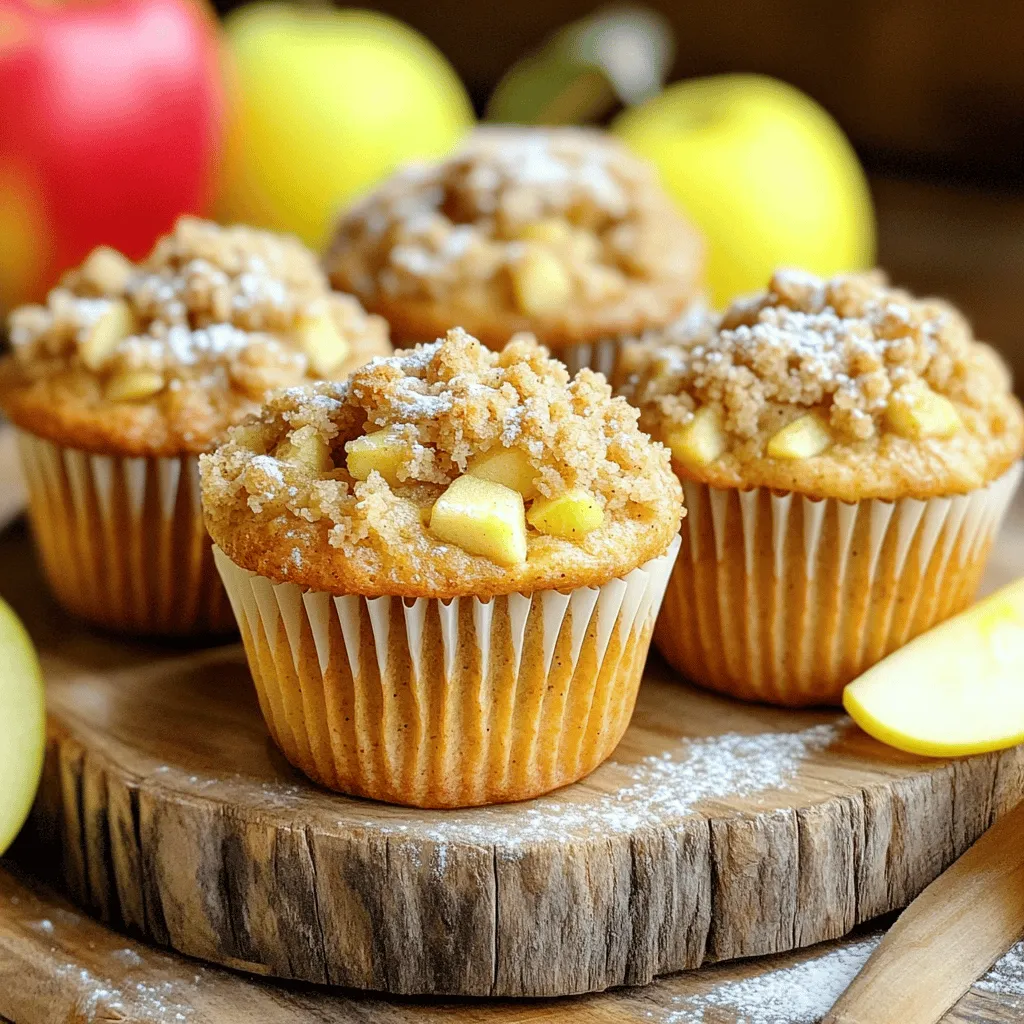
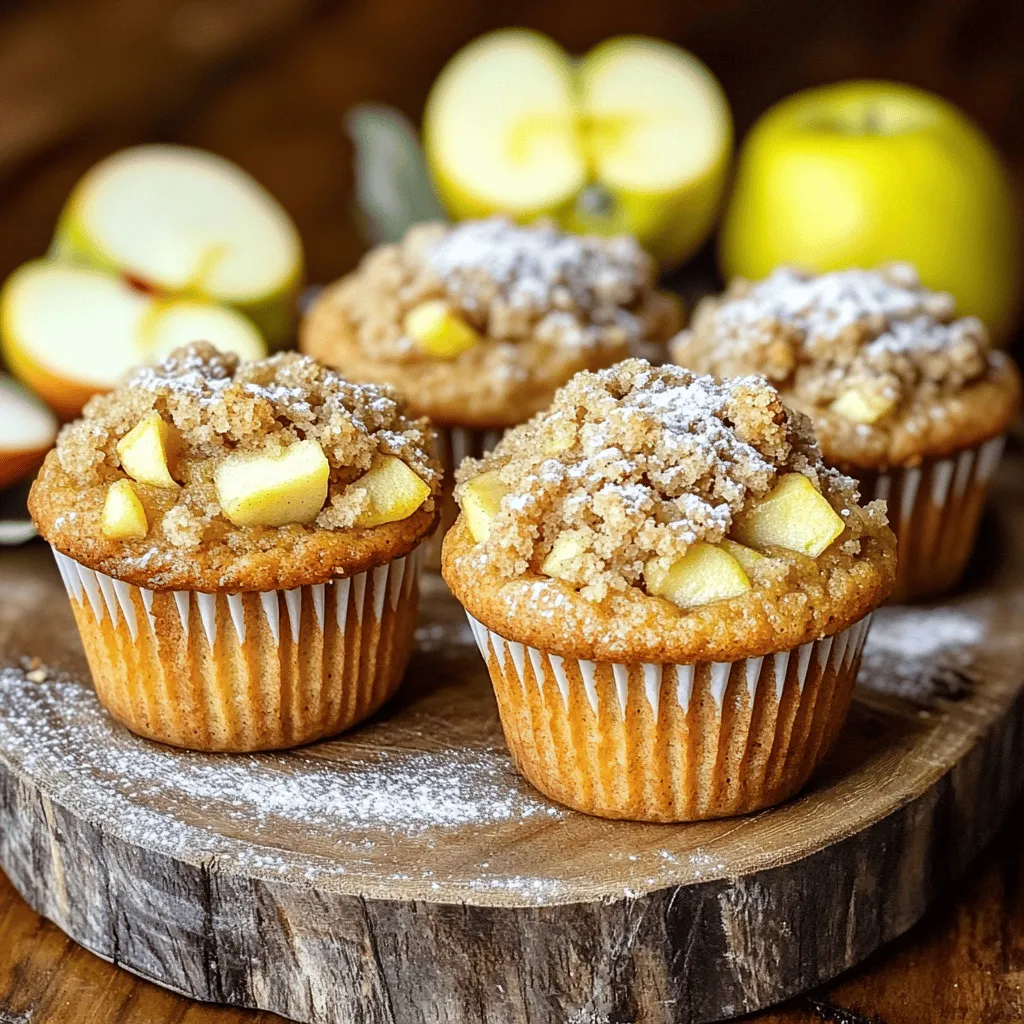
Presentation makes your muffins shine. Arrange them on a rustic wooden platter. A light dusting of powdered sugar adds charm. For an extra touch, place slices of fresh apples around the muffins. This creates a warm and inviting look.
Variations
Different Types of Apples to Use
Choosing the right apple makes a big difference. Sweet apples like Fuji or Honeycrisp work well. They add a nice balance of flavor. Tart apples like Granny Smith give a refreshing zing. You can mix different apples for a unique taste. This adds layers of flavor to your muffins.
Optional Add-ins
Nuts and Dried Fruits
Adding nuts or dried fruits can enhance your muffins. Chopped walnuts or pecans add a nice crunch. Dried cranberries or raisins bring a burst of sweetness. Just fold them in with the apples to keep it simple.
Flavor Variations with Spices
Consider adding spices for extra flavor. A pinch of nutmeg gives warmth. You can also try cardamom for a unique twist. Just remember to balance the spices so they don’t overpower the apples.
Healthier Alternatives
Gluten-Free Options
You can make these muffins gluten-free. Substitute all-purpose flour with a gluten-free blend. This works well and keeps the texture light. Just ensure your baking powder is gluten-free too.
Reducing Sugar or Fat
If you want to cut back on sugar, try using applesauce. It keeps the muffins moist and sweet. You can also use less butter or switch to a lighter oil. This way, you enjoy a tasty treat without the guilt.
Storage Info
Storing Leftover Muffins
Store your leftover muffins in an airtight container. This keeps them fresh for up to four days. If you want to keep them longer, consider freezing them.
Freezing Muffins for Later Use
To freeze muffins, let them cool completely. Wrap each muffin in plastic wrap and place them in a freezer bag. They can last up to three months in the freezer. When you’re ready to enjoy, just take them out and let them thaw at room temperature.
Reheating Instructions
Reheat muffins in the oven for the best taste. Preheat your oven to 350°F (175°C). Place the muffins on a baking sheet and warm them for about 10 minutes. You can also use the microwave. Heat each muffin for about 20-30 seconds. Enjoy them warm for the best flavor!
FAQs
What can I substitute for yogurt in the recipe?
You can use sour cream instead of yogurt. It gives a similar texture and flavor. Another option is to use buttermilk, which makes the muffins moist.
Can I make mini muffins instead of regular size?
Yes, you can make mini muffins. Just adjust the baking time to 12-15 minutes. Keep an eye on them, so they don’t overbake.
How do I know when the muffins are done baking?
Check for doneness by inserting a toothpick into the center of a muffin. If it comes out clean, they are ready. You can also lightly press the top; it should spring back.
How long do Apple Crumb Muffins last?
These muffins stay fresh for about 3 days at room temperature. Store them in an airtight container to keep them soft.
Can I make this recipe ahead of time?
Yes, you can prepare the batter the night before. Cover it and store it in the fridge. When you’re ready, bake them fresh in the morning.You’ll find all the steps and ingredients needed to make these tasty Apple Crumb Muffins.
You now have all the key steps to make delicious Apple Crumb Muffins. We covered ingredients, preparation, and baking instructions to ensure your muffins turn out great. Remember to follow the tips for flavor and presentation.
With these easy instructions, you can enjoy warm muffins at home. Whether you share them or keep them all, they are sure to impress. Happy baking!


