If you crave a meal that’s both tasty and easy to prepare, you’ll love Crispy Hot Honey Chicken. This dish brings sweet and spicy flavors together for a treat everyone will enjoy. I’ll share my step-by-step guide, tips, and even variations. Whether you’re a kitchen pro or a beginner, I’ll help you create a dish that stands out. Let’s dive into the world of crispy goodness!
Ingredients
Key Ingredients for Crispy Hot Honey Chicken
To make this dish, gather the following key ingredients:
– 2 lbs boneless, skinless chicken thighs
– 1 cup buttermilk
– 1 cup all-purpose flour
– 1/2 cup cornstarch
– 2 teaspoons baking powder
– 1 teaspoon garlic powder
– 1 teaspoon onion powder
– 1 teaspoon smoked paprika
– 1/2 teaspoon cayenne pepper (adjust for spice preference)
– Salt and black pepper, to taste
– Vegetable oil, for frying
– 1/2 cup honey
– 2 tablespoons hot sauce (like Sriracha or your preferred spicy sauce)
– Fresh parsley, finely chopped (for garnish)
These ingredients create a crispy and flavorful chicken dish. The chicken thighs stay juicy, while the coating gives that perfect crunch.
Optional Ingredients for Added Flavor
You can enhance the dish with these optional ingredients:
– Lemon zest for freshness
– Fresh herbs like thyme or rosemary for depth
– Other spices such as cumin or chili powder for extra kick
Adding lemon zest or fresh herbs can brighten the dish. Feel free to play with spices to match your taste buds.
Substitutions for Common Ingredients
Need a swap? Here are some easy substitutions:
– Use chicken breasts instead of thighs for a leaner option.
– Swap buttermilk with plain yogurt or milk mixed with vinegar.
– Cornstarch can be replaced with rice flour for a gluten-free option.
These substitutions keep the dish tasty while fitting various diets. Don’t hesitate to adapt the recipe to suit your pantry.
Step-by-Step Instructions
Preparation of the Chicken Marinade
Start by taking 2 pounds of boneless, skinless chicken thighs. Place them in a large bowl. Pour in 1 cup of buttermilk. Make sure all the chicken is soaked. Cover the bowl with plastic wrap. Let it sit in the fridge for at least 1 hour. If you have time, let it marinate overnight. This makes the chicken tender and flavorful.
How to Prepare the Coating
In another bowl, mix the dry ingredients. Combine 1 cup of all-purpose flour and 1/2 cup of cornstarch. Add 2 teaspoons of baking powder, 1 teaspoon of garlic powder, and 1 teaspoon of onion powder. Sprinkle in 1 teaspoon of smoked paprika and 1/2 teaspoon of cayenne pepper. Season with salt and black pepper to taste. Whisk everything together well. This coating gives the chicken its crispy texture.
Detailed Frying Instructions
Heat vegetable oil in a large pot or deep pan. Use enough oil to cover the chicken, about 2-3 inches deep. Bring the oil to 350°F (180°C). While waiting for the oil, take the chicken out of the marinade. Let the excess buttermilk drip off. Dredge each piece in the flour mixture. Make sure each piece is well coated, then shake off any extra flour.
Carefully place the chicken in the hot oil. Do not overcrowd the pan; fry in batches if needed. Cook for 6-8 minutes per side. You want the chicken to be golden brown and cooked through. The inside should reach 165°F (74°C). Once done, transfer the chicken to a plate lined with paper towels. This absorbs extra oil.
Now, for the hot honey sauce, mix 1/2 cup of honey with 2 tablespoons of hot sauce in a small pot. Heat it on low until warm. Stir it well to combine. Drizzle this warm sauce over the fried chicken. Toss gently to coat. Enjoy your crispy hot honey chicken!
Tips & Tricks
Best Practices for Achieving Crispy Chicken
To get that perfect crispy coating, follow these tips:
– Use Buttermilk: Marinate the chicken in buttermilk. This helps keep it moist and flavorful.
– Dry the Chicken: Before coating, pat the chicken dry. This helps the breading stick better.
– Use Cornstarch: Mix cornstarch with flour in the coating. It gives a lighter, crispier texture.
– Fry in Small Batches: Don’t overcrowd the pan. Fry a few pieces at a time to keep the oil hot.
– Maintain Oil Temperature: Use a thermometer to keep the oil at 350°F (180°C). This ensures even cooking.
Common Mistakes to Avoid
Here are some common pitfalls to steer clear of:
– Skipping the Marinade: Don’t skip marinating the chicken. It makes a big difference in taste.
– Not Enough Oil: Make sure to use enough oil for frying. This helps cook the chicken evenly.
– Wetting the Coating: Avoid getting the coating wet before frying. This can lead to soggy chicken.
– Not Adjusting Heat: Pay attention to the heat. If it’s too low, the chicken can become greasy.
– Ignoring Doneness: Always check the internal temperature. It should reach 165°F (74°C) for safety.
Serving Suggestions for Crispy Hot Honey Chicken
Serve this dish to impress your family and friends. Here are some great ideas:
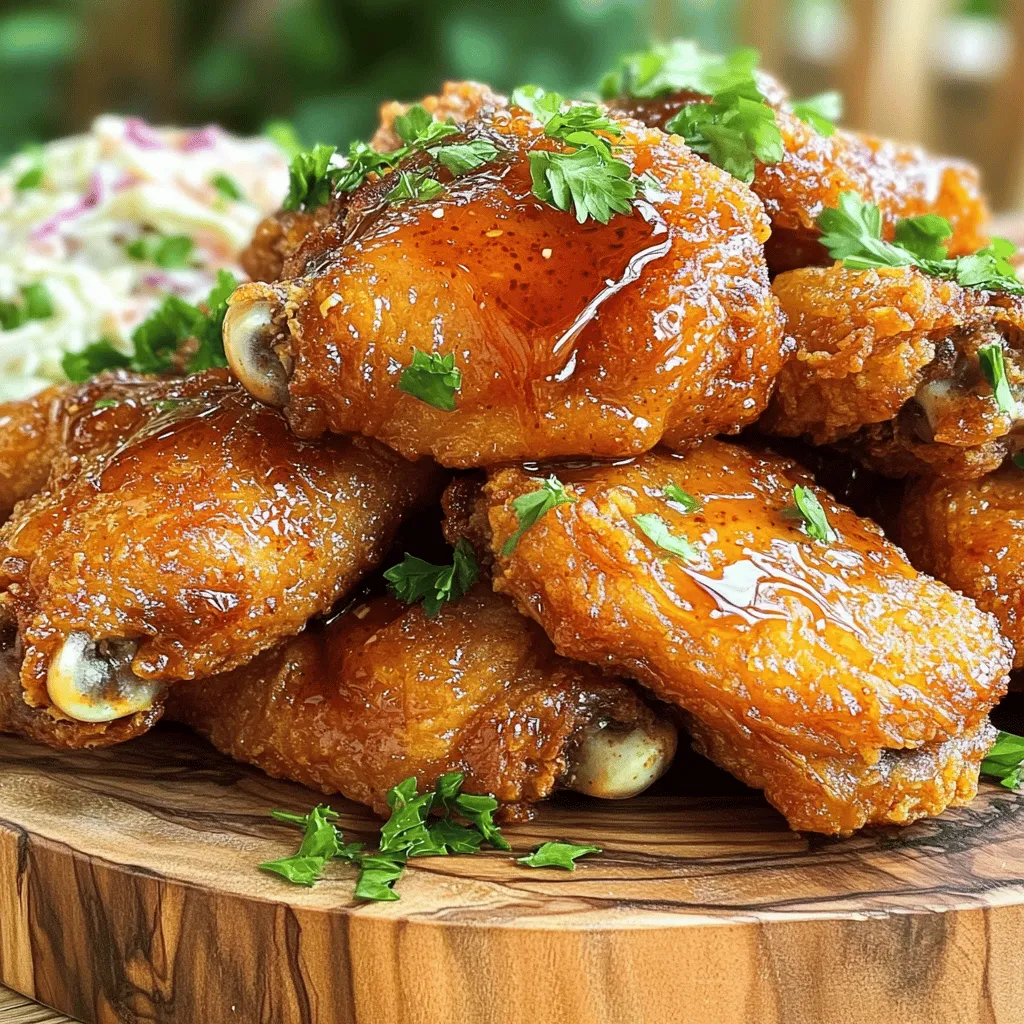
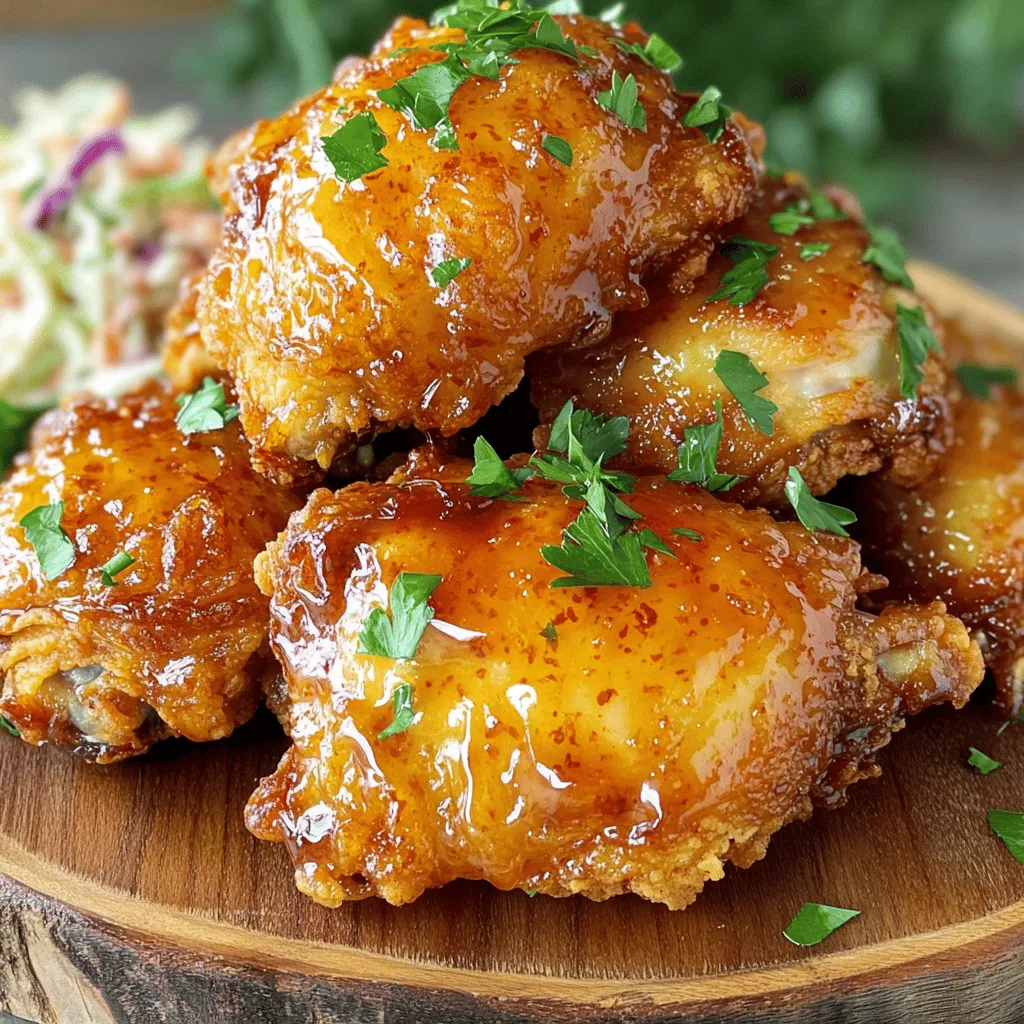
– Layer It Up: Stack the chicken on a rustic platter. Drizzle extra hot honey on top.
– Add Fresh Herbs: Garnish with chopped parsley for a pop of color.
– Pair It Right: Serve with a crisp salad or pickled veggies. This adds a fresh contrast.
– Make It a Meal: Serve with rice or mashed potatoes to round out the meal.
– Get Creative: Try serving it in a sandwich with slaw for a fun twist.
Variations
Spicy Version with Extra Heat
If you love heat, add more cayenne pepper. You can also use spicy sauces like ghost pepper sauce. This makes your chicken really pack a punch! Adjust the hot sauce in the honey mix for an even spicier kick. Just remember, start small and taste as you go.
Alternative Sauces to Try
Switch things up with different sauces. Instead of hot honey, try BBQ sauce or teriyaki. You can mix honey with soy sauce for a sweet and salty twist. A garlic butter sauce also works well! Get creative and find your favorite flavor combo.
Healthy Baking Option
If you want a healthier meal, bake the chicken instead of frying. Coat the chicken as usual, then place it on a baking sheet. Bake at 425°F for about 25-30 minutes. This method keeps the chicken juicy and crispy without the extra oil. Serve it with a light salad for a balanced dish.
Storage Info
How to Store Leftover Chicken
To keep your crispy hot honey chicken fresh, store it in an airtight container. Place the chicken pieces in the container after they cool down. Make sure to separate layers with parchment paper. This helps prevent sogginess. You can keep it in the fridge for up to three days.
Reheating Instructions for Best Results
When you want to enjoy your leftover chicken, reheating it carefully is key. The best way is to use an oven. Preheat the oven to 375°F (190°C). Place the chicken on a baking sheet lined with foil. Heat it for about 10-15 minutes. This keeps the chicken crispy. If you prefer a microwave, use it only as a last resort. Always check that the chicken reaches 165°F (74°C) inside.
Freezing Tips for Crispy Hot Honey Chicken
If you want to save your chicken for a longer time, freezing is a great option. First, let the chicken cool completely. Wrap each piece tightly in plastic wrap, then place them in a freezer bag. This helps prevent freezer burn. You can freeze the chicken for up to three months. When you’re ready to eat it, thaw it in the fridge overnight before reheating.
FAQs
What is the best way to prepare the chicken for frying?
The best way to prepare chicken for frying is to marinate it first. I suggest using buttermilk. It adds flavor and keeps the meat juicy. Soak the chicken thighs for at least one hour. If you have time, let it soak overnight. This makes the chicken extra tender and tasty.
Can I make this dish ahead of time?
Yes, you can make Crispy Hot Honey Chicken ahead of time. You can marinate the chicken the night before. Just coat it in the flour mix right before frying. You can also prepare the hot honey sauce in advance. Just heat it up when you are ready to serve.
How do I know when the chicken is fully cooked?
To check if the chicken is fully cooked, use a meat thermometer. The chicken should reach an internal temperature of 165°F (74°C). The outside should be golden brown and crispy. If you don’t have a thermometer, you can cut into a piece. The meat should not be pink inside.
What sides pair well with Crispy Hot Honey Chicken?
Crispy Hot Honey Chicken pairs well with several sides.It includes all the steps you need to create this delicious dish.
To sum up, crispy hot honey chicken is a delicious dish you can easily make. We covered key ingredients, steps for preparation, and tips for the best results. Remember to watch for common mistakes and consider fun variations. Storing leftovers and reheating properly keeps the dish fresh. With the right approach, you’ll enjoy a tasty meal that impresses everyone. Use the steps and tips shared here to make this dish your own. Enjoy your cooking adventure!


