Craving a delicious and easy meal? Let me introduce you to Crispy Chicken Katsu Bento! This Japanese-inspired dish features tender chicken, crunchy panko, and fresh veggies, making it perfect for any lunch. You’ll love the juicy chicken paired with rich tonkatsu sauce. Follow my simple steps, and you'll create a bento that’s not just tasty but also visually stunning. Ready to impress your taste buds? Let’s dive in!
Why I Love This Recipe
- Deliciously Crunchy: The crispy texture of the chicken katsu contrasts beautifully with the tender rice and fresh vegetables, creating a delightful bite every time.
- Colorful Presentation: This bento box is not only tasty but also visually appealing, with vibrant colors from the cabbage, carrots, and optional pickled ginger.
- Customizable Ingredients: You can easily modify the veggies or add different sides based on your preferences, making it a versatile meal option.
- Easy to Prepare: With straightforward steps and minimal prep time, this recipe is perfect for both busy weeknights and lunch prep on the weekends.
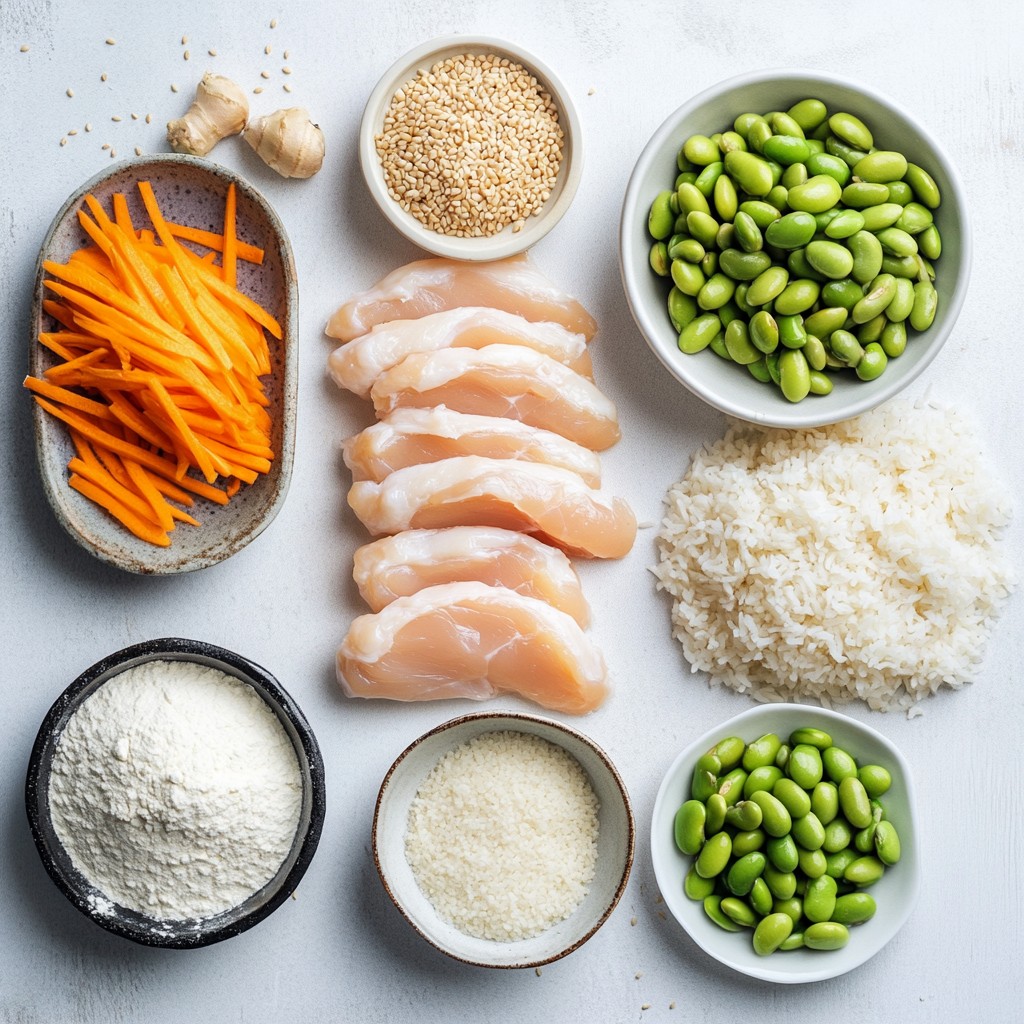
Ingredients
Main Ingredients for Crispy Chicken Katsu Bento
- 2 boneless, skinless chicken breasts
- Salt and pepper to taste
- 1/2 cup all-purpose flour
- 2 large eggs, beaten
- 1 cup panko breadcrumbs
- Vegetable oil, for frying
- 2 cups cooked white rice
- 1 cup shredded cabbage
- 1 small carrot, julienned
- 1/2 cup edamame (shelled)
- 1/4 cup tonkatsu sauce
- 1 tablespoon sesame seeds
- Pickled ginger for garnish (optional)
The key to a great chicken katsu is the chicken itself. I use boneless, skinless chicken breasts for a tender bite. You need to season them with salt and pepper. This simple step makes a big difference in flavor.
Next, let’s talk about the role of tonkatsu sauce. This sweet and tangy sauce adds depth to your dish. It balances well with the crispy chicken. A generous drizzle over the chicken brings it all together.
Panko breadcrumbs are super important for texture. They are light and airy, giving the chicken a nice crunch. Unlike regular breadcrumbs, panko keeps its shape and crisps up beautifully. This is what makes your katsu so crispy and golden.
Step-by-Step Instructions
Preparation of Chicken
To start, you need to flatten the chicken. Place the chicken breasts between two sheets of plastic wrap. Use a meat mallet or rolling pin to pound them gently. Aim for a thickness of about 1/2 inch. This step makes sure the chicken cooks evenly. Once flattened, season both sides with salt and pepper. This adds a nice flavor to the meat.
Creating the Dredging Station
Next, set up your dredging station. You will need three shallow bowls.
- Flour: Pour all-purpose flour into the first bowl.
- Eggs: Beat two large eggs in the second bowl until smooth.
- Panko: Place panko breadcrumbs in the last bowl.
This setup helps you coat the chicken easily. Each part plays a role: flour adds a base, eggs help the crumbs stick, and panko creates that crispy texture.
Cooking Process
Now, it's time to fry the chicken. Pour enough vegetable oil into a large skillet to cover the bottom, about 1/4 inch deep. Heat the oil over medium-high heat until it shimmers.
Carefully add the breaded chicken to the pan. Fry it for about 3-4 minutes on each side. You're looking for a deep golden brown color. To check if it's done, use a meat thermometer. The internal temperature should reach 165°F (75°C). Once cooked, transfer the chicken to a plate lined with paper towels to drain any excess oil.
Assembling the Bento
Now for the fun part: assembly! Slice the crispy chicken katsu into even strips. Arrange the slices on top of fluffy cooked rice in your bento box. Next, add a handful of shredded cabbage, some julienned carrots, and a small mound of shelled edamame.
For a touch of flavor, drizzle tonkatsu sauce over the chicken. This sauce adds sweetness and tang. Finally, sprinkle sesame seeds on top for extra texture. If you want, add a few pieces of pickled ginger on the side. It adds color and a nice kick to your meal. Enjoy your beautiful and tasty bento!
Tips & Tricks
Achieving Perfect Crispiness
To fry the chicken katsu just right, oil temperature matters. Heat your oil to about 350°F (175°C). This ensures a crispy outside while keeping the chicken juicy inside. Use a thermometer to check the heat.
Common mistakes?
- Don't overcrowd the pan. This lowers the oil temperature.
- Avoid flipping the chicken too soon. Wait until it’s golden brown.
Presentation Tips
To make your bento look colorful and fun, use vibrant ingredients. I suggest arranging the chicken on a bed of rice. Place the veggies like cabbage and carrots next to it. This adds contrast and makes each bite exciting.
For containers, a bento box works best. Choose one with compartments for an organized look. This keeps flavors separate while making the meal appealing. Add a touch of pickled ginger for extra color and a pop of flavor!
Pro Tips
- Even Cooking: Ensure the chicken breasts are of uniform thickness by pounding them gently. This prevents uneven cooking and results in a perfectly crispy exterior.
- Panko Perfection: Use Japanese panko breadcrumbs for an extra crispy texture. They provide a lighter, airier crunch compared to regular breadcrumbs.
- Oil Temperature: Make sure the oil is hot enough before frying. If it's not, the chicken will absorb too much oil and become greasy. The ideal temperature is around 350°F (175°C).
- Artful Assembly: When assembling your bento, play with colors and textures. A visually appealing presentation makes the meal more enjoyable and inviting to eat.
Variations
Alternative Proteins
You can use other proteins instead of chicken for your katsu bento. Pork is a popular choice and gives a nice flavor. You can also try tofu for a vegetarian option.
When using pork, the cooking time changes. A pork chop needs about 4-5 minutes per side. Tofu cooks faster, around 2-3 minutes each side. Always check that your protein is cooked through.
Vegetable Options
You can add many veggies to your bento. Broccoli, snap peas, or bell peppers work well. They add color and crunch to your meal.
Seasonal veggies can enhance freshness. In spring, add asparagus or radishes. In fall, use roasted squash or Brussels sprouts. Choose what you love and what’s in season for the best flavors.
Sauce Variations
Tonkatsu sauce is the star of this dish but feel free to mix it up. You can make a simple homemade tonkatsu sauce by mixing ketchup, soy sauce, and sugar.
Other sauces to try are teriyaki, sweet chili, or spicy mayo. Each of these sauces gives a unique twist to your chicken katsu. Experiment and find your favorite!
Storage Info
How to Store Leftovers
To store your crispy chicken katsu bento, follow these steps:
- Use airtight containers: Choose small, airtight containers to keep your food fresh. Bento boxes work great, too.
- Separate components: Keep the chicken, rice, and veggies in different sections. This prevents sogginess.
- Cool before refrigerating: Let your meal cool at room temperature. This helps avoid condensation in the container.
Reheating Instructions
To reheat your chicken katsu while keeping it crispy, try these methods:
- Oven method: Preheat your oven to 350°F (175°C). Place the chicken on a baking sheet. Heat for about 10-15 minutes until crispy.
- Air fryer method: Set your air fryer to 350°F (175°C). Cook the chicken for about 5-7 minutes. This keeps it nice and crunchy.
- Microwave tip: If you must use a microwave, place a paper towel under the chicken. This helps absorb moisture. Reheat for short bursts to avoid sogginess.
Following these tips makes sure your crispy chicken katsu bento stays delicious!
FAQs
Can I make the chicken katsu ahead of time?
Yes, you can prepare the chicken katsu ahead of time. To do this, follow these steps:
- Bread the chicken breasts a few hours before frying.
- Place them in the fridge to keep them fresh.
- Fry the chicken just before serving for the best crispiness.
Pre-breading helps save time. Just remember to fry them until golden brown before serving.
What can I serve with Crispy Chicken Katsu Bento?
You have many options for side dishes that pair well with your bento. Here are my favorites:
- Steamed vegetables: Broccoli or green beans add color and nutrients.
- Miso soup: A warm bowl complements the meal nicely.
- Pickled vegetables: They add a nice tang to balance the flavors.
- Fruit slices: Fresh fruit like oranges or apples can add sweetness.
These sides enhance the meal and provide a balanced plate.
Is it possible to make this recipe gluten-free?
Yes, you can easily make this recipe gluten-free. Here are some suggestions:
- Flour: Use gluten-free all-purpose flour instead.
- Breadcrumbs: Substitute panko with gluten-free breadcrumbs or crushed rice crackers.
- Sauce: Look for gluten-free tonkatsu sauce or make your own with gluten-free soy sauce.
These swaps let you enjoy crispy chicken katsu without gluten.
Crispy chicken katsu bento combines great flavors and textures. You need chicken, rice, and fresh veggies to make this meal. Use panko breadcrumbs for a perfect crunch and tonkatsu sauce for flavor.
Follow the simple steps for easy prep and cooking. Avoid common mistakes for the best results. Explore variations with proteins and veggies for a fresh take. Proper storage keeps your leftovers tasty.
By learning these tips, you can create a delicious bento box that impresses. Enjoy your cooking, and happy eating!