Creamy Garlic Shrimp Linguine Delicious Dinner Recipe

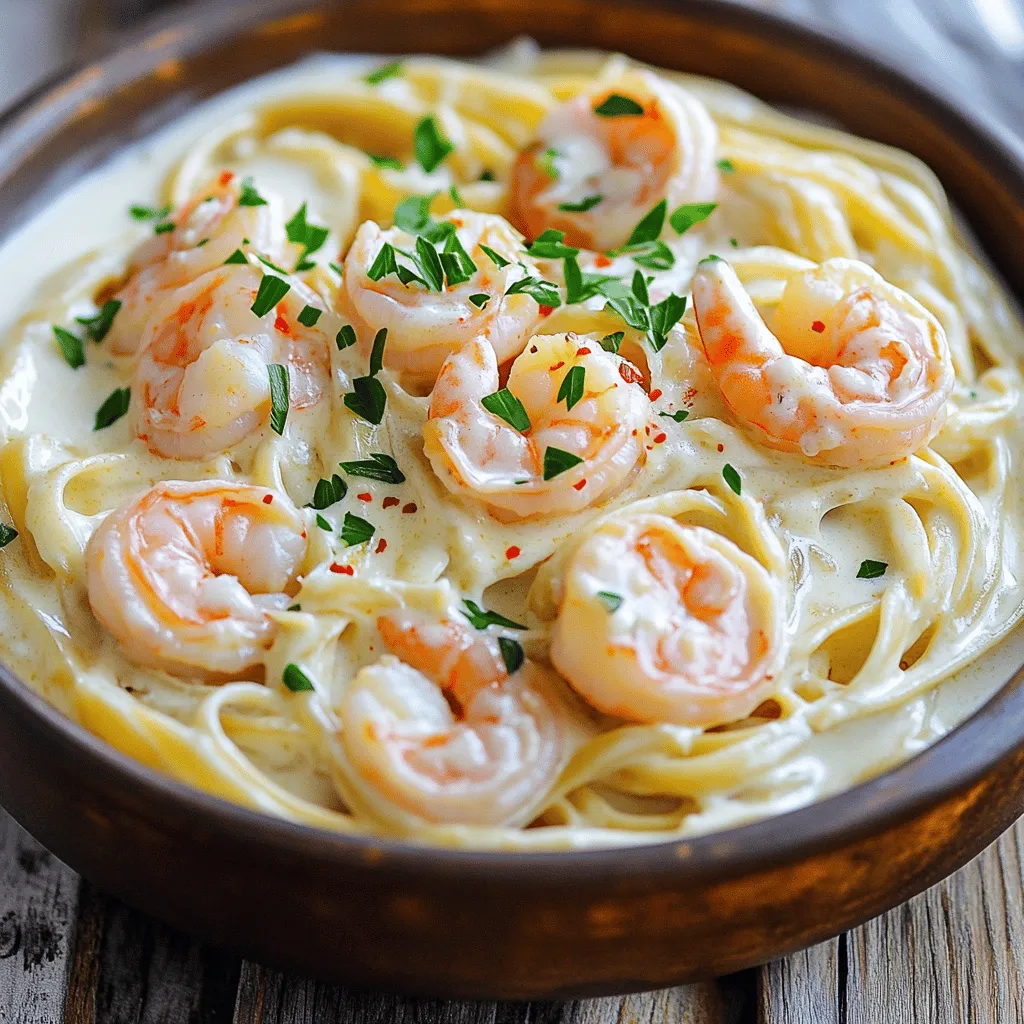
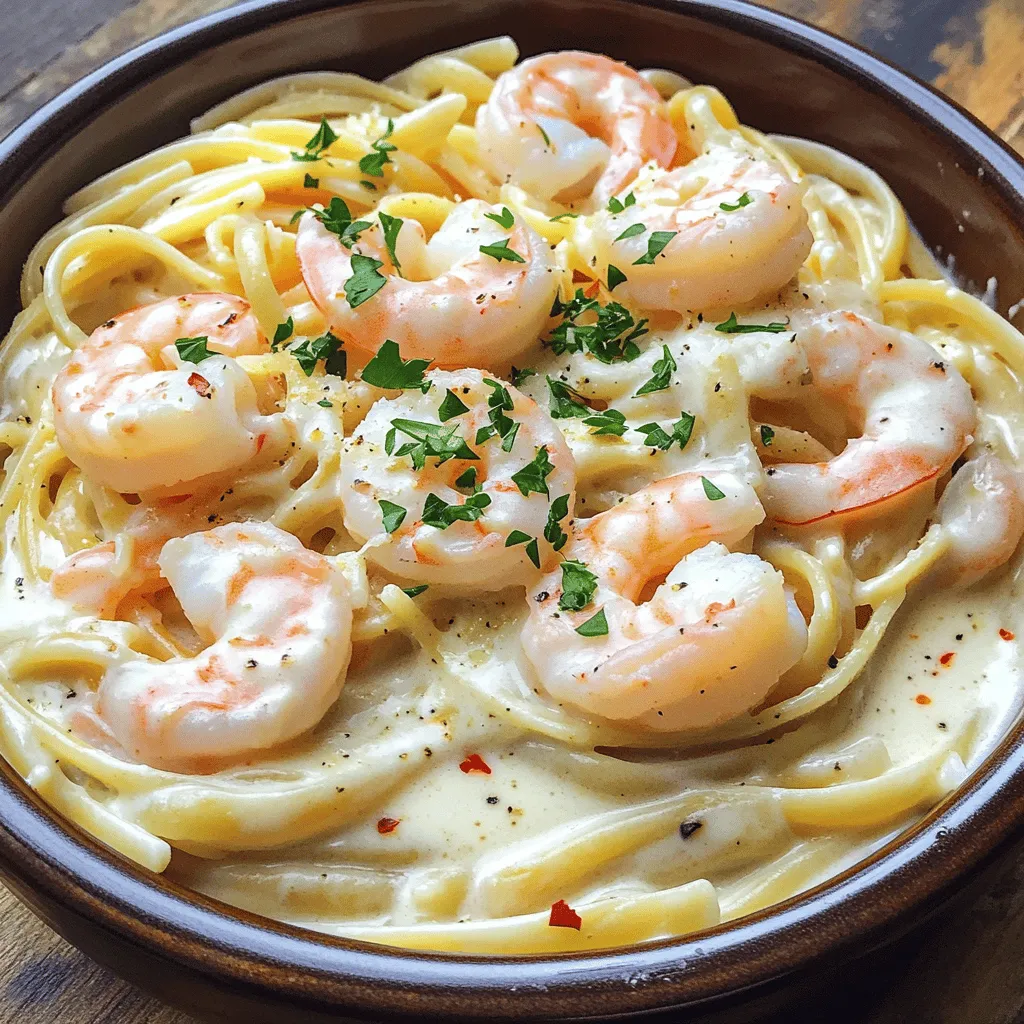
Craving a meal that’s packed with flavor and sure to impress? This Creamy Garlic Shrimp Linguine is your answer! Loaded with juicy shrimp, garlic, and creamy goodness, it’s perfect for a cozy night in or a special dinner. In this easy-to-follow recipe, I’ll guide you through each step. You’ll enjoy creating a dish that’s not only delicious but also looks great on your table! Let’s dive in!
Ingredients
Full List of Ingredients
– 8 oz linguine pasta
– 1 lb large shrimp, peeled and deveined
– 4 cloves garlic, minced
– 1 cup heavy cream
– 1 cup chicken broth
– ½ cup grated Parmesan cheese
– 2 tablespoons olive oil
– 1 tablespoon butter
– 1 teaspoon red pepper flakes (adjust according to your spice preference)
– Salt and freshly ground black pepper, to taste
– Chopped fresh parsley for garnish
Gathering the right ingredients is key to making this dish shine. You’ll need linguine pasta, which gives a nice base. The shrimp should be large, peeled, and deveined for easy cooking. Garlic adds that lovely aroma and flavor. Heavy cream brings the creaminess, while chicken broth adds depth.
Parmesan cheese gives a savory touch. Olive oil and butter enhance richness and flavor. Red pepper flakes add a hint of spice, but you can adjust it. Finally, don’t forget salt and pepper for seasoning, and fresh parsley for that vibrant finish.
Having all these ingredients ready makes cooking smooth and fun. A well-prepared kitchen sets you up for success!
Step-by-Step Instructions
Cooking the Linguine
First, take a large pot and fill it with water. Add a good amount of salt. Bring the water to a rolling boil. Add 8 oz of linguine pasta. Cook it for about 8-10 minutes. You want it al dente, which means it should still be firm. Once done, drain the pasta. Make sure to save ½ cup of that pasta water for later.
Sautéing the Shrimp
Next, grab a spacious skillet. Heat 2 tablespoons of olive oil and 1 tablespoon of butter over medium-high heat. Once hot, add 1 lb of large shrimp. Season the shrimp with salt, pepper, and 1 teaspoon of red pepper flakes. Cook the shrimp for about 2-3 minutes on each side. You know they are done when they turn pink and opaque. Once cooked, place the shrimp on a plate and set them aside.
Making the Garlic Cream Sauce
In the same skillet, lower the heat a bit. Add 4 minced garlic cloves. Sauté the garlic for about 30 seconds. You want it fragrant but not burnt. Then, pour in 1 cup of chicken broth. Let it simmer for about 2-3 minutes. This will help the flavors blend and the liquid to reduce a bit.
Combining Ingredients
Now, reduce the heat to medium-low. Pour in 1 cup of heavy cream while stirring. Gradually add ½ cup of grated Parmesan cheese. Keep mixing until it all combines and the sauce thickens to your liking.
Then, add the cooked linguine and shrimp back into the skillet. Toss everything until the pasta is well coated with the creamy sauce. If it seems too thick, add a splash of the reserved pasta water. This will help you achieve the perfect creaminess.
Serving Suggestions
Finally, taste the dish. Adjust the seasonings with more salt and pepper if needed. Serve the linguine hot. Garnish with chopped fresh parsley and a sprinkle of Parmesan cheese for extra flavor. Enjoy your meal!
Tips & Tricks
Perfecting the Shrimp
– How to know when shrimp are cooked: Shrimp turn pink and opaque when cooked. This usually takes about 2-3 minutes on each side.
– Avoiding overcooking: Remove shrimp from the heat as soon as they change color. Overcooked shrimp become tough and rubbery.
Making the Sauce Extra Creamy
– Tips for adjusting thickness: If your sauce is too thick, add a splash of reserved pasta water. Stir it in slowly to reach your desired creaminess.
– Alternative ingredients for creaminess: You can use half-and-half or milk instead of heavy cream. For a dairy-free option, try coconut milk.
Enhancing Flavor
– Suggestions for additional seasonings: Consider adding garlic powder, lemon zest, or fresh herbs like basil or thyme for extra flavor.
– How to adjust spice levels: To control heat, add more or less red pepper flakes. You can also add a pinch of cayenne for a different kick.

Variations
Seafood Alternatives
You can switch shrimp for other seafood. Scallops or crab are great choices. They add unique flavors and textures. For a fun twist, try lobster. Just remember, cooking times may vary. Adjust your cooking to ensure everything cooks evenly.
Vegetable Additions
Adding vegetables can enhance the dish. You might try spinach, peas, or bell peppers. These add color and vitamins. To include greens, simply sauté them with the garlic. This makes them tender and flavorful.
Gluten-Free Option
If you need a gluten-free dish, use gluten-free pasta. Many brands offer great options that taste similar. For the sauce, check the labels on the cream and broth. Some might have gluten. Adjust according to your taste and dietary needs.
Storage Info
Storing Leftovers
To keep your creamy garlic shrimp linguine fresh, use airtight containers. Let it cool to room temperature before sealing. Store it in the fridge for up to three days. The shrimp and sauce stay tasty, but the pasta may soften a bit.
Reheating Tips
To reheat, use the stove or microwave. If using the stove, add a splash of chicken broth to the skillet. Stir it gently over low heat until warm. If using a microwave, cover it loosely and heat in short bursts. This helps avoid sauce separation. Stir in between to keep it creamy.
FAQs
Can I use frozen shrimp?
Yes, you can use frozen shrimp. Just remember to thaw them first. To thaw shrimp, place them in the fridge overnight. If you need them fast, put them in a bowl of cold water for about 15-20 minutes. Change the water halfway through. After thawing, pat the shrimp dry. This helps them sear better in the pan.
What can I serve with Creamy Garlic Shrimp Linguine?
You can serve this dish with a variety of sides. Here are some ideas:
– Garlic bread: A crunchy side that pairs well with the creamy sauce.
– Green salad: A fresh salad adds a nice balance.
– Steamed vegetables: Broccoli or asparagus add color and nutrition.
– Roasted potatoes: Crispy potatoes make a hearty addition.
How can I make this recipe lighter?
To lighten up Creamy Garlic Shrimp Linguine, try these tips:
– Use half-and-half instead of heavy cream for fewer calories.
– Swap out some cheese for nutritional yeast for a cheesy taste without fat.
– Add more vegetables like spinach or zucchini to bulk up the meal.
– Use less oil or butter when cooking the shrimp.
These changes keep the flavor while cutting down on calories and fat.
This article covered how to make delicious creamy garlic shrimp linguine. We explored all the essential ingredients, cooking methods, and tips for perfect shrimp. You learned to create a rich garlic cream sauce and how to combine everything for a fantastic meal.
Feel free to adjust flavors and try alternative ingredients to make this dish your own. No matter your choice, enjoy your cooking and make this a meal to remember!


![Fresh peaches are the star of this pie. Choose ripe, sweet peaches for the best flavor. Use about 1 ½ cups of peaches, peeled and sliced. The slices should be thick enough to hold their shape. This will give your pie a lovely texture and taste. You have a few choices for the pie crust. A store-bought 9-inch pie crust is quick and easy. If you want to make it from scratch, use flour, butter, and a pinch of salt. Either way, the crust should be crisp and flaky. This creates a nice contrast with the smooth custard. Here’s a quick look at the other ingredients you’ll need: - ¾ cup granulated sugar - 3 tablespoons cornstarch - 2 large eggs - 1 cup heavy cream - 1 teaspoon pure vanilla extract - ½ teaspoon ground cinnamon - Pinch of salt These ingredients work together to form the rich custard. The sugar adds sweetness, while cornstarch helps it set. Eggs provide structure, and heavy cream gives a creamy texture. Vanilla and cinnamon add depth to the flavor. For the full recipe, check out the details above. To start, preheat your oven to 375°F (190°C). Take your store-bought pie crust and fit it snugly into a 9-inch pie plate. Use a fork to prick the bottom. This helps prevent bubbling. Place the crust in the oven for about 10 minutes. You want it set but not browned. Once done, take it out and let it cool on a wire rack. Next, grab a large mixing bowl. In it, combine the granulated sugar, cornstarch, ground cinnamon, and a pinch of salt. Mix these dry ingredients well to avoid any lumps. In a separate bowl, crack two large eggs and whisk them until well beaten. Add the heavy cream and vanilla extract, whisking until everything blends into a smooth mixture. Gradually pour this egg mixture into the dry ingredients. Stir continuously to create a smooth custard. Now, let's assemble the pie. Start by evenly distributing your sliced fresh peaches over the base of the pre-baked pie crust. Carefully pour the custard mixture over the peaches. Make sure they are all covered. Place the pie in the oven and bake for 30-35 minutes. The custard should be firm and slightly golden. To check if it's set, gently shake the pie. The center should jiggle just a bit. Once baked, let the pie cool on a wire rack for about an hour. This helps the custard firm up nicely. For the best results, refrigerate the pie for at least 2 hours before slicing. This step makes the custard even better. You can find the full recipe here: [Full Recipe]. To get a creamy custard, mix the sugar and cornstarch well. This step avoids lumps. When you add the eggs and cream, whisk until smooth. This ensures a rich texture. Bake until the center slightly jiggles. This tells you the custard is set but still soft. It will firm up as it cools. A soggy crust ruins your pie. To prevent this, bake the crust first. Prick the bottom with a fork to let steam escape. Bake it for about ten minutes until it’s just set. Once out of the oven, let it cool before adding the custard. This keeps the crust crisp and flaky. For a lovely presentation, slice the pie neatly. Serve each piece with whipped cream on top. A sprinkle of ground cinnamon adds warmth and charm. Add a slice of fresh peach on the side. This highlights the fresh flavors in the pie. Enjoy your beautiful creation! For more detailed steps, check the Full Recipe. {{image_4}} You can swap fresh peaches for other fruits. Try ripe nectarines for a similar taste. Plums add a tart kick and are juicy, too. Blueberries give a pop of color and sweetness. Apples offer a crunchy bite, especially if you bake them a bit first. Each fruit brings its own charm to the pie. If you need a gluten-free crust, several options exist. Almond flour is a great choice for a nutty flavor. You can also use a gluten-free pie crust mix from the store. Just follow the package instructions for best results. Make sure to check that all ingredients are gluten-free. This way, everyone can enjoy this tasty treat. To make your pie stand out, try some flavor boosts. A dash of lemon juice brightens the peach flavor. You can mix in some nutmeg for warmth, too. Adding a splash of bourbon or rum gives a nice depth. Experimenting with spices lets you create a unique pie that reflects your taste. Get creative and have fun with it! For the complete recipe, check out the [Full Recipe]. To store leftover pie, let it cool completely. Cover it with plastic wrap or foil. You can also use an airtight container. Keep it in the fridge for up to three days. The pie stays fresh this way. Avoid stacking anything on top to prevent crushing. If you want to freeze the pie, make sure it’s fully cooled. Wrap it tightly in plastic wrap, then in aluminum foil. This helps prevent freezer burn. You can freeze it for up to three months. To enjoy later, just thaw it in the fridge overnight before serving. To reheat the pie, preheat your oven to 350°F (175°C). Place the pie in an oven-safe dish. Cover it with foil to keep it from browning too much. Heat for about 15-20 minutes, or until warm. If you like, you can microwave individual slices for a quick snack. Just heat for 30 seconds, checking often. Enjoy your pie as if it were fresh! Yes, you can use canned peaches. However, fresh peaches taste better. Canned peaches are softer and sweeter. If you choose them, drain the syrup well. Pat them dry with a paper towel. This helps reduce excess moisture. Use the same amount as fresh peaches. But keep in mind that the texture will change. You can use half-and-half or whole milk as a lighter option. For a dairy-free choice, use coconut cream or almond milk. These will alter the flavor slightly. If you want to keep the richness, try a mix of milk and butter. Use 1 cup of milk and 2 tablespoons of melted butter. This gives a similar creamy texture. The custard is set when it has a smooth, firm texture. Give the pie a gentle shake. If the center jiggles slightly, it is ready. You can also insert a knife into the center. If it comes out clean, the custard is done. Let it cool for a bit to firm up further. For the best texture, refrigerate it for at least two hours. Enjoy this pie chilled for the best flavor! You learned how to make a delicious peach pie from scratch. We covered fresh peaches, pie crust options, and key ingredients. I detailed steps for prepping the crust, making the custard, and baking. Plus, I shared tips for a perfect texture and stunning presentation. You can even explore variations with different fruits and gluten-free options. Finally, we talked about storage and reheating to keep the pie tasty. Now, you have all you need to create this delightful treat! Enjoy every bite of your homemade peach pie.](https://fastmealmate.com/wp-content/uploads/2025/06/869ea291-58a7-44e1-8c29-8ce1fa52617f-768x768.webp)
![Here are the ingredients you need for Peach Blueberry Greek Yogurt Cake. Gather these items before you start. - 1 cup plain Greek yogurt - 1 cup granulated sugar - 1/2 cup vegetable oil - 3 large eggs - 1 teaspoon vanilla extract - 2 cups all-purpose flour - 1 tablespoon baking powder - 1/2 teaspoon baking soda - 1/4 teaspoon salt - 1 cup fresh peaches, diced - 1 cup fresh blueberries - Zest of 1 lemon - Powdered sugar for dusting (optional) Using Greek yogurt makes this cake moist and adds a nice tang. Fresh peaches and blueberries bring sweetness and color. The lemon zest brightens the flavor, making each bite delightful. You can easily find most of these ingredients at your local store. For the full recipe, check the section on instructions. Enjoy baking this tasty treat! - Preheat your oven to 350°F (175°C). - Prepare and grease the cake pan. Use butter or oil and a little flour. This helps the cake come out easily. - Combine wet ingredients. In a large bowl, mix Greek yogurt, sugar, oil, eggs, and vanilla. Whisk until smooth. - Sift and combine dry ingredients. In another bowl, sift flour, baking powder, baking soda, and salt. This makes the cake light and fluffy. - Fold in the fruits. Gently add diced peaches, blueberries, and lemon zest to the batter. Be careful not to break the fruit. - Bake and check for doneness. Pour the batter into the pan. Bake for 35-40 minutes. Your cake is done when it is golden brown and a toothpick comes out clean. Enjoy making this delicious Peach Blueberry Greek Yogurt Cake by following the [Full Recipe]. - Avoiding overmixing: When you mix the wet and dry ingredients, stir just until combined. Overmixing can make your cake tough. The batter should look a bit lumpy, and that's okay! - Signs your cake is done: Your cake is ready when it turns golden brown. A toothpick inserted in the center should come out clean or have a few moist crumbs. This tells you it’s perfectly baked. - Presentation ideas: Serve your cake on a lovely cake stand. Top it with whole blueberries and thin peach slices. This adds color and charm to your dish. - Pairing with whipped cream: A dollop of fresh whipped cream takes this cake to another level. The cream’s richness balances the fruity flavors and makes each bite heavenly. - Incorrect ingredient ratios: Always measure your ingredients carefully. Too much flour or too little sugar can ruin the cake's texture and taste. - Not greasing the cake pan properly: Make sure to grease your pan well. Use butter or oil and dust it with flour. This step helps the cake come out easily after baking, preventing any tears. For the Full Recipe, be sure to check out the detailed instructions on how to make this delightful cake! {{image_4}} You can change fruits in this cake. Raspberries and strawberries work well. They add a nice flavor. You can also use flavored yogurt. Try vanilla or peach yogurt for a twist. This will change the taste slightly but keep it tasty. If you need gluten-free options, use a gluten-free flour blend. This keeps the cake light. For lower sugar choices, you can use a sugar substitute. This will keep the cake sweet without the extra sugar. Always check the package for the best ratio. Making cupcakes or mini cakes is fun and easy. Use a muffin tin to create individual servings. Bake them for about 20-25 minutes. Check for doneness with a toothpick. This way, you can share with friends or enjoy them yourself! You can store the Peach Blueberry Greek Yogurt Cake in two ways. If you plan to eat it quickly, keep it at room temperature. Just wrap it in plastic wrap or place it in an airtight container. This keeps the cake moist. If you want to save it longer, put it in the fridge. The cold will help it stay fresh for days. This cake stays fresh for about 3 days at room temperature. If you store it in the fridge, it can last up to a week. The flavors will deepen over time, which is a nice bonus! Just make sure to check for any signs of spoilage before enjoying. If you have leftover cake, freezing is a great option. Cut the cake into slices for easy serving later. Wrap each slice in plastic wrap tightly. Then, place the wrapped slices in a freezer bag. Make sure you remove the air. This way, the cake can last up to 3 months in the freezer. When you’re ready to eat it, just thaw it in the fridge overnight. Enjoy your delicious Peach Blueberry Greek Yogurt Cake again! For the full recipe, check out the earlier section. To make this cake, follow these steps: 1. Preheat the oven to 350°F (175°C). Grease a 9-inch cake pan. 2. In a bowl, mix Greek yogurt, sugar, oil, eggs, and vanilla. Whisk until smooth. 3. In another bowl, sift flour, baking powder, baking soda, and salt. 4. Gradually add the dry mix to the wet mix. Stir gently to combine. 5. Fold in diced peaches, blueberries, and lemon zest. 6. Pour the batter into the pan and smooth the top. 7. Bake for 35-40 minutes until golden. Check for doneness. 8. Cool the cake for 10 minutes in the pan, then transfer to a wire rack. You can find the full recipe in the earlier sections. Yes, you can use canned peaches. However, they may change the cake's texture. Canned peaches are softer and wetter than fresh ones. This extra moisture may make the cake denser. If you use canned peaches, drain them well. This will help keep the cake light and fluffy. You can make this cake dairy-free. Use coconut yogurt or almond yogurt instead of Greek yogurt. For eggs, try flaxseed meal or applesauce. Mix 1 tablespoon of flaxseed meal with 3 tablespoons of water per egg. Let it sit until it thickens. This will help bind the ingredients together. If you don’t have a toothpick, check the cake by pressing lightly on the top. If it springs back, it’s done. You can also look for a golden-brown top. The sides should pull away from the pan slightly. These signs mean your cake is ready to be taken out of the oven. This blog post showed you how to make a delicious Peach Blueberry Greek Yogurt Cake. You learned about the simple ingredients, step-by-step instructions, and some helpful tips. Remember to avoid overmixing and choose the right baking time. Feel free to customize the recipe with different fruits or dietary changes. Store your cake properly to keep it fresh. Enjoy your baking adventure and impress your friends with this tasty treat!](https://fastmealmate.com/wp-content/uploads/2025/06/b601b86f-d636-457f-a46c-3ca961086cb7-768x768.webp)


