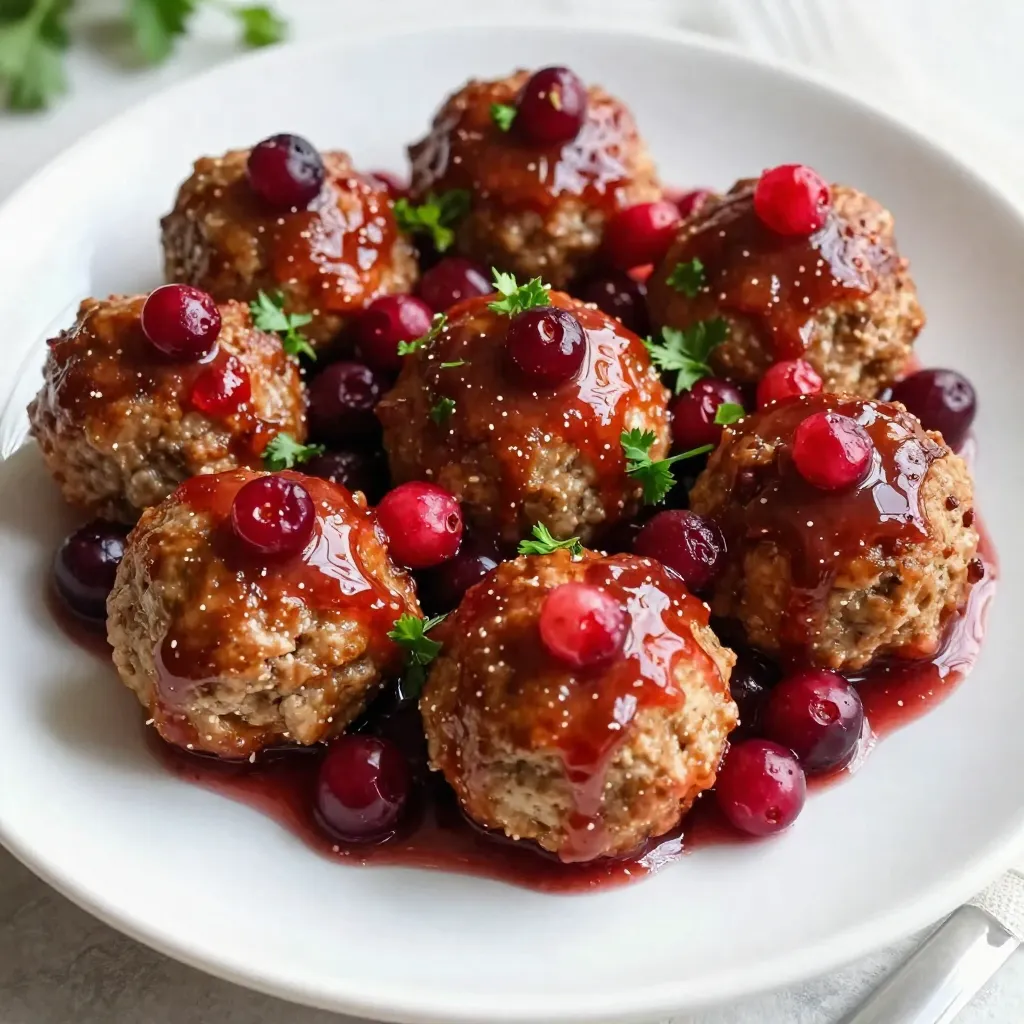
Get ready to impress your family this holiday season with my easy Cranberry Holiday Meatballs recipe! These savory meatballs pack a punch of flavor and are perfect for any festive gathering. I’ll guide you step-by-step, from mixing the meatball blend to making a delicious cranberry sauce. With tips for every home cook and tasty variations, you will love how simple and fun this dish can be. Let’s dive in!
Why I Love This Recipe
- Festive Flavor: The combination of turkey meatballs with a sweet and tangy cranberry glaze makes this dish perfect for holiday gatherings.
- Easy Preparation: This recipe is simple to follow and comes together quickly, making it ideal for busy cooks during the holidays.
- Healthy Twist: Using ground turkey instead of beef keeps the meatballs lean without sacrificing flavor, perfect for a healthier holiday option.
- Beautiful Presentation: With fresh cranberries and parsley as garnish, these meatballs look as good as they taste, enhancing any festive table.
Ingredients
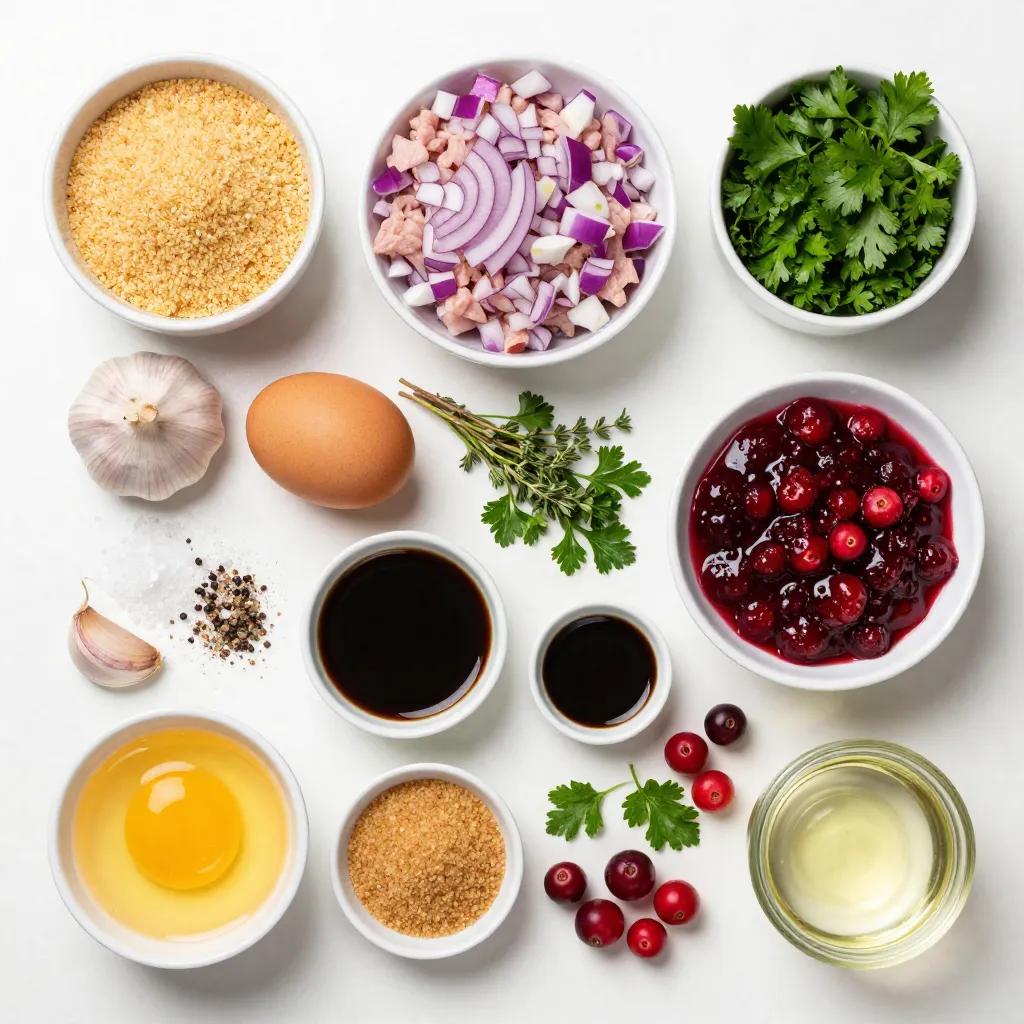
Main Ingredients for Cranberry Holiday Meatballs
To make these tasty cranberry holiday meatballs, you need some key items:
– 1 pound ground turkey (or chicken)
– 1 cup breadcrumbs
– 1/2 cup finely chopped onion
– 1/4 cup fresh parsley, chopped
– 1 large egg
– 2 cloves garlic, minced
– 1 teaspoon salt
– 1/2 teaspoon black pepper
– 1/2 teaspoon dried thyme
– 1 cup canned whole berry cranberry sauce
– 1 tablespoon soy sauce
– 1 tablespoon Dijon mustard
– 1 tablespoon brown sugar
– 1 tablespoon apple cider vinegar
These ingredients come together to create juicy meatballs with a sweet and tangy sauce.
Optional Garnishes
Adding some garnishes makes the dish look festive and bright. Consider these options:
– Fresh cranberries
– Extra parsley for a pop of color
These simple touches help to make your meatballs even more inviting!
Pantry Staples Explained
You may already have some of these items in your pantry, which makes this recipe easy. Here’s a quick look:
– Breadcrumbs: They add texture to the meatballs and help hold them together.
– Soy Sauce: This adds a rich umami flavor to the sauce.
– Dijon Mustard: It gives a nice tang to the sauce.
– Brown Sugar: This balances the tartness of the cranberry sauce.
These staples help create a flavor-packed dish that everyone will love.
Step-by-Step Instructions
Preparing the Meatball Mixture
Start by preheating your oven to 400°F (200°C). Line a baking sheet with parchment paper. This helps the meatballs not stick. In a large bowl, add 1 pound of ground turkey or chicken. Then, add 1 cup of breadcrumbs and 1/2 cup of finely chopped onion. Next, mix in 1/4 cup of fresh parsley, 1 large egg, and 2 minced garlic cloves. Season your mix with 1 teaspoon of salt, 1/2 teaspoon of black pepper, and 1/2 teaspoon of dried thyme.
Now, use your hands or a spoon to blend everything well. You want all the flavors to combine. Once mixed, the meat mixture should be moist, but not too wet.
Shaping and Baking the Meatballs
Now, shape the mixture into small meatballs. Aim for about 1 to 1.5 inches in diameter. This size cooks well and is easy to eat. Place the meatballs on your prepared baking sheet. Make sure they are spaced apart.
Bake the meatballs for 18 to 20 minutes. They should be firm to touch and lightly browned. To check if they are done, you can cut one open. There should not be any pink inside.
Making the Cranberry Sauce
While the meatballs bake, let’s make the cranberry sauce. In a medium saucepan, combine 1 cup of canned whole berry cranberry sauce, 1 tablespoon of soy sauce, 1 tablespoon of Dijon mustard, 1 tablespoon of brown sugar, and 1 tablespoon of apple cider vinegar.
Heat this mixture over medium heat. Stir it occasionally until it warms up. You want everything blended into a smooth sauce. Once the meatballs are baked, carefully add them to the saucepan. Gently toss the meatballs to coat them in the sauce.
Now, your Cranberry Holiday Meatballs are ready to serve!
Tips & Tricks
Achieving the Perfect Meatball Texture
To get the best meatballs, mix gently. If you overmix, they can be tough. Use your hands for a light touch. Aim for small, even meatballs about 1-1.5 inches wide. This size helps them cook evenly.
Flavor Enhancements for the Sauce
For a richer sauce, add spices. A pinch of cinnamon or nutmeg gives warmth. If you like heat, try some red pepper flakes. You can also mix in a splash of orange juice for added brightness. Taste the sauce as it cooks. Adjust the flavors to your liking.
Presentation Tips for Serving
Serve the meatballs in a festive dish. Use a platter for a beautiful display. Garnish with fresh cranberries and parsley. This gives a pop of color. Consider adding toothpicks for easy serving. It makes them fun to eat at parties!
Pro Tips
- Use Fresh Ingredients: Always opt for fresh herbs and spices to enhance the flavor of your meatballs. Fresh parsley adds a vibrant taste compared to dried.
- Chill the Mixture: After mixing the meatball ingredients, refrigerate the mixture for about 30 minutes. This helps the meatballs hold their shape while baking.
- Adjust the Sweetness: Feel free to modify the amount of brown sugar in the sauce according to your taste preference. A little more can enhance the sweetness of the cranberry sauce.
- Garnish Creatively: For a beautiful presentation, use a mix of fresh herbs and cranberries to garnish. This not only adds color but also a festive touch to your dish.
Variations
Ingredient Swaps for Dietary Needs
You can easily swap ingredients to fit your dietary needs. If you want a gluten-free option, use gluten-free breadcrumbs. This keeps the meatballs tasty and safe for those with gluten issues. For a leaner choice, switch turkey for ground chicken. This also adds a different flavor while keeping it light. If you’re vegan, try using a plant-based meat substitute. Just mix in the same spices and flavors as with meat.
Alternative Cooking Methods (Slow Cooker, Air Fryer)
You can use different cooking methods for these meatballs. A slow cooker is great for a hands-off approach. Just mix everything, shape the meatballs, and place them in the slow cooker. Pour the sauce over them and cook on low for 6 hours or high for 3 hours. This keeps the meatballs tender and juicy. If you prefer an air fryer, set it to 375°F. Cook the meatballs for about 12-15 minutes. This method gives them a nice crispy edge.
Flavor Profile Variations (Spicy, Sweet)
You can change the flavor of the meatballs easily. If you like heat, add red pepper flakes or chopped jalapeños to the meat mixture. This gives it a spicy kick. For a sweeter twist, mix in a bit more brown sugar or honey to the sauce. You can even add some orange zest for a fruity note. These changes make the dish fun and unique for your holiday table.
Storage Info
How to Store Leftover Meatballs
To keep your leftover meatballs fresh, first let them cool. Place them in an airtight container. Store them in the fridge for up to three days. If you want them to last longer, freezing is a great option.
Reheating Instructions
To reheat the meatballs, you have a few choices. The oven is best for keeping them crispy. Preheat your oven to 350°F (175°C). Place the meatballs on a baking sheet. Heat them for about 10-15 minutes. You can also use the microwave. Just heat them for 1-2 minutes, checking often.
Freezing Tips for Meal Prep
If you plan to freeze the meatballs, do this before adding the sauce. Shape your meatballs and place them on a baking sheet. Freeze them for about an hour until firm. Then, transfer them to a freezer bag. They can stay in the freezer for up to three months. When you are ready to use them, thaw them in the fridge overnight before cooking.
FAQs
Can I use beef or pork instead of turkey?
Yes, you can use beef or pork. Each meat brings a different flavor. Beef makes the meatballs rich and hearty. Pork adds a touch of sweetness. Make sure to adjust cooking times as needed. Ground turkey is leaner, so it cooks faster. Be mindful of the fat content in beef or pork.
How do I know when the meatballs are done?
To check if the meatballs are done, look for a few signs. They should be firm to the touch and no longer pink inside. You can also use a meat thermometer. The internal temperature should reach 165°F (74°C). If you’re unsure, cut one in half. Check that it’s fully cooked and hot.
What can I serve with cranberry holiday meatballs?
Cranberry holiday meatballs pair well with many sides. Consider serving them with rice or mashed potatoes. They also go great with a fresh salad. For a festive touch, serve with roasted vegetables. If you want something easy, use toothpicks for serving. This makes them perfect for parties or gatherings.
Cranberry holiday meatballs are simple and tasty. We covered key ingredients and made cooking easy. You learned how to prepare, bake, and sauce them for the best flavor. I shared tips for texture and serving. We also looked at variations for special diets and storage tips for leftovers.
In short, these meatballs are fun and festive. Enjoy making them for your next gatherin


