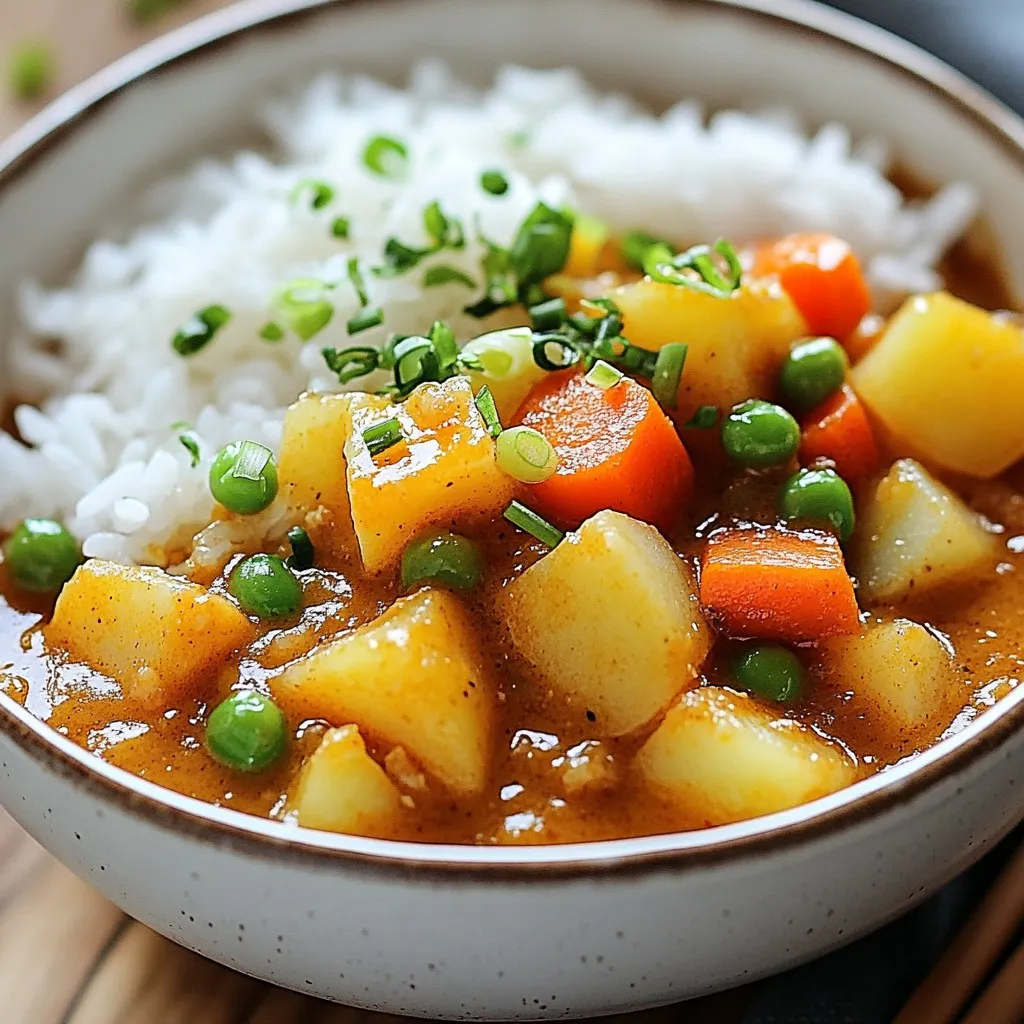
If you’re looking for a simple and tasty meal, a cozy Japanese curry rice bowl is perfect for you! This dish warms you up and fills your belly with comfort. With a blend of fresh veggies, aromatic spices, and hearty rice, it’s a meal you can make in no time. Join me as we explore how to create this delicious staple, perfect for any night of the week.
Why I Love This Recipe
- Comforting Flavor: This cozy Japanese curry rice bowl is a warm hug in a bowl, offering a perfect blend of spices and sweetness that’s incredibly satisfying.
- Easy to Make:
- Customizable: Feel free to swap in your favorite vegetables or proteins, making this dish versatile and adaptable to your tastes.
- Family-Friendly: This dish is loved by both kids and adults, making it an excellent choice for family dinners or gatherings.
Ingredients
List of Essential Ingredients
– 1 cup Japanese short-grain rice
– 1 tablespoon vegetable oil
– 1 onion, finely chopped
– 2 garlic cloves, minced
– 1-inch piece of fresh ginger, grated
– 2 carrots, peeled and sliced into rounds
– 2 medium potatoes, diced
– 1 cup chicken or vegetable broth
– 1 medium apple, finely grated
– 3 tablespoons Japanese curry powder (or curry roux)
– 1 cup frozen peas
– Salt and pepper to taste
– Fresh green onions, chopped (for garnish)
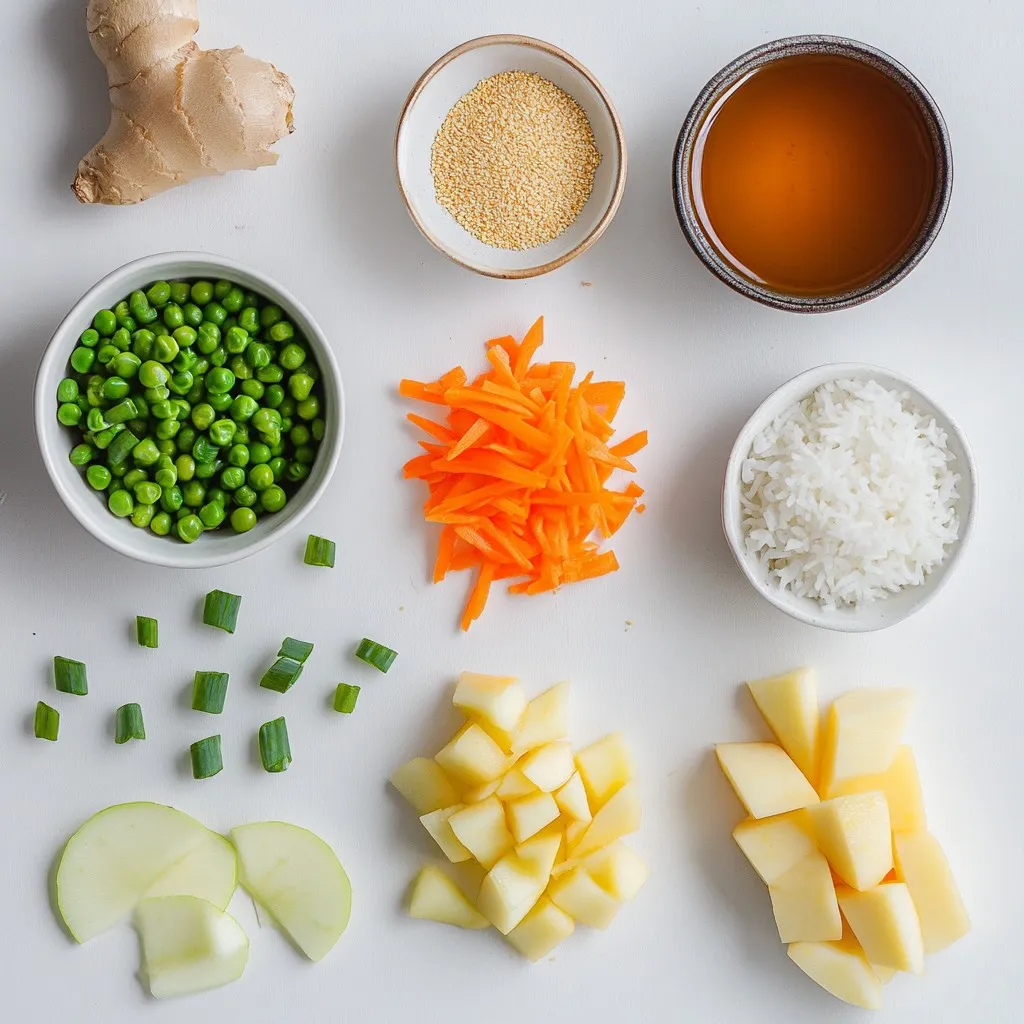
When making cozy Japanese curry rice, you need quality ingredients. Start with Japanese short-grain rice. This rice gives a sticky and soft texture. It’s the perfect base for the curry.
Next, gather your vegetables. You will need an onion, carrots, potatoes, and peas. These add color and flavor. The onion brings a sweet taste, while carrots and potatoes add heartiness. Don’t forget the peas! They add a nice pop of color and sweetness.
Aromatics are key. Use minced garlic and grated ginger. They add depth and warmth. Garlic gives a sharp bite, while ginger provides a fresh zing.
For the curry’s heart, use chicken or vegetable broth. This adds a rich flavor. The Japanese curry powder or roux is what gives the dish its unique taste. It’s a blend of spices that makes the curry both savory and sweet.
Lastly, the grated apple is a secret weapon. It adds sweetness and balances the spices. Don’t skip it!
These ingredients combine to create a warm and tasty meal. Each bite of curry over rice feels like a cozy hug. Enjoy the process of gathering these items and preparing your dish!
Step-by-Step Instructions
Cooking the Rice
1. First, rinse 1 cup of Japanese short-grain rice under cold water. Keep rinsing until the water runs clear. This step removes extra starch and helps the rice cook better.
2. Drain the rice well. Let it sit for a few minutes to dry slightly.
3. In a medium saucepan, add the rinsed rice and 1 ¼ cups of fresh water. Bring it to a rolling boil.
4. Once boiling, lower the heat to low. Cover the saucepan and let it simmer for 15-20 minutes. The rice should absorb all the water.
5. After cooking, turn off the heat and let it sit, covered, for another 10 minutes. This helps the rice steam and become fluffy.
Preparing the Curry Base
1. While the rice cooks, heat 1 tablespoon of vegetable oil in a large pot over medium heat.
2. Add 1 finely chopped onion. Sauté it for about 5 minutes until it becomes soft and translucent.
3. Next, add 2 minced garlic cloves and 1 inch of grated ginger. Stir for about a minute until they smell great.
4. Now, toss in 2 sliced carrots and 2 diced medium potatoes. Stir well to coat them with the oil and onion.
5. Pour in 1 cup of chicken or vegetable broth. Bring the mixture to a gentle boil.
6. Once boiling, reduce the heat to low. Let it simmer for about 15 minutes. The vegetables should be tender and easy to pierce with a fork.
Finalizing the Curry
1. After the veggies are soft, mix in 3 tablespoons of Japanese curry powder and the grated apple.
2. Stir until the sauce thickens, which should take about 5-10 minutes. If it’s too thick, you can add more broth or water.
3. Add 1 cup of frozen peas to the pot. Stir well and cook for another 2-3 minutes until the peas are warmed through.
4. Taste the curry and adjust the seasoning with salt and pepper as needed.
Now, you are ready to serve!
Tips & Tricks
Expert Cooking Tips
– Troubleshooting common issues: If your curry is too thick, add more broth or water. If it’s too thin, let it simmer longer without the lid. For burnt flavors, scrape the bottom gently, but be careful not to stir in any burnt bits.
– How to enhance flavor: Use fresh spices for the best taste. Adding a bit of soy sauce or mirin can deepen the flavor. The grated apple adds sweetness, but feel free to adjust based on your taste.
Serving Suggestions
– Presentation ideas for an Instagram-worthy bowl: Use a large, shallow bowl to show off the rice and curry. Garnish with bright green onions for color. Place a small dish of pickled vegetables on the side for contrast and extra flavor.
– Suggested accompaniments: Serve with a side of steamed broccoli or a cucumber salad. These add freshness and crunch to your meal.
Tools and Equipment
– Recommended pots and utensils for best results: A medium saucepan works well for the rice. Use a large pot with a thick bottom for the curry to prevent burning. A wooden spoon is perfect for stirring. Having a microplane for grating the ginger and apple makes the prep easier.
Pro Tips
- Rinse Your Rice: Make sure to rinse the rice thoroughly until the water runs clear. This removes excess starch and helps achieve a fluffy texture.
- Vegetable Variations: Feel free to mix in other vegetables like bell peppers or green beans for added nutrition and color.
- Adjusting Spice Level: If you prefer a milder curry, start with less curry powder and gradually add more to suit your taste.
- Make It Ahead: This curry can be made in advance and stored in the refrigerator for up to 3 days. Simply reheat before serving.
Variations
Dietary Adjustments
You can easily adapt this cozy Japanese curry rice bowl for different diets. If you want a vegetarian or vegan version, swap chicken broth for vegetable broth. Use tofu or chickpeas instead of meat for protein. You can also add more veggies like bell peppers or spinach.
For gluten-free options, look for gluten-free curry powder or roux. Many brands offer blends that keep the flavor without gluten. Just check the labels to make sure they fit your diet.
Ingredient Swaps
Feel free to play with the vegetables in this dish. You can use zucchini, sweet potatoes, or even broccoli. Each swap brings its own taste and texture. For protein, try using shrimp or beef instead of chicken.
If you want to enhance the flavor, add coconut milk for creaminess or a dash of chili powder for heat. These simple changes can make your dish unique and exciting.
Regional Twists
You can give your curry a local twist by incorporating regional ingredients. For instance, adding corn or black beans can give it a new flair. You might also try using spices from your area to mix with the curry flavor.
Fusion recipes are another fun way to explore. How about adding some Italian herbs for an unexpected kick? Or try serving it with naan instead of rice for a fun twist! These ideas keep your cozy curry fresh and interesting.
Storage Info
Refrigeration Guidelines
To store your cozy Japanese curry rice bowl, let it cool first. Place the leftovers in an airtight container. This keeps the dish fresh and tasty. You can store it in the fridge for up to three days. After that, the flavors may fade.
Freezing Instructions
If you want to keep it longer, freezing is a great option. Here’s how to do it:
1. Allow your curry to cool completely.
2. Spoon the curry into freezer-safe containers.
3. Leave some space at the top for expansion as it freezes.
4. Seal tightly and label with the date.
When you’re ready to eat, thaw the curry in the fridge overnight. Reheat it on the stove or in the microwave. Add a splash of broth or water to keep it moist. This will help the texture stay just right.
Meal Prep Tips
Preparing this cozy dish in advance saves time. You can chop the veggies ahead of time. Store them in the fridge in separate containers. When you’re ready to cook, just sauté and simmer.
You can also cook a big batch of rice. Cool it and store it in the fridge. When it’s time to eat, warm it up and serve with your curry. This way, you can enjoy a warm meal on busy nights!
FAQs
Common Questions
What is Japanese curry made of?
Japanese curry is a mix of spices, broth, and vegetables. Key ingredients include onions, carrots, potatoes, and protein. You often find it thickened with curry powder or roux. The flavor is sweet and savory, thanks to the grated apple.
Can I use different types of rice?
You can use other rice types, but Japanese short-grain rice is best. It is sticky and absorbs flavors well. If you prefer basmati or jasmine rice, they work too, but the texture will change.
Cooking Time and Servings
How long does it take to make curry rice?
Making curry rice takes about 50 minutes in total. You spend around 15 minutes on prep and 35 minutes for cooking. This includes time for rice and curry to be ready.
Can I scale the recipe for more servings?
Yes, you can easily scale the recipe. Just double or triple the ingredients. Adjust the broth and spices to taste. Keep in mind that cooking time may change slightly.
Ingredient Substitutions
What can I use instead of Japanese curry powder?
If you don’t have Japanese curry powder, use curry paste or powder from other regions. Indian curry powder can work, but it has a different flavor. Adjust the amount based on your taste.
Alternatives for apples in the recipe?
You can use pear or even a bit of honey for sweetness. Both will add a nice touch. If you prefer no fruit, just skip it altogether. The curry will still taste great!
This blog post outlined how to make delicious Japanese curry rice from scratch. We covered essential ingredients, step-by-step cooking instructions, and helpful tips. Don’t forget variations for dietary needs and ways to serve your dish. Remember to store leftovers properly for future meals. Using the right ingredients and methods will help you create a tasty meal every time. Enjoy your cooking journey and share your curry creations with other


