Corn Chowder Comforting and Creamy Recipe Delight

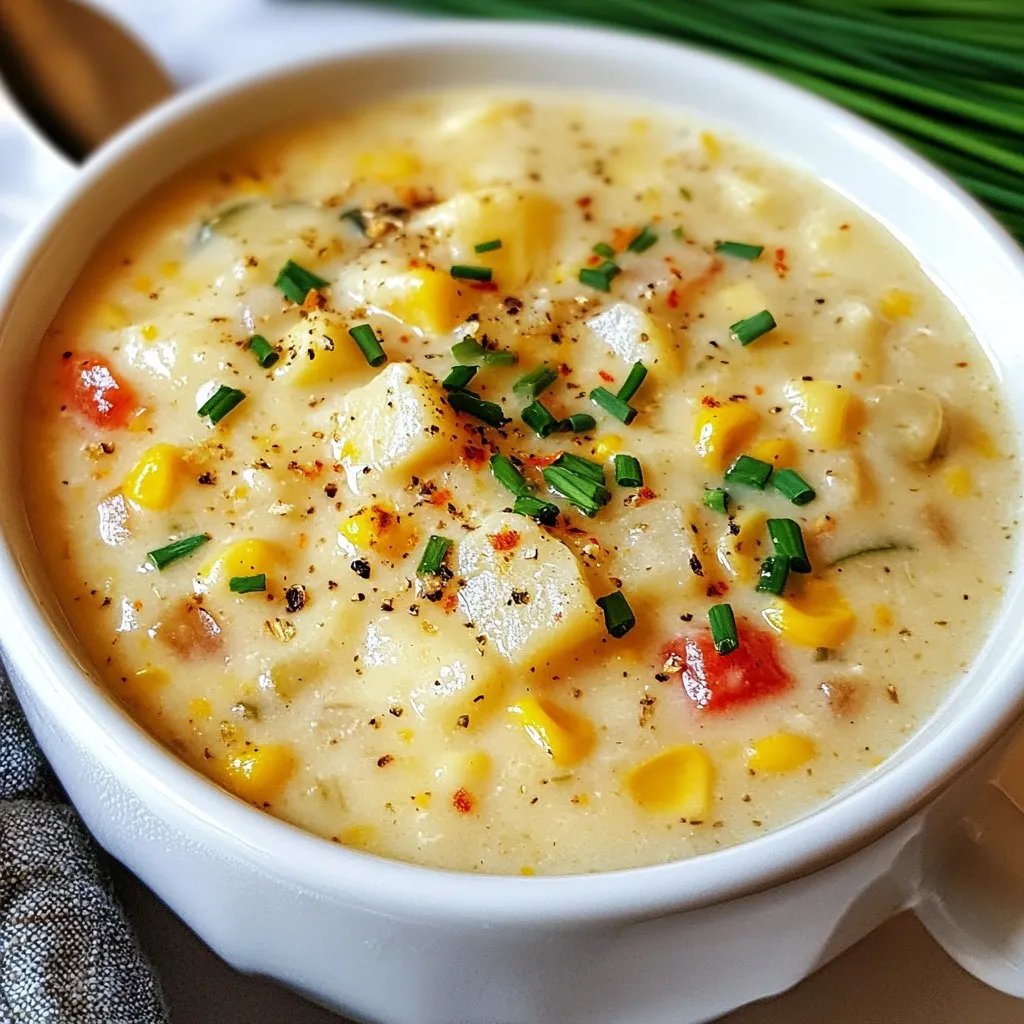
Warm your kitchen and your heart with my creamy Corn Chowder recipe! This comforting dish features fresh corn, tender potatoes, and fragrant spices. You’ll love how simple it is to make, yet so full of flavor. Whether you enjoy it with toppings or on its own, each bowl promises a taste of home. Ready to dive into this delightful recipe and warm up your family dinners? Let’s get started!
Why I Love This Recipe
- Fresh Ingredients: This chowder showcases the natural sweetness of fresh corn, making it a delightful summer dish.
- Comforting Texture: The creamy consistency combined with chunky vegetables creates a satisfying mouthfeel that warms the soul.
- Easy to Prepare: The simple steps make this recipe accessible even for novice cooks, ensuring success every time.
- Customizable Flavor: Feel free to add your favorite herbs or spices, making this chowder versatile for any palate.
Ingredients
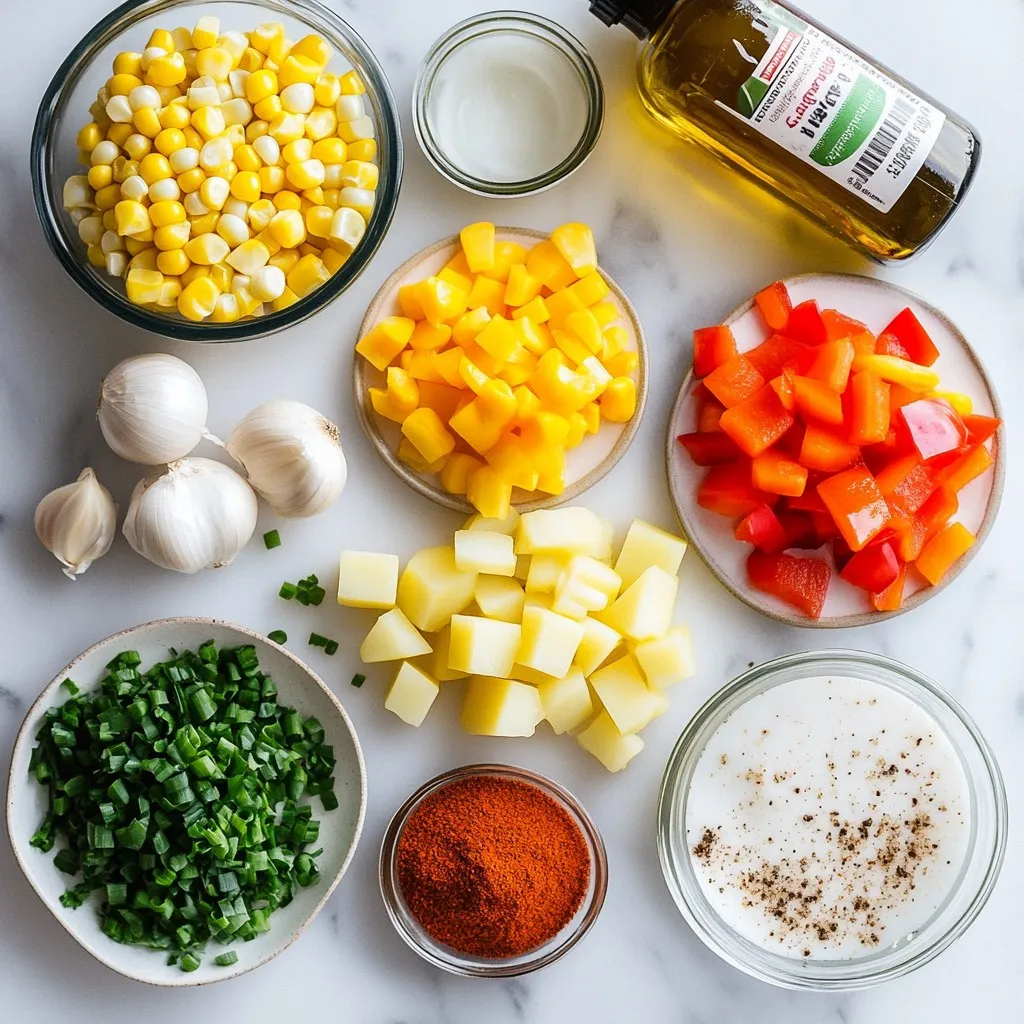
Main Ingredients for Corn Chowder
– 4 cups fresh corn kernels (about 6 ears of corn, husked and kernels removed)
– 1 medium onion, finely diced
– 2 cloves garlic, minced
– 2 medium potatoes, peeled and cut into small cubes
– 1 red bell pepper, diced
– 4 cups vegetable broth (preferably low-sodium)
You need fresh corn kernels for sweetness. I use about six ears of corn, and it makes a big difference. A medium onion adds depth, while garlic gives it a nice kick. Potatoes add heartiness and help thicken the chowder. A red bell pepper brings color and sweetness to the mix. Low-sodium vegetable broth provides a great base without too much salt.
Flavor Enhancers
– 1 cup coconut milk (full-fat for creaminess)
– 1 teaspoon smoked paprika (for a hint of smoky flavor)
– 1 teaspoon ground cumin (for warmth)
Coconut milk is key to a creamy texture. It adds richness without dairy. Smoked paprika gives the chowder a warm, smoky note. Ground cumin adds a touch of earthiness, enhancing the overall flavor profile.
Optional Garnishes
– Fresh chives or cilantro, finely chopped for garnish
– Coconut milk drizzle and corn kernels for presentation
Garnishes make your chowder look as good as it tastes. Fresh chives or cilantro add brightness and a pop of color. A drizzle of coconut milk on top makes it look inviting. You can also sprinkle a few extra corn kernels for texture and appeal. This simple touch elevates your dish to restaurant quality.

Step-by-Step Instructions
Sautéing Aromatics for Flavor
To start, I heat two tablespoons of extra virgin olive oil in a large pot over medium heat. Once the oil is warm, I add one finely diced medium onion. I sauté it for about five minutes until it turns soft and translucent. Then, I stir in two minced garlic cloves and one diced red bell pepper. I cook this mix for another two to three minutes, letting the garlic and pepper release their nice aromas.
Incorporating Vegetables and Spices
Next, I add two medium potatoes, peeled and cut into small cubes. I also toss in four cups of fresh corn kernels and my spices: one teaspoon of smoked paprika and one teaspoon of ground cumin. I let these cook for about two to three minutes. This step helps toast the spices and make the flavors richer.
Simmering and Blending for Texture
Then, I pour in four cups of low-sodium vegetable broth. I bring this mixture to a gentle boil. Once it boils, I reduce the heat and let it simmer uncovered for about 15 to 20 minutes. I check if the potatoes are tender by piercing them with a fork. When they are ready, I use an immersion blender to blend part of the chowder right in the pot. I make sure to leave some corn and potato chunks for a nice texture. If I don’t have an immersion blender, I carefully transfer half the chowder to a regular blender, blend until smooth, and return it to the pot.
Final Seasoning and Serving
After blending, I stir in one cup of full-fat coconut milk. I season the chowder with salt and freshly cracked black pepper to taste. I let it heat through for another five minutes, stirring occasionally. For serving, I ladle the hot chowder into bowls. I love to garnish it with fresh chives or cilantro for a pop of color. To make it extra special, I drizzle a bit of coconut milk on top and serve it with crusty bread or crackers.
Tips & Tricks
Perfecting Flavor
To make your corn chowder taste great, adjust spices and seasoning to your liking. Start with the smoked paprika and ground cumin. You can add more or less to suit your taste. A little salt and black pepper really helps too.
Choosing the right broth is key. I recommend using low-sodium vegetable broth. It adds depth without overpowering the sweet corn flavor. You can even try homemade broth for a richer taste.
Recommended Cooking Tools
An immersion blender works best for this recipe. It lets you blend the chowder right in the pot. This keeps the texture nice. If you don’t have one, a traditional blender works too. Just be careful when transferring hot chowder.
For cooking, a heavy-bottomed pot is ideal. It heats evenly and helps prevent burning. A Dutch oven is a great choice for making this chowder.
Timing for Best Results
When cooking the vegetables, keep an eye on the time. Sauté the onion for about 5 minutes. Then, cook the garlic and bell pepper for 2-3 minutes more. This builds a strong base for flavor.
The chowder needs to simmer for 15-20 minutes. Check if the potatoes are tender by piercing them with a fork. When they are soft, the chowder is ready to blend and finish.
Pro Tips
- Use Fresh Corn: For the best flavor and sweetness, use fresh corn that is in season. If fresh corn isn’t available, frozen corn can be a good alternative, but avoid canned corn for this recipe.
- Adjust Consistency: If you prefer a thicker chowder, blend more of the mixture. For a thinner consistency, add a little more vegetable broth or coconut milk until you reach your desired texture.
- Enhance Flavor: Consider adding a splash of lime juice or a pinch of cayenne pepper for an extra layer of flavor and a hint of heat.
- Garnish Creatively: Besides chives or cilantro, try garnishing with crispy bacon bits or avocado for added texture and flavor contrast.

Variations
Vegetarian and Dairy-Free Options
You can easily make this corn chowder vegetarian and dairy-free. For the broth, try vegetable broth instead of chicken broth. This keeps the flavors rich and full. If you want a lighter option, use water with herbs instead.
Instead of coconut milk, you could use almond milk or cashew cream. Both can add a nice creaminess. If you prefer, use a blend of both for a unique taste.
Additional Ingredients
Want to change things up? You can add different vegetables to your chowder. Zucchini can offer a fresh crunch. Carrots add sweetness and color. Just chop them small and add them early on.
For protein, consider beans or chicken. Black beans give a hearty feel while chickpeas boost fiber. If you use chicken, cook it first, then add it to the chowder. This way, it absorbs all the great flavors.
Global Twist Ideas
Want to spice things up? Try adding herbs and spices from other cuisines. A bit of curry powder can give a warm twist. Alternatively, a pinch of chili powder can add some heat.
You can also explore fusion ideas. Combine corn chowder with Mexican flavors by adding cumin and lime. Top with tortilla strips for crunch. Or blend it with Asian flavors using ginger and soy sauce. This can give your chowder a whole new life.
Storage Info
How to Store Corn Chowder
To keep your corn chowder fresh, cool it to room temperature first. Place it in an airtight container. This helps avoid any bad smells in your fridge. Always label the container with the date. Store it in the fridge for up to 3-4 days. If you want to keep it longer, consider freezing.
Reheating Instructions
The best way to reheat corn chowder is on the stove. Pour it into a pot over low heat. Stir it often to ensure even heating. You can also use a microwave. Place in a microwave-safe bowl, cover loosely, and heat for 1-2 minutes. To regain creaminess, add a splash of coconut milk while reheating. This will keep it smooth and rich.
Freezing Corn Chowder
If you want to freeze corn chowder, use a freezer-safe container. Leave some space at the top, as it will expand. Seal tightly to avoid freezer burn. It’s best used within 3 months for optimal taste. When you’re ready to eat, thaw it overnight in the fridge. Heat gently on the stove, stirring well, before serving.
FAQs
How do I thicken my corn chowder?
To thicken corn chowder, you have a few good options. First, you can use starch like cornstarch. Mix it with cold water, then stir it into the hot chowder. This will help it thicken quickly. Another method is to blend part of the chowder. Use an immersion blender or a regular blender. Blend until smooth, then mix it back in. This gives your chowder a creamy texture while keeping some chunks.
Can I make corn chowder ahead of time?
Yes, you can make corn chowder ahead of time. It is best to cook it and let it cool before storing. Place it in an airtight container in the fridge. The chowder will taste even better after resting. The flavors blend nicely over time. Just remember to reheat it gently to keep it creamy.
What can I serve with corn chowder?
Corn chowder pairs well with many sides. Consider crusty bread or savory crackers for dipping. A fresh salad with greens adds a nice crunch. You might also enjoy some grilled cheese sandwiches on the side. These options enhance the chowder and make your meal more satisfying.
Corn chowder is simple and tasty. We covered its main ingredients, flavors, and variations. You’ll find easy steps to create the perfect chowder, along with helpful tips. Remember, you can adjust flavors and try new veggies or spices. This dish is great for sharing, storing, and enjoying later. Dive into this recipe, and make it your own! Enjoy the warmth and comfort each bowl brings. Now, go ahead and make your corn chowder specia


![- 1 tablespoon olive oil - 1 medium onion, finely diced - 2 cloves garlic, minced - 2 medium carrots, peeled and diced - 1 medium zucchini, diced - 1 cup green peas (fresh or frozen) - 1 cup cauliflower florets, chopped - 4 cups vegetable broth - 1 cup coconut milk To make a creamy vegetable soup, start with olive oil, onion, and garlic. The olive oil adds a nice richness. The onion gives a sweet base flavor. Garlic brings a warm, aromatic touch. Next, choose fresh vegetables like carrots, zucchini, and cauliflower. Carrots add sweetness and color. Zucchini brings a mild flavor and a tender texture. Cauliflower gives the soup a creamy feel when blended. For the broth and creaminess, use vegetable broth and coconut milk. Vegetable broth adds depth. Coconut milk makes the soup rich and smooth. Together, these ingredients create a lovely balance of flavors. - 1 teaspoon dried thyme - ½ teaspoon smoked paprika - Salt and freshly ground black pepper to taste - Fresh parsley, chopped (for garnish) Now, season your soup with dried thyme and smoked paprika. Thyme adds a warm herbal note. Smoked paprika gives a hint of smokiness. Use salt and pepper to taste, adjusting as you go. Finally, top your soup with fresh parsley. It adds a pop of color and a fresh taste. This simple garnish makes the soup look inviting and bright. For the complete recipe, check the [Full Recipe]. Start by heating 1 tablespoon of olive oil in a large pot over medium heat. Once the oil is hot, add 1 medium onion, finely diced, and 2 cloves of minced garlic. Sauté these for about 3-4 minutes. Keep stirring until the onion is soft and clear. This step builds a strong flavor base for your soup. Next, add 2 medium carrots, peeled and diced, along with 1 medium zucchini, diced, and 1 cup of chopped cauliflower florets. Cook these vegetables for an additional 5 minutes. Stir often until they begin to soften. This mix of veggies adds color and nutrition to your dish. Now, pour in 4 cups of vegetable broth. This broth acts as the heart of the soup. Add 1 cup of green peas, 1 teaspoon of dried thyme, and ½ teaspoon of smoked paprika. Bring this mixture to a boil. After it boils, lower the heat and let it simmer uncovered for about 15 minutes. The goal is to cook until all the vegetables are tender and full of flavor. Once the soup has simmered, remove it from the heat. Use an immersion blender to carefully purée the soup until it is smooth and creamy. If you prefer, you can also transfer the soup in batches to a countertop blender. Blend until the mixture is silky. This step is key for achieving that creamy texture we all love. Return the pot to low heat. Now, stir in 1 cup of coconut milk. This ingredient adds a rich creaminess and a hint of sweetness. Season the soup with salt and freshly ground black pepper to taste. Gently warm the soup for about 5 minutes. This will make sure everything is hot without boiling. Serve the soup hot in bowls. Garnish with fresh chopped parsley for a pop of color. Enjoy your creamy vegetable soup, made with love and fresh ingredients! For the complete recipe, check out the Full Recipe section. Choosing the right vegetables is key to great flavor. I love using fresh carrots, zucchini, and cauliflower. Each adds a unique taste. You can also add sweet potatoes or bell peppers for a twist. Always pick vegetables that are in season. They taste better and have more nutrients. Adjusting the creaminess level is easy. For a lighter soup, use less coconut milk. If you like it rich, add more. You can also blend in some white beans for extra creaminess without extra calories. Garnishing the soup makes it look stunning. I like to sprinkle fresh parsley on top. It adds a pop of color and fresh taste. You can also drizzle a bit of coconut milk for a fancy touch. Serving suggestions are just as important. A slice of crusty bread pairs well with the soup. You can also serve it with a side salad. This makes for a filling meal. For the full recipe, check out the complete guide! {{image_4}} You can change your creamy vegetable soup by using different veggies. Try seasonal vegetables for fresh flavors. For spring, add asparagus or green beans. In summer, use ripe tomatoes and corn. In fall, butternut squash and sweet potatoes shine. You can also experiment with bases. Instead of coconut milk, try almond milk for a nutty twist. This gives the soup a different taste and texture. Each change brings a new layer of flavor to your soup. Adding protein can make your soup heartier. Beans and lentils are great options. They add fiber and keep you full. For example, black beans or chickpeas blend well with the soup. You can add them when you simmer the broth. Another option is chicken or sausage. Cooked chicken pieces are tasty and satisfying. If you like sausage, slice it and sauté it with the onions. This adds a savory kick to the soup. Enjoy making it your own! Check out the Full Recipe for more ideas. To keep your creamy vegetable soup fresh, allow it to cool before storing. Place it in airtight containers to avoid air exposure. This helps maintain its flavor and texture. Store the soup in the fridge for up to three days. If you want to keep it longer, freezing is a great option. For freezing, use freezer-safe containers or bags. Make sure to leave some space for expansion. The soup can last up to three months in the freezer. When reheating the soup, you want to keep it creamy. The best method is to use the stove over low heat. Stir it gently to avoid burning. If you want to use the microwave, do so in short bursts. Stir the soup in between each burst to ensure even heating. To prevent separation, add a splash of water or vegetable broth if it thickens too much. This keeps the texture smooth and enjoyable. Can I make creamy vegetable soup vegan? Yes, you can easily make this soup vegan. Just use vegetable broth and coconut milk. Skip any dairy products. How do I make the soup spicier? To add heat, sprinkle in red pepper flakes or cayenne pepper. You can also add fresh jalapeños for a kick. What are the best side dishes to serve with the soup? Serve the soup with crusty bread, a fresh salad, or grilled cheese. These pair well and add more flavor. What to do if the soup is too thick? If your soup is too thick, add more vegetable broth. Stir well to combine and adjust until you reach your desired texture. How can I add more flavor? For extra flavor, try adding herbs like basil or dill. A splash of lemon juice can also brighten the taste. If you want, use the Full Recipe to explore more options. This blog post covered how to make a creamy vegetable soup from scratch. We explored essential ingredients like olive oil, fresh veggies, and broth. You learned step-by-step instructions, from sautéing to blending the soup. Tips for perfecting flavor and presentation will enhance your dish. Remember, you can change the recipe to suit your taste and store leftovers for later. With this knowledge, you can create a warm, comforting dish that you and others will enjoy. Happy cooking!](https://fastmealmate.com/wp-content/uploads/2025/07/74153262-6d82-4db7-a8c8-a4016c29ccdc-768x768.webp)

. - Bring salted water to a boil. - Add rotini pasta and cook until al dente. - This usually takes about 7 to 9 minutes. - Drain the pasta and rinse it under cold water to cool. - Chop the cherry tomatoes in half. - Dice the cucumber and red bell pepper. - Finely chop the red onion. - If you use fresh corn, cook it lightly for 2-3 minutes. - Cool the corn under cold water. - In a bowl, combine olive oil and lemon juice. - Add Dijon mustard and minced garlic. - Whisk the mixture until it is smooth. - Season it with salt and pepper to taste. - In a large bowl, mix the cooled pasta with the chopped vegetables. - Add crumbled feta cheese, basil, and parsley. - Drizzle the lemon vinaigrette over the pasta mixture. - Toss gently to coat all the ingredients evenly. - Cover the salad with plastic wrap. - Chill in the refrigerator for at least 30 minutes. - This helps the flavors blend together nicely. This refreshing summer pasta salad with lemon vinaigrette is perfect for hot days. For the complete recipe, check the [Full Recipe]. - Use fresh, seasonal vegetables for better flavor. Fresh veggies taste brighter and more delicious. They also add color and crunch. Look for ripe tomatoes, crisp cucumbers, and sweet bell peppers. - Adjust dressing ingredients according to personal preference. This salad is flexible. If you like tangy, add more lemon juice. If you prefer creamy, a bit of yogurt can work wonders. - Serve in a chilled bowl and garnish with basil leaves and lemon wedges. This adds a lovely touch and makes your dish pop. - Consider colorful serving dishes to enhance visual appeal. Bright colors make the salad inviting. Use a vibrant bowl to catch the eye and draw people in. {{image_4}} You can make your summer pasta salad even more filling. Adding proteins boosts nutrition and flavor. Grilled chicken, shrimp, or chickpeas work well. Grilled chicken adds a smoky taste. Shrimp gives a fresh ocean flavor. Chickpeas offer a hearty, plant-based option. Each choice makes your salad special and satisfying. While lemon vinaigrette is zesty, you can switch it up. Try balsamic vinaigrette for a sweet-tangy twist. A yogurt-based dressing adds creaminess and a slight tang. Both options change the salad's vibe while keeping it fresh. Feel free to experiment to find your favorite taste. Using seasonal vegetables makes your salad vibrant. Swap in zucchini for a crunchy bite. Asparagus adds a touch of elegance. Bell peppers bring sweetness and color. You can mix and match based on what’s fresh and available. This keeps your salad exciting and full of flavor. For the full recipe, check out the detailed instructions above. After enjoying your summer pasta salad, store any leftovers in an airtight container. This keeps the salad fresh. You can keep it in the refrigerator for up to 3 days. Freezing this pasta salad is not a good idea. The texture of the pasta and vegetables changes when frozen. They become mushy when thawed, which affects the taste. I recommend eating the salad cold straight from the fridge. This keeps the flavors bright and fresh. Don’t reheat it, as it tastes best when chilled. For more details, check out the Full Recipe. Use a gluten-free pasta option available in stores. Many brands offer good choices. Just check the label to ensure it's truly gluten-free. This way, everyone can enjoy the dish without worry. Yes, it’s best to make the salad a few hours before serving for best flavor. This time lets the ingredients blend together. You can chill it in the fridge, which enhances the taste. Just remember to toss it gently before serving. Try goat cheese, mozzarella, or skip cheese entirely for a dairy-free option. Each cheese gives a different flavor. Goat cheese adds creaminess, while mozzarella is mild and stretchy. Picking one that fits your taste makes the salad even better! This summer pasta salad is fresh, simple, and easy to make. You learned how to prepare a tasty dish with rotini pasta, colorful vegetables, and a zesty lemon vinaigrette. We discussed tips to enhance flavor and presentation. Remember, you can add proteins or swap ingredients for variety. This salad makes a great side or light meal. Enjoy making your own version and impress your guests this warm season!](https://fastmealmate.com/wp-content/uploads/2025/07/167fa52b-6c37-4fee-aa24-5fa64edc3341-768x768.webp)