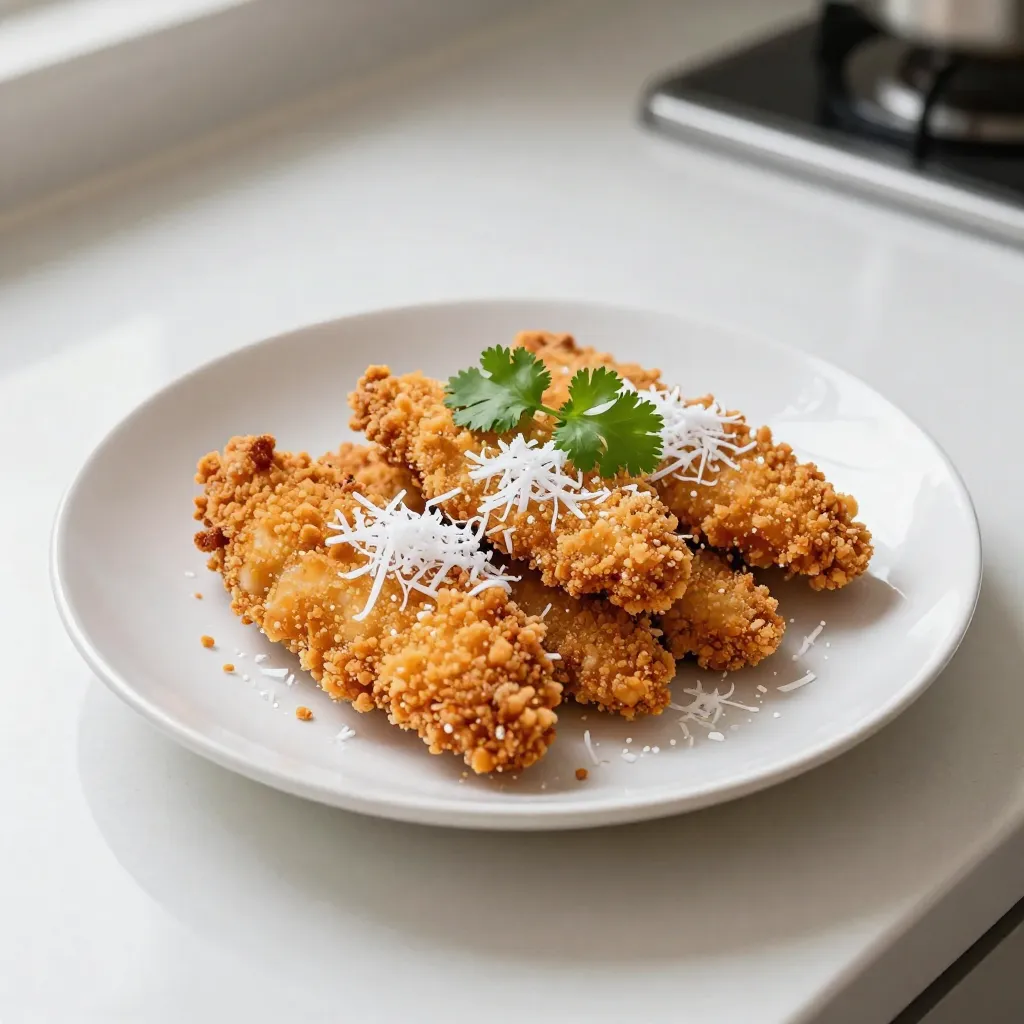
Are you ready to elevate your dinner game? Coconut Crunch Chicken is a crispy delight that combines juicy chicken with a crunchy coconut coating. It’s perfect for family meals or impressing guests. In this article, I’ll share simple steps, tips for that perfect crunch, and delicious serving ideas. Let’s dive into this tasty recipe that will have everyone asking for seconds!
Why I Love This Recipe
- Delicious Crunch: The combination of coconut and panko breadcrumbs gives the chicken a delightful crunch that makes every bite enjoyable.
- Easy to Prepare: This recipe requires minimal ingredients and straightforward steps, making it perfect for a quick weeknight dinner.
- Versatile Dish: Whether served with a salad or a fruity salsa, the coconut crunch chicken pairs beautifully with various sides.
- Kid-Friendly: The crispy coating and flavorful chicken are sure to please even the pickiest eaters at the dinner table.
Ingredients
Main Ingredients
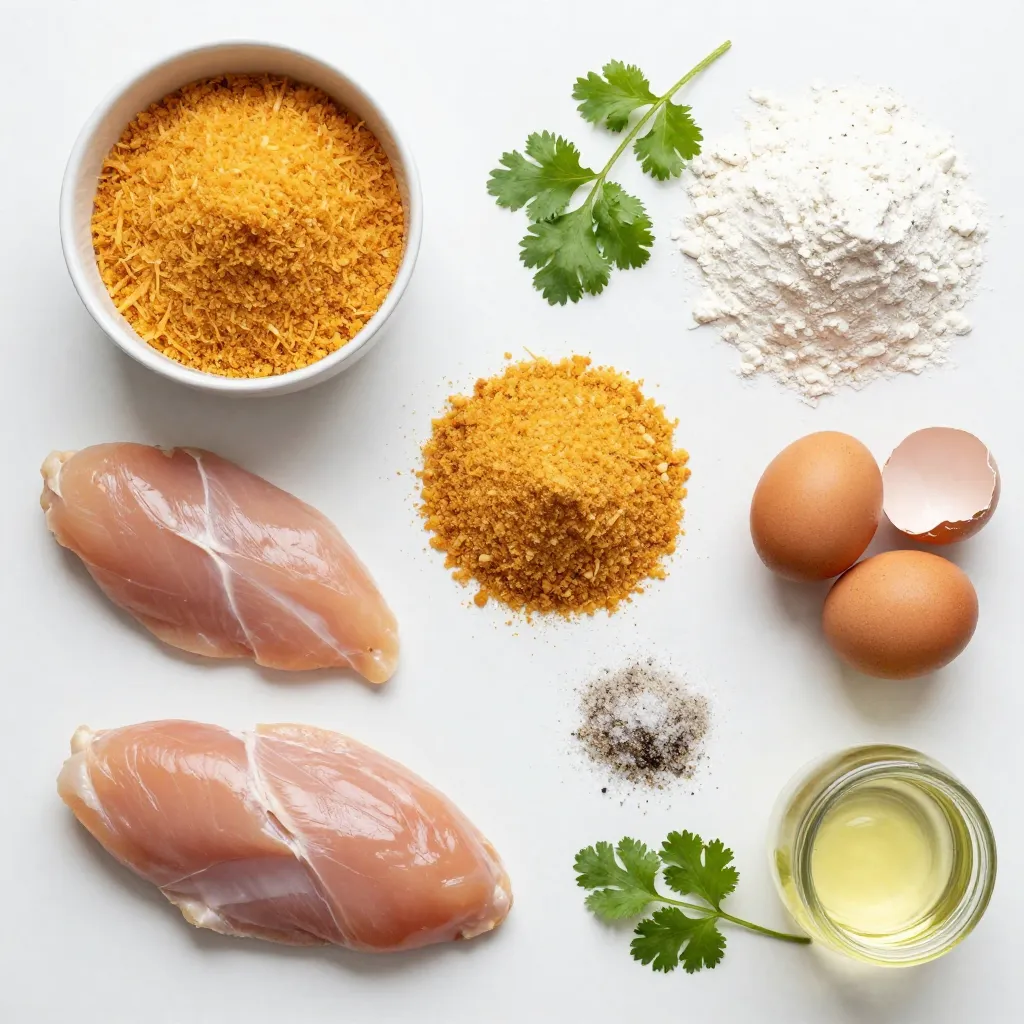
For this Coconut Crunch Chicken, you need:
– 4 boneless, skinless chicken breasts
– 1 cup unsweetened shredded coconut
– 1 cup panko breadcrumbs
– 1/2 cup all-purpose flour
– 2 large eggs
– 1 teaspoon garlic powder
– 1 teaspoon onion powder
– Salt and freshly ground black pepper to taste
The chicken forms the base of this dish. The coating includes coconut and panko breadcrumbs. I love using unsweetened coconut for a rich flavor. Panko gives it that extra crunch.
Cooking Oil
Coconut oil is key for frying. It adds a light coconut flavor. The oil also helps achieve a perfect golden color. You can use vegetable oil or canola oil if you’d like. However, they won’t give the same taste as coconut oil.
Garnishing Ingredients
For garnishing, I suggest using fresh cilantro or parsley. They add a nice pop of color. You can also try lime wedges for a zesty touch. If you want extra flavor, consider adding a mango salsa or a fresh salad. These add freshness and balance to the crispy chicken.
Step-by-Step Instructions
Preparing the Coating
1. Mixing dry ingredients: In a medium bowl, combine flour, garlic powder, onion powder, salt, and pepper. This blend adds great flavor to the chicken.
2. Beating the eggs: In a separate bowl, beat the two eggs until they are mixed well. This egg wash helps the coating stick to the chicken.
3. Combining coconut and panko: In another bowl, mix the unsweetened shredded coconut with panko breadcrumbs. This mix gives the chicken its crunchy texture.
Coating the Chicken
1. Step-by-step process for coating: Take a chicken breast and dip it in the flour mixture first. Shake off any extra flour. Next, dip it into the beaten eggs. Let any excess egg drip off. Finally, press the chicken into the coconut and panko mix, coating all sides well.
2. Tips to ensure even coverage: Make sure to press firmly into the coconut mix. This step is key for a thick and crunchy coating.
Cooking the Chicken
1. Heating oil correctly: In a large skillet, heat the coconut oil over medium heat until it shimmers. This signals it’s hot enough for frying.
2. Key frying tips for the perfect crunch: Place the coated chicken gently into the hot oil. Do not overcrowd the skillet; this keeps the oil hot. Fry each piece for about 5-7 minutes on each side until golden brown.
3. Ensuring chicken is fully cooked: Check the internal temperature of the chicken. It should reach 165°F (74°C) to be safe to eat. If needed, fry in batches, adding more oil as required.
Tips & Tricks
Achieving the Perfect Crunch
To get that ideal crunch, focus on your breading technique. Start with dry hands to keep the coating intact. Use three bowls for the coating process: one for flour, one for eggs, and one for the coconut-panko mix. Dip your chicken in flour first. This helps the egg stick better. After that, dunk it in the egg. Finally, press it into the coconut and panko mix. Make sure to cover all sides well.
Cook at a medium temperature. If the oil is too hot, the chicken burns on the outside. If it’s too cool, the chicken will soak up oil. Aim for about 350°F (175°C). Fry each piece for 5-7 minutes per side. Look for a golden color; that’s your sign it’s ready!
Common Mistakes to Avoid
One big mistake is overcrowding the skillet. When you add too many pieces, the oil cools down. This leads to soggy chicken instead of crispy. Fry in small batches to keep the oil hot.
Another issue is not letting the oil heat enough. Always wait until it shimmers before adding chicken. A drop of water should sizzle when it hits the oil. This means you’re ready to fry!
Equipment Recommendations
Use a heavy-bottomed skillet for frying. Cast iron works great, as it holds heat well. A non-stick skillet is another good option. Both types help prevent sticking and ensure even cooking.
For quick prep, have a pair of tongs handy. They help turn the chicken without messing up the coating. A slotted spoon can also help lift the chicken out of the oil. These tools will make your cooking easier and more fun!
Pro Tips
- Use Fresh Ingredients: Always opt for fresh chicken breasts and high-quality coconut for the best flavor and texture in your dish.
- Maintain Oil Temperature: Ensure the coconut oil is hot enough before frying; too low of a temperature will result in greasy chicken.
- Double Dipping for Extra Crunch: For an even crunchier coating, consider double-dipping the chicken in the egg and breadcrumb mixture.
- Let it Rest: After frying, let the chicken rest for a few minutes before serving to lock in moisture and enhance the flavor.
Variations
Flavor Variations
You can easily change the flavor of your coconut crunch chicken. Adding spices or herbs to the coating brings new tastes. Try adding paprika for a little heat or dried thyme for a fresh twist. You can also make it sweet. A touch of cinnamon or allspice in the coating adds a warm flavor. This will give a fun contrast to the coconut.
Alternate Proteins
If you want to switch up the protein, chicken is not your only option. You can use shrimp or fish. They both fry quickly and soak up the coconut flavor well. For a plant-based choice, use tofu or tempeh. Just make sure to press the tofu first to remove extra moisture.
Serving Suggestions
Pair your coconut crunch chicken with delicious side dishes. A fresh salad or mango salsa works great. The salad adds crunch and the salsa brings sweetness. For dipping sauces, try a sweet chili sauce or a tangy yogurt dip. These will enhance the crispy chicken even more.
Storage Info
Refrigeration Tips
To keep your coconut crunch chicken fresh, let it cool first. Place it in an airtight container. This helps lock in moisture and flavor. You can also use a glass dish with a lid. Make sure to use a container that is big enough. This prevents the chicken from getting squished.
Freezing Instructions
To freeze coconut crunch chicken, ensure it’s completely cool. Wrap each piece tightly in plastic wrap. Then, place the wrapped chicken in a freezer bag. Squeeze out as much air as possible before sealing. For reheating, let it thaw in the fridge overnight. Reheat in an oven at 350°F (175°C) until hot, about 15-20 minutes.
Shelf Life
You can store leftovers in the fridge for up to 3 days. If you notice any strange smell or color, it’s best to toss it. Look for signs like a slimy texture or mold. Always taste a small piece if you feel unsure. It’s better to be safe than sorry!
FAQs
How do I get the chicken extra crispy?
To make your chicken extra crispy, follow these tips:
– Use panko breadcrumbs: These are light and create a better crunch.
– Double coat: Dip the chicken in flour, then egg, and coat again with the coconut-panko mix.
– Dry the chicken: Pat the chicken dry before coating to help the crust stick better.
– Fry in batches: Avoid overcrowding the skillet. This keeps the oil hot and helps form a crunchy crust.
By following these steps, your coconut crunch chicken will have that perfect crispy bite.
Can I bake the coconut crunch chicken instead of frying?
Yes, you can bake the coconut crunch chicken. Here’s how:
1. Preheat your oven to 400°F (200°C).
2. Line a baking sheet with parchment paper.
3. Place the coated chicken on the baking sheet with space in between each piece.
4. Spray the chicken lightly with cooking spray or brush with coconut oil for a golden finish.
5. Bake for 20-25 minutes, flipping halfway through, until the chicken is cooked through and crispy.
Baking may not give you the same crunch as frying, but it’s a healthier option.
Is coconut crunch chicken gluten-free?
Yes, you can make coconut crunch chicken gluten-free. Here are some ideas:
– Use gluten-free flour: Substitute all-purpose flour with almond flour or a gluten-free blend.
– Choose gluten-free breadcrumbs: Look for gluten-free panko or make your own by grinding gluten-free crackers.
With these swaps, you can enjoy this dish without gluten.
In this article, we explored the key elements of making coconut crunch chicken. We covered the essential ingredients, cooking oil options, and the best garnishes. I shared step-by-step instructions for preparation and tips to achieve the perfect crunch. Remember to avoid common mistakes, use the right equipment, and explore variations that excite your palate. Finally, proper storage helps keep leftovers fresh. Enjoy creating your delicious coconut crunch chicken, and don’t hesitate to get creative as you coo


