Christmas Sprinkle Vanilla Bread Delightful and Festive

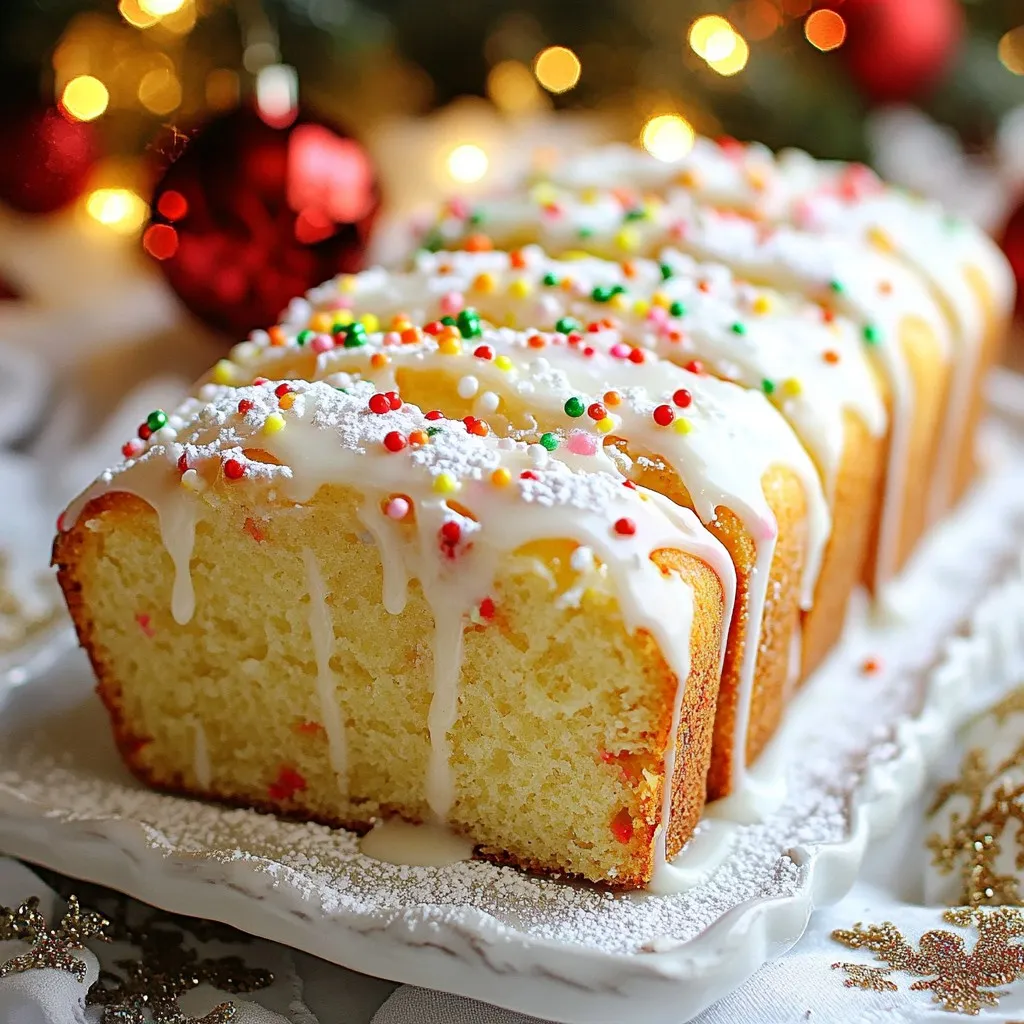
Get ready to make your holiday season sweeter with Christmas Sprinkle Vanilla Bread! This delightful and festive treat combines buttery vanilla flavor with colorful sprinkles, making it a perfect centerpiece for your celebrations. In this article, I’ll guide you through the simple steps to create this delicious bread, share tips for perfecting your bake, and explore fun variations. Let’s dive into the joy of baking together!
Why I Love This Recipe
- Festive Flavor: This vanilla bread is infused with a delightful vanilla flavor and brightened by colorful sprinkles, making it a perfect festive treat for the holiday season.
- Easy to Make: With simple ingredients and straightforward steps, this recipe is beginner-friendly, allowing everyone to join in on the holiday baking fun!
- Perfect for Gifting: Once baked and glazed, this bread makes for an adorable homemade gift that friends and family will love to receive during the holidays.
- Great for Any Occasion: While it’s perfect for Christmas, this sprinkle vanilla bread can be enjoyed year-round, making it a versatile addition to your baking repertoire.
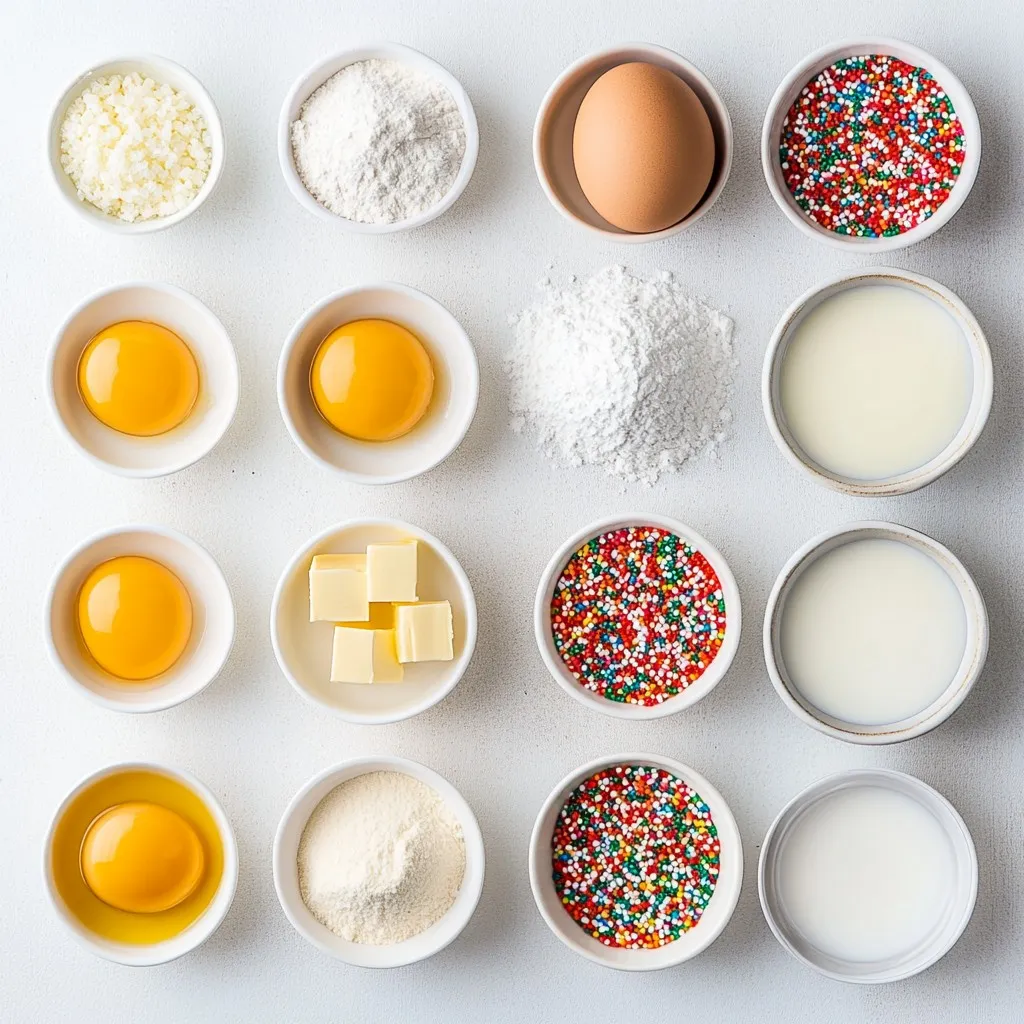
Ingredients
Main Ingredients
– 3 cups all-purpose flour
– 1 tablespoon baking powder
– 1/2 teaspoon salt
– 1 cup unsalted butter, softened
– 1 cup granulated sugar
Additional Ingredients
– 4 large eggs, at room temperature
– 1 tablespoon pure vanilla extract
– 1 cup buttermilk
– 1 cup colorful Christmas-themed sprinkles
– 1/2 cup powdered sugar (for glaze)
– 2 tablespoons milk (for glaze)
When I make Christmas Sprinkle Vanilla Bread, I love using fresh ingredients. The flour is the base, giving the bread its body. Baking powder helps it rise, while salt adds flavor. The butter is key; it makes the bread rich and soft. Sugar sweetens the mix and gives it a lovely golden color.
Next, I add eggs, which help with texture. Vanilla extract brings a warm, sweet aroma. Buttermilk keeps the bread moist and tender. The real fun comes with the colorful sprinkles! They add a festive touch and a bit of crunch.
For the glaze, I mix powdered sugar with milk. This drizzle adds sweetness and makes the bread look extra special. Using these ingredients, you will create a delightful holiday treat that everyone will love!

Step-by-Step Instructions
Preparation Steps
1. Preheat the oven and prepare the loaf pan
Start by preheating your oven to 350°F (175°C). While it’s heating, take a 9×5 inch loaf pan. Grease it well with butter or non-stick spray. This will help the bread come out easily later.
2. Combine dry ingredients
In a medium bowl, mix 3 cups of all-purpose flour, 1 tablespoon of baking powder, and 1/2 teaspoon of salt. Use a whisk to blend these ingredients until they are well mixed. Set this bowl aside for later.
Mixing Steps
1. Cream butter and sugar
In a large bowl, use an electric mixer. Cream together 1 cup of softened unsalted butter and 1 cup of granulated sugar. Beat the mix for about 3 to 5 minutes until it becomes light and fluffy.
2. Incorporate eggs and vanilla
Add 4 large eggs to the butter and sugar mix, one at a time. Mix well after each egg. Then, pour in 1 tablespoon of pure vanilla extract and combine everything thoroughly.
Final Steps
1. Add flour and buttermilk
Slowly add the flour mixture to the butter mix. Alternate with 1 cup of buttermilk. Start and finish with the flour mix. Mix gently until just combined. Do not overmix, as this keeps the bread soft.
2. Fold in sprinkles and bake
Carefully fold in 1 cup of colorful Christmas-themed sprinkles. Make sure they are spread evenly throughout the batter. Pour the batter into the prepared loaf pan. Smooth the top with a spatula. Bake in the oven for 50 to 60 minutes. Check doneness by inserting a toothpick; it should come out clean.
Tips & Tricks
Baking Tips
To ensure the bread rises well, use room-temperature ingredients. Cold butter or eggs can slow the rise. When mixing, don’t overmix. This keeps your bread light and fluffy. For testing doneness, insert a toothpick into the center. If it comes out clean, your bread is ready. If it has batter on it, give it a few more minutes.
Glazing Tips
To get the perfect glaze, mix powdered sugar and milk in a bowl. Stir until the glaze is smooth and thick, but still runny enough to drizzle. The best time to glaze is after the bread cools completely. This way, the glaze stays nice and bright on top.
Presentation Tips
When serving, slice the bread and arrange it on a festive platter. Add a sprinkle of extra sprinkles on top for color. A light dusting of powdered sugar creates a beautiful holiday touch. You can even place the bread next to some holiday cookies for an even more festive display.
Pro Tips
- Perfect Room Temperature Ingredients: Ensure your butter, eggs, and buttermilk are at room temperature before mixing. This helps create a smoother batter and better texture in the final bread.
- Don’t Overmix: When combining the wet and dry ingredients, mix just until incorporated. Overmixing can lead to a dense bread rather than a light and fluffy loaf.
- Let It Cool: Allow the bread to cool completely before glazing. This prevents the glaze from melting into the bread and helps maintain a beautiful finish.
- Customize Your Sprinkles: Feel free to use different types of holiday-themed sprinkles or even chocolate chips for a fun twist on this festive bread.

Variations
Flavor Variations
You can make this bread your own by adding new flavors. Almond extract gives a sweet twist. Just swap it for the vanilla extract. You can also add spices like cinnamon or nutmeg for warmth. Just a pinch can make a big difference.
Dietary Swaps
If you need gluten-free options, try almond flour or a gluten-free blend. Both work well in this recipe. For a vegan version, replace eggs with flaxseed meal mixed with water. Use plant-based butter and almond milk instead of dairy for a tasty loaf.
Garnish Options
Sprinkles are a fun way to dress up your bread. Use colorful holiday sprinkles, or try chocolate ones for a richer look. You can also add crushed candy canes on top for a festive pop. This adds a lovely crunch and flavor too.
Storage Info
Short-Term Storage
To keep your Christmas Sprinkle Vanilla Bread fresh, wrap it tightly in plastic wrap. You can also place it in an airtight container. Store it at room temperature for up to three days. This method helps keep the bread moist and tasty. Avoid refrigeration, as it can dry out the bread.
Long-Term Storage
If you want to keep your bread longer, freezing is a great option. First, let the bread cool completely. Then, wrap it in plastic wrap and foil to prevent freezer burn. Place it in a freezer-safe bag or container. It can last up to three months in the freezer. When you’re ready to enjoy it, remove the bread from the freezer. Let it thaw in the fridge overnight or at room temperature for a few hours.
Shelf Life
This delicious bread can stay fresh for about three days at room temperature. When stored properly in the freezer, it can last for up to three months. Look for signs of spoilage, like a dry texture or mold. If the bread smells off or has an unusual color, it’s best to throw it away. Always check the bread before serving to ensure it’s safe to eat.
FAQs
Common Questions
Can I use a different type of milk for this recipe?
Yes, you can use whole milk, almond milk, or oat milk. Each milk adds a slightly different flavor and texture. If you use a non-dairy milk, ensure it’s unsweetened for the best taste.
How do I know when my Christmas Sprinkle Vanilla Bread is done baking?
Check for doneness by inserting a toothpick into the center. If it comes out clean, the bread is ready. The top should be golden brown, and the bread should spring back slightly when touched.
Ingredient Substitutions
What can I substitute for buttermilk?
If you don’t have buttermilk, mix 1 cup of milk with 1 tablespoon of vinegar or lemon juice. Let it sit for 5 minutes to thicken. You can also use plain yogurt or sour cream mixed with water.
Is it necessary to use vanilla extract?
While vanilla extract adds a lovely flavor, you can skip it if you prefer. You can also try almond extract or other flavorings for a twist.
Serving Suggestions
What goes well with this bread?
This bread pairs well with hot cocoa, coffee, or tea. You can spread butter or cream cheese on each slice for extra flavor. Fresh fruit, like strawberries or oranges, also makes a nice side.
Can I toast Christmas Sprinkle Vanilla Bread?
Yes, toasting this bread enhances its flavors. Just slice it and place it in a toaster or under a broiler for a few minutes. Enjoy it warm with toppings like butter or jam.
This blog explored the key ingredients and steps to make delightful Christmas Sprinkle Vanilla Bread. You learned about baking tips, variations, and storage methods to keep your bread fresh. Remember, you can customize this bread with different flavors and dietary swaps. Don’t hesitate to get creative with your sprinkles and presentation. Enjoy baking and sharing this festive treat with friends and famil

Christmas Sprinkle Vanilla Bread 🎄✨
Ingredients
- 3 cups all-purpose flour
- 1 tablespoon baking powder
- 0.5 teaspoon salt
- 1 cup unsalted butter, softened to room temperature
- 1 cup granulated sugar
- 4 large eggs, at room temperature
- 1 tablespoon pure vanilla extract
- 1 cup buttermilk, also at room temperature
- 1 cup colorful Christmas-themed sprinkles
- 0.5 cup powdered sugar (for the glaze)
- 2 tablespoons milk (for the glaze)
Instructions
- Begin by preheating your oven to 350°F (175°C). Grease a 9x5 inch loaf pan generously with butter or non-stick spray, and set it aside to prepare for the batter.
- In a medium mixing bowl, combine the all-purpose flour, baking powder, and salt. Whisk together until the mixture is well blended, then set the bowl aside.
- In a large mixing bowl, use an electric mixer to cream together the softened unsalted butter and granulated sugar. Beat the mixture for about 3-5 minutes until it becomes light, fluffy, and pale in color.
- Add the large eggs to the butter and sugar mixture one at a time, ensuring to mix well after each addition. Then, pour in the pure vanilla extract and combine thoroughly.
- Slowly add the flour mixture to the creamed butter, alternating with the buttermilk. Start and finish with the flour mixture. Mix gently until just combined, taking care not to overmix.
- Carefully fold in the colorful Christmas-themed sprinkles, distributing them evenly throughout the batter without deflating the mixture.
- Pour the batter into the prepared loaf pan and use a spatula to smooth the top for an even bake.
- Place the loaf pan in the preheated oven and bake for 50-60 minutes. To check for doneness, insert a toothpick into the center of the bread; it should come out clean when it is ready.
- Once baked, let the bread cool in the pan for 10 minutes. After that, transfer it to a wire rack to cool completely before glazing.
- For the glaze, whisk together the powdered sugar and milk in a small bowl until it reaches a smooth and drizzle-worthy consistency. Once the bread has cooled, drizzle the glaze over the top for an added touch of sweetness.


![- 1 cup grated zucchini - ½ cup unsweetened applesauce - ½ cup brown sugar - ¼ cup white sugar The main ingredients in these brownies are simple and nutritious. Zucchini adds moisture and keeps the brownies soft. The applesauce replaces some fat while adding sweetness. Using both brown and white sugar gives the brownies a rich flavor and a nice texture. - ⅓ cup vegetable oil or melted coconut oil - 2 large eggs - 1 teaspoon vanilla extract - 1 cup all-purpose flour - ⅓ cup unsweetened cocoa powder - ½ teaspoon baking soda - ¼ teaspoon baking powder - ¼ teaspoon salt - ½ cup chocolate chips - Optional: ¼ cup chopped nuts (e.g., walnuts or pecans) The additional ingredients help create a great structure in the brownies. The oil keeps them moist, while the eggs bind everything together. Flour and cocoa powder provide the base, giving that rich, chocolate flavor. Baking soda and baking powder help the brownies rise. The chocolate chips melt into sweet pockets of goodness. If you like nuts, they add a nice crunch and flavor. You can find the complete list of ingredients in the Full Recipe section for more details on how to get started. - Preheat your oven to 350°F (175°C). - Prepare an 8x8 inch baking pan. You can grease it or line it with parchment paper. - In a large bowl, combine the wet ingredients. Mix grated zucchini, applesauce, brown sugar, white sugar, oil, eggs, and vanilla extract until well blended. - In another bowl, mix the dry ingredients. Whisk flour, cocoa powder, baking soda, baking powder, and salt together. - Now, add the dry mixture to the wet ingredients. Stir gently until just combined. Be careful not to overmix. - Pour the brownie batter into the prepared pan. Use a spatula to smooth the top. - Bake in the preheated oven for 25-30 minutes. Check for doneness by inserting a toothpick. It should come out with a few moist crumbs. - Let the brownies cool in the pan for about 10 minutes. Then transfer them to a wire rack to cool completely. You can find the full recipe in the earlier sections. Enjoy your delicious zucchini brownies! To make perfect zucchini brownies, focus on two key tips: - Avoid overmixing: Mix just enough until the dry and wet ingredients blend. Overmixing can make brownies tough. - Drain excess moisture from zucchini: Zucchini holds a lot of water. Grate it, then put it in a clean cloth. Squeeze out the extra moisture. This step helps achieve a fudgy texture. Baking these brownies is simple. Here are two tips to ensure the best results: - Check for doneness with a toothpick: Insert a toothpick into the center. If it comes out with moist crumbs, your brownies are done. If it comes out clean, they might be overbaked. - Cooling suggestions for optimal texture: After baking, let the brownies cool in the pan for about 10 minutes. Then, transfer them to a wire rack to cool completely. This cooling method helps keep the brownies soft and chewy. For more details, check the Full Recipe. {{image_4}} You can make these brownies gluten-free! Just swap regular flour for a gluten-free flour blend. This simple change works well without affecting taste. Look for blends that contain rice flour, almond flour, or coconut flour. These options hold moisture and keep the brownies soft. Want to mix it up? Try different types of chocolate in your brownies. You can use milk chocolate, dark chocolate, or even white chocolate. Each type adds its own unique taste. Adding spices like cinnamon or nutmeg can enhance the flavor too. A pinch of cinnamon gives warmth, while nutmeg adds a hint of sweetness. You can also add dried fruits or seeds for more texture. Try mixing in chopped nuts, like walnuts or pecans, for a nice crunch. Dried cherries or raisins can add a burst of sweetness. These additions make your brownies even more delightful and fun to eat. For the full recipe, check out the Chocolate Zucchini Brownies Full Recipe! To keep your zucchini brownies fresh, use an airtight container. This helps seal in moisture and flavor. Place them in the container after they cool down. You can store them at room temperature for up to four days. If you want them to last longer, keep them in the fridge. They can stay fresh for about a week in the fridge. Just make sure they are well-covered to avoid drying out. Freezing zucchini brownies is a great way to save some for later. First, let the brownies cool completely. Then, cut them into squares. Wrap each square in plastic wrap, and place them in a freezer bag. Make sure to remove as much air as possible from the bag. You can freeze them for up to three months. When you're ready to eat them, simply thaw them in the fridge overnight. This way, they will keep their great taste and soft texture. For the full recipe, check out the Chocolate Zucchini Brownies full recipe. Yes, you can use sugar substitutes. Common options are stevia, erythritol, or monk fruit. These substitutes can make your brownies lower in calories. However, they may change the taste and texture. Some might be sweeter, so adjust the amount. Always check the package for the right measurement. This way, your brownies will still taste great. To check if your brownies are done, look for a few signs. The edges will pull away from the pan. The top should look set and have a slight sheen. You can also use a toothpick. Insert it into the center of the brownies. If it comes out with a few moist crumbs, they are ready. If it has wet batter, bake a few more minutes. Yes, you can make these brownies vegan. Replace eggs with flax eggs or applesauce. Use 1 tablespoon of flaxseed meal mixed with 2.5 tablespoons of water for each egg. For dairy, substitute with plant-based milk or yogurt. You can also use coconut oil instead of butter. These swaps will keep the brownies moist and tasty. Each brownie has about 150 calories. They contain around 6 grams of fat and 20 grams of sugar. The exact numbers can change based on the ingredients used. For example, using less sugar or different oils can lower calories. Adding nuts can increase healthy fats and protein. Always check the recipe for detailed info. Zucchini brownies can last up to a week when stored properly. Keep them in an airtight container at room temperature. If you want them to last longer, freeze them. They can stay fresh in the freezer for up to three months. Just remember to wrap them well in plastic wrap or foil. For the complete recipe, check out the Chocolate Zucchini Brownies [Full Recipe]. Zucchini brownies blend health and taste. We covered key ingredients, easy steps, and tips. Think alternatives like gluten-free flour or added spices for fun flavors. Proper storage keeps them fresh, while freezing maintains taste and texture. With answers to common questions, you now have all you need for success. Try making these tasty brownies soon! You'll enjoy a delicious treat that also sneaks in some veggies.](https://fastmealmate.com/wp-content/uploads/2025/06/6955e8e8-deef-478f-bc92-a4114a14f9ca-768x768.webp)


