Chili Lime Shrimp Zesty and Flavorful Delight

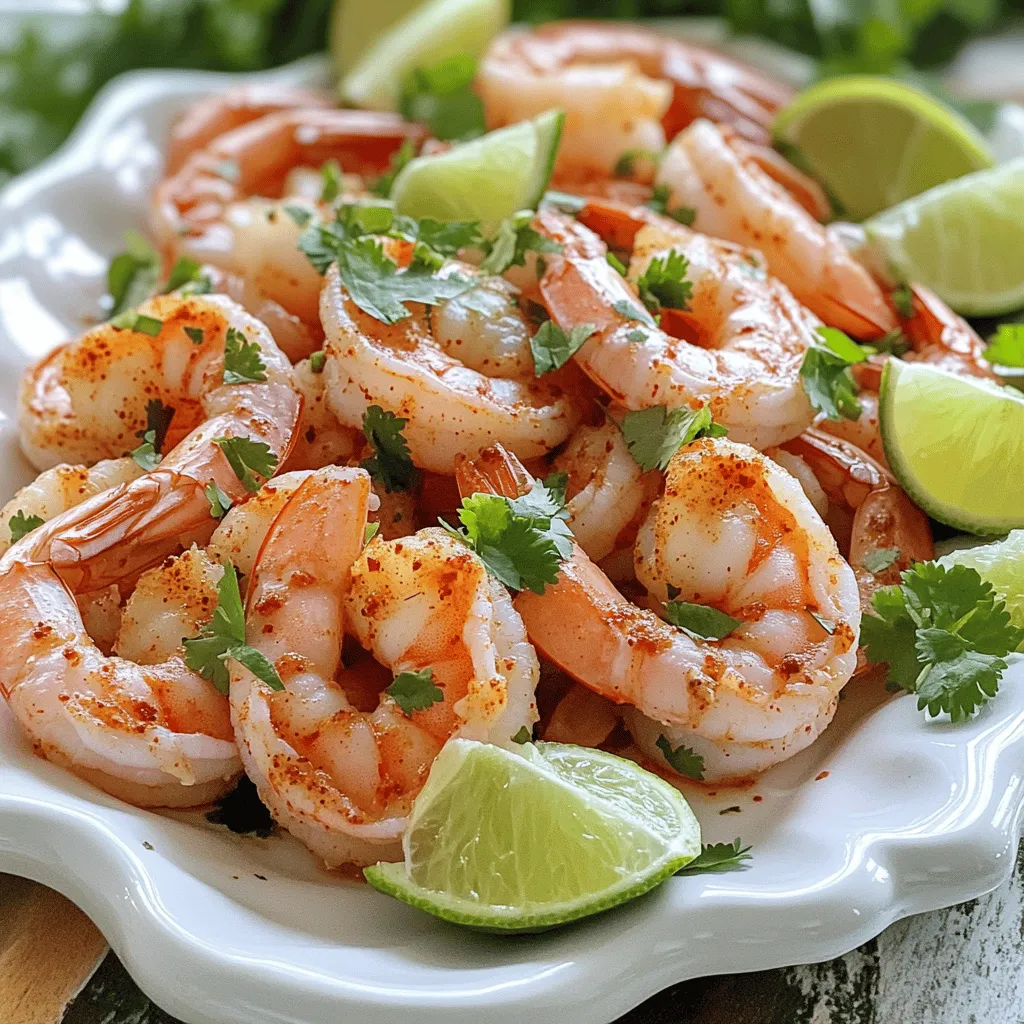
Are you ready to tantalize your taste buds? Chili Lime Shrimp is a zesty dish bursting with flavor. With just a few simple ingredients like fresh shrimp, lime juice, and chili powder, you can create a delicious meal in no time. In this post, I’ll share easy steps, tips for perfecting the dish, and fun ways to serve it. Let’s dive right in and spice up your dinner tonight!
Ingredients
Main Ingredients
– 1 pound large shrimp, peeled and deveined
– 2 tablespoons extra virgin olive oil
– 2 tablespoons fresh lime juice
– 1 tablespoon chili powder
Seasoning and Garnishing
– 1 teaspoon ground cumin
– 1 teaspoon smoked paprika
– 1 garlic clove, finely minced
– Sea salt and freshly ground black pepper
Serving Suggestions
– Fresh cilantro, finely chopped (for garnish)
– Lime wedges (for serving)
When you gather your ingredients, focus on quality. Fresh shrimp makes a big difference. Look for shrimp that smell like the ocean, not fishy. The olive oil should be extra virgin for the best flavor. Fresh lime juice brightens up the dish and adds zest. Chili powder gives that kick you want.
Seasoning is key. Ground cumin and smoked paprika bring depth to the flavors. The minced garlic adds a nice punch. Don’t forget sea salt and black pepper to taste.
For serving, fresh cilantro not only looks nice but adds freshness. Lime wedges let everyone add their own zing. This dish is all about bright, bold flavors. Each ingredient plays its part in making your chili lime shrimp a standout dish.
Step-by-Step Instructions
Preparing the Marinade
To start, take a large bowl and combine 2 tablespoons of extra virgin olive oil with 2 tablespoons of fresh lime juice. This mix creates a zesty base. Next, add 1 tablespoon of chili powder, 1 teaspoon of ground cumin, and 1 teaspoon of smoked paprika. Then, add one finely minced garlic clove, 1/2 teaspoon of sea salt, and 1/4 teaspoon of freshly ground black pepper. Use a whisk to mix everything well. This process brings out all the flavors.
Marinating the Shrimp
Now, it’s time to marinate the shrimp. Take 1 pound of large shrimp that are peeled and deveined. Place the shrimp into the bowl with the marinade, making sure each piece is covered. This step is key for flavor. Cover the bowl with plastic wrap or a lid. Put it in the refrigerator for 15-30 minutes. This allows the shrimp to soak up those delicious flavors.
Cooking the Shrimp
Next, heat your cooking surface. You can use a skillet or a grill, setting it to medium-high heat. Once hot, add the marinated shrimp in a single layer. Make sure not to overcrowd the surface. Cook the shrimp for about 2-3 minutes on each side. They should turn bright pink and opaque when done. This quick cooking keeps them tender and juicy.
Tips & Tricks
Perfecting the Marinade
To make the best chili lime shrimp, the marinade is key. You can adjust the spice levels based on your taste. If you like it hot, add more chili powder. For milder flavor, reduce it. Fresh herbs can also boost the taste. Try adding cilantro or fresh parsley to your marinade. These herbs add freshness and depth to the dish.
Cooking Techniques
Cooking shrimp is simple, but overcooking can ruin your meal. Shrimp cooks fast, so watch them closely. Sauté or grill them for just 2-3 minutes on each side. They should turn bright pink and opaque. If you crowd the pan, they may steam instead of sear. Cook in batches for the best results. Grilling adds a nice smoky flavor, while sautéing gives you more control over cooking.
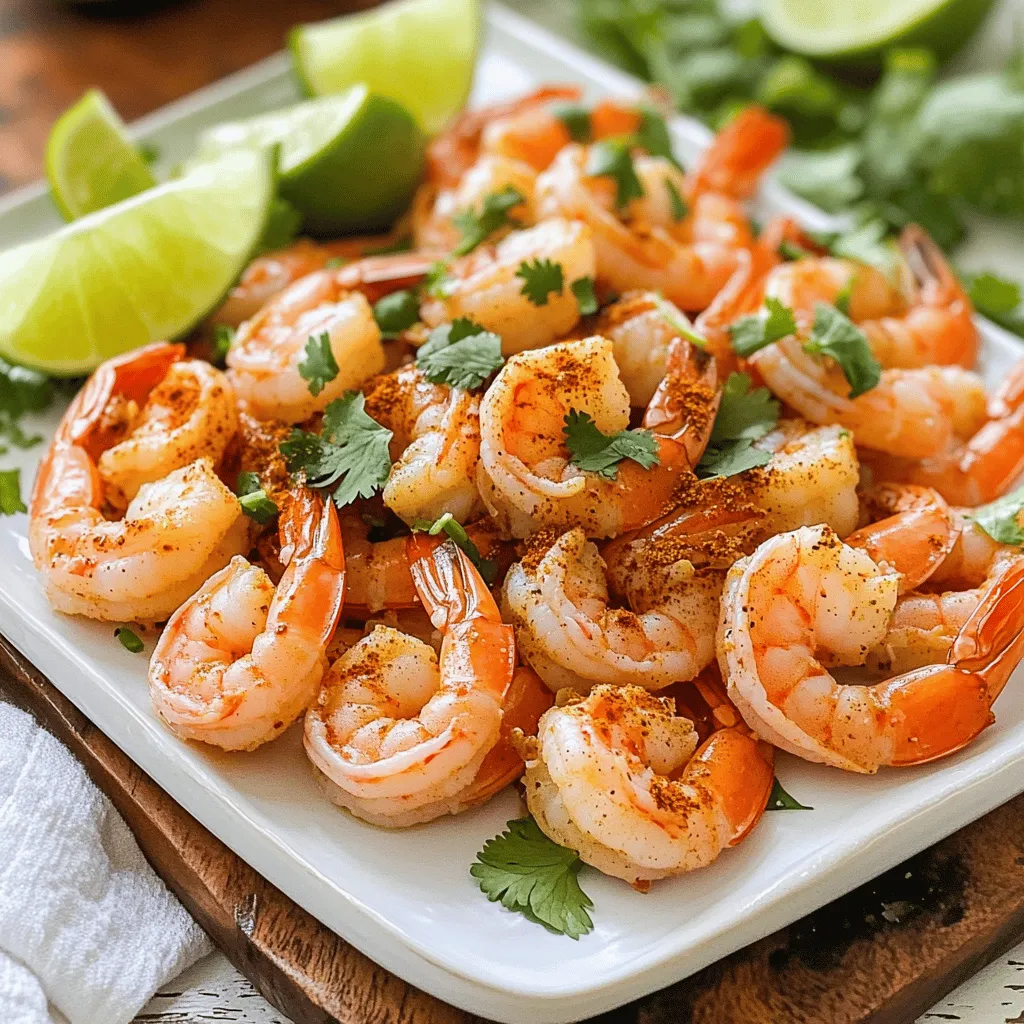
Presentation Tips
How you serve your shrimp matters. Arrange them in a circular pattern on the platter. It makes the dish look inviting and fun. Place lime wedges around the shrimp. This adds color and lets guests squeeze more lime juice on their shrimp. Garnish with fresh cilantro for a pop of green. This not only looks good but adds a burst of flavor too.

Variations
Flavorful Alternatives
You can switch up the flavors of your chili lime shrimp. Try using different citrus fruits like orange or lemon. Each fruit brings a unique taste. Orange adds sweetness, while lemon offers a sharper tang. Both options keep the dish bright and zesty.
You can also add heat. Fresh chili peppers, like jalapeños or serranos, boost the spice level. Chop them finely and mix them into the marinade. This adds a kick that will excite your taste buds.
Cooking Method Variations
You don’t have to stick to just one cooking method. Oven-baked chili lime shrimp is a great option. Preheat your oven to 400°F. Spread the marinated shrimp on a baking sheet. Bake for about 8-10 minutes, or until they turn pink and opaque.
Skewering shrimp for grilling is another fun way to cook them. Thread the marinated shrimp onto wooden or metal skewers. Grill them for 2-3 minutes on each side. This method adds a smoky flavor that pairs well with the lime and chili.
Pairing Suggestions
Pairing your chili lime shrimp with the right sides elevates the meal. Serve it with fluffy rice or a fresh salad. Both options complement the shrimp’s bright flavors. A side of cilantro-lime rice adds an extra flavor pop.
When it comes to drinks, consider refreshing beverages. A chilled white wine, like Sauvignon Blanc, works well. If you prefer non-alcoholic options, try a cold limeade or sparkling water with lime. These drinks balance the shrimp’s spice and enhance your dining experience.Enjoy your cooking adventure!
Storage Info
Refrigeration Guidelines
To keep your chili lime shrimp fresh, cool leftovers properly. Place them in a shallow dish. This method helps the shrimp cool quickly. Use airtight containers to store them. Glass or plastic containers work well. Make sure to seal them tightly to prevent air exposure.
Freezing Tips
You can freeze marinated shrimp for later use. First, place the shrimp in a single layer on a baking sheet. This helps them freeze without sticking together. Once frozen, transfer them to freezer bags. Remove as much air as possible. For thawing, move the shrimp to the fridge overnight. This keeps their texture and flavor intact.
Shelf Life
Refrigerated shrimp lasts about 2-3 days. Always check for signs of spoilage. Look for an off smell or a slimy texture. If you notice either, it’s best to toss them. Fresh shrimp should have a mild ocean scent and a firm texture. Enjoy your shrimp at their best quality!
FAQs
How long do I need to marinate the shrimp?
I recommend marinating the shrimp for 15 to 30 minutes. This time lets the shrimp soak up all the great flavors from the marinade. If you marinate too long, the shrimp can become tough. So, keep an eye on the clock!
Can I use frozen shrimp for this recipe?
Yes, you can use frozen shrimp! Just make sure to thaw them first. To thaw, place the shrimp in the fridge for several hours or run cold water over them for about 10 to 15 minutes. Once they are thawed, pat them dry before adding to the marinade. This step helps the shrimp absorb more flavor.
What is the best way to serve chili lime shrimp?
There are many fun ways to serve chili lime shrimp! You can serve them on a bed of rice or toss them in a fresh salad. They also taste great in tacos or as a filling for wraps. Don’t forget to garnish with fresh cilantro and lime wedges for a pop of color and flavor.
How spicy is this chili lime shrimp recipe?
The spice level depends on the chili powder you use. If you like it mild, use less chili powder. For more heat, add extra or try a spicier variety. Always taste the marinade first to adjust to your liking. This flexibility lets you create a dish that matches your spice tolerance perfectly.
In this post, we explored making tasty chili lime shrimp. We covered key ingredients, from the shrimp to fresh garnishes. I shared easy steps to prepare, marinate, and cook shrimp perfectly. Tips on adjusting spice levels and presentation helped highlight your dish. With variations and storage info, you can enjoy it more than once. Remember, cooking is fun! Experiment and tweak as needed. Savor your shrimp with loved ones for a great meal. Enjoy your culinary journey in shrimp cooking!


![- 1 lb ground beef - 1 cup shredded cheddar cheese - 1 cup shredded mozzarella cheese - 1/2 cup grated Parmesan cheese - 1 tablespoon minced garlic - 1 teaspoon onion powder - 1 teaspoon garlic powder - 1/2 teaspoon salt - 1/2 teaspoon black pepper - 1 package (16 oz) refrigerated pizza dough - 1/2 cup unsalted butter, melted - 2 tablespoons fresh parsley, chopped (for garnish) I recommend using fresh ground beef for the best flavor and texture. Look for good-quality cheeses. A mix of sharp cheddar and creamy mozzarella works wonders. For the Parmesan, choose a block and grate it yourself. Fresh garlic adds a punch that garlic powder cannot match. Always opt for unsalted butter to control the saltiness in your dish. Each serving contains approximately: - Calories: 250 - Protein: 15g - Carbohydrates: 20g - Fat: 14g - Fiber: 1g - Sugar: 1g This dish packs flavor and comfort in each bomb. Enjoy the satisfaction of creating these tasty bites. For the full recipe, check the section above. First, preheat your oven to 375°F (190°C). This ensures the bombs bake evenly. While the oven warms up, grab a large mixing bowl. In this bowl, mix together the ground beef, shredded cheddar, mozzarella, and grated Parmesan cheese. Add minced garlic, onion powder, garlic powder, salt, and black pepper. Stir until all the ingredients blend well. This mixture is the heart of your cheeseburger bombs. Next, you need to handle the pizza dough. Lightly flour a clean surface to prevent sticking. Roll out the pizza dough into a large rectangle. Use a pizza cutter or knife to slice the dough into 12 equal squares. Each square should measure about 3 inches by 3 inches. For each square, place a generous spoonful of the cheeseburger filling right in the center. Now, fold the corners of each dough square over the filling. Pinch them tightly to create a seal. Place the sealed bombs seam-side down on your prepared baking sheet. Now it’s time to bake. Brush the tops of each bomb with melted butter. This gives them a nice, golden finish. Bake these tasty treats in the preheated oven for 18-20 minutes. They should puff up and turn a beautiful golden brown. After baking, let them cool for a few minutes on the baking sheet. This step helps enhance the flavors. For a fresh touch, sprinkle chopped parsley on top just before serving. For the full recipe, check the earlier section. Enjoy your Garlic Parmesan Cheeseburger Bombs! To make your Garlic Parmesan Cheeseburger Bombs pop with flavor, use quality spices. Fresh garlic adds a strong taste. Minced garlic blends well with the beef. Garlic powder boosts the garlic flavor. Onion powder adds depth and sweetness. The mix of cheddar, mozzarella, and Parmesan gives a rich, creamy texture. Try using sharp cheddar for a bolder taste. Always taste the mixture before sealing the bombs. Adjust the salt and pepper to your liking. A perfect golden crust makes your bombs look and taste great. Start by brushing the tops with melted butter. This adds flavor and helps with browning. Bake at 375°F for 18-20 minutes. Keep an eye on them as they bake. If they are not golden yet, let them bake a few more minutes. The crust should be puffed and golden brown. For a stunning display, use a large platter. Place the bombs in a circle, and sprinkle fresh parsley on top. This adds a nice pop of color. Serve with dipping sauces like ketchup or ranch for extra fun. You can also add a side of pickles or a fresh salad. This makes a great snack or meal for any gathering. Enjoy each tasty bite from your Garlic Parmesan Cheeseburger Bombs! For the complete recipe, click [Full Recipe]. {{image_4}} You can change the filling for your Garlic Parmesan Cheeseburger Bombs. For a vegetarian option, swap ground beef for cooked lentils or black beans. Add some diced bell peppers and chopped onions for flavor. If you want a spicy kick, mix in jalapeños or hot sauce. You can even use spicy sausage for a meaty twist. This way, everyone can enjoy these tasty bombs. If you need a gluten-free option, use gluten-free pizza dough. Many stores sell this now. If you feel adventurous, you can make homemade dough. Combine almond flour, coconut flour, and eggs for a gluten-free base. This change keeps the bombs delicious and safe for those with gluten issues. Experiment with different types of dough to find your favorite. Toppings can take your bombs to a new level. After baking, try adding melted cheese on top. You can also sprinkle some crispy bacon bits for extra flavor. Fresh herbs like chives or cilantro can add a burst of color and taste. Consider serving with a side of garlic butter for dipping. These creative touches make your Garlic Parmesan Cheeseburger Bombs truly special. For detailed steps, check the Full Recipe. After you enjoy your Garlic Parmesan Cheeseburger Bombs, store any leftovers right away. Let them cool to room temperature first. Then, place them in an airtight container. This keeps them fresh and tasty. You can also wrap them tightly in plastic wrap. Store them in the fridge for up to three days. If you want to keep them longer, freezing is a great option. When it’s time to eat those leftover bombs, reheating them properly is key. Preheat your oven to 350°F (175°C). Place the bombs on a baking sheet. Heat for about 10-15 minutes. This helps them regain their crispiness. You can also use a microwave. Heat them for about 30-45 seconds. However, the oven method is best for keeping that nice texture. If you want to freeze your Garlic Parmesan Cheeseburger Bombs, do it before baking. After shaping the bombs, place them on a baking sheet. Freeze them for about an hour until solid. Then, transfer them to a freezer-safe bag. They can last up to three months in the freezer. When you’re ready to bake, just add a few extra minutes to the cooking time. Enjoy the fresh taste anytime with this simple method! You can still enjoy these bombs without specific cheese. Use any cheese you like. Try gouda, pepper jack, or even cream cheese. Just make sure the cheese melts well. This keeps the bombs gooey and tasty. Yes, you can prepare these bombs ahead of time. Make the filling and fill the dough squares. Place them on a baking sheet. Cover and store them in the fridge. Bake them fresh when you are ready to eat. This saves time for your busy days. Dipping sauces make these bombs even better. Ketchup is a classic choice. Ranch dressing or garlic aioli adds a nice touch. You can also try spicy mustard or BBQ sauce. Each sauce brings a new flavor and fun to your meal. This blog post covered all you need for Garlic Parmesan Cheeseburger Bombs. I shared the key ingredients, step-by-step instructions, and handy tips to enhance flavor. You also learned about great variations to try and how to store your tasty treats. In my final thoughts, remember to have fun while cooking. Experiment with flavors and enjoy every bite of your creations. Happy cooking!](https://fastmealmate.com/wp-content/uploads/2025/06/70ca770e-dfd2-457a-a57a-f773e5b0e22d-768x768.webp)
![- 1 cup coconut milk - 1 tablespoon chai tea leaves (or 1 chai tea bag) - 1/4 cup granulated sugar (adjust based on desired sweetness) - 1/2 teaspoon pure vanilla extract - 1 cup sparkling water - 1/4 teaspoon ground cinnamon - Ice cubes - Toasted coconut flakes, for garnish To make Coconut Chai Cream Soda, you need a few simple ingredients. Each one plays a key role in the drink's flavor. First, coconut milk gives a creamy base. I love how it adds a rich taste. You can find it in cans or cartons at most stores. Next, chai tea leaves, or a tea bag, bring warmth and spice. Chai is a blend of tea and spices like cinnamon and cardamom. It makes the drink cozy and inviting. Sugar sweetens the drink. You can adjust the amount based on your taste. A little sugar goes a long way in balancing the flavors. Vanilla extract adds depth. It mixes well with the coconut and chai. Sparkling water brings a fizzy lift. It makes the drink refreshing and fun. Ground cinnamon adds a lovely aroma. It also enhances the chai's spice notes. Lastly, ice cubes cool the drink down. To top it off, toasted coconut flakes add a crunchy texture. They also make the drink look beautiful. Gather these ingredients, and you're ready to make this lovely drink. For the full recipe, check out the [Full Recipe]. - First, gently heat 1 cup of coconut milk in a small saucepan. Use medium heat, making sure it doesn’t boil. Stir it occasionally. - Once warm, add 1 tablespoon of chai tea leaves or 1 chai tea bag to the coconut milk. Let it steep for 5-7 minutes. This helps get the best flavor. If you used loose tea, strain it through a fine mesh sieve after steeping. - Now, stir in 1/4 cup of granulated sugar and 1/2 teaspoon of pure vanilla extract. Mix until fully dissolved. This creates a creamy and sweet base. - After the mixture cools to room temperature, fill two glasses with ice cubes. - Pour the cooled coconut chai mixture over the ice, filling each glass halfway. - Carefully add 1 cup of sparkling water to each glass. Stir gently to mix the flavors. - To finish, sprinkle a dash of ground cinnamon on top of each drink. - Garnish with toasted coconut flakes for a crunchy touch. This adds both flavor and a nice look to your drink. For the full recipe, refer to the earlier section. Enjoy your refreshing Coconut Chai Cream Soda! Adjusting sweetness levels Start with the basic recipe. Use 1/4 cup of sugar. If you like it sweeter, add more. If you prefer it less sweet, use less sugar. You can also try honey or maple syrup instead. Each sweetener gives a different taste. Taste as you go to find your perfect level. Choosing the right chai blend Not all chai is the same. Some blends are spicier, while others are milder. I love using a masala chai blend. It adds warmth and depth. You can use loose tea leaves or tea bags. Try different brands to find your favorite. Ideal glassware for presentation Use clear glasses to showcase the drink. The layers and colors look beautiful. Tall glasses are great for a refreshing look. You can also use mason jars for a rustic vibe. Add a colorful straw for fun. Pairing with snacks or light bites This drink pairs well with light snacks. Think about coconut macaroons or cinnamon cookies. Cheese and crackers also work nicely. These snacks enhance the flavors of the drink. Nutritional aspects of coconut milk Coconut milk is creamy and rich. It contains healthy fats that are good for your heart. It also has vitamins and minerals. Coconut milk can help with hydration. It's a great dairy-free option for many recipes. Benefits of chai tea Chai tea is packed with spices. These spices have health benefits. Ginger can help digestion, while cinnamon may help with blood sugar. Chai also contains antioxidants that protect your body. Enjoying this drink not only tastes good, but it can also be good for you. {{image_4}} You can switch coconut milk for almond or oat milk. Each option adds its own flavor. For a nut-free choice, oat milk works great. It keeps the drink creamy without the nut taste. Want to spice things up? Add a pinch of nutmeg or cardamom. These spices bring warmth and depth. You might also try adding fruit flavors. Pineapple adds a tropical twist that pairs well with chai. Just blend it into the coconut milk before serving. You can serve Coconut Chai Cream Soda hot for a cozy drink. Just skip the ice and pour it warm into your glass. For iced versions, use plenty of ice. The ice helps keep it cool and refreshing. You can even blend it for a frosty treat. For more details, be sure to check the Full Recipe. To keep your coconut milk fresh, store it in the fridge. Use an airtight container. It lasts about 5 to 7 days. Always shake well before use since it can separate. For spices like chai tea, store them in a cool, dark place. A sealed jar works best. This keeps them flavorful and fresh. Check the expiration dates regularly to avoid stale spices. You can make the coconut chai mixture ahead of time. Just follow the recipe steps, then cool the mixture. Transfer it to a clean container. Store it in the fridge for up to three days. When you’re ready to serve, pour it over ice and add sparkling water. This keeps the drink bubbly and fresh. You can also prepare the drink one day ahead. Just store it without ice. Add ice right before serving for the best taste. For the full recipe, check the earlier section. Enjoy your Coconut Chai Cream Soda! Coconut Chai Cream Soda is a fun and fizzy drink. It combines rich coconut milk with the warm spices of chai tea. The key flavors come from: - Coconut milk - Chai tea (with spices like cinnamon and cardamom) - Sweet sugar - Sparkling water This drink is creamy, sweet, and refreshing. It’s perfect for warm days or as a unique treat. Yes, you can easily make Coconut Chai Cream Soda vegan. The main ingredient, coconut milk, is already vegan. Just use a plant-based sweetener if needed. You can swap the sugar for agave or maple syrup. This way, you keep the drink tasty and plant-based. You can find coconut milk at most grocery stores. Look in the international aisle or near dairy alternatives. For chai tea, visit the tea section. If you prefer online shopping, websites like Amazon or specialty tea shops have both coconut milk and chai tea. This makes it easy to get the best ingredients. Coconut Chai Cream Soda is best enjoyed fresh. If you store it, keep it in the fridge for up to two days. The flavors may change a bit, but it will still taste good. Just give it a stir before serving again. Enjoy this drink right after making it for the best taste. Coconut Chai Cream Soda blends rich flavors into a refreshing drink. We looked at the key ingredients and the simple steps to create it. I shared tips for enhancing the taste and health benefits of each component. You can even adjust recipes for your preferences. Have fun experimenting with variations, and store leftovers correctly for future enjoyment. This drink can delight your taste buds and impress guests. Enjoy making it today!](https://fastmealmate.com/wp-content/uploads/2025/06/117a7c4a-19db-4251-9c08-7fd2f96708ea-768x768.webp)
![- Arugula (4 cups) - Cherry tomatoes (1 cup) - Cucumber (1 medium) - Red onion (1/2 medium) - Kalamata olives (1/2 cup) - Feta cheese (1/4 cup) - Sunflower seeds (1/4 cup, optional) - Extra virgin olive oil (1/4 cup) - Fresh lemon juice (2 tablespoons) - Dried oregano (1 teaspoon) - Salt and black pepper to taste Gathering fresh ingredients is key for this salad. Arugula gives it a peppery taste. Cherry tomatoes add sweetness and color. Cucumber brings crunch, while red onion gives a nice bite. Now, let’s talk about the add-ins. Kalamata olives add a briny flavor. Feta cheese gives creaminess and tang. If you want a crunch, add sunflower seeds. They work well with the other flavors. Next, we need the dressing. Extra virgin olive oil is rich and smooth. Fresh lemon juice brightens the salad. Dried oregano adds an earthy touch. Don’t forget salt and black pepper to finish. You can find the complete recipe in the [Full Recipe]. First, wash the arugula well. Rinse it under cold water to remove dirt. After washing, dry it gently with a salad spinner or a clean kitchen towel. This step helps the leaves stay crisp. Next, prepare the vegetables. Slice the cherry tomatoes in half. Dice the cucumber into half-inch cubes. For the red onion, cut it into thin rings. These steps add color and crunch to your salad. Now, it's time to mix the salad. In a large mixing bowl, add the fresh arugula, halved cherry tomatoes, diced cucumber, sliced red onion, and Kalamata olives. Use your hands to toss the salad gently. This method keeps the leaves from bruising. After mixing, sprinkle the crumbled feta cheese on top. This cheese adds a creamy texture and salty flavor. If you want extra crunch, you can also add sunflower seeds at this point. For the dressing, take a small bowl. Whisk together the extra virgin olive oil, fresh lemon juice, and dried oregano. Add a pinch of salt and pepper for taste. Whisk until everything combines well. Drizzle the dressing over the salad mixture. Use a large spoon or salad tongs to toss gently. This ensures every bite is flavorful without crushing the arugula. For a complete meal, check out the Full Recipe for all the details. To keep arugula fresh, handle it gently. Avoid squishing or bruising the leaves. When washing arugula, fill a bowl with cold water. Submerge the leaves and swish them around. This helps remove dirt without damaging them. Lift the arugula out and place it on a clean towel. Pat it dry carefully to keep the leaves crisp. To boost the flavor of your Mediterranean Arugula Salad, add fresh herbs like basil or parsley. These herbs bring bright notes to the dish. You can also sprinkle in a pinch of crushed red pepper for heat. When garnishing, use a few extra olives or a lemon wedge. This adds a pop of color and makes the salad look inviting. Serve your salad right after mixing for the best taste. The freshness of the arugula is key. If you need to prep ahead, wash and dry the arugula first. Store it in a container lined with paper towels. This keeps the leaves dry and crisp. You can chop the other veggies and store them separately. Just combine everything before serving. Enjoy the full flavors of your Mediterranean Arugula Salad! For the full recipe, refer to the earlier section. {{image_4}} You can make your Mediterranean arugula salad even more filling. Adding grilled chicken is a great choice. It brings a nice smoky flavor. If you prefer a plant-based option, try chickpeas. They add protein and a hearty texture. For a seafood twist, consider incorporating shrimp. Lightly sautéed or grilled shrimp works well. It adds a delightful taste that pairs nicely with the fresh ingredients. Feel free to adjust your salad based on the season. In summer, add ripe peaches or strawberries for sweetness. In fall, consider roasted butternut squash for warmth. You can also change up the dressing. Swap traditional vinegar for balsamic or apple cider vinegar. Each type will give the salad a unique flavor profile. If you want to make your Mediterranean arugula salad vegan, simply omit the cheese. The salad will still be fresh and tasty. For those needing gluten-free options, this salad is perfect. All ingredients are gluten-free, making it a safe choice for everyone. Enjoy your meal without worries! To store leftover Mediterranean Arugula Salad, place it in an airtight container. This helps keep the salad fresh and prevents it from drying out. Use glass or plastic containers with tight lids. If you have a lot of salad, consider dividing it into smaller portions. This makes it easy to grab just what you need. The salad stays fresh for about three days in the fridge. After this, the arugula may wilt, and the tomatoes might get mushy. Watch for signs like a slimy texture or off smells. If you see these, it's best to toss the salad. Fresh ingredients are key to a great taste. To refresh the salad, add a splash of lemon juice or olive oil. This can bring back some flavor and zest. You can also mix in fresh arugula or other greens. If you want to repurpose leftover salad, try using it as a filling for wraps or sandwiches. You can also stir it into cooked pasta for a quick meal. Arugula is low in calories but packed with nutrients. It has vitamins A, C, and K. Arugula also contains calcium and iron. These nutrients support bone health and boost immunity. Eating arugula can improve heart health due to its antioxidants. It's a great choice for a Mediterranean diet. This diet focuses on whole foods, healthy fats, and fresh produce. Arugula fits perfectly into this style of eating, enhancing flavors and health. Yes, you can prepare parts of the salad ahead of time. Wash and dry the arugula and veggies first. Store them separately to keep them fresh. Chop the tomatoes, cucumber, and onion in advance. Keep them in airtight containers in the fridge. You can make the dressing ahead too. Just whisk together olive oil, lemon juice, and seasonings. Store the dressing in a jar. When ready to serve, mix everything together for a fresh salad. You can try several dressings with this salad. A classic vinaigrette works well. Use olive oil, vinegar, salt, and pepper. A lemon-tahini dressing adds a creamy touch. You could also use balsamic vinaigrette for sweetness. Another tasty option is yogurt-based dressing for a tangy kick. Each dressing can enhance the salad’s flavors, so experiment to find your favorite. For the full recipe, check out the details above. In this blog post, we explored the Mediterranean Arugula Salad. We discussed fresh produce, flavorful add-ins, and the best dressing to bring it all together. You learned how to prepare, mix, and serve the salad with tips for freshness and flavor enhancement. Remember, this salad is versatile—you can change the protein or vegetables based on the season. Enjoy making your own tasty versions and store leftovers properly. With the right care, your salad can stay fresh and delicious for days.](https://fastmealmate.com/wp-content/uploads/2025/06/6fae422d-07df-4724-84de-c8edab5789ea-768x768.webp)


![To make Maine Blueberry Bread, you need the right ingredients. Here’s what you will need: - 1 ½ cups all-purpose flour - ½ teaspoon baking soda - 1 teaspoon baking powder - ½ teaspoon salt - 1/3 cup unsalted butter, softened - ½ cup granulated sugar - 1 large egg, at room temperature - 1 teaspoon pure vanilla extract - ½ cup plain Greek yogurt - 1 cup fresh or frozen blueberries - Zest of 1 lemon - 2 tablespoons fresh lemon juice These ingredients come together to create a soft, flavorful bread. The blueberries add sweetness, while the lemon gives a nice zing. You can customize your Maine Blueberry Bread with some fun add-ins. Here are a few ideas: - Chopped nuts, like walnuts or pecans - A sprinkle of cinnamon for warmth - Chocolate chips for a sweet twist - A handful of oats for texture Feel free to mix and match these options to suit your taste. Before you start, gather your tools to make the process smooth. You will need: - A 9x5-inch loaf pan - Mixing bowls (one large and one medium) - An electric mixer or whisk - A spatula for mixing - Measuring cups and spoons Having these items ready will help you stay organized and focused. For the full recipe, check the details provided earlier. First, preheat your oven to 350°F (175°C). This sets the stage for baking. Next, grab a 9x5-inch loaf pan. Grease it with butter or line it with parchment paper. This helps the bread come out easily later. In a medium bowl, whisk together the flour, baking soda, baking powder, and salt. Mix these dry ingredients well and set them aside for now. In another large bowl, cream the softened butter and sugar using an electric mixer. Beat this mixture for 3-4 minutes until it is light and fluffy. Then, add the egg, vanilla extract, lemon zest, and lemon juice. Mix until everything is combined well. Now, add the Greek yogurt to this mix and blend until smooth. Gradually add the dry ingredient mixture to the wet mixture. Stir gently until just combined. Be careful not to overmix; this keeps the bread soft. Finally, fold in the blueberries. Make sure they are evenly spread throughout the batter. Pour the batter into your prepared loaf pan. Smooth the top with a spatula to ensure it rises evenly. Place the loaf pan in the oven and bake for 50-60 minutes. To check if it’s done, insert a toothpick into the center. If it comes out clean, your bread is ready. Once baked, take the loaf out of the oven. Let it cool in the pan for about 10 minutes. After that, transfer the bread to a wire rack to cool completely. When you are ready to serve, slice the bread. For a tasty touch, add a pat of butter or a sprinkle of powdered sugar on top. This blueberry bread pairs perfectly with tea or coffee, making it a wonderful treat for breakfast or a snack. Enjoy your Maine Blueberry Bread! For the complete recipe, be sure to check the [Full Recipe]. When making Maine blueberry bread, avoid overmixing the batter. This can make the bread tough. Also, don’t skip the lemon juice. It brightens the flavor and balances the sweetness. If using frozen blueberries, do not thaw them. This keeps the batter from turning blue. For a soft and moist texture, use room temperature ingredients. This includes the butter, egg, and yogurt. They mix better and create a fluffy bread. Make sure your oven is preheated to 350°F (175°C). Baking at the right temperature is key for even cooking. You can add a pinch of cinnamon or nutmeg for warmth. A bit of cardamom can also bring a unique twist. Pure vanilla extract adds depth to the flavor. Feel free to experiment with different spices to find your favorite mix. For a citrusy kick, try adding a bit more lemon zest. For the full recipe, check the earlier sections. {{image_4}} You can swap blueberries for other fruits. Try raspberries, blackberries, or strawberries. Each fruit brings a unique taste. For a tropical twist, use diced mango or pineapple. These fruits change the flavor but keep the bread moist and delicious. To make this recipe gluten-free, use a gluten-free flour blend. Make sure it has xanthan gum to help with texture. Also, check that your baking powder and baking soda are gluten-free. These small changes will let you enjoy this bread without gluten. Nuts and chocolate can add flavor and texture. Walnuts or pecans work well in this bread. Just chop them coarsely and fold them into the batter. If you love chocolate, try adding chocolate chips. They melt and create sweet pockets in each slice. For the full recipe, check out the Maine Blueberry Bread section above. Store leftover Maine blueberry bread at room temperature. Wrap it in plastic wrap or foil. This keeps it fresh for up to three days. If you want to keep it longer, consider freezing. To freeze Maine blueberry bread, slice it first. Wrap each slice in plastic wrap. Place the wrapped slices in a freezer-safe bag. This method allows you to take out one slice at a time. The bread can last in the freezer for up to three months. Reheat blueberry bread for the best taste. Use a toaster oven or microwave. For a toaster oven, set it to 350°F (175°C) and heat for about 10 minutes. If using a microwave, warm a slice for 15-20 seconds. Enjoy it warm for a cozy flavor. You can buy Maine blueberries at local farms, farmers' markets, or grocery stores. Many stores offer fresh blueberries during the summer months. You can also find frozen Maine blueberries year-round in the freezer section. Online retailers may offer them as well, so check for local delivery options. Maine blueberries are unique due to their intense flavor and vibrant color. They grow wild in the state’s unique climate and soil. This gives them a sweet, tangy taste that stands out. Maine blueberries are also smaller than cultivated ones, making them more flavorful. Additionally, their high antioxidant levels make them a healthy choice. Fresh blueberries should be firm and plump. Look for a deep blue color with a hint of white bloom. Avoid any berries with wrinkles or soft spots. If they are still attached to the stem, that’s a good sign they are fresh. Smelling them can also help; they should have a sweet, fruity aroma. Yes, you can use other types of yogurt. Greek yogurt gives a rich texture, but you can use regular yogurt. Non-dairy options like almond or coconut yogurt work too. Just keep in mind that the flavor may change slightly. Choose a plain yogurt to maintain the taste of the bread. To make Maine blueberry bread vegan, substitute the egg with flaxseed meal or applesauce. For the butter, use a plant-based alternative like coconut oil or vegan butter. Ensure your yogurt is dairy-free. These swaps keep the bread moist and delicious while making it suitable for a vegan diet. You can still enjoy the same great flavor! Making Maine Blueberry Bread is fun and easy. We covered key ingredients, optional add-ins, and the right tools to use. I shared step-by-step instructions, common mistakes to avoid, and tips for great texture. You can even try different fruits or make it gluten-free. Lastly, I explained how to store extras and answered some questions about blueberries. Enjoy baking and sharing this delicious bread with friends!](https://fastmealmate.com/wp-content/uploads/2025/06/ff86cb4e-0a8a-479f-8f36-b1606605b05b-768x768.webp)