Chewy Pumpkin Spice Cookies Perfect for Fall Baking

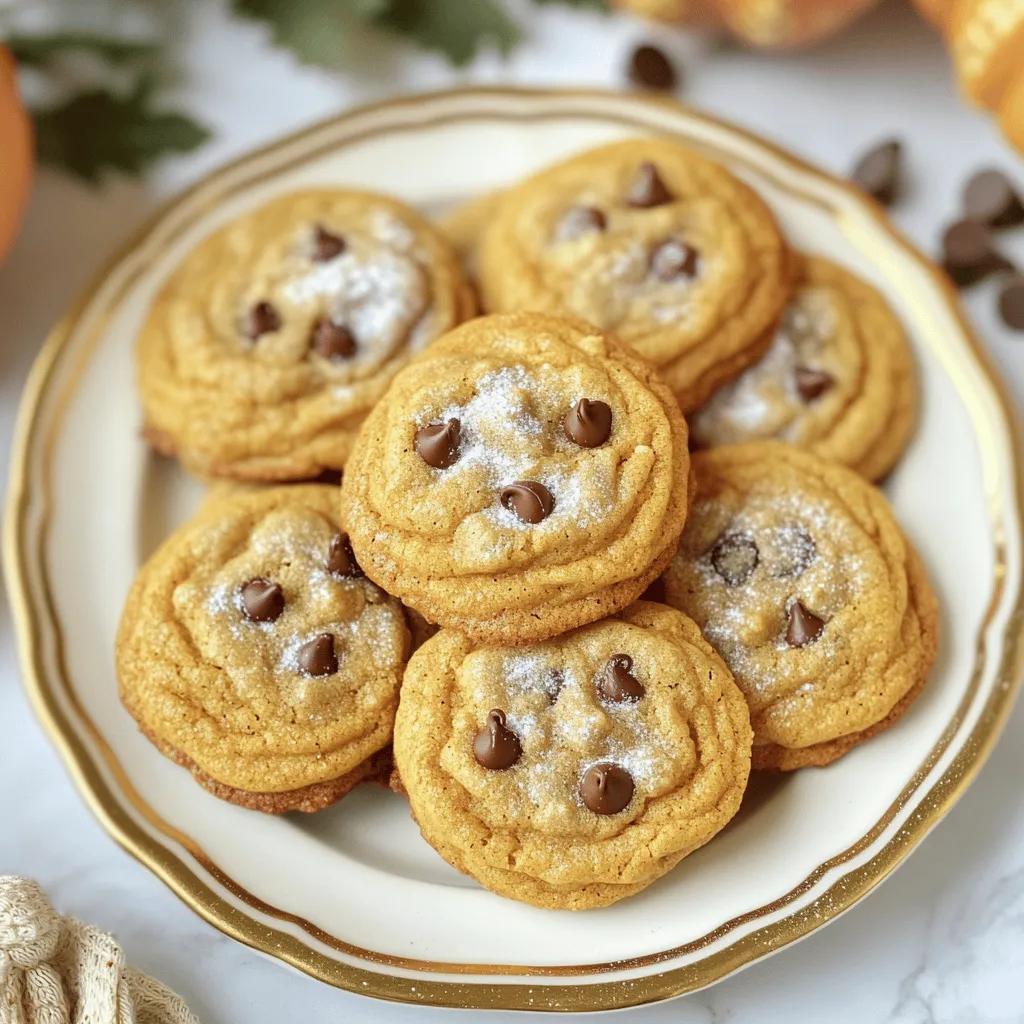
Fall is here, and what better way to celebrate than with chewy pumpkin spice cookies? These delightful treats pack all the warm flavors of the season into each bite. In this blog post, I’ll guide you through the simple steps to make cookies that are soft, chewy, and oh-so-delicious. From selecting the finest ingredients to tips for perfecting texture, let’s dive into the world of fall baking together!
Ingredients
Detailed List of Ingredients
To make chewy pumpkin spice cookies, gather these items:
– 1 cup canned pumpkin puree
– 1/2 cup unsalted butter, softened at room temperature
– 1 cup brown sugar, firmly packed
– 1/2 cup granulated sugar
– 1 large egg, at room temperature
– 2 teaspoons vanilla extract
– 2 cups all-purpose flour
– 1 teaspoon baking soda
– 1 teaspoon baking powder
– 1 teaspoon ground cinnamon
– 1 teaspoon ground ginger
– 1/2 teaspoon ground nutmeg
– 1/4 teaspoon ground cloves
– 1/2 teaspoon salt
– 1 cup chocolate chips or chopped nuts (optional, for added texture)
Each ingredient plays a key role. The pumpkin puree gives moisture and flavor. The sugars create sweetness and help with browning. The spices add warmth, making these cookies perfect for fall.
Optional Add-ins and Toppings
You can customize your cookies with fun add-ins. Here are some ideas:
– Chocolate chips: Add a sweet touch and a nice texture.
– Chopped nuts: Use walnuts or pecans for crunch.
– White chocolate chips: For a creamy, sweet twist.
– Dried cranberries: They add a tart flavor and a pop of color.
Feel free to mix and match based on what you like!
Tips for Selecting Quality Ingredients
Choosing good ingredients makes a big difference. Here are some tips:
– Pumpkin puree: Look for 100% pure pumpkin, not pumpkin pie filling.
– Butter: Use unsalted butter for better control over salt levels.
– Sugars: Choose fresh brown sugar; it should be moist and clump together.
– Spices: Use fresh spices for a more intense flavor. Check the date on the jar.
With quality ingredients, your cookies will taste great and impress everyone!
Step-by-Step Instructions
Prepping the Oven and Baking Sheet
First, set your oven to 350°F (175°C). This temperature helps the cookies bake just right. While the oven heats, take a baking sheet and line it with parchment paper. This keeps the cookies from sticking. It also makes cleanup a breeze.
Creaming Butter and Sugars
In a large mixing bowl, add the softened butter, brown sugar, and granulated sugar. Use an electric mixer to beat them together. Mix for about 2-3 minutes. The mixture should turn light and fluffy. This step is key for soft, chewy cookies.
Mixing Wet and Dry Ingredients
Next, add the pumpkin puree, room-temperature egg, and vanilla extract to the bowl. Beat everything together until smooth. In another bowl, whisk together the flour, baking soda, baking powder, ground cinnamon, ground ginger, ground nutmeg, ground cloves, and salt. Make sure everything is mixed well.
Now, slowly add the dry mixture to the wet mixture. Stir gently until combined. It’s okay if a few lumps remain. This helps keep the cookies chewy.
Baking and Cooling Process
If you want some extra fun, now’s the time to fold in chocolate chips or chopped nuts. Use a tablespoon or cookie scoop to drop rounded dough onto the baking sheet. Leave at least 2 inches of space between each cookie.
Put the baking sheet in the oven and bake for 12-15 minutes. Look for lightly golden edges and soft centers. Once baked, let the cookies cool on the sheet for about 5 minutes. After that, move them to a wire rack to cool completely.
Tips & Tricks
Achieving the Perfect Chewy Texture
To make your cookies chewy, use plenty of brown sugar. Brown sugar has moisture, which helps cookies stay soft. Also, do not overmix your dough. Mix just until the dry ingredients blend in. This keeps the cookies tender. Lastly, underbake them slightly. Remove them when the edges are golden but the middle is still soft.
Common Mistakes to Avoid
One common mistake is using cold butter. Always use softened butter for better mixing. Another mistake is not measuring flour correctly. Too much flour makes cookies dry and hard. Use a spoon to scoop flour into a measuring cup, then level it off with a knife. Lastly, don’t skip the chilling step. If you chill the dough for 30 minutes, it helps shape the cookies and improves texture.
Alternate Baking Methods
If you want to switch things up, try making mini cookies. Just scoop smaller amounts of dough. Bake them for less time—around 8-10 minutes. You can also use a silicone mat instead of parchment paper. This can give you a nice, even bake. For a crispier edge, bake them at a higher temperature for a shorter time. Just watch them closely to prevent burning.

Variations
Chocolate Chip vs. Nut Variations
You can make chewy pumpkin spice cookies even better. Try adding chocolate chips for a sweet touch. The chocolate melts just right, creating a gooey center. If you prefer nuts, chop them up and fold them into the dough. Walnuts or pecans add a nice crunch. Both options work well, so pick your favorite!
Gluten-Free and Vegan Alternatives
Want to make these cookies gluten-free? Use almond flour or a gluten-free flour blend. Just make sure the flour has a good texture. For a vegan version, swap the butter for coconut oil. Use a flax egg instead of a regular egg. Mix one tablespoon of ground flaxseed with three tablespoons of water, then let it sit until it thickens. These swaps keep the cookies tasty and chewy.
Seasonal Flavor Additions
Get creative with seasonal flavors! Add a splash of maple syrup for a warm taste. You can also mix in dried cranberries or raisins for a fruity twist. If you love spice, try adding a pinch of cardamom or allspice. These little changes bring a fresh spin to your cookies. Enjoy experimenting!
Storage Info
Best Practices for Cookie Storage
To keep your chewy pumpkin spice cookies fresh, store them in an airtight container. A glass jar or a plastic box works well. Place parchment paper between layers of cookies to avoid sticking. Keep them at room temperature for up to one week. If you want to keep them longer, consider freezing them.
Freezing Instructions
Freezing these cookies is easy and a great way to save some for later. First, let the cookies cool completely. Then, arrange them in a single layer on a baking sheet. Freeze them for about two hours. Once frozen, transfer the cookies to a freezer-safe bag or container. They’ll stay fresh for up to three months. When you’re ready to enjoy them, just thaw at room temperature.
How to Refresh Cookies
If your cookies lose their softness, don’t worry! To refresh them, preheat your oven to 300°F (150°C). Place the cookies on a baking sheet and warm them for about 5-10 minutes. This will help them regain their chewy texture. You can also add a slice of bread to the container when storing. The bread keeps the cookies soft for longer.
FAQs
What makes cookies chewy?
Chewy cookies have a special texture due to specific ingredients and methods. The balance of butter and sugar plays a key role. When you use more brown sugar, it adds moisture and a nice chew. The egg also helps, as it binds the ingredients and adds richness. Lastly, mixing the dough just right keeps it soft and chewy. Avoid over-mixing; it can make the cookies tough.
Can I substitute pumpkin puree?
Yes, you can substitute pumpkin puree with other options. Mashed bananas or applesauce work well, adding moisture. However, these swaps change the flavor. If you want to keep the spice flavor, consider using butternut squash puree. This keeps the taste close to the original.
How long do chewy pumpkin spice cookies last?
Chewy pumpkin spice cookies last about one week when stored properly. Keep them in an airtight container at room temperature. If you want them to last longer, you can freeze them. They stay fresh for up to three months in the freezer. Just make sure to wrap them well to avoid freezer burn.
How to adjust the recipe for different serving sizes?
If you want to adjust the recipe, it’s easy. First, decide how many cookies you want. If you want half the amount, simply cut each ingredient in half. For double the cookies, double each ingredient. Always keep the baking time the same, but check for doneness.
To make great cookies, you need the right ingredients and steps. Choosing quality items matters, as does mixing well. Follow the tips to avoid mistakes and explore fun variations. Store cookies properly for lasting taste. Remember, chewy cookies come from the right blend of ingredients and care in baking. Enjoy the sweet results and share with friends or family! Happy baking!


![- 1 pound boneless, skinless chicken thighs, cut into 1-inch cubes - 1/4 cup soy sauce - 1/4 cup honey - 2 tablespoons rice vinegar - 1 tablespoon sesame oil - 2 cloves garlic, finely minced - 1 teaspoon fresh ginger, grated - 1 red bell pepper, cut into 1-inch squares - 1 yellow bell pepper, cut into 1-inch squares - 1 zucchini, sliced into thick rounds The main ingredients are key to a great teriyaki dish. Chicken thighs are juicy and flavorful. The soy sauce and honey create a sweet and salty marinade. Rice vinegar adds a slight tang. Garlic and ginger bring warmth and depth to the flavor. The colorful veggies add crunch and a fresh touch. - 1 teaspoon cornstarch mixed with 1 tablespoon cold water (optional, for thickening the sauce) - Sesame seeds, for garnish - Fresh cilantro, for garnish Cornstarch helps thicken the teriyaki sauce. This makes it stick better to the chicken. Sesame seeds and cilantro are perfect for garnishing. They add a nice look and extra flavor. - Bamboo skewers (soaked in water for at least 30 minutes) - Grill or grill pan You need skewers to hold the chicken and veggies. Soaking them in water prevents burning. A grill or grill pan cooks the skewers evenly. It gives the chicken those beautiful grill marks. For the full recipe and more tips, check out the Full Recipe section. To start, we need to mix the marinade. In a medium bowl, combine the soy sauce, honey, rice vinegar, sesame oil, minced garlic, and grated ginger. Whisk these ingredients together until they blend well. This mixture is key to our teriyaki chicken skewers. Marinating is very important. It lets the chicken soak up all the nice flavors. Aim for at least 30 minutes. For the best taste, try to marinate for 1 to 2 hours. This makes a big difference in flavor. Now, it’s time to thread the chicken and veggies onto the skewers. First, take your soaked bamboo skewers and start with a piece of chicken. Then, add a square of red bell pepper, followed by a piece of yellow pepper. Next, add a thick slice of zucchini. Repeat this pattern. This colorful arrangement is not just tasty; it looks great too! Make sure the pieces fit snugly but not so tightly that they can't cook well. A nice visual appeal will impress everyone at the table. When it’s time to cook, we can grill the skewers. Preheat your grill or grill pan to medium-high heat. Place the skewers on the grill and cook them for about 10 to 12 minutes. Turn them occasionally for even cooking. If you prefer, you can also bake or broil the skewers. Just adjust the cooking time. Cook until the chicken is fully done and has lovely grill marks. For added flavor, brush the skewers with the thickened teriyaki sauce while they cook. Check the Full Recipe for more details on each step! To make a great teriyaki marinade, you need balance. Start with soy sauce for saltiness. Add honey for sweetness. Rice vinegar brings in acidity, which brightens the flavors. Garlic and ginger give depth. Ensure you mix these well. A good marinade coats the chicken evenly. For extra flavor, let the chicken sit in the marinade for longer. Aim for 1 to 2 hours for the best taste. If you want more richness, try adding a splash of orange juice. This will enhance the flavor profile. Grilling your skewers right is key. First, preheat your grill to medium-high heat. This helps get those beautiful grill marks. Place the skewers on the grill and leave them alone for a few minutes. Avoid moving them too much; let them sear. Flip them only once or twice. If you brush them with the thickened sauce, it adds a nice glaze. Keep an eye on the time; cook them for about 10-12 minutes. Common mistakes include overcrowding the grill. Give each skewer space so they cook evenly. Also, don’t skip the resting time after grilling; it helps the juices redistribute. When serving, presentation matters. Lay the skewers on a big platter. Drizzle with any leftover teriyaki sauce for extra flavor. Sprinkle sesame seeds and chopped cilantro on top. It adds color and looks inviting. For side dishes, think simple. Steamed rice or a fresh salad pairs well. You could also serve grilled veggies for a complete meal. These combinations elevate your dish and make for a delicious feast. Remember, the Full Recipe will guide you through the process! {{image_4}} You can swap chicken for other proteins like beef or tofu. Beef gives a rich, hearty taste. Tofu offers a plant-based option that absorbs flavors well. Adjust cooking times depending on what you use. Beef may need longer than chicken, while tofu cooks quicker. Always check for doneness to keep your meal safe. Feel free to include seasonal vegetables. Bell peppers, zucchini, and onions add color and crunch. Try mushrooms or cherry tomatoes for even more variety. These colorful additions not only taste great but also make your dish visually appealing. Mixing different veggies can create a vibrant plate that excites the eyes. You can use store-bought teriyaki sauce for speed. Homemade sauce allows you to control flavors better. If you want a kick, try adding chili flakes for spice. For a sweeter twist, mix in some pineapple juice. These variations help you customize the sauce to fit your taste. Check the [Full Recipe] for details on how to make your own sauce! After enjoying your teriyaki chicken skewers, you may have some leftovers. It’s best to store them right away. Place the skewers in an airtight container. This keeps them fresh and prevents odors. You can refrigerate them for up to four days. For longer storage, wrap them tightly in plastic wrap and place them in a freezer bag. You can freeze them for up to three months. Just remember to label the bag with the date. When it’s time to enjoy leftovers, reheating correctly matters. You want to keep the chicken moist. The oven works best for this. Preheat it to 350°F (175°C). Place the skewers on a baking sheet and cover them with foil. Heat for about 10-15 minutes until warm. The microwave is quicker but can dry out the chicken. If you use it, heat in short bursts of 30 seconds. Check often to avoid overcooking. Leftover teriyaki chicken skewers can last up to four days in the fridge. If frozen, they remain safe for three months. Always check for signs of spoilage before eating. If the chicken smells bad or looks off, don’t eat it. Look for a change in color or texture too. When in doubt, throw it out. Enjoying your teriyaki chicken skewers fresh is the best way to experience their flavor. For the full recipe, refer to the earlier sections. The best chicken for skewers is thighs. They stay juicy and tender when cooked. Breasts can dry out quickly. They have less fat, which makes them less forgiving. Thighs are more flavorful and can handle marinating well. Yes, you can make teriyaki chicken skewers in advance. Marinate the chicken for at least 30 minutes. For the best taste, marinate for 1 to 2 hours. You can even marinate them overnight. Cook them right before serving for the best results. You can serve teriyaki chicken skewers with many tasty sides. Rice, like jasmine or brown rice, pairs well. You can also offer stir-fried veggies for crunch. A fresh salad with sesame dressing adds a nice touch. Consider serving with grilled pineapple for a sweet twist. Explore these options to find what you love! This article covered making delicious teriyaki chicken skewers. We explored key ingredients like chicken, marinade, and vegetables. You learned how to prepare the marinade, assemble skewers, and cook on the grill. We also shared tips for flavor, grilling techniques, and serving ideas. You can mix in different proteins or vegetables and make it your own. Remember to store any leftovers properly to enjoy later. Now, get ready to impress with your new skewering skills!](https://fastmealmate.com/wp-content/uploads/2025/06/9b1dc869-68dc-4727-be9c-b0e6615ca1ac-768x768.webp)
![- 2 slices of rustic sourdough bread - 1 cup cooked chicken, shredded - 1 cup marinara sauce - 1 cup shredded mozzarella cheese - ¼ cup freshly grated Parmesan cheese - 1 tablespoon extra virgin olive oil - 1 teaspoon garlic powder - 1 teaspoon dried Italian seasoning - Salt and pepper, to taste Gathering the right ingredients is key to making a great Lazy Chicken Parmesan Grilled Cheese. Start with rustic sourdough bread. This bread gives your sandwich a hearty base. Next, grab cooked chicken. Shredded rotisserie chicken is a fantastic choice. It adds flavor and saves time. For the sauce, you can use homemade or store-bought marinara. Either way, it brings rich taste. Now, mozzarella cheese is a must for that gooey, stretchy texture. The Parmesan cheese adds a nice sharp bite too. You will also need some simple seasonings. Extra virgin olive oil helps achieve that golden crust. Garlic powder brings out depth in flavor. Italian seasoning adds a nice herbal note. Finally, don’t forget salt and pepper to taste. With these ingredients, you'll create a delightful twist on a classic dish. For the full recipe, check out the [Full Recipe]. First, preheat your skillet over medium heat. This gets the skillet hot and ready. Next, add a tablespoon of olive oil. This will coat the bottom of the skillet. The oil helps keep the bread from sticking and adds flavor. In a mixing bowl, combine your shredded chicken and marinara sauce. You can use any chicken you like, but rotisserie chicken is fast and tasty. Then, add garlic powder, Italian seasoning, and a pinch of salt and pepper. Mix everything well. You want all the chicken to be coated in sauce and spices. Take one slice of the sourdough bread and place it in the hot skillet. Layer half of the shredded mozzarella cheese on top. Spoon the chicken mixture onto the cheese, spreading it evenly. Add the rest of the mozzarella cheese on top of the chicken. Finish with a sprinkle of grated Parmesan cheese. Place the second slice of sourdough on top to make a sandwich. Grill it for about 3-4 minutes. You want the bottom to be golden brown and the cheese to begin melting. Carefully flip the sandwich using a spatula. Grill the other side for another 3-4 minutes. You want both sides crispy and the cheese fully melted. Once done, take it out and slice it in half. Let it cool for a minute before serving. This helps the cheese set a bit. Enjoy your Lazy Chicken Parmesan Grilled Cheese! For more details, check out the Full Recipe. Using rotisserie chicken makes this recipe quick and easy. You can find it at most grocery stores. It saves time, as it is already cooked and seasoned. To shred chicken quickly, use two forks to pull it apart. This method works well and takes just minutes. You can also use your hands if the chicken is cool enough. For the best grilled cheese, choose rustic sourdough bread. It has a great texture and flavor. You can also try a hearty Italian bread or whole grain. To achieve a crispy crust, heat your skillet over medium heat. Make sure to coat the pan with olive oil evenly. This will help the bread brown nicely and not stick. To ensure the cheese melts perfectly, use a mix of mozzarella and Parmesan. The mozzarella adds stretch, while Parmesan adds a sharp flavor. Place a lid on the skillet to trap heat and help the cheese melt faster. This prevents the sandwich from getting soggy. Grill the sandwich until the bread is golden brown and the cheese is gooey. {{image_4}} You can easily boost the health of your Lazy Chicken Parmesan Grilled Cheese by adding veggies. Spinach is a great choice. It adds color and nutrients. Just toss in a handful of fresh spinach when you layer the chicken. Bell peppers work well too. Slice them thin, and add them with the chicken. They give a nice crunch and a pop of flavor. Other ingredients can add texture and taste. Try sun-dried tomatoes for a tangy bite. You can also add mushrooms for an earthy note. Each veggie brings its own special twist. Experiment with what you like best! If you love heat, spice up your sandwich! One easy way is to use spicy marinara sauce. It adds warmth and flavor. You can also add jalapeños for an extra kick. Slice them thin and layer them on top of the chicken. Using pepper jack cheese is another fun option. This cheese melts beautifully and has a nice heat. Mix it with mozzarella to keep things gooey and flavorful. Your taste buds will thank you! For those who need a gluten-free choice, there are great alternatives. Instead of sourdough, try gluten-free bread. Look for brands that are soft and hearty. They will hold up well when grilling. You can adjust the recipe easily. Ensure your marinara sauce is gluten-free too. Many brands offer this option. Always check the labels when shopping. This way, everyone can enjoy this delicious meal! For the full recipe, be sure to check the complete guide. To keep your Lazy Chicken Parmesan Grilled Cheese fresh, wrap it tightly in foil or plastic wrap. Place it in an airtight container. This method helps keep the flavors and moisture inside. You can store it in the fridge for up to three days. If you want to keep it longer, consider freezing it. It can last in the freezer for about one month. Just remember to let it cool completely before storing. Reheating your grilled cheese needs care. I recommend using a skillet or toaster oven for the best results. Heat the skillet over low to medium heat. Add a small amount of butter or oil to keep it crispy. Place the sandwich in the skillet and cover it with a lid. This helps the cheese melt without burning the bread. Heat for about 3-4 minutes on each side. If using a toaster oven, set it to 350°F (175°C). Bake for around 10-15 minutes until warm and crispy. Enjoy that delicious, gooey goodness just like the first time! Yes, you can prepare this dish in advance. Here are some tips for prepping. - Cook the chicken: Shred and mix it with marinara sauce. Store it in the fridge. - Slice the bread: Cut the sourdough and keep it in a sealed bag. - Grate cheese: Pre-grate the mozzarella and Parmesan. Store these in airtight containers. - Assemble before cooking: You can layer the sandwich without grilling. Wrap it tightly in plastic wrap. Making these steps ahead helps save time. Just grill when you are ready to eat! Yes, you can freeze Lazy Chicken Parmesan Grilled Cheese. Here are the best practices. - Assemble without grilling: Build the sandwich fully, but do not cook it. - Wrap tightly: Use plastic wrap or aluminum foil to cover each sandwich. - Store in a freezer bag: Label with the date, then place in the freezer. When you want to eat it, thaw in the fridge overnight. Reheat in a skillet to keep it crispy. Pairing sides can enhance your meal. Here are some tasty suggestions. - Salad: A fresh mixed greens salad adds crunch. - Soup: Tomato or basil soup complements the sandwich well. - Fries: Crispy fries or sweet potato fries are a fun choice. - Veggies: Roasted or steamed veggies give a healthy balance. These sides will make your meal even more delightful. Enjoy your Lazy Chicken Parmesan Grilled Cheese! You learned how to make Lazy Chicken Parmesan Grilled Cheese. This dish is tasty and easy. We covered main ingredients, cooking steps, and useful tips. I shared fun variations to fit your taste. Now, you can store leftovers and reheat them without losing flavor. Enjoy your cooking and make this sandwich again. It’s a great meal for busy days or fun gatherings. Happy grilling!](https://fastmealmate.com/wp-content/uploads/2025/06/c9cbfd60-7ee3-4aef-9602-f6c93f96b3d1-768x768.webp)

