Cherry Garcia Fudge Squares Easy and Delicious Treat

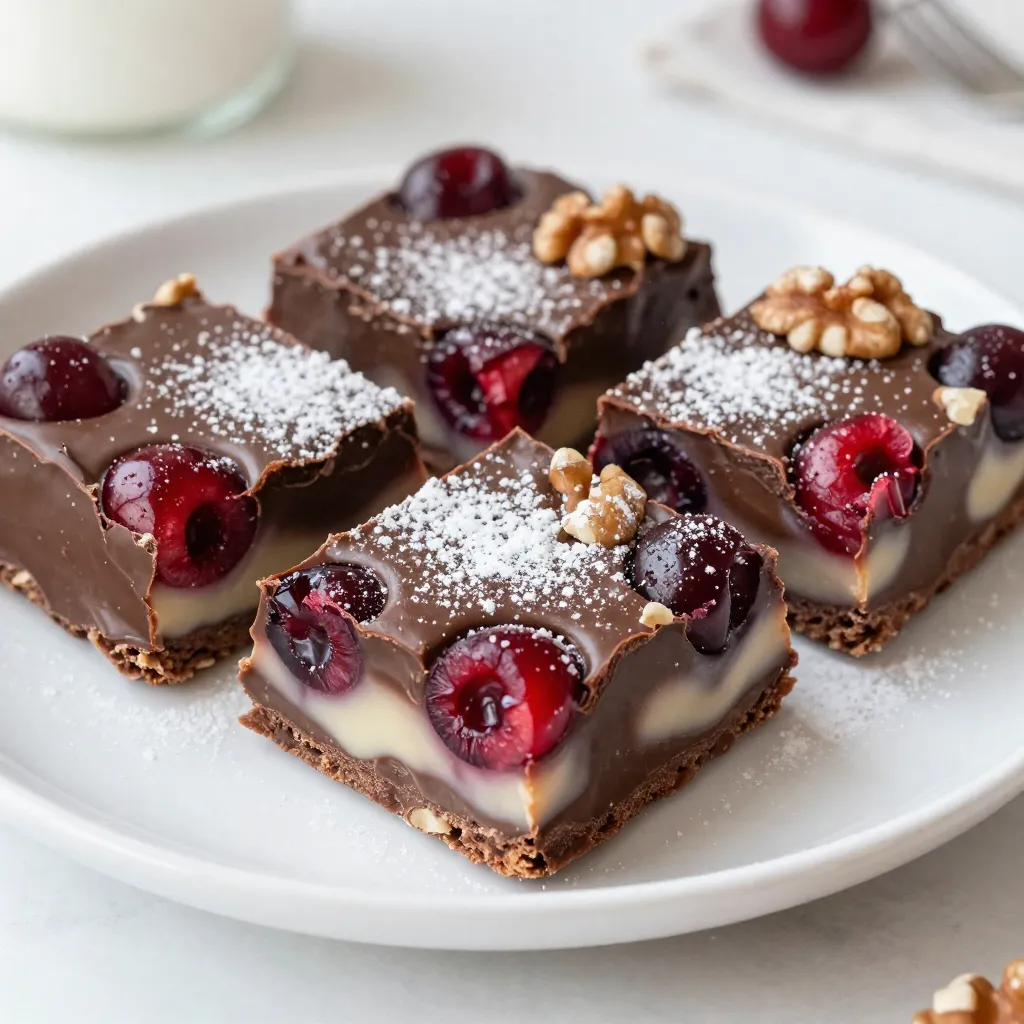
If you crave a sweet treat that’s easy to make and full of flavor, you’ll love these Cherry Garcia Fudge Squares! With rich dark chocolate, creamy sweetened condensed milk, and juicy maraschino cherries, this recipe combines classic fudge flavors with a fruity twist. In just a few simple steps, you can whip up a delicious dessert that everyone will adore. Let’s dive into the ingredients and start making this delightful treat!
Why I Love This Recipe
- Decadent Flavor: This fudge combines rich dark chocolate with the sweet and tart flavor of maraschino cherries, making every bite a delightful treat.
- Easy to Make: With just a few simple ingredients and straightforward steps, this recipe is perfect for both novice and experienced cooks.
- Perfect for Sharing: Cut into squares, these fudge treats are ideal for parties, gatherings, or as a sweet homemade gift.
- Customizable: Feel free to experiment with different nuts or add-ins, making this recipe versatile for various tastes.
Ingredients
Main Ingredients
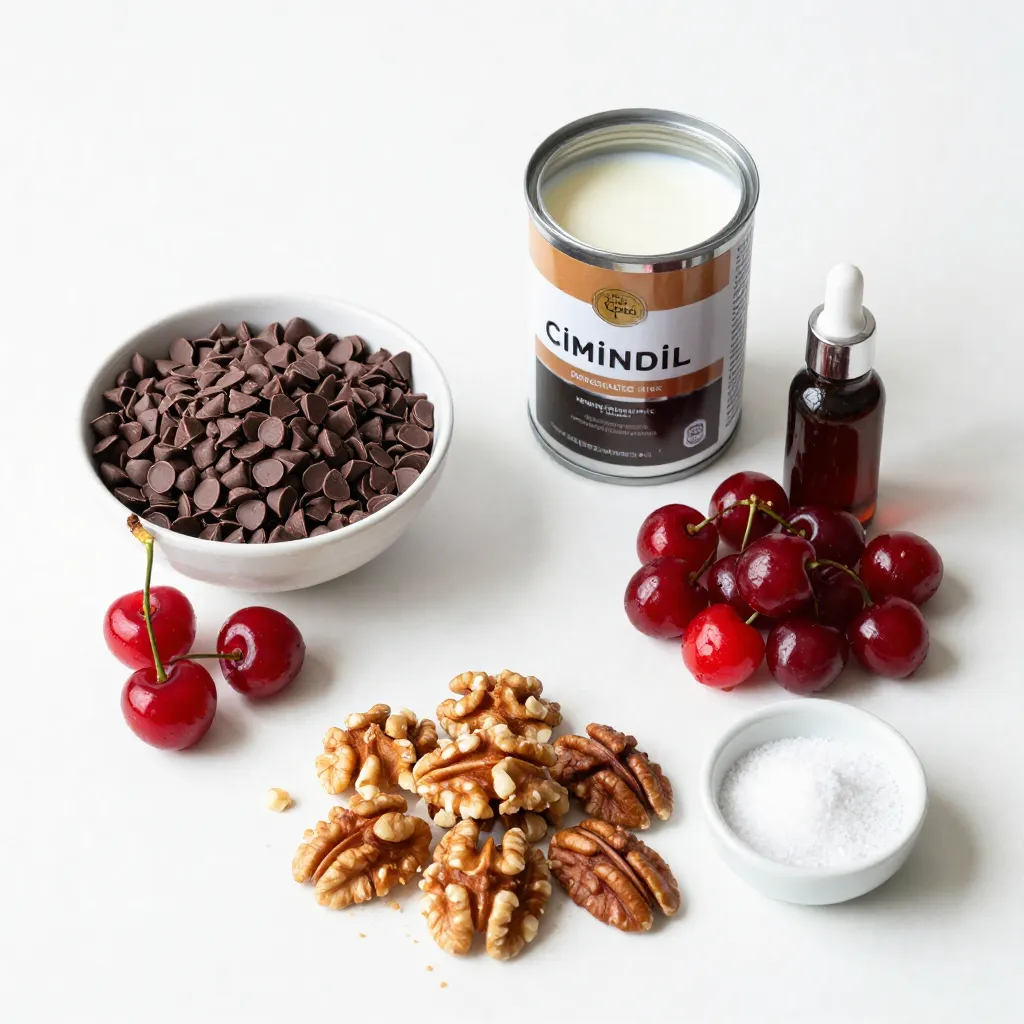
– 1 cup dark chocolate chips
– 1 cup sweetened condensed milk
– 1 cup maraschino cherries, drained and finely chopped
These ingredients create a rich and creamy base. Dark chocolate chips give a deep flavor. Sweetened condensed milk adds sweetness and creaminess. Maraschino cherries provide a burst of color and tang.
Additional Ingredients
– 1 teaspoon vanilla extract
– 1/2 teaspoon almond extract
– 1/2 cup chopped walnuts or pecans
Vanilla extract enhances the chocolate flavor. Almond extract adds a nice hint of nuttiness. Chopped walnuts or pecans give a lovely crunch and texture.
Seasoning and Enhancements
– A pinch of salt
A pinch of salt balances the sweetness. It brings out the flavors in the fudge.
Presentation ingredients
For a beautiful finish, consider these tips. Arrange the fudge squares on a colorful plate. Garnish with whole maraschino cherries and scattered nuts. A light dusting of powdered sugar on top adds elegance.

Step-by-Step Instructions
Preparation of Equipment
To start, grab an 8×8 inch square baking dish. This size works best for our fudge squares. Line the bottom and sides with parchment paper. Make sure some paper hangs over the edges. This overhang helps you lift the fudge out later.
Parchment paper is important. It keeps the fudge from sticking. You want clean edges when you cut the fudge. This small step saves time and makes serving easy.
Melting the Chocolate
Next, we will melt the chocolate. In a medium saucepan, combine the dark chocolate chips and sweetened condensed milk. Stir these two together over low heat. This slow melting helps avoid burning the chocolate. Keep stirring until the mixture is smooth.
To achieve a smooth consistency, be patient. If the heat is too high, the chocolate can seize. Stirring continuously helps blend the ingredients well.
Mixing and Setting
Once the chocolate melts, take the saucepan off the heat. Now, add the vanilla and almond extracts, along with a pinch of salt. Stir these in well.
Carefully fold in the chopped maraschino cherries and nuts. This adds flavor and crunch. Make sure they are mixed in evenly.
Transfer the fudge mixture into your prepared baking dish. Use a spatula to spread it out evenly. Press it down gently so it sits flat.
Now, it’s time to chill. Place the baking dish in the refrigerator. Let the fudge set for about 2-3 hours. You want it firm before cutting. Once it sets, lift it out using the parchment paper. Cut it into 16 equal squares. Enjoy your delicious Cherry Garcia Fudge Squares!
Tips & Tricks
Perfecting the Fudge Texture
To get the best fudge, cooling is key. After mixing, let the fudge chill in the fridge for about 2 to 3 hours. This helps it firm up nicely. If you want to speed this up, you can put it in the freezer for about 30 minutes. Just remember to check it often.
Evenly spreading the ingredients is also important. When you fold in the cherries and nuts, be gentle. This way, every bite has a nice mix of flavors. Use a spatula to spread the fudge evenly in the baking dish. This helps it set better, too.
Presentation Suggestions
When it’s time to serve, think about how to make it pretty. Arrange the fudge squares on a colorful plate. You can add whole maraschino cherries on top and sprinkle some nuts around. This adds color and texture.
For a special touch, dust some powdered sugar on top of the fudge. It makes the squares look fancy without much effort. You can also serve the fudge with a scoop of ice cream for a delicious combo.
Common Mistakes to Avoid
One big mistake is overheating the chocolate. Always melt it on low heat. Stir it constantly to get a smooth texture. If the chocolate burns, it can ruin your fudge.
Another mistake is not measuring your ingredients correctly. Use measuring cups and spoons. This keeps the recipe balanced and ensures the fudge sets up perfectly. A little extra or missing ingredient can change the taste and texture.
Pro Tips
- Use Quality Chocolate: The flavor of your fudge largely depends on the chocolate you use. Opt for high-quality dark chocolate chips for the best taste and texture.
- Chill for Perfect Texture: Allow the fudge to chill in the refrigerator for the full 2-3 hours. This ensures it sets properly and achieves the right consistency for cutting.
- Experiment with Nuts: Feel free to swap out walnuts or pecans for your favorite nuts. Almonds or hazelnuts could provide a delightful twist to the flavor profile.
- Add a Touch of Sea Salt: A light sprinkle of sea salt on top before serving can enhance the flavors and add a sophisticated touch to your fudge squares.
Variations
Ingredient Substitutions
You can easily change the ingredients to suit your needs. Here are some ideas:
– Dairy-free options: Use dairy-free chocolate chips and coconut milk for a creamy base. This swap keeps the fudge rich while being friendly to those who avoid dairy.
– Nut-free versions: Omit the nuts or replace them with seeds like sunflower seeds. This keeps the squares safe for nut allergies.
Flavor Additions
Adding different flavors can make your fudge even more exciting. Consider these options:
– Adding spices or other extracts: A dash of cinnamon or a drop of peppermint extract can give your fudge a fun twist. Try mixing in orange zest for a fresh, zesty flavor.
– Introducing other fruits: Swap the maraschino cherries for dried cranberries or raspberries. This change adds new colors and tastes to your fudge.
Serving Suggestions
How you serve your fudge can make it even more special. Here are some fun ideas:
– Pairing with ice cream: Serve the fudge squares atop a scoop of vanilla or cherry ice cream. The warm fudge melts slightly into the cold ice cream, creating a delicious contrast.
– Creative serving presentations: Arrange the fudge on a colorful plate. Garnish with whole cherries and a sprinkle of nuts. Dust a little powdered sugar on top for a sweet finish.
Storage Info
Proper Storage Methods
To keep your Cherry Garcia fudge squares fresh, use an airtight container. This helps prevent air from making them dry. You can also use parchment paper. Wrap the fudge tightly and place it in the fridge. This method keeps flavors intact.
Shelf Life
These fudge squares stay fresh for about two weeks in the fridge. Look for signs of spoilage. If you see any dark spots or a change in smell, it’s time to toss them.
Freezing Instructions
You can freeze the fudge squares for up to three months. Cut them into squares first. Then, wrap each piece in plastic wrap. Place them in a freezer-safe bag. When you want to enjoy them, take them out and let them thaw in the fridge overnight. This keeps them tasty and soft.
FAQs
Can I use white chocolate instead of dark chocolate?
Yes, you can use white chocolate. This change gives a different taste and look. White chocolate is sweeter and creamier than dark chocolate. It also lacks the rich cocoa flavor. If you swap, keep the same amount. The texture will be smooth, but the fudge will be sweeter.
How do I cut the fudge cleanly?
To cut your fudge cleanly, use a sharp knife. A hot knife works best. Heat the knife by running it under hot water, then dry it. This will make cutting easier. Cut the fudge into squares after it has set fully. Wipe the knife between cuts to keep edges clean.
What if I don’t have sweetened condensed milk?
If you lack sweetened condensed milk, you can make your own. Combine 1 cup of milk with 1 cup of sugar. Heat until the sugar dissolves, then simmer until thickened. You can also try using coconut milk for a dairy-free option. Just add sugar to taste for sweetness.
In this blog post, we explored making delicious fudge with dark chocolate, sweetened condensed milk, and cherries. You learned step-by-step instructions, tips for perfecting texture, and variations to try. Remember to store your fudge properly for the best taste. With these skills, you can create tasty treats for any occasion. Enjoy cooking and sharing your homemade fudge with friends and family. Your journey in the kitchen just got sweete

Cherry Garcia Fudge Squares
Ingredients
- 1 cup dark chocolate chips
- 1 cup sweetened condensed milk
- 1 teaspoon vanilla extract
- 1/2 teaspoon almond extract
- 1 cup maraschino cherries, drained and finely chopped
- 1/2 cup chopped walnuts or pecans
- a pinch salt
Instructions
- Begin by preparing an 8x8 inch square baking dish. Line the bottom and sides with parchment paper, allowing some overhang to facilitate easy removal of the fudge later on.
- In a medium saucepan, combine the dark chocolate chips and sweetened condensed milk. Melt the mixture over low heat, stirring continuously to ensure even melting and a smooth consistency.
- Once the chocolate is fully melted, take the saucepan off the heat. Add the vanilla extract, almond extract, and a pinch of salt. Stir well until all ingredients are thoroughly mixed together.
- Carefully fold in the chopped maraschino cherries and the nuts, ensuring they are evenly distributed throughout the fudge mixture to create a beautiful contrast in color and texture.
- Transfer the fudge mixture into the prepared baking dish. Use a spatula to spread it evenly so that it sits flat in the dish.
- Place the baking dish in the refrigerator. Allow the fudge to chill for about 2-3 hours, or until it becomes firm and sets completely.
- After the fudge is set, lift it out of the dish using the parchment paper overhang. Use a sharp knife to cut it into 16 equal squares for serving.


![- 2 cups grated zucchini or yellow squash - 1 cup breadcrumbs (preferably seasoned) - 1/2 cup grated parmesan cheese - 1/4 cup finely chopped onion - 2 cloves garlic, minced - 2 large eggs - 1 teaspoon dried oregano - 1/2 teaspoon salt - 1/4 teaspoon black pepper - 1/4 cup fresh parsley, chopped (optional) - Skillet - Cooking oil - Mixing bowl - Kitchen towel Mom's squash patties use simple ingredients. The main ones are zucchini or yellow squash. You need seasoned breadcrumbs to add flavor. Parmesan cheese gives a nice touch. Onions and garlic boost the taste. Eggs help bind everything together. Spices like oregano, salt, and pepper add extra flavor. Fresh parsley adds color and freshness to the mix. For cooking, you will need a skillet and some oil. A mixing bowl helps combine all ingredients. A kitchen towel is handy for squeezing out squash moisture. This is part of the [Full Recipe]. Start by grating the zucchini or yellow squash. I use a box grater for this. Then, take the grated squash and put it in a clean kitchen towel or cheesecloth. Squeeze it hard to drain as much moisture as you can. This step is key. If there is too much moisture, the patties will be soggy. We want them crispy and delicious. In a large bowl, combine the drained squash with the other ingredients. Add breadcrumbs, grated parmesan cheese, chopped onion, minced garlic, eggs, dried oregano, salt, and black pepper. If you like, toss in some chopped parsley too. Mix everything well using your hands or a spoon. The mixture should feel a bit sticky and hold together well. This texture helps the patties stay intact while cooking. Next, heat a large skillet on medium heat. Pour in enough olive oil to cover the bottom of the pan. Wait until the oil shimmers, but don’t let it smoke. This shows it’s hot enough for frying. Scoop about 1/4 cup of the squash mix and shape it into a patty. Gently place it in the hot skillet. Don’t overcrowd the pan. Leave space between each patty for even cooking. Cook the patties for about 4 to 5 minutes on each side. They should turn golden brown and crispy. Keep an eye on the heat. Adjust it as needed to prevent burning. You might need to fry in batches, depending on your skillet size. Once cooked, take them out and place them on a plate lined with paper towels. This will soak up any extra oil and keep the patties crispy. Follow these steps, and you'll have lovely, golden squash patties ready to enjoy! For the full recipe, check out the earlier section. To get the best texture, you want your patties crispy, not soggy. Start by squeezing out moisture from the grated squash. Use a clean kitchen towel for this. If you skip this step, your patties may fall apart or become mushy. Keep the right ratio of ingredients. Too much squash can lead to sogginess. Aim for two cups of squash to one cup of breadcrumbs. This balance helps create a sturdy patty. Cooking time is key. Heat your skillet to medium. This temperature helps the patties cook evenly. If the heat is too low, they won’t crisp up. If it’s too high, they may burn. Fry each side for 4-5 minutes. Check for a golden brown color. Don’t rush this process. Undercooked patties can be mushy, while overcooked ones can taste dry. For serving, add tasty condiments. A dollop of yogurt or sour cream works great. Fresh herbs like parsley add color and flavor. You can also pair these patties with a salad or roasted veggies. They make a lovely side for grilled meats too. Explore different sauces like tzatziki or spicy ketchup for extra flavor. Enjoy making these patties your own! {{image_4}} You can change the squash for variety. Try using butternut squash or pattypan squash. Each type gives a unique taste and texture. You can also add more veggies. Grated carrots or bell peppers mix well. Fresh herbs, like basil or thyme, add a fresh kick. You can bake these patties instead of frying them. Just place them on a baking sheet and drizzle with olive oil. Bake at 400°F for 20 minutes, flipping halfway through. This method makes them a bit healthier. An air fryer is another option. It cooks them fast and gives a nice crisp without much oil. Set the air fryer to 375°F and cook for about 12-15 minutes. Adding cheese can elevate the flavor. Try feta, cheddar, or even goat cheese. Each brings a different taste. You can also play with spices. Add a pinch of cumin for warmth or smoked paprika for depth. Experimenting with flavors can lead to your perfect batch of patties. Check out the Full Recipe for more ideas! To store leftovers, let the patties cool first. Place them in an airtight container. This helps to keep them fresh. You can store them in the fridge for up to three days. To extend freshness, reheat only what you will eat. This avoids sogginess in the remaining patties. For freezing, make sure the patties are fully cooled. Arrange them in a single layer on a baking sheet. Place the sheet in the freezer until they are solid. Then transfer them to a freezer bag. This method helps prevent them from sticking together. When ready to eat, reheat frozen patties in the oven. Bake them at 350°F for about 15 minutes or until hot. The expected freshness duration is about three days in the fridge. Frozen patties can last up to three months. Signs of spoilage include a sour smell or a change in color. If you notice any of these, it’s best to discard them. Fry the patties for about 4 to 5 minutes on each side. This cooking time gives them a nice golden color and crispy texture. Make sure to keep an eye on them. If the heat is too high, they may burn. Adjust the heat as needed for even cooking. Yes, you can make these patties gluten-free. Instead of breadcrumbs, use gluten-free breadcrumbs or crushed gluten-free crackers. You can also use ground oats as a substitute. Just check the labels to ensure they're gluten-free. These patties pair well with many side dishes and sauces. Here are some great options: - A fresh salad with lemon vinaigrette - Creamy yogurt or sour cream for dipping - Applesauce for a sweet contrast - Grilled vegetables or a medley of roasted root veggies - A slice of lemon to brighten the dish For the full recipe, check out Mom's Heavenly Squash Patties. Enjoy! This blog post covered how to make delicious squash patties. We looked at key ingredients, preparation steps, and cooking tips. I shared ways to adjust the recipe and storage methods for leftovers. Making these patties can be fun and simple. You can explore new flavors and textures that suit your taste. Enjoy these tips, and I hope you create something tasty. Experimenting in the kitchen leads to great meals!](https://fastmealmate.com/wp-content/uploads/2025/06/c31883a2-1cc5-40ff-adb3-b1ed6b0d87a1-768x768.webp)
![For this dish, I recommend using ribeye steak. It has great flavor and tenderness. To slice it right, place the steak in the freezer for 30 minutes. This makes it firm and easier to cut. Always slice against the grain for the best texture. You’ll want to include onions and green bell peppers. They add sweetness and crunch. You can also add mushrooms or jalapeños for extra flavor and texture. These veggies bring life to the dish. Provolone cheese works best because it melts beautifully. You can also use Cheez Whiz for a classic touch. To get that melty texture, cover the skillet after adding the cheese. This traps the heat and helps it melt evenly. For the complete recipe, check out the [Full Recipe]. Choosing the right pan makes a big difference. I recommend using a heavy-bottom skillet or cast iron. These pans heat evenly and hold heat well. This helps to cook the meat and veggies perfectly. Before starting, heat the pan over medium-high. Wait until the pan is hot and shimmering. This ensures a good sear. Timing is key when sautéing. Start with the onions and bell peppers. Cook them for about 5-7 minutes. Stir occasionally. You want them to soften and the onions to turn clear. This shows they are ready for the next step. Then, add the minced garlic and sauté for one more minute. You’ll know it’s done when you can smell the garlic. For the steak, thin slices work best. Sear the meat in the center of the skillet. Let it cook undisturbed for 2-3 minutes. This gives it a nice brown crust. Keep an eye on your steak. You want it cooked to your liking. For medium-rare, aim for an internal temp of about 130°F. Once done, mix everything together. Don’t forget to add salt, pepper, and Worcestershire sauce for flavor. For the full recipe, check out the details to make this delicious dish! To make your Philly cheesesteak skillet even better, try adding spices. Some great choices include garlic powder, onion powder, and smoked paprika. These spices add depth and warmth to the dish. You can also add a splash of hot sauce for a kick. To elevate the flavor profile, consider using fresh herbs like thyme or oregano. They make the dish smell great and taste fresh. When cooking a one-pan dish like this, keep your pan hot. A well-heated skillet helps sear the steak and cook the veggies evenly. Avoid crowding the pan; too much food can trap steam and make things soggy. Use a large skillet to give your ingredients space. Common mistakes include not letting the steak sear enough or overcooking the vegetables. Both can change the taste and texture of your meal. There are many fun ways to serve this dish. You can spoon the cheesesteak mix into toasted hoagie rolls for a classic feel. For a different twist, try serving it over rice or pasta. This adds comfort and heartiness. Pair your meal with crispy fries or a fresh salad for crunch. When it comes to drinks, a cold soda or a light beer works well. This combination makes for a perfect comfort meal. For the full recipe, check out the instructions above. {{image_4}} You can make your Philly cheesesteak skillet lighter by choosing leaner meats. Turkey or chicken breast work well. These options cut down on fat while still keeping great flavor. If you want to boost your veggie intake, add mushrooms or zucchini. They provide nice texture and taste without many calories. You can also use whole grain hoagie rolls for more fiber. If you love heat, add jalapeños or a splash of hot sauce. These add a kick that can really enhance the dish. You can also experiment with different peppers. Try serrano or poblano for unique flavors. Each pepper brings its own twist to the classic recipe. Not a meat eater? No problem! You can use plant-based substitutes like seitan or mushrooms. These options mimic the texture and flavor of steak. For cheese, try vegan cheese or nutritional yeast. Both melt well and add that creamy touch. You can still enjoy a comforting meal while sticking to your diet. To keep your Philly Cheesesteak Skillet fresh, store leftovers in an airtight container. Make sure to cool the dish first before sealing. This helps prevent moisture buildup. For best results, eat leftovers within three days. If you want to extend shelf life, consider wrapping the skillet in plastic wrap then foil. When reheating, use the stovetop for best texture. Heat on low and stir often to avoid burning. You can also add a splash of water to keep it moist. Avoid microwaving, as it may make the dish soggy. If you must use a microwave, cover it with a damp paper towel. To freeze leftovers, let them cool completely. Place them in a freezer-safe container. Seal tightly and label with the date. For best flavor, use within two months. To thaw, move the container to the fridge overnight. Reheat on the stovetop, stirring gently for even warmth. This helps keep the meat and cheese nice and creamy. You can add heat in a few simple ways. - Jalapeños: Slice fresh jalapeños and add them with the onions and peppers. - Hot sauce: Drizzle your favorite hot sauce into the skillet while cooking. - Red pepper flakes: Sprinkle in red pepper flakes for a quick kick. Each option gives a different flavor and heat level. You can mix and match to find what you like best! Yes, you can use chicken or turkey. - Flavor: Chicken has a milder taste than ribeye. It works well with the same seasonings. - Texture: Turkey is leaner and may be drier. Ribeye has more fat, giving it a juicy bite. If you choose chicken or turkey, slice it thinly for even cooking. There are many great side dishes to pair with this skillet meal. - Fries: Crispy fries are a classic choice. - Rice: Fluffy rice makes a nice base for the cheesesteak mix. - Salad: A fresh salad can balance the rich flavors. Feel free to get creative with your sides! You can even serve the cheesesteak in toasted hoagie rolls for a fun twist. For the full recipe, check out the details above. With the right steak, fresh veggies, and melty cheese, you can create a delicious Philly Cheesesteak Skillet. Key steps include choosing your meat, sautéing vegetables perfectly, and cooking the steak to your liking. Don’t forget to try different flavors, cooking techniques, and even variations like vegetarian options. This dish is versatile for every taste. Finally, follow the best storage and reheating methods to enjoy your meal longer. Happy cooking!](https://fastmealmate.com/wp-content/uploads/2025/06/aad18596-9f8f-4d41-afd4-0dccfe0a87de-768x768.webp)


